If you're serious about tracking Facebook ads, you have to look beyond Meta's built-in tools. Relying on them alone is like trying to navigate a new city with a map that’s missing half the streets.
Privacy updates, browser restrictions, and ad blockers are punching massive holes in your data, making it almost impossible to see your true return on ad spend. A platform like Cometly is designed to fill those gaps by tracking events directly from your server, giving you reliable data to make profitable decisions.
Why Facebook Ads Tracking Falls Short
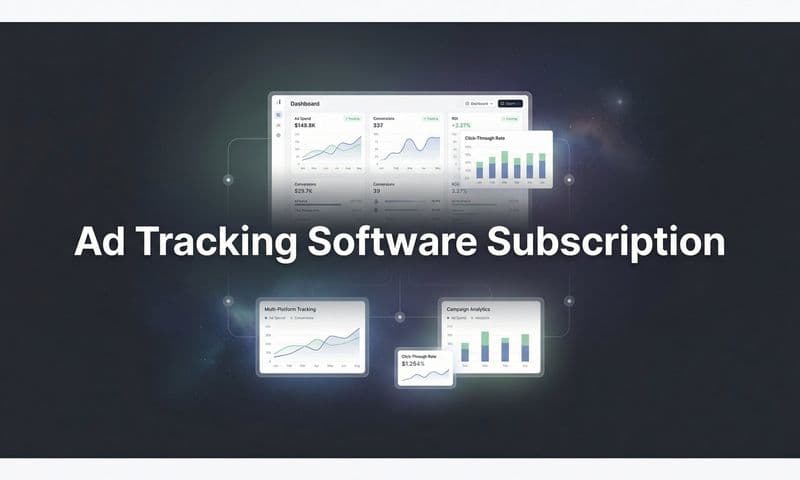
 Ultimate Guide To Track Facebook Ads With Cometly
Let's be blunt: client-side tracking, which depends entirely on browser pixels, is becoming a thing of the past. It’s increasingly unreliable, and pretending otherwise is just costing you money.
You’re fighting a losing battle against Apple's iOS privacy updates, widespread browser cookie restrictions, and the fact that nearly 27% of US users now have ad-blockers running. A huge chunk of your conversion data isn't just delayed—it's gone forever. This isn't a small rounding error; it's a black hole in your marketing strategy that’s eating your ad budget alive.
The Real-World Impact of Data Gaps
When you can't see the full picture, the consequences are immediate and expensive. This isn't just about skewed numbers on a dashboard. It’s about making bad calls that actively stunt your company's growth.
Here are a few real-world scenarios I’ve seen play out time and time again:
- The E-commerce Blind Spot: An online store saw their sales in Ads Manager tank after a browser update. The dashboard showed a ROAS of 1.5x, making the campaign look like a total flop. But after switching to a server-side solution, they found they were missing 25% of their purchase data. The real ROAS was actually 2.2x—a profitable campaign they were just about to kill.
- The Misattributed Subscription: A SaaS company was attributing nearly all of its new sign-ups to direct traffic, thinking their Facebook ads were only good for brand awareness. The truth? People clicked the ads on their phones, researched later on their desktops, and then signed up. Without proper attribution, they nearly cut the budget for their single most effective acquisition channel. For more on this, you can explore the common marketing analytics and attribution challenges in our detailed guide.
- The Wasted Local Budget: A local business was running ads to get people in the door. Meta’s reporting showed high engagement from a certain demographic, so they poured more money into that audience. But server-side data told a different story. That group clicked a lot but rarely ever bought anything. They were burning cash on a low-value audience while a more profitable—but less "engaged"—segment was being ignored.
These aren't just one-off stories. They represent a fundamental breakdown in traditional ad tracking that hits businesses of every size. The problem is simple: when you can’t trust your data, you can’t make smart optimizations.
Ultimately, these tracking gaps create a vicious cycle. You waste money on ad sets that feel like they're working but aren't, you scale back campaigns that are secretly crushing it, and you completely misread how users are interacting with your brand.
To truly track Facebook ads with any degree of confidence, you need a system that captures the entire customer journey—no matter the device, browser, or privacy setting. This is exactly where server-side tracking with a platform like Cometly becomes a non-negotiable part of your toolkit.
Setting Up Cometly for Accurate Ad Tracking
Jumping into a more powerful, server-side method to track Facebook ads might seem like a huge technical hurdle, but it’s surprisingly simple. You don’t need to be a developer to get your ad data back. In fact, you can sign up for Cometly and get your most important platforms connected in less than ten minutes.
This first part is all about laying the right foundation. When you link your Facebook Ads Manager and e-commerce store to Cometly, you’re creating a direct data pipeline that can’t be easily shut down by browser updates or ad blockers. It’s this connection that makes sure every important customer action—from their first page view to the final purchase—is captured and attributed correctly.
Linking Your Key Platforms
First thing's first: you need an account. The signup is designed to be quick so you can move straight to the integrations. You can follow along by starting the setup process on Cometly’s official site.
Once you're in, you'll see prompts to connect your primary advertising and sales channels. This boils down to two main integrations:
- Facebook Ads Manager: This gives Cometly permission to pull in all your campaign, ad set, and ad data. It’s the critical link that lets the platform match conversion data back to the specific ads that drove those sales.
- Your E-commerce Store: Whether you use Shopify, WooCommerce, or another major platform, this integration lets Cometly receive server-side events straight from your store. This is how you get around the unreliable browser pixel for tracking purchases, add-to-carts, and everything in between.
This is what you’ll see on the initial dashboard. It points you right where you need to go to get connected and start tracking.
The interface is clean and immediately guides you to connect your ad accounts and stores, so there’s no guesswork involved.
Pro Tip: When you connect your Facebook Ads account, make sure the user granting access has full admin permissions in Business Manager. I once coached a D2C founder who used an account with "analyst" permissions and couldn't figure out why half her conversion data was missing. Switching to an admin account fixed the problem instantly and doubled her tracked conversions overnight.
Why Each Integration Matters
Connecting these platforms isn't just a setup task; it’s the very core of what makes server-side tracking so effective. When a customer buys something on your Shopify store, the event fires from Shopify’s server directly to Cometly’s server. From there, it’s passed on to Facebook’s Conversion API.
This server-to-server conversation is completely immune to the problems that plague browser-based tracking. Ad-blockers can't touch it, and iOS privacy settings don't get in the way. The result is a much higher fidelity of data, giving you a far more accurate picture of how your campaigns are really performing.
Think about the sheer scale of the platform you’re advertising on. With 3.065 billion monthly active users projected for 2025, Facebook is essentially the most populous ‘country’ on the internet. For advertisers, that translates to a potential reach of nearly 2 billion users every month—something no other social platform comes close to. Given that massive audience, making decisions based on incomplete or fuzzy data is a surefire way to burn through your ad spend.
Nailing this initial setup means you're tapping into that audience with data you can actually trust. Every optimization you make from this point forward—from how you allocate your budget to which creative you scale—will be based on a complete and accurate view of what’s driving results. This quick 10-minute setup is the first and most important step toward making smarter, more profitable advertising decisions. It gets you ready for the next phase: configuring the Cometly Pixel to ensure you capture flawless data from every single visitor.
Configuring Your Cometly Pixel For Flawless Data Collection
Alright, you've got your ad accounts and e-commerce store connected. Now for the most important part: installing the Cometly Pixel.
Think of this little piece of code as the bridge between what a user does in their browser (like viewing a product) and the rock-solid data your server captures. Getting this right is the key to a complete, accurate picture of your ad performance.
The whole setup process is designed to connect your key platforms seamlessly.
 Ultimate Guide To Track Facebook Ads With Cometly
This simple flow makes sure your advertising and sales data are perfectly aligned for accurate attribution right from the start.
Placing The Cometly Pixel On Your Store
First things first, head over to the setup menu in your Cometly dashboard. You’ll find a unique pixel script generated just for your account. This isn't some generic tag; it's the key that unlocks precise data collection for your specific store.
If you're on Shopify, which most of our users are, the best place for this script is inside the <head> section of your theme.liquid file. Why there? Placing it in the theme's main liquid file guarantees the pixel loads on every single page of your site—from the homepage all the way to the thank you page.
Here’s a quick rundown of where to put it:
- From your Shopify Admin, go to Online Store > Themes.
- Find your active theme, click the three-dots icon, and choose Edit code.
- In the file menu on the left, find and open the
theme.liquidfile. - Scroll down until you see the closing
</head>tag. Paste your Cometly Pixel script on a new line right above it.
This placement is strategic. It lets the pixel fire as early as possible, maximizing its chance to grab initial page view events before a user clicks away.
Verifying Your Pixel Is Firing Correctly
Once the script is in place, don't just walk away and assume it's working. Verification is a non-negotiable step. An unverified pixel is like a security camera that's not plugged in—it looks like it’s doing its job, but it’s capturing nothing.
You've got two main tools for this job: your browser's developer tools and Cometly's own diagnostic tools.
- Using Chrome DevTools
Open your website in a Chrome browser. Right-click anywhere, select "Inspect," and click on the "Network" tab. In the little filter box, type "cometly." Now, click around your site. You should see events firing and popping up in the log. - Using Cometly’s Diagnostics Tab
This is your mission control for event tracking. Inside the Cometly dashboard, the Diagnostics tab gives you a real-time feed of all the events we're receiving from your site. This is where you confirm that standard e-commerce events likeViewContent,AddToCart, andPurchaseare coming through loud and clear.
Real-World Fix: I worked with a fashion brand that saw a huge, unexplained drop in their "Initiate Checkout" events. Using the Diagnostics tab, we quickly confirmed that AddToCart events were firing but the checkout event was completely missing. The culprit? Their custom checkout plugin was loading before the Cometly pixel. By simply reordering the tags in their theme file to load Cometly first, they fixed the data gap in less than five minutes.
The Power Of Reliable Event Data
Having this data pipeline dialed in is absolutely foundational to getting the most out of your ad spend. In 2025, Facebook is still the king of social advertising, with projected ad revenue expected to hit a staggering $156.8 billion. That’s a 5.8% year-over-year jump, proving just how much advertisers are pouring into the platform to reach its massive user base.
With that much competition, making decisions with flawed or incomplete data is a surefire way to burn cash.
A correctly installed Cometly Pixel feeds both your browser-side and server-side tracking systems. This dual-layer approach gives you maximum data capture, even when facing ad blockers and privacy updates.
If you want to get into the weeds of how this all works, our guide on Cometly's server-side tracking capabilities is a great place to start. By completing this setup, you’re not just pasting a script; you're building a reliable data foundation that will power every single optimization decision you make from here on out.
Mastering UTM Parameters And Campaign Naming
Even with a perfectly installed Cometly Pixel, your ability to track Facebook ads will fall apart without a disciplined system for naming your campaigns and using UTM parameters.
Think of it like running a warehouse where none of the boxes have labels. You know you have all the right inventory, but you have no clue what’s inside each box or where it came from. That's what running ads without UTMs is like.
UTM parameters are simply the labels for your ad traffic. They're small tags you add to the end of your URLs that tell platforms like Cometly exactly where each click originated. Without them, all your ad traffic gets dumped into a generic "facebook.com" bucket, making it impossible to tell your campaigns, ad sets, or even individual ads apart.
Deconstructing The Five UTM Parameters
To make any sense of your data, you have to know what each UTM parameter does. Each one answers a specific question about your traffic, giving you a much clearer picture of what's actually working.
Getting this right is foundational. For a deeper dive, our complete guide on what UTM tracking is is a great place to start.
Here's the breakdown of the five core parameters, with some real-world examples for Facebook Ads.
utm_source: This one’s easy. It just identifies where the traffic is coming from.- Example:
utm_source=facebook utm_medium: This explains the marketing channel. For paid ads on Facebook, you should always be consistent.- Example:
utm_medium=cpc(for Cost-Per-Click)
- Example:
utm_campaign: Here's where you name your specific promotion or strategic push. Make it descriptive enough that you can understand it at a glance.- Example:
utm_campaign=spring_sale_2025
- Example:
utm_content: Use this to tell your ads apart within the same campaign. It's perfect for A/B testing different creatives or copy.- Example:
utm_content=blue_carousel_ad_v1
- Example:
utm_term: While it was originally designed for paid search keywords, you can get creative here. A great use for Facebook Ads is to identify the specific audience you're targeting.- Example:
utm_term=lookalike_audience_top_purchasers
- Example:
When you put them all together, these parameters create a powerful URL that tells the full story of every single click.
Building A Scalable Naming Convention
Consistency is everything. A messy, inconsistent naming structure will completely break your reporting and make it impossible to compare performance over time. The goal is to create a simple, repeatable template that your entire team can stick to without any confusion.
To illustrate, a D2C brand I worked with was burning hours every week trying to manually stitch together messy ad reports. After we implemented a strict naming convention, they cut their reporting time in half and could finally see their top-performing ad creative in seconds.
Your goal isn't just to track data; it's to make that data easily searchable and comparable. A disciplined naming convention turns your Cometly dashboard from a confusing spreadsheet into a powerful optimization engine.
To help you get started, here's a clear guide on how to structure each UTM parameter for Facebook Ads to ensure your data flows into Cometly cleanly and consistently.
UTM Parameter Best Practices for Facebook Ads
UTM Parameter | Purpose | Example for Facebook Ads |
|---|---|---|
utm_source | Identifies the platform sending the traffic. |
|
utm_medium | Defines the marketing channel. |
|
utm_campaign | Names your specific campaign. |
|
utm_content | Distinguishes between different ads. |
|
utm_term | Identifies the target audience or ad set. |
|
By using Facebook's dynamic URL parameters ({{campaign.name}}, {{ad.name}}, etc.), you can automate most of this process. You set the template once, and Facebook's Ads Manager fills in the details for every ad, ensuring perfect consistency without any manual effort.
This disciplined approach ensures that when you log into Cometly, you can slice and dice your data with total precision. You’ll be able to compare retargeting vs. prospecting, video vs. static images, and different sale promotions—all because you took the time to label your traffic correctly from the start.
This foundational work is what separates amateurs from the pros who effectively track Facebook ads for maximum profitability.
Analyzing Your Data and Making Smarter Decisions
 Ultimate Guide To Track Facebook Ads With Cometly
Alright, the setup is done. Clean, reliable data is now flowing into Cometly. This is where you stop guessing and start making calculated, profitable decisions. The real power of being able to accurately track Facebook ads isn't just about staring at numbers; it's about understanding the story those numbers tell and acting on it with confidence.
Instead of getting lost in a sea of vanity metrics, you can finally narrow your focus to the reports that directly impact your bottom line. All that initial setup work is about to pay off in a big way, giving you a level of clarity that Meta’s native tools simply can't offer.
Uncovering the Insights That Matter
Inside Cometly, your data is organized into actionable views designed to answer your most pressing questions. Are my ads actually profitable? Which audiences are driving long-term value? What’s the true customer journey look like?
Here are a few of the most impactful reports to dive into first:
- ROAS by Ad Set: This report cuts straight to the chase, showing you exactly which ad sets are generating a positive return. It’s your go-to for making quick, decisive budget moves.
- LTV by Source: Forget just looking at the initial purchase. This view reveals which campaigns attract customers who stick around and buy again. You might discover an ad set with a lower initial ROAS is actually a goldmine for lifetime value.
- First-Click vs. Last-Click Attribution: This comparison helps you finally understand the full customer journey. An ad might not get the final click, but it could be the essential first touchpoint that introduces customers to your brand.
For a full breakdown of all the reporting capabilities, you can explore Cometly’s advanced analytics features. These tools are built to give you a complete picture of your marketing performance.
A Real-World Optimization Scenario
Let's make this practical. Imagine you're running two different carousel ads targeting the same audience. Inside Ads Manager, both appear to have a similar Cost Per Purchase (CPP), making it nearly impossible to pick a clear winner.
But once you pull up the data in Cometly, a completely different story emerges.
- Carousel Ad A: Shows a 2.1x ROAS. It gets a lot of initial clicks and immediate, lower-value conversions.
- Carousel Ad B: Shows a 2.8x ROAS. While its CPP is slightly higher, the average order value from its conversions is 30% greater.
Armed with this insight, you confidently shift your budget from Ad A to Ad B. Within a single week, that one simple change results in a $5,000 lift in total revenue—without increasing your overall ad spend. This is the kind of high-impact optimization that accurate tracking makes possible.
The goal is to stop making decisions based on surface-level metrics and start optimizing for true profitability. Clean data lets you see the subtle differences that have massive impacts on your campaign outcomes.
Turning Data Into Automated Action
Beyond manual analysis, you can set up custom performance alerts to stay ahead of the curve. You could create an alert that notifies you via Slack or email if an ad set’s ROAS drops below a certain threshold for more than 24 hours. This lets you pause underperformers before they waste any more of your budget.
Ultimately, the ability to track Facebook ads effectively is the bedrock of any serious growth strategy, especially for more advanced tactics. For example, accurate data is the foundation for successful campaigns like remarketing with Facebook, where you re-engage high-intent audiences. You can’t afford to get this wrong.
Frequently Asked Questions About Tracking Facebook Ads
Even the cleanest setup can throw curveballs once you start digging into how you track Facebook ads. Swapping out a purely browser-based pixel for a server-side solution opens a world of new scenarios—and with them, questions. Below, you’ll find the most common concerns we hear from advertisers who’ve already made the jump to Cometly. Think of this as your quick-reference guide to troubleshooting and perfecting your data stream.
How Do I Fix Discrepancies Between Facebook And Cometly Data
Spotting a few percentage points of difference between platforms isn’t fun, but it usually boils down to one simple issue: deduplication. If you see the same conversion counted twice—once by the browser pixel and again by the server—you’ll need to turn on deduplication in both Facebook Events Manager and Cometly’s diagnostics panel.
Other quick checks you can run:
- Enable Deduplication: Make sure it’s active on both sides to avoid duplicate conversions.
- Confirm Pixel Code Order: Load Cometly’s script early in your
<head>—before any other tracking snippets. - Align Event Timestamps: Verify that your website, Cometly, and Facebook all share the same clock settings.
These tweaks alone solve most data drift issues.
Can I Track Custom Events Like Newsletter Sign-Ups
Yes—you can track anything from free trials to newsletter subscriptions. Once you’ve installed the default pixel, head into the Events Tab in your Cometly dashboard. There you can:
- Create a new server-side event.
- Paste a tiny code snippet on your site to fire that event.
- Test it live using Chrome DevTools before you rely on those numbers.
Shopify users, take note: many setups let you skip manual code edits thanks to built-in integrations. Either way, always confirm your custom event fires in real time.
What Happens To My Historical Meta Pixel Data
Switching to Cometly won’t wipe out a thing in your Facebook Events Manager. All of your past browser-based events stay exactly where they are. Cometly simply adds a fresh, high-fidelity stream of server-side data.
No data loss occurs in Meta’s system when you integrate Cometly. You simply gain a more accurate, parallel data stream that enriches your analytics and improves your ad performance moving forward.
Once live, you’ll see both historical browser data and your new server-side results side by side. It’s a powerful way to measure the uplift in accuracy you get from true server-side tracking.
Does Cometly Support Multiple Ad Accounts And Stores
Absolutely. Whether you’re an agency juggling three clients or a brand running several Shopify and WooCommerce stores, Cometly keeps everything under one roof. You can:
- Link multiple Facebook ad accounts.
- Connect different e-commerce platforms—all in one subscription.
- View cross-store performance without endless logins or spreadsheets.
For agencies, that unified dashboard is a game-changer. You’ll finally have a single source of truth for all your attribution and tracking needs.
Ready to get tracking data you can finally trust? Cometly provides the server-side accuracy you need to scale your Facebook ads with confidence. Sign up today and see what you've been missing.