
Every ecommerce marketer knows the frustration of seeing sales roll in without knowing which ads actually drove them. You're running campaigns across Meta, Google, TikTok, and email, but your data tells conflicting stories. Google Analytics credits one source, your ad platforms claim another, and your gut says something different entirely.
This disconnect costs you money every single day through misallocated budgets and missed scaling opportunities.
Think about it: when you can't identify which campaigns generate profitable customers, you're essentially flying blind. You might be pouring budget into channels that look good on paper but deliver low-quality buyers, while starving the campaigns that actually drive your best customers.
Ecommerce attribution tracking solves this by connecting every customer touchpoint from first ad click to final purchase, giving you a clear picture of what's actually working. In this guide, you'll learn how to set up attribution tracking that captures the complete customer journey, connects your ad platforms and store data, and provides actionable insights for scaling your campaigns.
By the end, you'll have a functioning attribution system that shows exactly which channels drive revenue, not just clicks.
Step 1: Audit Your Current Tracking Infrastructure
Before you build anything new, you need to understand what's already in place. Most ecommerce stores have accumulated a patchwork of tracking pixels, tags, and scripts over time, and many of them conflict with each other or collect duplicate data.
Start by logging into each of your ad platforms and documenting which pixels are installed. Check Meta Events Manager, Google Ads conversion tracking, TikTok Pixel, Pinterest Tag, and any other platforms where you run campaigns. Note which events each pixel tracks: page views, add to cart, initiate checkout, and purchase.
Next, examine your ecommerce platform's native tracking capabilities. Shopify, WooCommerce, and BigCommerce each have built-in analytics, but they vary significantly in what they capture and how they attribute conversions. Log into your platform's analytics dashboard and review what data it currently collects about customer journeys.
The critical step is mapping your current data flow. Pick a recent order and trace it backward: What does your ecommerce platform say about how that customer found you? What does Google Analytics show? What do your ad platforms claim? You'll likely find discrepancies that reveal where your tracking breaks down.
Common gaps include missing data between ad click and site visit, lost tracking when customers switch devices, and incomplete purchase data that doesn't include revenue or product details. Browser-based pixels also fail to fire when customers use ad blockers or have tracking prevention enabled. Understanding these issues is essential for implementing effective ecommerce attribution tracking solutions.
Create a tracking inventory spreadsheet with these columns: Platform, Event Type, Implementation Method (pixel vs. server-side), Data Captured, and Known Issues. This becomes your roadmap for what needs fixing.
You've succeeded when you can clearly articulate where your current setup fails to capture the complete customer journey. If you discover that 30-40% of your purchases can't be traced back to their original source, that's normal and exactly why you're implementing proper attribution tracking.
Step 2: Implement Server-Side Tracking for Accurate Data Collection
Browser-based pixels have become increasingly unreliable, and if you're still relying solely on them, you're missing a significant portion of your conversions. iOS App Tracking Transparency changes and growing ad blocker usage mean that browser pixels often fail to fire, leaving you with incomplete data.
Server-side tracking solves this by sending conversion data directly from your store's backend to your analytics and ad platforms. Instead of relying on a customer's browser to execute tracking code, your server reports events the moment they happen in your database.
Here's how it works: When a customer completes a purchase, your ecommerce platform processes the order on its server. Implementing server-side tracking solutions for ecommerce captures that event immediately and sends it to your attribution system and ad platforms, bypassing browser limitations entirely.
For Shopify stores, you'll want to use a server-side tracking solution that integrates with Shopify's webhook system. When an order is created, Shopify sends a webhook to your tracking platform with complete purchase details including customer information, products bought, and revenue.
WooCommerce and BigCommerce users can implement server-side tracking through their respective API systems. The setup involves configuring your tracking platform to receive order data directly from your store's backend whenever key events occur.
The technical implementation typically requires adding a server-side tracking integration to your ecommerce platform. Most modern attribution platforms provide pre-built integrations that handle this automatically. You'll need to authenticate the connection, map your conversion events, and configure which data points to send.
Make sure your server-side setup captures these essential data points: order ID, customer email (hashed for privacy), purchase amount, product SKUs, and the timestamp. This information allows your attribution system to match the purchase back to the customer's earlier interactions with your ads.
To verify success, place a test order on your store and check two things: First, confirm the event appears in your attribution platform's dashboard within seconds of purchase completion. Second, compare the number of server-side tracked conversions against your platform's native analytics over a 24-hour period. You should see server-side tracking capture 20-30% more conversions than browser-based pixels alone.
The difference represents real sales that your old tracking system was missing completely. Those are conversions you can now attribute to the right campaigns and use to make better budget decisions.
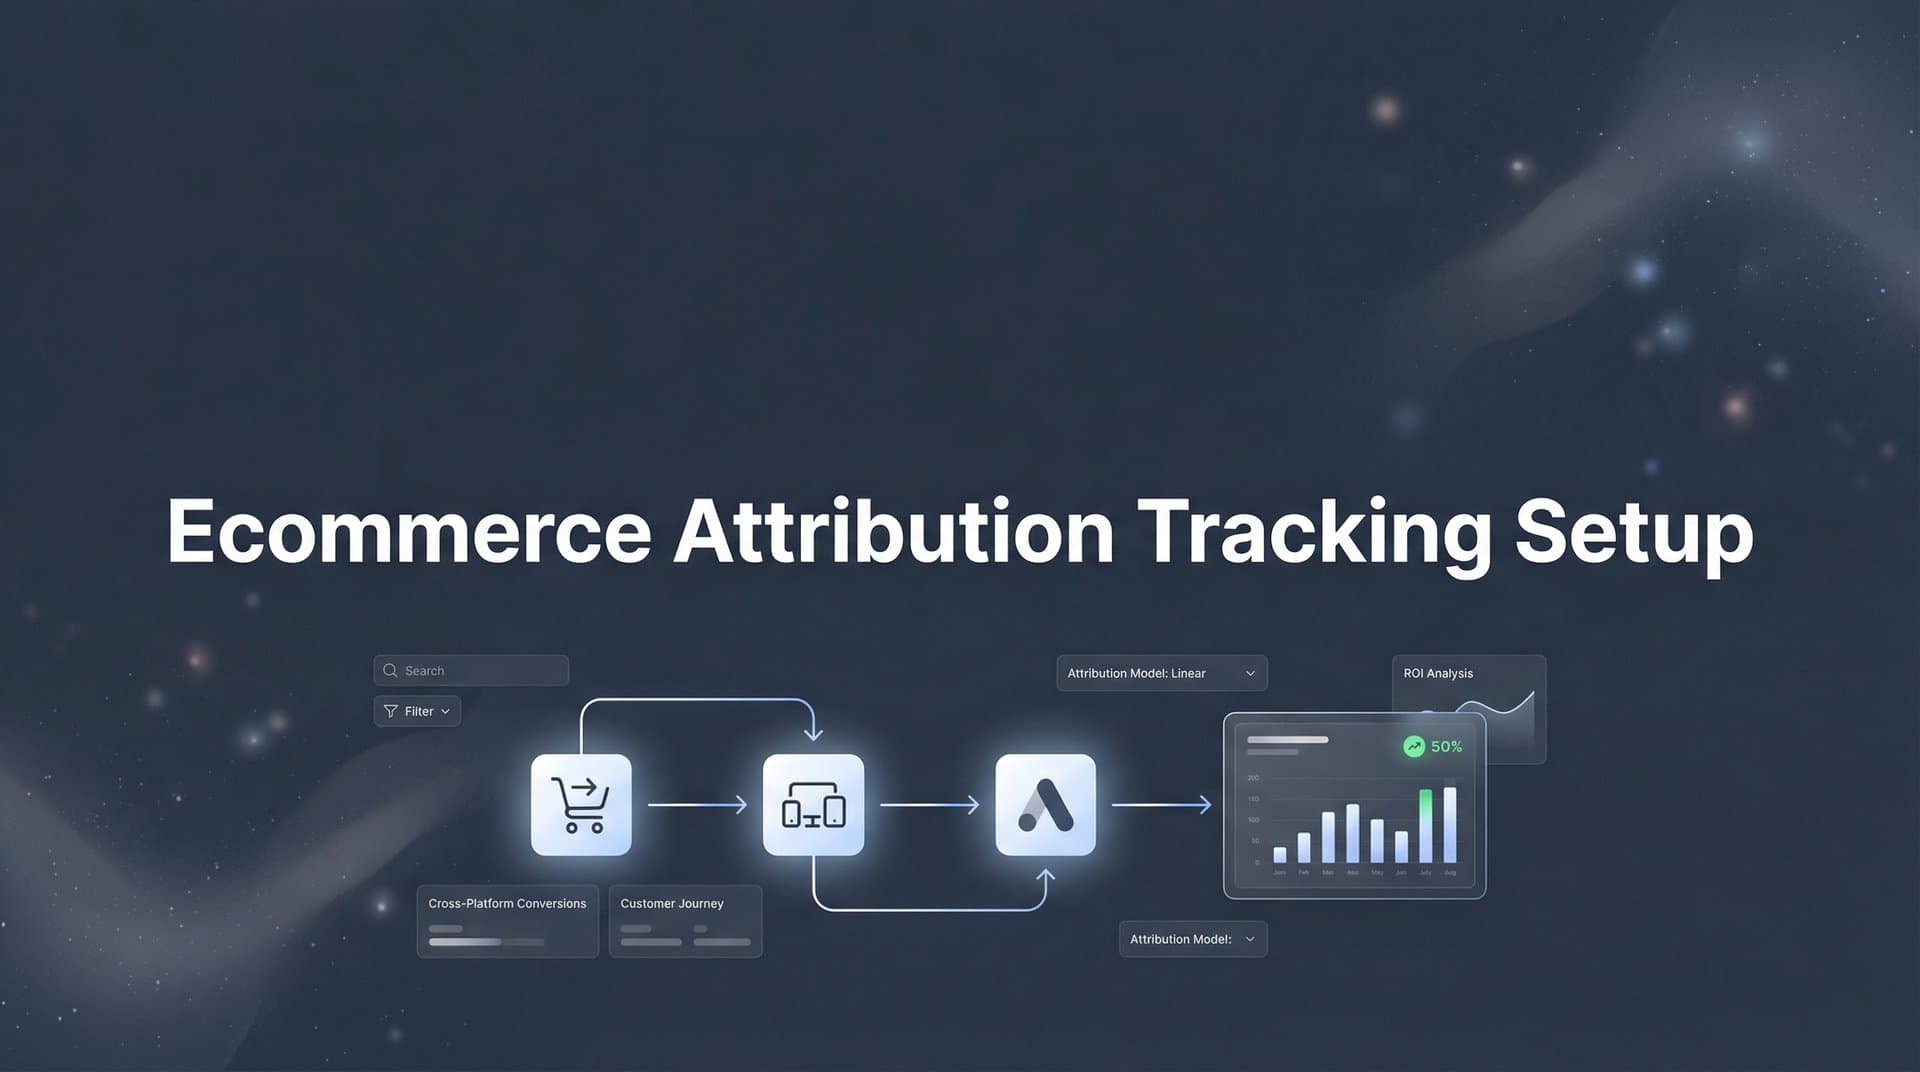
Step 3: Connect Your Ad Platforms to a Unified Attribution System
Now that you're capturing accurate conversion data, you need to connect it to the ad platforms where your traffic originates. This step brings together Meta, Google Ads, TikTok, and any other paid channels into a single attribution view.
Start by integrating each ad platform with your attribution system. For Meta, you'll connect through the Facebook Marketing API, which requires creating an app in Meta Business Suite and granting permissions to access your ad account data. This integration pulls in campaign performance metrics, ad spend, and click data.
Google Ads integration works similarly through the Google Ads API. You'll need to authenticate your Google account and select which ad accounts to connect. The integration imports campaign data, keyword performance, and click information that can be matched to conversions.
TikTok, Pinterest, and other platforms each have their own API connections. Most attribution platforms provide step-by-step wizards that guide you through the authentication process for each channel. For detailed guidance on managing ecommerce tracking setup for multiple channels, ensure each platform is properly configured.
Here's where UTM parameters become critical. Set up a consistent UTM parameter convention across all campaigns to ensure accurate tracking. Use this structure: utm_source identifies the platform (facebook, google, tiktok), utm_medium specifies the channel type (cpc, social, email), and utm_campaign names the specific campaign.
Be rigorous about UTM consistency. Create a UTM naming guide for your team and stick to it. Inconsistent parameters like using both "facebook" and "meta" as sources will fragment your data and make analysis impossible.
Next, configure conversion events to sync across all connected platforms. Your attribution system should receive purchase events from your server-side tracking and automatically associate them with the ad clicks and impressions from your integrated platforms.
This matching process uses multiple identifiers: click IDs from ad platforms, customer email addresses, IP addresses, and user agent strings. The more data points available, the more accurately your system can attribute conversions to the right source.
To verify everything works correctly, run test purchases using unique UTM parameters for each platform. Create a test campaign in Meta with specific UTM tags, click your own ad, and complete a purchase. Within minutes, that conversion should appear in your attribution dashboard with the correct source attribution.
Repeat this test for each connected platform. If attribution data appears correctly for all test purchases, your integration is working. If certain platforms show missing data, review your UTM parameters and API connection settings to identify the gap.
Step 4: Link Your CRM and Customer Data Sources
Attribution isn't just about the first purchase. The real value comes from understanding which campaigns attract customers who buy repeatedly and generate the highest lifetime value. This requires connecting your CRM and customer data sources to your attribution system.
If you use HubSpot, Klaviyo, Salesforce, or another CRM, integrate it with your attribution platform. This connection allows you to track what happens after the initial purchase: repeat orders, subscription renewals, upsells, and customer support interactions.
The integration process typically involves API authentication similar to your ad platform connections. Once connected, your CRM sends customer event data to your attribution system, creating a complete timeline from first ad click through months or years of customer relationship.
Customer identity resolution is the technical challenge here. The same person might interact with your brand as an anonymous website visitor, then a known email subscriber, then a purchaser with account credentials. Your attribution system needs to recognize these are the same individual and connect all their touchpoints into one unified customer journey. Implementing cross device attribution tracking helps solve this challenge effectively.
Modern attribution platforms use probabilistic and deterministic matching to solve this. Deterministic matching uses concrete identifiers like email addresses to definitively link customer records. Probabilistic matching uses patterns in behavior, device fingerprints, and timing to make educated guesses about identity when direct identifiers aren't available.
Configure your system to track lifetime value by setting up revenue tracking that extends beyond the first purchase. When a customer makes their second, third, or tenth purchase, that revenue should be attributed back to the original acquisition source.
This reveals which campaigns attract one-time buyers versus loyal repeat customers. You might discover that Meta campaigns generate more first-time purchases, but Google Shopping ads attract customers with 40% higher lifetime value. That insight completely changes how you should allocate budget.
Set up custom fields in your attribution system to track key CRM metrics: customer acquisition date, total orders, total revenue, average order value, and customer status (active, churned, VIP). These data points enable sophisticated analysis of campaign quality beyond simple conversion counting.
To verify success, find a customer in your CRM who has made multiple purchases. Look up that customer in your attribution dashboard and confirm you can see their complete journey: the original ad that brought them in, their first purchase, and all subsequent orders. If the timeline is complete and accurate, your CRM integration is working correctly.
Step 5: Configure Multi-Touch Attribution Models
Most ecommerce purchases don't happen on the first click. Customers typically interact with your brand multiple times across different channels before they buy. Multi-touch attribution acknowledges this reality by giving credit to all the touchpoints that contributed to a conversion, not just the last one.
Your attribution platform should support multiple attribution models so you can analyze your data from different perspectives. The most common models include first-touch (credits the initial interaction), last-touch (credits the final click before purchase), linear (distributes credit equally across all touchpoints), and data-driven (uses machine learning to assign credit based on actual impact). Understanding the right attribution model for ecommerce marketing is crucial for accurate analysis.
Start by understanding what each model reveals. First-touch attribution shows which channels are best at creating initial awareness and bringing new prospects into your funnel. Last-touch shows which channels are effective at closing sales. Linear attribution helps you understand the full journey, while data-driven models attempt to calculate the true incremental value of each touchpoint.
Configure attribution windows that match your typical customer journey length. Attribution windows define how far back in time the system looks when assigning credit to touchpoints. For most ecommerce businesses, a 7-day click window and 1-day view window works well for impulse purchases and everyday products.
If you sell higher-consideration items like furniture, electronics, or luxury goods, extend your attribution window to 30 days or even 90 days. Customers researching these purchases take longer to decide, and you need a wider window to capture their full journey.
Set up your attribution platform to run multiple models simultaneously on the same data. This comparative view is incredibly valuable. You might see that Meta gets 40% of credit under last-touch attribution but 60% under first-touch, indicating it's stronger at creating awareness than closing sales.
Use these insights to refine your campaign strategy. Channels that score high on first-touch attribution should focus on broad targeting and awareness messaging. Channels that dominate last-touch attribution should emphasize retargeting and conversion-focused creative.
Pay special attention to the "path length" metric, which shows how many touchpoints typically occur before conversion. If your average path length is five interactions, you know that single-touch attribution models are dramatically oversimplifying your customer journey.
To verify success, analyze the same high-performing campaign under three different attribution models: first-touch, last-touch, and linear. The credit assigned should vary significantly. If all three models show identical results, something is wrong with your configuration, and you're likely only capturing single-touch journeys.
The goal isn't to find the "right" attribution model. Each model provides a different lens for understanding your marketing performance. Use them together to build a complete picture of how your channels work individually and in combination.
Step 6: Set Up Conversion Sync to Optimize Ad Platform Algorithms
Accurate attribution data isn't just for your own analysis. It's also critical for improving how ad platforms optimize your campaigns. Conversion sync sends your attribution data back to Meta, Google, and other platforms, giving their algorithms better information for targeting and bidding.
This is where server-side tracking delivers its biggest advantage. When you send conversion data directly from your server to ad platforms through their Conversion APIs, you provide much richer information than browser pixels can capture. You can include purchase amounts, product categories, customer lifetime value predictions, and other data points that help platforms optimize more effectively.
For Meta, configure the Conversions API (CAPI) to send purchase events with complete details. Include the event name, timestamp, customer information (hashed email and phone), purchase value, currency, and product data. The more complete your event data, the better Meta's algorithm can identify similar high-value customers.
Google's Enhanced Conversions works similarly. You'll send hashed customer data along with conversion events, which Google uses to match conversions back to ad clicks even when browser tracking fails. This improves conversion tracking accuracy and helps Google Ads optimize for the customers most likely to convert.
Event match quality is the metric that tells you how well your conversion data is reaching ad platforms. In Meta Events Manager, check your Event Match Quality score for each pixel and Conversions API configuration. Scores above 6.0 are good, above 7.0 is excellent.
To improve event match quality, include more customer data parameters in your conversion events. Email addresses and phone numbers (properly hashed) are the most valuable identifiers. Also send first name, last name, city, state, and zip code when available. Each additional parameter increases the likelihood of successful matching.
Configure your conversion sync to send events in real-time, not in batches. Real-time event sending allows ad platforms to optimize faster, incorporating conversion data into their algorithms within minutes rather than hours or days. Proper ecommerce conversion tracking setup ensures your data flows seamlessly to all platforms.
Set up deduplication between your browser pixels and server-side events. Without proper deduplication, ad platforms might count the same conversion twice: once from the browser pixel and once from your server-side event. Most attribution platforms handle this automatically by sending a unique event ID that platforms use to identify duplicates.
To verify success, check your event match quality scores in Meta Events Manager and Google Ads. For Meta, navigate to Events Manager, select your pixel, and review the Event Match Quality section. For Google, check the Enhanced Conversions reporting in your Google Ads account.
You should also monitor the "Events Received" count in each platform and compare it to your attribution system's conversion count. They should match closely. If ad platforms show significantly fewer events than your attribution system recorded, you have a sync issue that needs troubleshooting.
Step 7: Build Your Attribution Dashboard and Reporting Workflow
All the data collection in the world is worthless if you can't easily access insights when making budget decisions. Your final step is creating a dashboard and reporting workflow that turns attribution data into actionable intelligence.
Start by building custom views that answer your most important questions. Create a channel performance view that shows revenue attributed to each marketing channel: Meta, Google, TikTok, email, organic search. Include metrics like attributed revenue, return on ad spend, cost per acquisition, and customer lifetime value by source. Utilizing revenue attribution tracking tools can streamline this process significantly.
Build a campaign-level view that breaks down performance by individual campaigns within each channel. This reveals which specific campaign strategies work best. You might discover that your Meta prospecting campaigns generate lower immediate ROAS but attract customers with higher lifetime value than retargeting campaigns.
Create an ad creative performance view if your attribution system can track at that granularity. Knowing which specific ads drive the most valuable customers allows you to double down on winning creative approaches and kill underperformers faster.
Set up automated reports that deliver key metrics to your inbox or Slack on a schedule that matches your decision-making rhythm. A weekly summary report showing revenue by channel and flagging significant performance changes keeps you informed without requiring daily dashboard checking.
Configure alerts for anomalies. If a major traffic source suddenly stops showing attributed conversions, you want to know immediately so you can investigate whether it's a tracking issue or an actual performance problem. Following attribution tracking best practices helps you avoid common pitfalls.
Establish a testing framework to validate attribution accuracy over time. Run periodic holdout tests where you pause specific campaigns and measure the actual revenue impact compared to what your attribution model predicted. This reveals whether your attribution is over-crediting or under-crediting certain channels.
Document your reporting workflow in a simple guide for your team. Specify which metrics to review weekly, which require monthly analysis, and what thresholds trigger budget reallocation decisions. This prevents analysis paralysis and ensures attribution data actually influences your strategy.
To verify success, use your new dashboard to make your first data-driven budget reallocation. Identify a channel that's underperforming on attributed ROAS and reduce its budget by 20%. Simultaneously, increase budget by 20% on a channel showing strong attributed returns. Monitor the results over the following two weeks.
If your attribution system is working correctly, the budget shift should improve your overall ROAS. The channel you scaled should maintain its performance or improve with additional budget, while the channel you reduced should show it wasn't generating as much value as claimed.
Putting It All Together
Your ecommerce attribution tracking system is now complete. Let's review what you've built:
You've audited your current tracking setup and identified gaps where conversions were slipping through unattributed. Server-side tracking is now capturing conversions that browser pixels miss, giving you a more complete picture of actual sales. All your ad platforms connect to a unified attribution system that shows how channels work together to drive conversions.
Your CRM data links customer journeys to lifetime value, revealing which campaigns attract your best long-term customers. Multi-touch attribution models show how channels contribute throughout the customer journey, not just at the final click. Conversion sync feeds enriched data back to ad platforms, improving their targeting algorithms and optimization.
Your dashboard provides clear, actionable insights for budget decisions, and you've established a reporting workflow that turns data into strategy.
With this foundation in place, you can finally answer the question that matters most: which marketing efforts actually drive revenue? No more conflicting reports from different platforms. No more budget decisions based on incomplete data. No more wondering whether your best campaigns are getting the credit and investment they deserve.
Start by implementing steps one through three this week. Get your tracking audit complete, server-side tracking installed, and ad platforms connected. These foundational steps deliver immediate value by improving data accuracy.
Build out the remaining components over the following weeks. CRM integration, multi-touch attribution configuration, conversion sync optimization, and dashboard creation can happen progressively without disrupting your current operations.
The sooner you have accurate attribution data, the sooner you can stop wasting budget on underperforming channels and scale what actually works. Every day you operate without proper attribution is another day of suboptimal budget allocation costing you profitable growth.
Ready to elevate your marketing game with precision and confidence? Discover how Cometly's AI-driven recommendations can transform your ad strategy. Get your free demo today and start capturing every touchpoint to maximize your conversions.


