Learn how to setup how to set up Google Ads conversion tracking for your Shopify store using GA4 (Google Analytics 4). This video will show you step-by-step how to track purchases on your Shopify store using GA4. We will be using Google Tag Manager and a data layer to setup GA4 tracking on your Shopify store.
For written instructions while following the video tutorial, please download the guide here.
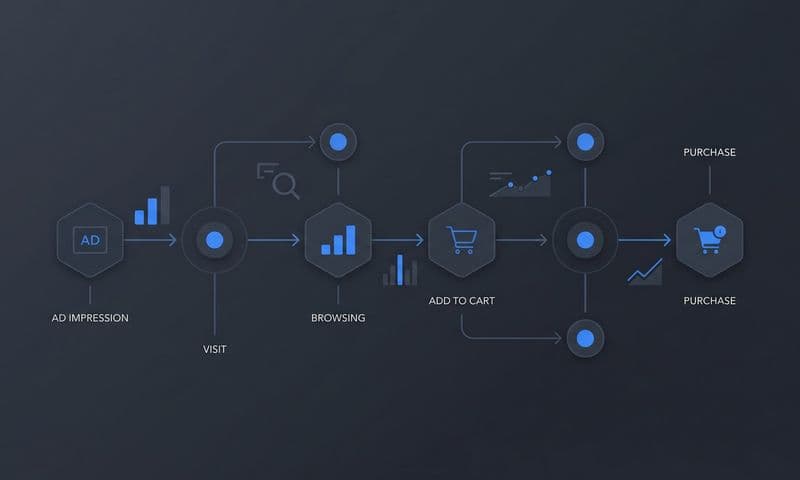
Google Ads conversion tracking is an essential tool for any Shopify store owner who wants to track and measure the success of their advertising campaigns. By setting up conversion tracking, you can determine which ads are generating the most revenue, which products are selling best, and which keywords are driving the most traffic.
With the introduction of Google Analytics 4 (GA4), setting up conversion tracking has become easier and more flexible. In this article, we'll go through the steps to set up Google Ads conversion tracking for a Shopify store using GA4.
Step 1: Create a Google Ads Conversion Action
The first step is to create a conversion action in your Google Ads account. This will allow you to track the specific actions that users take on your website, such as making a purchase or filling out a form.
To create a conversion action, follow these steps:
- Sign in to your Google Ads account and click on "Tools & Settings" in the top right corner.
- Select "Conversions" from the dropdown menu.
- Click on the "+ Conversion" button.
- Choose the type of conversion you want to track, such as "Purchase."
- Set up the conversion settings, such as the conversion value and the attribution window.
- Click "Create and Continue."
Step 2: Connect Google Analytics 4 to your Shopify Store
Next, you'll need to connect your Google Analytics 4 property to your Shopify store. To do this, follow these steps:
- Sign in to your Google Analytics account and select your GA4 property.
- Click on "Admin" in the left-hand menu.
- In the "Property" column, click on "Data Streams."
- Click on the "+ New Data Stream" button.
- Choose "Web" as the data stream source.
- Enter your website URL and a name for your data stream.
- Click "Create Stream."
- Copy the Measurement ID that appears on the next screen.
- In your Shopify admin, go to "Settings" and then "Online Store."
- Click on "Google Analytics" in the left-hand menu.
- Paste the Measurement ID into the "Google Analytics 4 Property ID" field.
- Click "Save."
Step 3: Link Google Ads and GA4
Finally, you need to link your Google Ads account to your GA4 property. To do this, follow these steps:
- In your Google Analytics account, select your GA4 property.
- Click on "Data Streams" in the left-hand menu.
- Click on the three dots next to your data stream and select "Tagging Settings."
- Under "Tag Configuration," select "Google Ads."
- Enter your Google Ads account ID and conversion ID.
- Click "Save."
Congratulations! You have now set up Google Ads conversion tracking for your Shopify store using GA4. It may take a few hours for data to start populating in your Google Ads account.
Learn more about how Cometly can help attribute revenue back to the correct ads and understand where customers are coming from → Get Free Cometly Demo Today