Getting your Facebook ad tracking right is no longer a “nice-to-have”—it’s the entire foundation of a profitable campaign. It involves using tools like the Meta Pixel and Conversions API (CAPI) to see exactly how people interact with your website after clicking an ad.
This data is your lifeline for optimizing campaigns, boosting your return on ad spend (ROAS), and figuring out which ads are actually making you money. Without it, you’re just throwing your budget into a black box and hoping for the best.

It feels like a lifetime ago, but there was a time when Facebook advertising felt simpler. Today, precise data is everything. Flying blind with your ad spend is a guaranteed way to burn cash with nothing to show for it. When your data is off, you end up making expensive mistakes, like scaling the wrong ad set or pouring money into an audience that will never convert.
Privacy shifts, especially Apple's iOS updates, completely rewrote the rules. These changes limit how much data advertisers can get from users on their devices, making it much harder to connect sales directly back to your ads. This is exactly why relying on a single tracking method just doesn't cut it anymore.
To get a clear picture of performance these days, you need a multi-layered setup. Think of it as building a small, specialized team where each player has a critical role in gathering intelligence for your campaigns. Before we dig in, here’s a quick overview of the essential tools you'll be working with.
Tracking ComponentPrimary FunctionBest ForMeta PixelTracks user actions on your website via their browser.Capturing on-site events like page views, add-to-carts, and purchases.Conversions API (CAPI)Sends conversion data directly from your server to Facebook.Bypassing browser-based blockers and capturing data the Pixel misses.UTM ParametersAdds tracking tags to your ad URLs for granular insights.Identifying which specific ad, audience, or campaign drove a conversion.
Each of these components plays a vital part in building a resilient and accurate tracking system. Let's break down what each one does.
Your tracking setup starts with two core pieces from Meta: the Pixel and the Conversions API.
By combining the Pixel and CAPI, you create a more robust tracking system that captures conversions the Pixel might miss on its own. This synergy is key to closing the data gap created by modern privacy features.
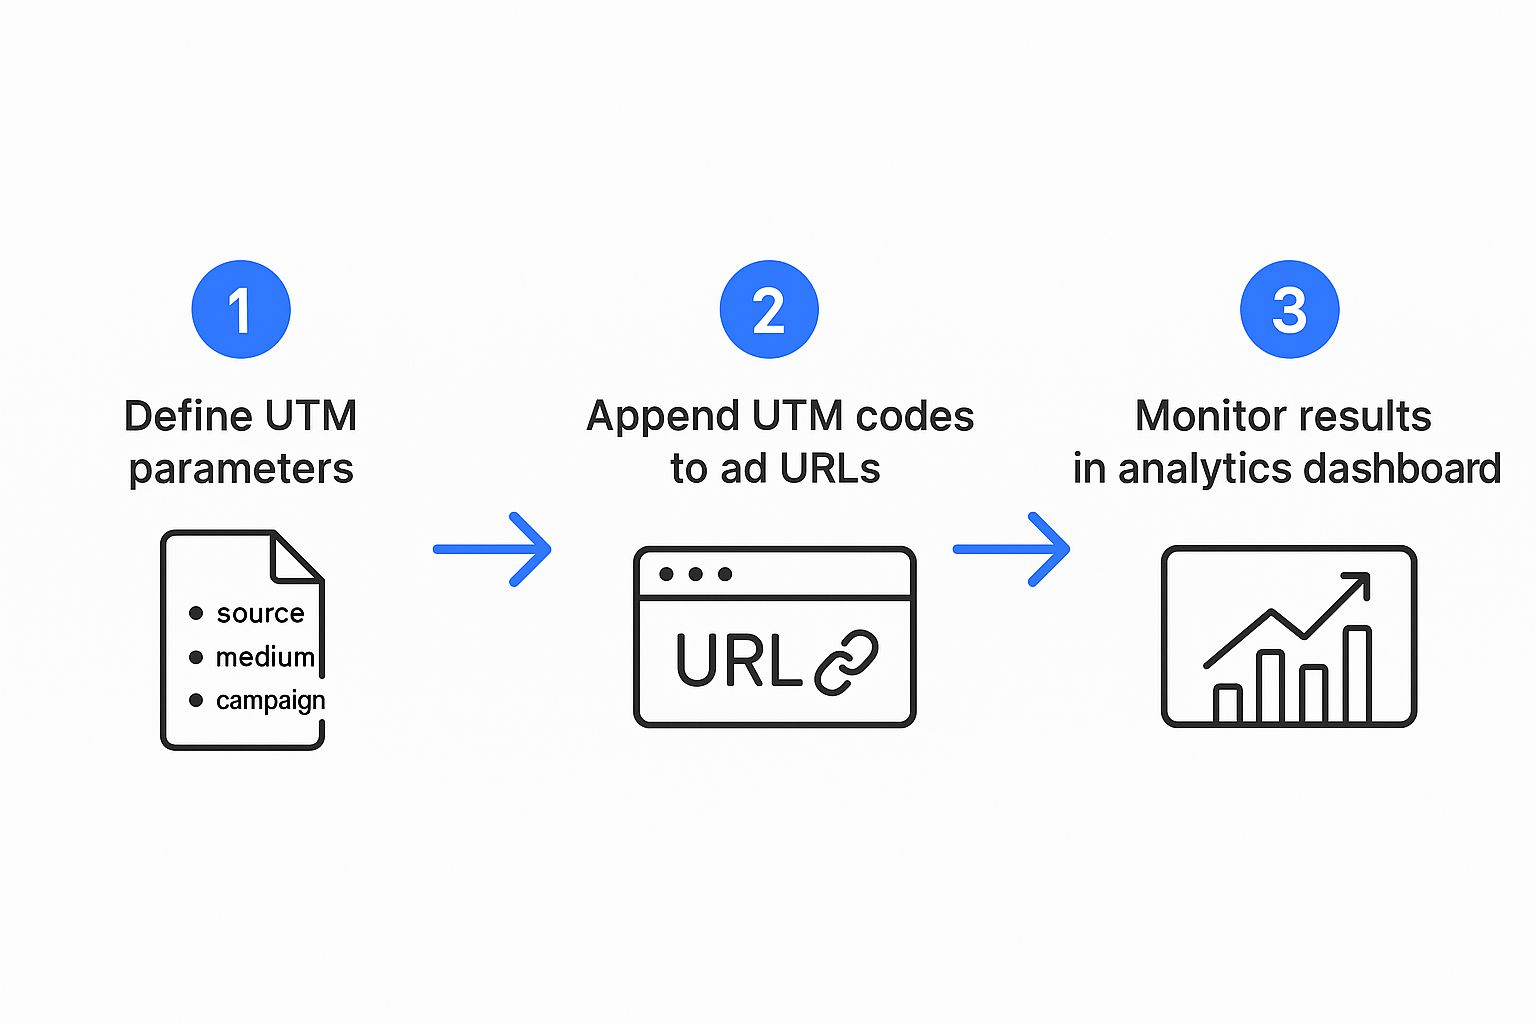
Finally, we have UTM Parameters. These are custom tags you add to the end of your ad URLs. They give you incredibly granular details about where your traffic is coming from, helping you see precisely which campaign, ad set, or even ad creative drove a specific action.
This combined approach is critical, especially when you consider the sheer scale of the platform. As of early 2025, Facebook ads have a potential reach of 2.28 billion people, with ad revenues hitting around $131.9 billion in 2023. With that kind of volume, you need sharp, accurate data to find your ideal customer in a sea of noise.
Ultimately, the goal is to piece together a complete, undeniable picture of your ad performance. Our full guide on Facebook Ad Tracking dives deep into how these elements work together to give you true clarity, allowing you to see beyond what Facebook's dashboard reports and understand what’s actually driving growth for your business.

Before we even think about server-side tracking, we need to get the basics right. And in the world of Facebook ads, the absolute foundation is the Meta Pixel.
Think of the Pixel as a small snippet of JavaScript code that lives on your website. Its job is simple but critical: it acts as your on-site scout, watching how users behave and reporting those actions back to Facebook. This browser-side tracking is the first and most fundamental layer of any modern tracking Facebook ads strategy. It’s not perfect on its own, but it’s essential for capturing the broad range of user interactions that fuel ad optimization, retargeting, and audience building.
Just dropping the Pixel code on your site isn’t enough. The real magic happens when you configure standard events—predefined actions that Facebook's algorithm understands. These events tell Facebook precisely what happened on your site, which allows it to get smarter and find more people who are likely to take those same valuable actions.
For most businesses, a few core events are completely non-negotiable:
Getting these events set up correctly is the difference between flying blind with vague data and having actionable intelligence you can use to confidently scale your campaigns.
How you implement these events really depends on your business model. Let's walk through two common scenarios I see all the time.
Scenario 1: E-commerce BrandAn online store selling custom coffee mugs needs to track the entire sales funnel. Their Pixel event setup should fire at these key moments:
ViewContent on every single product page for their mugs.AddToCart the instant a customer clicks the "Add to Cart" button.InitiateCheckout when the customer lands on the checkout page.Purchase on the "Thank You" or order confirmation page, making sure to pass back the order's value and currency.Scenario 2: Lead Generation BusinessA B2B software company trying to get more demo requests has a simpler, but equally important, setup:
ViewContent on their main features and pricing pages.Lead on the "Thank You" page that appears right after a user submits the "Request a Demo" form.Key Takeaway: Your goal is to map out a logical flow of events that mirrors your actual customer journey. This gives Facebook the clean, sequential data it needs to optimize your ad delivery and find you better customers.
Once your events are configured, you absolutely have to verify they’re firing correctly. Don't skip this. The easiest way is with the Meta Pixel Helper, a free Chrome extension.
Just navigate through your website like you're a customer. View a product, add it to your cart, start the checkout—do it all. At each step, the Pixel Helper icon will light up and show you exactly which events fired on that page and if there are any issues. You can also see this data populate in real-time within Facebook's Events Manager.
If you see green checkmarks, you're good to go. If you see yellow warnings or red errors, it's time to troubleshoot before you spend a single dollar on ads. Getting this browser-side tracking dialed in is the first real step to mastering how you are tracking Facebook ads.
The Meta Pixel is your starting point for tracking Facebook ads, but it has a massive weakness: it’s completely reliant on a user's browser. That makes it vulnerable to everything from ad blockers and spotty network connections to the ever-growing privacy walls built into browsers like Safari and Firefox. When the Pixel gets blocked, that data just vanishes, leaving you with a blurry, incomplete picture of your campaign performance.
This is where the Conversions API (CAPI) becomes your most valuable player. Instead of piggybacking on a user's browser, CAPI establishes a direct, secure connection between your website’s server and Meta's. Think of it as a private data highway that completely bypasses all the browser-level traffic jams and roadblocks.
By sending event data straight from your server, you can guarantee that critical actions like purchases, leads, and sign-ups get recorded, even if the Pixel fails to fire. This server-side approach is the key to closing the data gap that modern privacy features and ad blockers have created.
Implementing CAPI alongside your Pixel pays off immediately. It’s not just about getting more data; it's about getting better data—the kind you can actually trust when you're deciding where to put your budget.
The main advantages are pretty clear:
The whole idea is to create a redundant system. The Pixel and CAPI work together as a team. Meta is smart enough to deduplicate identical events, ensuring every conversion is counted exactly once. This blended approach gives you the best of both worlds: the speed of browser-side tracking and the reliability of server-side data.
Setting up the Conversions API might sound like a job for a developer, but Meta has worked hard to make it accessible. You don't need to be a coding wizard to get started, especially if you're on a common e-commerce or website platform.
The most straightforward method by far is through partner integrations. Platforms like Shopify, WooCommerce, and dozens of others have built-in integrations that connect your server to Meta with just a few clicks. Honestly, this is the simplest and fastest way to get CAPI up and running. While the process is tailored to Meta, you can find helpful resources about the Google Conversion API that explain the core server-side concepts, which are similar.
For more custom-built websites or those with advanced needs, a manual setup using Google Tag Manager (GTM) or a direct integration is always an option. But for most advertisers, partner integrations are more than enough. The screenshot below shows you the first step in Meta's Events Manager where you choose your connection path.

This interface is designed to guide you to the right setup, whether it's through a partner or a more hands-on configuration. The goal is to make server-side tracking Facebook ads as painless as possible.

While the Meta Pixel and Conversions API do a solid job of telling you what happened on your website, they often leave you guessing about the why. That's where UTM parameters come in. Think of them as the missing piece of the puzzle, giving you the granular data you need to connect every single click back to a specific campaign, ad set, and creative.
So what are they? UTMs are just simple text tags you tack onto the end of your ad's destination URL. They work like a GPS tracker for your clicks, telling analytics tools like Cometly or Google Analytics exactly where your traffic came from.
For anyone serious about tracking Facebook ads with real precision, this layer of tracking is non-negotiable. It’s how you start to truly own your data, outside of what Meta’s black box decides to show you.
A well-structured UTM system is your key to unlocking deep, actionable insights. The goal is to create a clear and consistent naming convention for all your marketing efforts. A standard setup uses five core parameters, with each one answering a critical question about your traffic.
facebook or meta.cpc (cost-per-click) to identify our paid ad traffic.Consistency is everything here. If you use Facebook one day, facebook the next, and FB on another ad, your analytics tools will see them as three different sources. This shatters your data into unusable fragments, making accurate analysis impossible.
If you want a deeper dive on the fundamentals, check out our complete guide on what UTMs are and how marketers use them for campaigns.
Let’s be real: manually building UTMs for every single ad is a recipe for disaster. It’s tedious, mind-numbingly slow, and practically begs for human error.
Thankfully, Facebook Ads Manager has a feature that’s a complete game-changer: dynamic URL parameters.
Instead of typing out each parameter by hand, you use special placeholders that Facebook automatically fills in with the right information from your campaign setup. It’s brilliant.
Here's the go-to template we use. Just copy and paste this into the "URL Parameters" box at the ad level in your campaign setup:
utm_source=facebook&utm_medium=cpc&utm_campaign={{campaign.name}}&utm_content={{ad.name}}&utm_term={{adset.name}}
When your ad runs, Facebook automatically swaps out {{campaign.name}} with your actual campaign name, {{ad.name}} with your ad’s name, and {{adset.name}} with the ad set’s name. This ensures your tracking is always accurate, standardized, and perfectly aligned across all your ads.
Pro Tip: Name your ads and ad sets descriptively (e.g., "VideoAd-Blue-Graphic" or "Lookalike-1%-Purchasers"). This way, your dynamic UTMs will feed rich, easy-to-read data directly into your analytics platform, telling you exactly which creative and audience combo is driving sales.
This method gives you the power to definitively answer the most important question in advertising: which specific ad, shown to which specific audience, drove this exact sale? That level of clarity is how you scale ad spend profitably and with confidence.
Relying solely on Facebook's internal reporting is like asking a fox to guard the henhouse. Seriously. Each ad platform—whether it's Facebook, Google, or TikTok—is naturally biased to take credit for every single conversion it touches. This creates a completely warped and unreliable picture of your marketing performance.
This is exactly why dedicated attribution tools are a game-changer for anyone who's serious about tracking their ads effectively.
Think of these platforms as a neutral, third-party referee. They pull in data from all your different sources—your ad accounts, your sales platform like Shopify, and your analytics—and bring it all together under one roof. The end result is a single, trustworthy dashboard that shows you what’s actually happening across the entire customer journey, from the very first click to the final sale.
The biggest headache with platform-native reporting is that each system lives in its own silo. Facebook might claim a sale, but so might Google Ads if the customer happened to click ads on both platforms before buying. This overlap creates an absolute mess of your data, making it impossible to know which touchpoint really drove the purchase.
An attribution tool cleans this up by de-duplicating conversions and mapping out the full sequence of events. Instead of seeing multiple platforms all claiming the same $100 sale, you see a single sale attributed correctly based on the model you choose.
If you want to get into the weeds on these methodologies, you can learn more by understanding the difference between single-source attribution and multi-touch attribution models. This kind of clarity is what separates guessing from making genuinely smart budget decisions.
By centralizing all your marketing data, you move from a state of conflicting reports to a single source of truth. This empowers you to see the real impact of your campaigns and stop wasting money on channels that only look like they're performing well.
Bringing a centralized attribution system like Cometly into your workflow delivers some immediate and very real benefits that go way beyond just cleaning up messy data.
Ultimately, using a third-party attribution tool isn't just about getting better reports. It's about making smarter, more profitable marketing decisions based on data you can actually trust.
Even with a perfectly planned setup, you’re going to run into questions with Facebook ads. It's a complex ecosystem, and a tiny tracking issue can feel like a massive roadblock when you’re trying to scale. Let’s tackle some of the most common challenges advertisers hit so you can keep your campaigns running smoothly.
A classic one is data discrepancy. You might see 10 sales in Ads Manager, but Shopify or your attribution platform shows 8. This is completely normal and usually comes down to different attribution windows or how each platform takes credit for a conversion.
It’s a perfect example of why having a single source of truth is non-negotiable. A dedicated attribution tool gives you one unified, reliable view of what’s actually happening.
If your Pixel suddenly seems to go silent, the first thing to check is the Meta Pixel Helper Chrome extension. It's a lifesaver for quickly diagnosing common setup problems, like if the code is in the wrong place on your site or has a syntax error.
Another frequent culprit is your website's cookie consent banner. If a user opts out of tracking cookies, your Pixel won't be allowed to fire, and you’ll get zero browser-side data for that user. This is exactly why the Conversions API has become so essential—it gives you a much more resilient tracking foundation.
Key Insight: Most "broken" Pixels aren't actually broken. They're often being blocked by ad blockers or consent management tools. This is an expected part of modern advertising, not necessarily a technical error on your end.
Absolutely. While a dedicated "thank you" page is the cleanest way to track a Purchase or Lead event, it's not the only way. You can trigger events based on other user actions, like a button click.
For example, you can set up your Pixel to fire a Purchase event the moment a user clicks the final "Complete Order" button. This approach requires a bit more technical finesse, usually involving Google Tag Manager to create a specific trigger for that button click. It ensures you’re still tracking Facebook ads performance accurately, even if your checkout flow doesn't have a final confirmation page.
For a deeper dive into the various ways you can assign value to all these different touchpoints, our guide on how to measure marketing attribution offers a comprehensive overview. It breaks down the models you can use to really understand which interactions are driving results.
Ready to get a crystal-clear picture of your ad performance? Cometly is the single source of truth that unifies all your marketing data. It eliminates guesswork by accurately tracking every conversion, so you can see your true ROAS and scale your campaigns with confidence. Start your free trial today and see what you've been missing.
Learn how Cometly can help you pinpoint channels driving revenue.
.svg)
Network with the top performance marketers in the industry