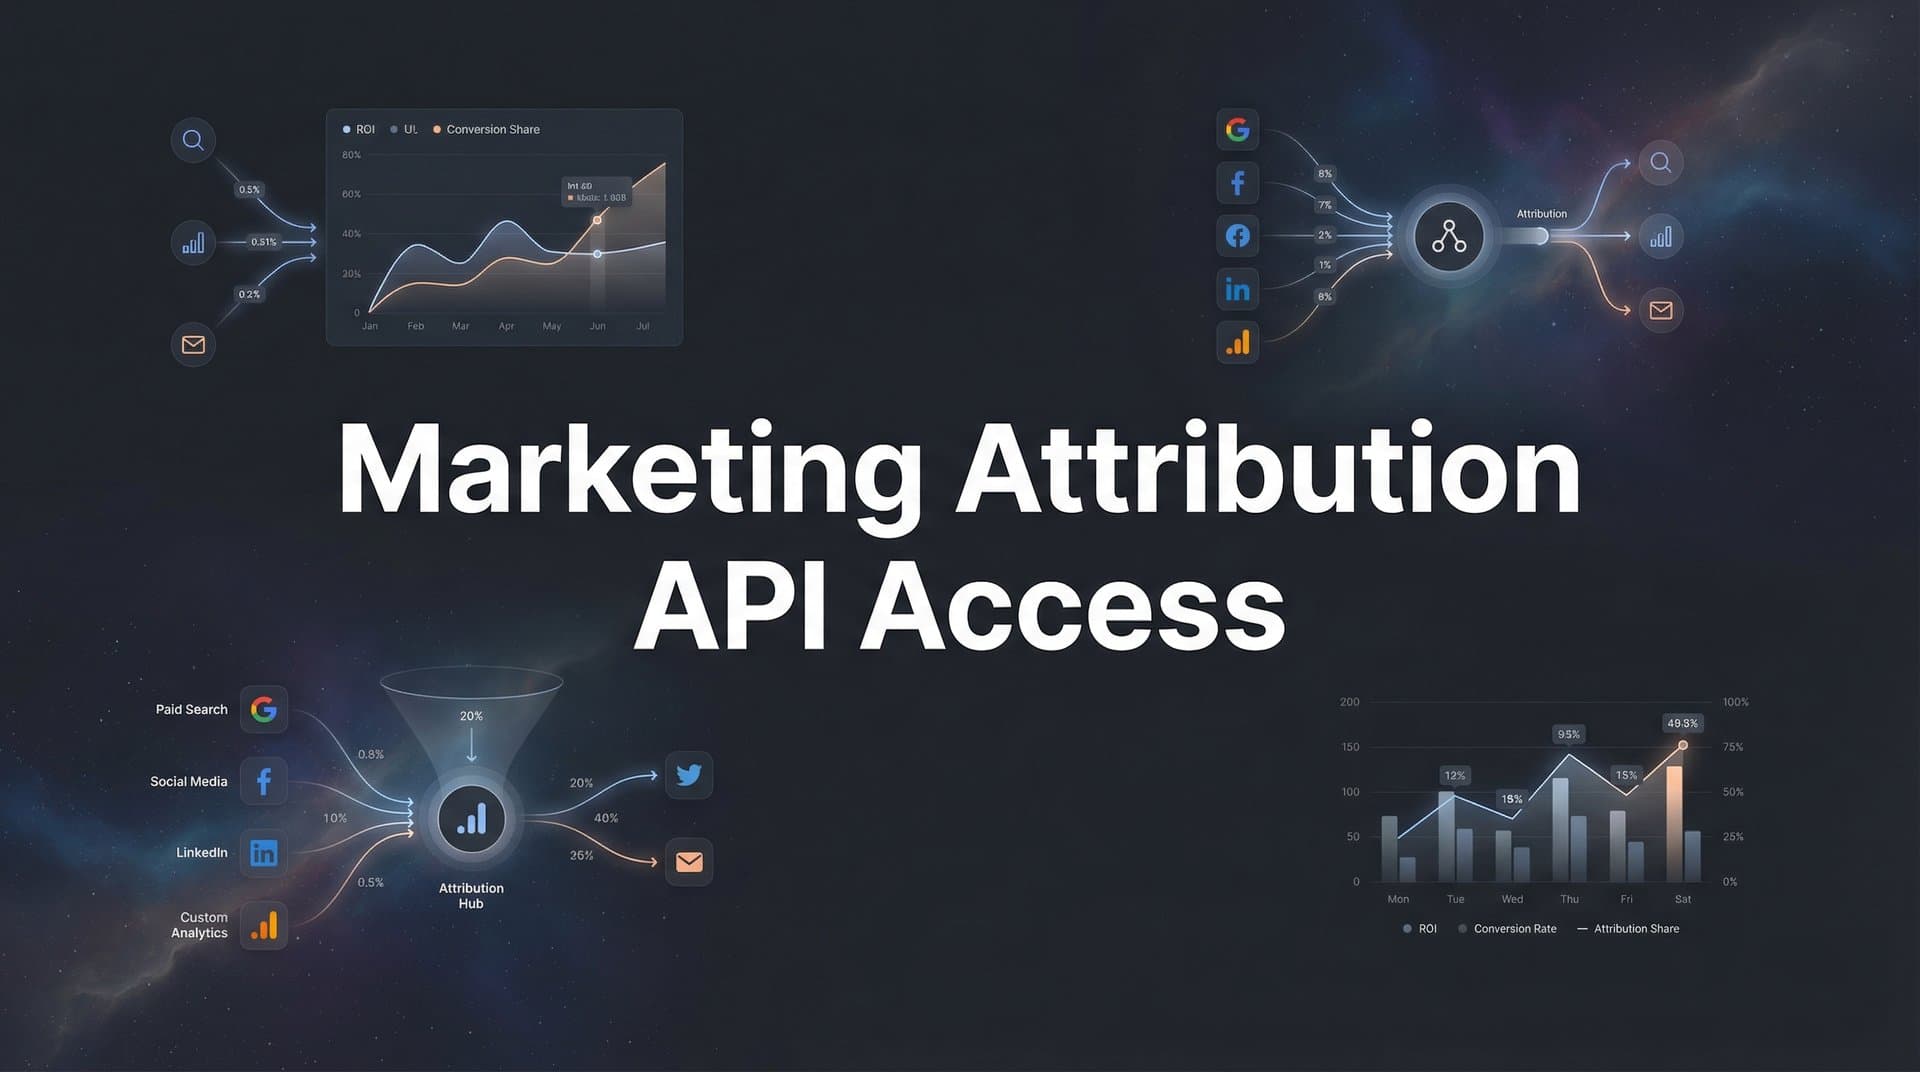
You've invested in a marketing attribution platform that tracks every touchpoint across your customer journeys. Your dashboard shows which channels drive conversions, how customers move through your funnel, and where your best ROI comes from. But here's the challenge: that valuable data lives in isolation, trapped inside a single platform while your team works across CRMs, business intelligence tools, and custom internal systems.
API access changes everything.
Instead of manually exporting CSV files or copying numbers between platforms, you can pull attribution data directly into the tools your team already uses. Your sales team sees attribution context in Salesforce. Your executives get automated reports in their BI dashboard. Your engineering team builds custom applications that leverage real attribution insights.
This guide walks you through setting up marketing attribution API access from start to finish. Whether you're a technical marketer handling the integration yourself or coordinating with your development team, you'll understand exactly what needs to happen at each stage. Most teams complete a basic integration in a few hours, though complex multi-system architectures may take longer.
The process isn't as technical as it sounds. We'll break down authentication, data retrieval, system connections, and validation into clear, actionable steps. By the end, you'll have attribution data flowing automatically into your systems—no more manual exports, no more data silos, just seamless integration that makes your marketing data work harder.
Step 1: Define Your Data Requirements and Use Cases
Before touching any code or API documentation, map out exactly what you need. This planning phase prevents you from building the wrong integration or pulling unnecessary data that slows everything down.
Start with your end goal. Are you syncing attribution data to Salesforce so sales reps see which marketing touchpoints influenced each lead? Building executive dashboards in Tableau that update automatically? Feeding a data warehouse for advanced analysis? Each use case determines what data you'll request and how you'll structure your integration.
Document your required data points. Common attribution data includes conversion events with timestamps, touchpoint sequences showing customer journeys, channel performance metrics, campaign-level attribution, and revenue data tied to specific marketing activities. Write down the specific fields you need—not just "conversion data" but "conversion timestamp, conversion value, attributed channel, attribution model used, and customer ID."
Identify your destination systems. Where will this data actually go? Your CRM needs different formatting than your data warehouse. Your custom dashboard might require real-time updates while your monthly executive report can use batch processing. List every system that will consume this attribution data.
Determine data freshness requirements. Some use cases demand real-time data—like triggering automated workflows when high-value conversions occur. Others work fine with daily batch updates. Real-time access typically requires webhook support or frequent polling, which affects your integration architecture and may impact API rate limits.
Map metrics to business questions. If your CMO asks "which channels drive our highest-value customers," you need customer lifetime value data joined with attribution touchpoints. If your paid media team wants to optimize mid-funnel spend, you need multi-touch attribution showing assist value by channel. Connect each data requirement back to an actual business question someone will answer.
This upfront work saves hours of rework later. You'll know exactly which API endpoints to call, what parameters to pass, and how to structure responses for your destination systems. Teams that skip this step often build integrations that pull too much data, miss critical fields, or format data incorrectly for their use case.
Step 2: Generate Your API Credentials and Configure Access
With your requirements documented, it's time to get your hands on API credentials. Every attribution platform handles this differently, but the core concepts remain consistent.
Locate your platform's developer portal. Most marketing attribution platforms place API access under Settings, Integrations, or a dedicated Developer section. Look for terms like "API Keys," "API Access," or "Developer Tools." Some platforms require administrator permissions to generate credentials, so verify your account has the necessary access level.
Generate your API credentials. Modern platforms typically offer API key authentication or OAuth 2.0. API keys are simpler—you generate a key, include it in your request headers, and you're authenticated. OAuth is more secure but requires an additional token exchange flow. For most marketing attribution integrations, API key authentication works well since you're connecting trusted internal systems rather than building a public-facing application.
When creating credentials, pay attention to permission scopes. Many platforms let you generate keys with read-only access, write access, or full administrative privileges. Start with the minimum permissions needed for your use case. If you're only pulling attribution data for reporting, read-only access is sufficient and reduces security risk if credentials are compromised.
Secure your credentials immediately. Never hardcode API keys directly into your application code or commit them to version control systems like GitHub. Use environment variables to store credentials separately from your codebase. In production environments, leverage secrets management systems like AWS Secrets Manager, Azure Key Vault, or HashiCorp Vault.
Here's what proper credential storage looks like: your application reads an environment variable at runtime rather than having the actual key visible in code. If someone gains access to your codebase, they don't automatically get your API credentials. This separation is critical for maintaining security as your team grows and more people touch the integration code.
Configure security measures. Some attribution platforms offer IP whitelisting, allowing API access only from specified IP addresses. If your integration runs from a fixed server or cloud environment with static IPs, enable this feature. It adds another security layer—even if credentials leak, requests from unauthorized locations get blocked.
Check rate limiting policies in your platform's documentation. Most APIs limit how many requests you can make per hour or day. Understanding these limits now prevents your integration from breaking when you scale up data requests. Some platforms offer higher rate limits for paying customers or specific plan tiers, so verify your account's limits match your anticipated usage.
Save your credentials in a secure location accessible to your development team but not broadly shared. Document what permissions each key has and what it's used for. As your integrations grow, you might generate multiple API keys for different purposes—having clear documentation prevents confusion about which key does what.
Step 3: Authenticate and Make Your First API Call
Now comes the moment of truth—actually connecting to the API and retrieving data. Start simple with a basic test call before building complex integrations.
Understand your authentication method. If your platform uses API key authentication, you'll typically include your key in the request headers. The exact header name varies by platform—common patterns include "Authorization: Bearer YOUR_API_KEY" or "X-API-Key: YOUR_API_KEY." Check your platform's documentation for the specific header format required.
OAuth authentication requires an additional step. You'll first request an access token using your client credentials, then include that token in subsequent API calls. The token typically expires after a set period, requiring your integration to request fresh tokens periodically. While more complex, OAuth provides better security for production integrations.
Choose your testing tool. Before writing integration code, test authentication manually using tools like Postman, Insomnia, or simple cURL commands from your terminal. These tools let you quickly verify your credentials work and see actual API responses without debugging application code simultaneously.
A basic cURL test looks like this conceptually: you make a GET request to a simple endpoint (often something like /api/v1/account or /api/v1/health), include your authentication header, and check if you get a successful response. Most platforms return JSON data with a 200 status code when authentication succeeds.
Parse the response structure. When your first call succeeds, examine the response format carefully. Marketing attribution APIs typically return JSON with nested objects containing your data. Look for patterns in how data is structured—are conversions in an array? How are timestamps formatted? What fields are always present versus optional?
Understanding response structure now saves debugging time later. If you know conversion data comes back as an array of objects with specific field names, you can write parsing code confidently. Many platforms include sample responses in their documentation, but seeing actual data from your account reveals the real structure you'll work with.
Handle authentication errors systematically. Common issues include incorrect header formatting, expired credentials, insufficient permissions for the requested endpoint, or IP restrictions blocking your requests. Most platforms return descriptive error messages—a 401 status typically means authentication failed, while 403 indicates you're authenticated but lack permission for that resource.
If authentication fails, work through a checklist: Is the API key copied correctly with no extra spaces? Are you using the right header name? Is your account active and in good standing? Are you hitting the correct API endpoint URL? Simple typos cause most initial authentication failures.
Document your successful test call—the exact endpoint URL, headers used, and sample response. This becomes your reference point as you build more complex queries. When something breaks later, you can return to this basic test to verify authentication still works before debugging query parameters or data processing logic.
Success at this stage means you've proven connectivity. Your credentials work, you understand the authentication flow, and you can retrieve data from the API. Everything else builds on this foundation.
Step 4: Build Your Data Retrieval Queries
With authentication working, it's time to request the specific attribution data you need. This step transforms simple connectivity into purposeful data retrieval.
Structure requests for your use cases. Marketing attribution APIs typically organize data around key resources: conversions, touchpoints, customer journeys, and channel performance. Each resource has its own endpoint. If you need conversion data, you'll call something like /api/v1/conversions. For multi-touch attribution showing complete customer journeys, you might call /api/v1/journeys or /api/v1/attribution.
Start with the simplest query that returns useful data. Request conversions from the last 24 hours without filters. Verify you get back real data from your account. Then progressively add parameters to narrow results to exactly what you need.
Apply filters strategically. Most attribution APIs accept query parameters for filtering results. Common filters include date ranges (start_date and end_date), specific campaigns or ad groups, attribution models (first-touch, last-touch, multi-touch), and conversion types. Use filters to reduce data transfer and speed up responses—requesting six months of unfiltered data when you only need yesterday's conversions wastes time and hits rate limits unnecessarily.
Date range filtering deserves special attention. When syncing data to other systems, you'll typically request data for specific time periods. Use ISO 8601 date formatting for consistency. For ongoing syncs, track the timestamp of your last successful request and query for data since that point—this prevents duplicate data and ensures you don't miss conversions that occurred between sync runs.
Implement pagination for large data sets. APIs rarely return unlimited results in a single response. When your query matches thousands of conversions, the API returns a subset (often 100 or 1000 records) plus pagination information to retrieve additional pages. Look for pagination parameters like limit, offset, or next_page_token in your API documentation.
A typical pagination flow requests the first page, checks if more pages exist, then loops through subsequent pages until you've retrieved all matching records. This might mean making multiple API calls for a single logical data request. Factor pagination into your rate limit planning—a query returning 10,000 conversions with 100 records per page requires 100 API calls.
Optimize query parameters. Many attribution APIs let you specify which fields to return. If you only need conversion timestamp, value, and attributed channel, request just those fields rather than pulling complete conversion objects with dozens of unused attributes. Field selection reduces response size, speeds up processing, and lowers bandwidth costs.
Test your queries with small date ranges first. Request one day of data and verify the response contains what you expect. Check that filters work correctly—if you filter for a specific campaign, confirm only that campaign's data appears. Validate that attribution model parameters return data attributed according to your chosen model.
Build queries incrementally. Start with basic conversion data, confirm it works, then add touchpoint information. Add customer journey details only after simpler queries succeed. This incremental approach helps isolate issues—if a complex query fails, you can simplify it to identify which parameter causes problems.
Step 5: Connect Your Destination Systems
You've successfully retrieved attribution data from the API. Now you need to get that data into the systems where your team will actually use it.
Set up data pipelines to your destinations. The architecture depends on where data goes. For CRM integration, you'll typically use the CRM's API to create or update records with attribution information. For data warehouses, you might write to staging tables then transform data for your analytics schema. For BI tools, you could push data to intermediate databases that your BI platform queries.
Consider using integration platforms like Zapier, Make, or dedicated ETL tools for simpler use cases. These platforms handle much of the connection logic, letting you focus on data mapping rather than managing API calls and error handling. For complex requirements or high data volumes, custom code gives you more control and better performance.
Map API response fields to destination schemas. Your attribution API returns data in its format, but your destination system expects data structured its way. Create a mapping document showing which API fields populate which destination fields. This mapping becomes critical for troubleshooting—when data appears incorrect in your CRM, you can trace it back through your mapping to the original API response.
Handle data type conversions carefully. Dates might come from the API as Unix timestamps but need to be formatted as readable dates for your CRM. Currency values might be in cents from the API but need dollar formatting for reports. Null values require special handling—decide whether to skip records with missing data, use default values, or mark them specially in your destination system.
Configure automated sync schedules. One-time data loads have limited value. Real power comes from automated syncs that keep your systems updated without manual intervention. Determine the right sync frequency based on your data freshness requirements from Step 1. Real-time use cases might sync every few minutes, while daily reporting can run once overnight.
Use scheduled tasks, cron jobs, or cloud-based schedulers like AWS EventBridge to trigger syncs automatically. Include logic to prevent overlapping runs—if a sync takes longer than expected, you don't want a second sync starting before the first completes. Most scheduling systems offer configurations to prevent concurrent runs.
Build robust error handling and retry logic. Networks fail, APIs go down for maintenance, and destination systems occasionally reject data. Your integration must handle these scenarios gracefully without losing data or requiring manual intervention.
Implement exponential backoff for retries. When an API call fails, wait a short time then retry. If it fails again, wait longer before the next retry. This pattern prevents hammering an API that's temporarily unavailable while still recovering automatically when service resumes. Most production integrations retry 3-5 times with increasing delays before giving up and alerting someone.
Log everything important. Record when syncs start and complete, how many records processed, any errors encountered, and summary statistics about the data moved. These logs become invaluable for troubleshooting when something goes wrong. Store logs where your team can easily search them—not just local files that disappear when servers restart.
Create fallback mechanisms for critical integrations. If your primary sync method fails repeatedly, can data queue for later processing? Should the system send alerts so someone investigates? Define what "failed" means for your use case and build appropriate responses.
Step 6: Validate Data Accuracy and Monitor Performance
Your integration runs automatically, moving attribution data from API to destination systems. But how do you know it's working correctly? Validation and monitoring catch issues before they impact business decisions.
Cross-check API data against platform dashboards. Pull the same data through both the API and your attribution platform's UI, then compare results. Request conversions for a specific date range via API, then view that same date range in your dashboard. Numbers should match exactly. If they don't, investigate why—common causes include timezone differences, attribution model mismatches, or filters applied differently.
Perform this validation immediately after setup and periodically thereafter. Data accuracy can drift over time as platforms update their APIs or your integration code changes. Quarterly validation checks catch discrepancies before they compound into serious data quality issues.
Set up monitoring for API rate limits and quota usage. Most attribution platforms display current API usage in their dashboard or return usage information in API response headers. Track how close you are to rate limits, especially as your data volumes grow. If you're consistently hitting 80% of your rate limit, you'll need to optimize queries, request limit increases, or adjust sync frequency before you start getting throttled.
Monitor API response times as a health indicator. If calls that normally complete in under a second start taking five seconds, something changed—maybe the API is under heavy load, your queries became more complex, or network connectivity degraded. Response time monitoring helps you catch performance issues before they cause timeouts or failed syncs.
Create alerts for failed syncs or data discrepancies. Configure your integration to send notifications when syncs fail, when data volumes fall outside expected ranges, or when errors exceed thresholds. A sync that normally processes 1,000 conversions but suddenly processes only 10 might indicate a broken filter or API issue. Alert someone immediately rather than discovering the problem days later.
Set up monitoring for data freshness in destination systems. If your BI dashboard should update hourly but hasn't received new data in three hours, that's a problem. Automated freshness checks detect integration failures even when error logs don't show obvious issues.
Document your integration thoroughly. Create documentation covering authentication details (without exposing credentials), API endpoints used, query parameters and their purposes, destination system connections, sync schedules, error handling behavior, and troubleshooting steps. This documentation helps team members maintain the integration when you're unavailable and speeds up debugging when issues arise.
Include runbook entries for common scenarios: "If sync fails with authentication error, check if API key expired." "If conversion counts don't match dashboard, verify timezone settings in API query." Practical troubleshooting steps based on actual issues you've encountered save hours of investigation time.
Review and update documentation as your integration evolves. When you add new data fields or change sync schedules, update the docs immediately. Outdated documentation is worse than no documentation—it misleads people trying to understand how things work.
Your Attribution Data Integration Is Live
You've built a complete marketing attribution API integration from scratch. Let's recap what you've accomplished:
Quick-Start Checklist:
□ Data requirements documented with clear use cases
□ API credentials generated and stored securely
□ Authentication tested and working reliably
□ Data queries built with proper filters and pagination
□ Destination systems connected with automated syncs
□ Monitoring and validation actively tracking performance
Your marketing attribution data now flows automatically into the tools your team uses daily. Sales reps see attribution context in your CRM. Executives get updated dashboards without manual exports. Your data warehouse contains comprehensive attribution history for advanced analysis. You've eliminated the manual work and data silos that previously limited how your team used attribution insights.
This foundation supports increasingly sophisticated use cases. You might build custom alerts that notify your team when high-value conversion patterns emerge. You could automate budget recommendations based on real-time attribution data. Your engineering team can build internal tools that leverage attribution insights for personalization or optimization.
The integration you built is maintainable and scalable. As your marketing grows and data volumes increase, the architecture handles it. When your attribution platform releases new API features, you can add them incrementally. Your documentation ensures team members can troubleshoot issues and make updates confidently.
Platforms like Cometly offer robust API access designed specifically for these integrations. You can pull comprehensive attribution data including multi-touch customer journeys, conversion events enriched with touchpoint details, and AI-powered insights about campaign performance—all through clean, well-documented APIs. The platform's server-side tracking ensures the data you're integrating is accurate even as browser-based tracking becomes less reliable.
Ready to elevate your marketing game with precision and confidence? Discover how Cometly's AI-driven recommendations can transform your ad strategy—Get your free demo today and start capturing every touchpoint to maximize your conversions.