You're staring at your dashboard at 11 PM, and the numbers don't add up. Facebook claims 47 conversions this week. Google Analytics shows 31. Your CRM recorded 52 actual sales. Each platform tells a different story about which ads are working, and you're supposed to make budget decisions based on this mess.
This isn't just frustrating—it's expensive. When attribution tracking breaks down, every marketing decision becomes a guess. You might be killing campaigns that actually drive revenue while scaling the ones that just happen to get last-click credit. With the average B2B company spending $400,000+ annually on paid advertising, even a 10% misallocation costs $40,000 in wasted spend.
The problem got worse after iOS 14.5 launched App Tracking Transparency. Browser-based tracking that used to capture 90% of conversions now misses nearly half of mobile traffic. Cookie restrictions from Safari and Firefox created more blind spots. Platform-reported metrics diverged even further from reality because each system only sees part of the customer journey.
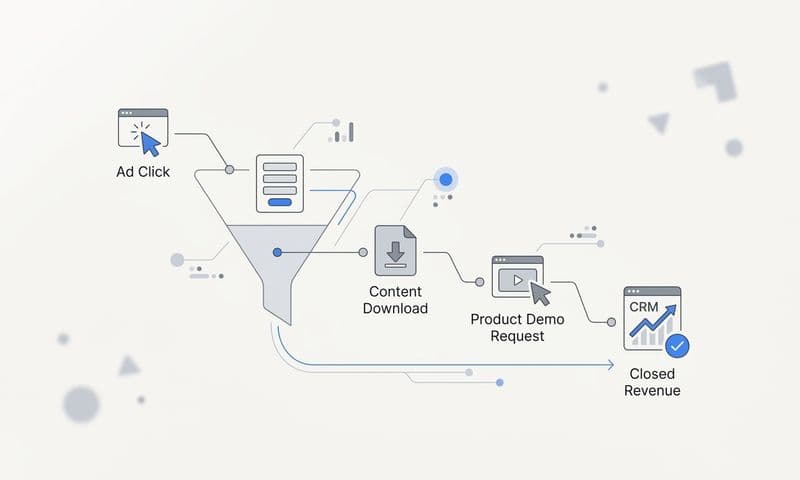
Here's what makes this particularly challenging: modern customers don't convert in a straight line. They see your Instagram ad on mobile during their commute, research on desktop at work, compare options on their tablet at home, then finally purchase on their phone three days later. Traditional tracking methods lose them somewhere between device two and three.
But proper attribution tracking setup solves this. When implemented correctly, you'll see the complete customer journey across every device, platform, and touchpoint. You'll know exactly which campaigns drive revenue—not just clicks. You'll make confident budget decisions backed by accurate data instead of conflicting reports.
This guide walks you through building that system step-by-step. We'll start with server-side tracking infrastructure that bypasses browser limitations. Then we'll connect your advertising platforms through unified tracking that standardizes data across Meta, Google, TikTok, and LinkedIn. You'll configure attribution models that match your actual customer journey, integrate your CRM to track revenue attribution, and set up AI-powered optimization that continuously improves performance.
By the end, you'll have a complete attribution tracking system that captures every touchpoint, attributes revenue accurately, and gives you the confidence to scale what's actually working. Let's walk through how to build this step-by-step.
Step 1: Implementing Server-Side Tracking Infrastructure
Browser-based tracking is dying. Safari blocks third-party cookies by default. Firefox follows the same path. Chrome's Privacy Sandbox is coming. And iOS 14.5's App Tracking Transparency already killed traditional pixel tracking for nearly half of mobile users.
This isn't a future problem—it's happening right now. If you're still relying on client-side pixels alone, you're missing 30-50% of your conversions. The data you're using to make budget decisions is incomplete before it even reaches your dashboard.
Server-side tracking solves this by moving data collection from the browser to your server. Instead of relying on cookies that get blocked, your server captures conversion events directly and sends them to advertising platforms through secure APIs. This bypasses browser restrictions entirely while giving you complete control over what data gets collected and how it's processed.
Google Tag Manager Server Container Configuration
Before diving into GTM server container configuration, understanding why server-side tracking delivers superior accuracy helps justify the technical investment required. The setup takes 2-3 hours initially, but the data quality improvement is immediate and permanent.
Start by creating your server container in Google Tag Manager. Log into your GTM account, click "Create Container," and select "Server" as the container type. This creates a separate container from your web container—they work together but serve different purposes.
Next, you'll need hosting infrastructure. Google Cloud Platform offers the simplest setup through App Engine. Click "Automatically provision tagging server" in GTM, which creates a Cloud Run instance configured specifically for tag management. The cost runs $50-150 monthly depending on traffic volume, but the accuracy gains justify this investment immediately.
Configure your server container URL as a subdomain of your main domain—something like "tracking.yourdomain.com" works well. This first-party domain structure is critical because it maintains cookie persistence and avoids browser restrictions that affect third-party domains.
Connect your web container to the server container by updating your gtag.js configuration. Replace the default Google Analytics endpoint with your server container URL. This routes all tracking data through your server before reaching advertising platforms, giving you complete visibility and control over the data flow.
Event Data Layer Structure and Testing
Your data layer structure determines what information flows through your attribution system. Poor structure means missing critical data points that could explain why customers convert. Proper structure captures everything you need for accurate attribution across every platform.
Standardize your event naming across all platforms. Use clear, consistent names like "purchase," "addtocart," and "begin_checkout" rather than platform-specific variations. This consistency makes cross-platform analysis possible and prevents data fragmentation that creates attribution blind spots.
Include these critical parameters with every conversion event: transaction ID, revenue value, currency, product details, and user identifiers. These data points enable accurate revenue attribution and customer journey mapping. Without them, you'll see that conversions happened but won't understand their business impact.
Test your implementation using GTM's preview mode combined with your browser's developer console. Send test events through your server container and verify they appear correctly in your advertising platforms. Check that revenue values match, user IDs persist across sessions, and all required parameters flow through properly.
Step 2: Cross-Platform Pixel Integration
Here's where most attribution setups fall apart. You've built server-side tracking infrastructure, but now you need to connect Meta, Google, TikTok, and LinkedIn—each with different tracking requirements, event structures, and attribution windows. Without proper integration, you're back to conflicting data and blind spots.
The challenge isn't just installing pixels. It's maintaining data consistency across platforms that speak different languages. Meta wants specific event parameters. Google requires enhanced conversion data. TikTok needs its own event structure. And if your events aren't standardized, you'll spend weeks reconciling data that should match but doesn't.
Meta and Google Ads Advanced Configuration
Start with Meta's Conversions API—this is non-negotiable for accurate facebook attribution tracking post-iOS 14.5. Log into your Facebook Business Manager, navigate to Events Manager, and select your pixel. Click "Settings" then "Conversions API." You'll need to generate an access token and configure your server endpoint.
Here's what most guides miss: event deduplication. When you're running both browser pixel and Conversions API, Meta receives duplicate events unless you implement proper eventid matching. Every event sent from your server must include an eventid that exactly matches the browser pixel event. Use a timestamp-based unique identifier: `fb${timestamp}${randomString}`.
For Google Ads enhanced conversions, navigate to your Google Ads account, select "Tools & Settings," then "Conversions." Click on your conversion action and enable "Enhanced conversions." You'll need to pass hashed user data (email, phone, address) with each conversion event. Use SHA-256 hashing on your server before sending—never send plain text user data.
The critical piece: event parameter standardization. Create a mapping document that defines how each conversion type translates across platforms. Your "Purchase" event should send identical data to Meta (as "Purchase"), Google (as "conversion"), and your analytics platform. Include value, currency, transaction_id, and product details in every purchase event.
Emerging Platform Integration Strategy
TikTok's Events API requires similar server-side implementation but with platform-specific quirks. Access your TikTok Ads Manager, navigate to "Assets" then "Events," and generate your pixel code. The Events API setup requires a separate access token from TikTok's developer portal.
TikTok's event structure differs from Meta's. While Meta uses "Purchase," TikTok expects "CompletePayment." Your server-side integration needs translation logic that converts your standardized events into platform-specific formats. Build a middleware layer that handles this translation automatically rather than maintaining separate event structures for each platform.
LinkedIn's Insight Tag follows a simpler implementation but still requires careful attention to conversion tracking. Install the base Insight Tag on all pages, then configure specific conversion events in Campaign Manager. LinkedIn's attribution window is shorter than other platforms (default 30 days), so adjust your reporting expectations accordingly.
Test every integration with platform-specific debugging tools. Meta has the Test Events feature in Events Manager. Google offers the Tag Assistant. TikTok provides the Pixel Helper browser extension. Send test events and verify they appear correctly with all required parameters before launching campaigns.
The biggest mistake at this stage: assuming pixel installation equals accurate tracking. Fire test conversions through each platform and verify they appear in your attribution reporting software with correct revenue values and user identifiers before considering the integration complete.
Step 3: Configuring Attribution Models and Windows
Here's where attribution gets strategic. You've built the tracking infrastructure and connected your platforms. Now you need to decide how to credit conversions across multiple touchpoints—and that decision directly impacts which campaigns you scale and which you kill.
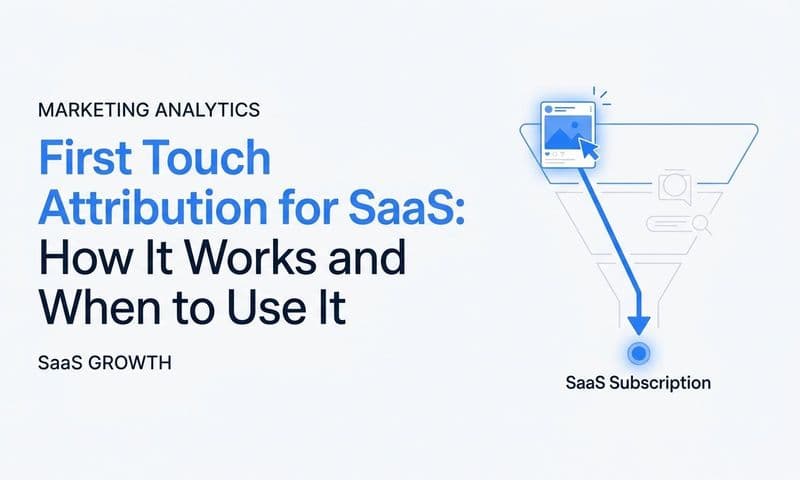
The attribution model you choose determines everything. First-touch attribution gives all credit to the initial interaction. Last-touch credits the final touchpoint before conversion. Multi-touch models distribute credit across the entire journey. Each tells a completely different story about what's working.
Start by analyzing your actual customer journey length. Pull conversion data from your CRM and calculate the average time from first touch to purchase. B2B SaaS companies typically see 14-30 day cycles. E-commerce might be 1-7 days. High-ticket services can stretch 60+ days. Your attribution window needs to match this reality.
Setting Your Attribution Window: In your attribution platform, configure the lookback window based on your journey data. If customers convert within 7 days on average, a 7-day click and 1-day view window captures most conversions without over-attributing. For longer cycles, extend to 28-day click windows. The key is matching your actual data, not industry defaults.
Most platforms default to last-click attribution because it's simple. But this systematically undervalues top-of-funnel campaigns that introduce customers to your brand. If you're running awareness campaigns on Meta and conversion campaigns on Google, last-click will make Google look like a hero while Meta appears worthless—even though Meta drove the initial discovery.
Selecting Your Attribution Model: For most businesses, start with position-based (U-shaped) attribution that gives 40% credit to first touch, 40% to last touch, and distributes 20% across middle interactions. This balances awareness and conversion value. Configure this in your attribution platform's model settings, typically found under "Attribution" or "Conversion Settings."
Understanding customer journey tracking reveals the complexity of your buyer's path and informs which attribution model will most accurately reflect reality. The more touchpoints in your typical journey, the more you need multi-touch attribution to see the complete picture.
Test your model selection by comparing attributed conversions against your CRM revenue data. If your attribution platform shows 100 conversions worth $50,000 but your CRM recorded $45,000 in actual revenue, you're over-attributing. Adjust your attribution window shorter or switch to a more conservative model until the numbers align within 10%.
Common Pitfall: Don't set attribution windows longer than your actual sales cycle. A 28-day window for a 7-day purchase cycle will double-count conversions and make every campaign look more effective than it actually is. This leads to budget inflation and disappointed stakeholders when real revenue doesn't match projections.
Document your attribution model choice and window settings. When you review campaign performance next month, you need to remember whether you're looking at 7-day or 28-day attribution. Changing models mid-analysis makes all historical comparisons meaningless.
Now that your attribution logic is configured, the next step connects this marketing data to actual revenue outcomes through CRM integration. That's where attribution transforms from interesting data into actionable insights that directly impact your bottom line.
Putting It All Together
You've built something most marketers never achieve—a complete attribution tracking system that captures the full customer journey across every device, platform, and touchpoint. Your server-side infrastructure bypasses browser limitations. Your cross-platform integrations standardize data across Meta, Google, TikTok, and LinkedIn. Your attribution models reflect actual customer behavior, not just last-click assumptions.
But implementation is just the beginning. The real value comes from what you do with this data. Start by validating your attribution accuracy against actual revenue for the first 30 days. Watch for discrepancies between platform-reported conversions and your unified attribution view. Use those insights to refine your attribution windows and model weights.
Then focus on optimization. Identify campaigns that drive early-funnel awareness versus bottom-funnel conversions. Reallocate budget based on true revenue contribution, not just last-click credit. Test different attribution models quarterly to ensure your framework evolves with your customer journey.
Most importantly, treat attribution as a continuous process, not a one-time project. Customer behavior changes. Platforms update their tracking capabilities. Privacy regulations evolve. Your attribution system needs regular audits and optimization to maintain accuracy.
Ready to see how unified attribution tracking transforms your marketing performance? Get your free demo and discover which campaigns are actually driving your revenue.