You are spending thousands on Facebook ads, but your attribution data tells a confusing story. Conversions in Ads Manager do not match your CRM. Revenue numbers seem inflated or mysteriously low. You cannot tell which campaigns actually drive sales.
This is the reality for most marketers since iOS 14.5 and ongoing privacy changes fundamentally disrupted Facebook tracking. The good news: these attribution issues are fixable.
This guide walks you through a systematic process to diagnose exactly where your tracking breaks down and implement solutions that restore accurate, actionable data. By the end, you will have a clear picture of which ads generate revenue and the confidence to scale winning campaigns.
Let us fix your Facebook attribution once and for all.
Step 1: Audit Your Current Tracking Setup for Gaps
Before you can fix attribution problems, you need to know exactly where your tracking breaks down. Think of this like diagnosing a car that will not start—you need to check each component systematically.
Start by opening Facebook Events Manager and navigating to the Diagnostics tab. This tool shows you in real time whether your pixel is firing correctly, which events are being captured, and where errors occur. Look for warning messages about missing events, incorrect parameters, or pixel implementation issues.
Next, install the Meta Pixel Helper browser extension and visit your key conversion pages while it is active. The extension displays a small popup showing which pixels fire on each page, what events they trigger, and whether any errors exist. Navigate through your entire conversion funnel—from landing page to checkout—and document what fires at each step.
Common Issues to Watch For: Duplicate pixels from multiple installations that inflate your conversion counts. Missing events on critical pages like checkout or thank you pages. Event parameters passing incorrect values or no values at all. Events firing on the wrong pages, such as a purchase event triggering on a product page instead of order confirmation.
Now comes the critical part: quantifying the gap between what Facebook reports and what actually happened. Pull your conversion data from Facebook Ads Manager for the past 30 days. Then pull the same data from your CRM, payment processor, or backend database.
Create a simple comparison spreadsheet. If Facebook reports 500 purchases but your payment processor shows 350, you have a 43% overreporting issue. If Facebook shows 200 conversions but your CRM logged 280 leads, you are undertracking by 40%. This baseline measurement tells you how severe your attribution problem is and gives you a benchmark to measure improvement.
Document everything you find. Screenshot errors in Events Manager. Note which pages have tracking gaps. Record the exact percentage difference between Facebook data and your source of truth. This documentation becomes your roadmap for the fixes ahead.
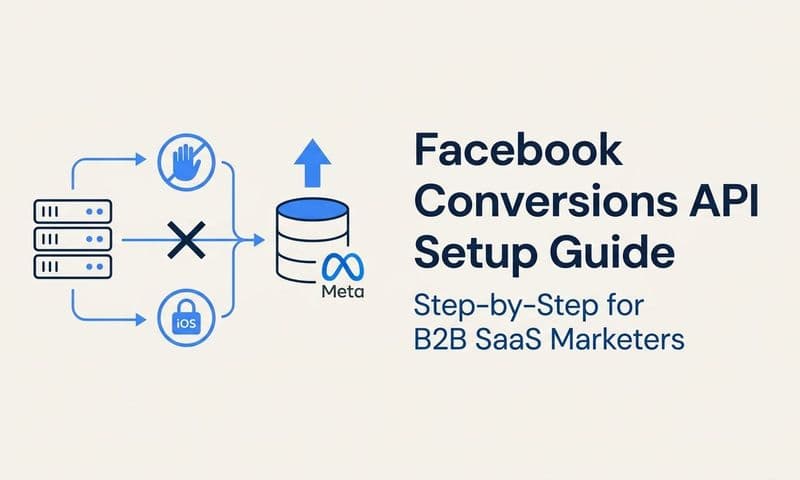
Step 2: Configure the Conversions API for Server-Side Tracking
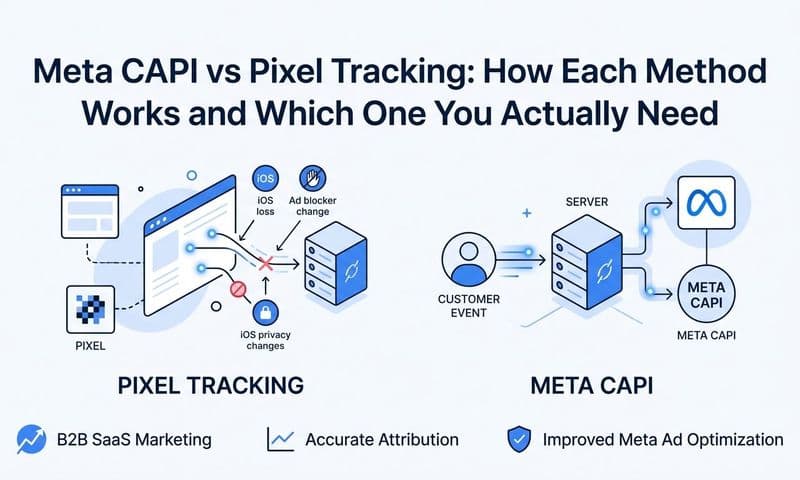
Here is why your browser-based pixel alone no longer cuts it: ad blockers strip tracking code before it loads. iOS privacy features block cross-site tracking by default. Cookie restrictions prevent persistent user identification. Even users who do not actively block ads often have privacy settings that cripple your pixel.
The Conversions API solves this by sending event data directly from your server to Facebook, completely bypassing browser restrictions. When a customer completes a purchase, your server sends that conversion event to Facebook regardless of what their browser allows. Understanding how to fix Facebook Conversion API issues is essential for proper implementation.
Setting up the Conversions API depends on your platform. For Shopify, install the official Facebook channel app and enable both pixel and Conversions API tracking in the settings. For WordPress with WooCommerce, use a plugin like PixelYourSite that handles both pixel and CAPI implementation. For custom platforms, you will need to implement the Conversions API through your server code using Facebook's API documentation.
The technical setup typically involves generating an access token in Facebook Events Manager, configuring your server or plugin with this token, and mapping your conversion events to the standardized Facebook event names. Most modern e-commerce platforms now offer one-click CAPI setup that handles the technical complexity for you.
Event Deduplication Is Critical: When you run both pixel and Conversions API, the same conversion can be reported twice—once from the browser pixel and once from your server. This doubles your conversion count and destroys attribution accuracy.
Prevent this by implementing event deduplication. Every event needs a unique identifier called an event ID. When your pixel fires a purchase event, it generates an event ID. When your server sends the same purchase through CAPI, it uses the identical event ID. Facebook sees these matching IDs and counts the conversion only once.
Most modern plugins and platforms handle deduplication automatically. If you are implementing CAPI manually, ensure your code generates consistent event IDs that both pixel and server use for the same conversion.
After setup, use Facebook's Test Events tool to verify everything works. Send a test conversion through your funnel and watch it appear in Test Events within seconds. You should see both pixel and CAPI events arriving with matching event IDs, confirming deduplication works correctly.
Step 3: Verify Domain and Event Configuration in Events Manager
Domain verification might sound like a minor technical step, but it is essential for maintaining tracking accuracy. Without verified domain ownership, Facebook applies stricter limitations on your tracking capabilities and event prioritization.
Navigate to Business Settings, then Brand Safety, then Domains. Add your website domain and complete verification using one of three methods: uploading an HTML file to your server, adding a meta tag to your homepage, or updating your DNS records. DNS verification is most reliable since it persists through website redesigns.
Once your domain is verified, you unlock full control over Aggregated Event Measurement. This Facebook feature limits iOS 14+ tracking to eight prioritized conversion events per domain. If you have more than eight events, Facebook only optimizes for your top eight, and the rest receive limited data.
Strategic Event Prioritization: Rank your eight events based on business value, not vanity metrics. Your purchase or qualified lead event should always be number one. Revenue-driving events get top priority, while engagement metrics like page views or add to cart rank lower.
A typical e-commerce prioritization might look like this: Purchase at priority 1, Add Payment Info at 2, Initiate Checkout at 3, Add to Cart at 4, View Content at 5, and so on. For lead generation, place your highest-quality lead event first, followed by form submissions, then engagement actions.
Check your event parameters while you are in Events Manager. Click on any event and review the parameters being passed. Your purchase event should include value, currency, content IDs, and content type. Lead events should pass meaningful data about the lead source and quality.
Incorrect parameters cause attribution problems even when events fire correctly. If your purchase event does not pass the actual order value, Facebook cannot calculate accurate ROAS. If currency is missing or wrong, revenue reports become meaningless.
Step 4: Align Attribution Windows with Your Sales Cycle
Facebook defaults to a 7-day click and 1-day view attribution window. This means conversions are attributed to an ad if the customer clicked it within 7 days or viewed it within 1 day before converting. Sounds reasonable until you realize your actual sales cycle might be completely different.
If you sell high-consideration products or B2B services, customers often research for weeks before purchasing. A 7-day window misses conversions that happen on day 10, even though your ad directly influenced the decision. You are undercounting conversions and killing campaigns that actually work. Understanding attribution window limitations helps you make better decisions.
Conversely, if you sell impulse-buy products, customers who convert 6 days after clicking might have been influenced by something else entirely. Your attribution window is too long and you are overcounting.
Review your actual customer journey data. Pull a report from your analytics or CRM showing the time between first touchpoint and conversion. Calculate the median time to convert. If 80% of your customers convert within 3 days, a 7-day window might be fine. If conversions regularly happen at 14 or 21 days, you need a longer window.
Adjust your attribution window in Ads Manager by going to Settings, then Attribution Setting. You can choose click windows of 1-day, 7-day, or 28-day, and view windows of 1-day or 7-day. Test different combinations and compare the reported conversions to your actual backend data.
Understanding the Impact: Shorter windows show fewer conversions because they exclude delayed purchases. Longer windows show more conversions but may include customers who would have converted anyway. The right window is the one that most accurately reflects which ads actually influenced purchase decisions.
Run a comparison test over 30 days. Set up custom columns in Ads Manager showing conversions with different attribution windows side by side. Compare these against your CRM or payment processor data. The window that aligns closest to your source of truth is your optimal setting.
Step 5: Implement UTM Parameters and Cross-Reference Data Sources
UTM parameters are the tracking codes you append to your ad URLs that tell analytics platforms exactly where traffic came from. They look like this: ?utm_source=facebook&utm_medium=cpc&utm_campaign=spring_sale. Without them, you are flying blind outside of Facebook's walled garden.
Create a consistent UTM naming convention and stick to it religiously. A standard structure might be: utm_source always equals "facebook", utm_medium equals "cpc" or "social", utm_campaign equals your campaign name exactly as it appears in Ads Manager, utm_content equals your ad set name, and utm_term equals your ad name or ID.
Consistency matters more than the specific convention you choose. If one campaign uses "Facebook" and another uses "facebook" and a third uses "fb", your analytics platform treats them as three separate sources. Pick a format and enforce it across your entire team.
Use Facebook's URL parameters feature to automatically append UTM codes to all your ads. In Ads Manager, go to Settings, then URL Parameters, and add your UTM template. Facebook will automatically append these parameters to every ad you create, eliminating manual work and human error.
Now set up Google Analytics or your preferred analytics platform to capture this UTM data. Create a custom report showing traffic and conversions broken down by utm_source, utm_campaign, and utm_content. This gives you a second source of truth completely independent of Facebook's tracking. Be aware of potential Facebook attribution vs Google Analytics discrepancies when comparing data.
Build Your Comparison Report: Create a spreadsheet with three columns—Facebook Ads Manager conversions, Google Analytics conversions from Facebook traffic, and your CRM or backend conversions. Pull data for the same date range and compare.
Discrepancies tell you where tracking breaks. If Facebook shows 100 conversions, Analytics shows 85, and your backend shows 90, you know Facebook slightly overcounts while Analytics undercounts. If a specific campaign shows huge discrepancies, that campaign has a tracking issue worth investigating.
Use these cross-platform comparisons weekly. When numbers align closely, you have trustworthy data. When they diverge significantly, something broke and needs immediate attention.
Step 6: Connect Your CRM for Full-Funnel Attribution Visibility
Facebook tells you which ads drove clicks and conversions. Your CRM tells you which leads actually became customers and generated revenue. Connecting these two systems reveals the complete truth about ad performance.
Most modern CRMs offer native integrations with Facebook through tools like Zapier or direct API connections. For example, when a lead submits a form on your website, that lead data flows into your CRM along with the Facebook click ID (fbclid) from the URL. Your CRM can then send conversion events back to Facebook when that lead becomes a customer. Learning how to sync conversion data to Facebook Ads properly is crucial for this process.
This creates a closed-loop system. Facebook knows a click happened. Your website captures the lead with the click ID attached. Your CRM tracks that lead through your sales process. When the lead closes as a customer three weeks later, your CRM sends a conversion event back to Facebook with the original click ID, properly attributing that revenue to the ad that started the journey.
Multi-Touch Attribution Reveals the Real Story: Last-click attribution gives all credit to the final touchpoint before conversion. But customers rarely convert on their first interaction. They might see a Facebook ad, visit your site, leave, see a retargeting ad, click, read reviews, see another ad, and finally purchase.
Multi-touch attribution distributes credit across all touchpoints in the customer journey. Your CRM integration makes this possible by tracking every interaction from first touch to closed deal. You can see which campaigns start journeys, which nurture consideration, and which close sales.
This visibility changes everything. You might discover that your prospecting campaigns generate low immediate ROAS but start journeys that convert at high rates after retargeting. Or that a specific ad set drives tons of conversions but the leads never close, indicating quality issues. Last-click attribution misses these insights entirely.
Use your CRM data to calculate true ROAS based on actual revenue, not Facebook's estimated conversion values. If Facebook reports $10,000 in conversion value but your CRM shows those customers generated $15,000 in revenue, your real ROAS is 50% higher than Facebook indicates. Make budget decisions based on the real number.
Step 7: Validate Fixes and Establish Ongoing Monitoring
You have implemented pixel and CAPI tracking, verified your domain, configured events, adjusted attribution windows, added UTM parameters, and connected your CRM. Now you need to confirm these fixes actually work and establish systems to catch future issues.
Run a validation period of 7 to 14 days where you closely monitor all your tracking systems. Compare your new attribution data against the benchmarks you documented in Step 1. If you previously had a 40% gap between Facebook and your backend data, that gap should now be 10% or less. Addressing attribution data discrepancies is an ongoing process.
Send test conversions through your funnel daily during this period. Complete a purchase or submit a lead form yourself and verify it appears correctly in Facebook Events Manager, your analytics platform, and your CRM. Check that event parameters pass correct values and that deduplication prevents double-counting.
Set Up Automated Monitoring: Create alerts that notify you when tracking breaks. Facebook Events Manager allows you to set up custom alerts for sudden drops in event volume, missing events, or pixel errors. Configure these to email your team immediately when issues occur.
In Google Analytics or your analytics platform, set up anomaly detection alerts for Facebook traffic and conversions. If your daily Facebook conversion volume suddenly drops by 50%, you want to know within hours, not weeks.
Build a monthly attribution audit checklist and schedule it. The checklist should include: verify pixel and CAPI are both firing correctly, check Events Manager for new errors or warnings, compare Facebook conversions to backend data, review UTM parameter consistency, confirm CRM integration is passing data both ways, and test a conversion end-to-end. Following Facebook attribution best practices ensures consistent accuracy.
Document your entire tracking setup in a shared document. Include pixel IDs, CAPI access tokens, UTM conventions, event prioritization, attribution window settings, and integration details. When team members change or issues arise, this documentation prevents knowledge loss and speeds troubleshooting.
Schedule quarterly deep-dive audits beyond your monthly checks. Platform updates, website changes, and new campaign types can introduce tracking issues that slip past routine monitoring. A thorough quarterly review catches configuration drift before it compounds into major attribution problems.
Moving Forward with Confidence
Fixing Facebook attribution is not a one-time task but an ongoing practice. The tracking landscape constantly evolves with privacy updates, platform changes, and new browser restrictions. The systems you build today need maintenance to stay accurate tomorrow.
Start by auditing your current setup to find gaps, then layer in server-side tracking through the Conversions API. Verify your domain and event configuration, align attribution windows to your sales cycle, and implement UTM tracking for cross-platform validation. Finally, connect your CRM for true revenue attribution and establish regular monitoring.
Your Quick Implementation Checklist: Pixel and CAPI both firing with proper event deduplication confirmed in Test Events. Domain verified in Business Settings with your top eight conversion events strategically prioritized. UTM parameters automatically appended to all Facebook ads with consistent naming conventions. CRM integrated to track leads from click through closed revenue. Monthly attribution audits scheduled with automated alerts for tracking anomalies.
With accurate attribution restored, you can finally see which Facebook campaigns drive real revenue and scale with confidence. You will know which audiences convert at the highest rates, which creative resonates with buyers, and which campaigns deserve bigger budgets versus which need optimization or elimination.
The difference between guessing and knowing is the difference between wasted ad spend and profitable growth. When your attribution data reflects reality, every decision becomes clearer. You stop second-guessing campaign performance and start making data-driven choices that compound into sustainable competitive advantage.
Ready to elevate your marketing game with precision and confidence? Discover how Cometly's AI-driven recommendations can transform your ad strategy—Get your free demo today and start capturing every touchpoint to maximize your conversions.