Running paid advertising campaigns without proper tracking is like driving blindfolded. You might be spending thousands on ads across Meta, Google, TikTok, and other platforms, but without accurate attribution, you have no idea which campaigns actually drive revenue.
An ad tracking platform solves this by connecting every touchpoint in your customer journey, from the first ad click to the final purchase or demo booking. This guide walks you through the entire signup process for an ad tracking platform, covering everything from evaluating your tracking needs to connecting your first ad accounts.
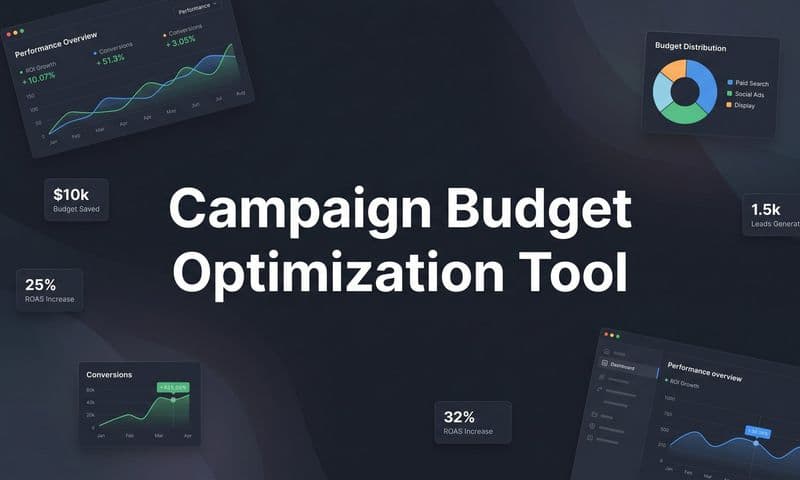
By the end, you will have a fully functional attribution system that shows exactly which ads and channels generate leads and revenue. Whether you are a solo marketer managing multiple campaigns or part of a larger team handling complex multi-channel strategies, these steps will help you get set up quickly and start making data-driven decisions.
Step 1: Assess Your Current Tracking Gaps and Goals
Before you sign up for any platform, you need to understand exactly what problems you are solving. Start by auditing your existing tracking setup across all ad platforms you currently use.
Open each platform's dashboard and check what conversion data you are currently seeing. Are you relying solely on the conversion numbers Meta or Google reports? If so, you are likely missing a significant portion of your actual results, especially after iOS privacy updates limited browser-based tracking.
Document the specific attribution challenges you are facing. Common issues include iOS tracking limitations that create blind spots in your Meta campaigns, inability to track customers who click an ad on mobile but convert on desktop, and disconnection between your ad platform data and what your CRM shows as actual revenue.
Ask yourself these questions: Do you know which ad campaigns drive the highest-value customers? Can you track someone who sees a Facebook ad, clicks a Google ad later, then converts through direct traffic? Does your sales team have visibility into which marketing touchpoints influenced their closed deals?
Define what success looks like for your specific business. A SaaS company might prioritize tracking the full journey from ad click to demo booking to closed deal. An e-commerce brand might focus on understanding which combination of ads drives purchases, not just which ad gets the last click.
Make a complete list of every platform where you run paid advertising. Include Meta (Facebook and Instagram), Google Ads, TikTok, LinkedIn, YouTube, or any other channels in your mix. You will need to connect all of these to get a complete cross-platform attribution tracking picture.
Consider your team structure as well. Will multiple people need access to the platform? Do you need different permission levels for media buyers, analysts, and executives? Understanding your collaboration needs upfront saves reconfiguration later.
The clearer you are about your tracking gaps and goals, the better equipped you will be to configure your platform correctly from day one. This assessment becomes your roadmap for the setup process ahead.
Step 2: Choose the Right Ad Tracking Platform for Your Needs
Not all ad tracking platforms are built the same. The features you need depend on your specific marketing complexity and business model.
Start by evaluating server-side tracking capabilities. This is non-negotiable in 2026. Browser-based tracking alone misses too many conversions due to ad blockers, browser privacy settings, and iOS limitations. A platform with robust server-side tracking captures conversions that browser pixels miss, giving you a more complete picture of campaign performance. Check out the best server-side tracking platform options to understand what features matter most.
Look for multi-touch attribution models beyond simple last-click. Your customer journey likely involves multiple touchpoints before conversion. A prospect might see a Facebook ad, click a Google ad a week later, visit your site directly, then finally convert through an email link. Multi-touch attribution shows you the value of each interaction, not just the final one.
Check platform compatibility with all your advertising channels. The platform should integrate seamlessly with Meta, Google Ads, TikTok, LinkedIn, and any other channels you use. Native integrations are better than workarounds because they pull cleaner data and update automatically.
CRM integration capabilities matter tremendously, especially if you run a business with a sales cycle longer than a single session. You need to connect your ad data to actual revenue, not just form fills or demo requests. Look for platforms that integrate with Salesforce, HubSpot, Pipedrive, or whatever CRM system you use.
Consider AI-powered features for optimization recommendations. Modern platforms use AI to analyze your attribution data and suggest budget reallocation strategies. Instead of manually comparing dozens of campaigns, AI can identify patterns and recommend which ads to scale and which to pause.
Conversion sync capabilities provide a significant advantage. This feature sends enriched conversion data back to your ad platforms, helping their algorithms optimize better. When Meta or Google receives more accurate conversion information, their AI can target and bid more effectively.
Evaluate the reporting interface and data visualization options. You will be spending significant time in this platform, so it needs to present complex attribution data in an understandable way. Look for customizable dashboards, easy-to-read attribution reports, and the ability to slice data by campaign, channel, or time period.
Check for AI chat or natural language query features. Being able to ask questions like "Which campaigns drove the most revenue last month?" and get instant answers saves hours of manual report building.
Consider your budget and pricing structure. Some platforms charge based on ad spend, others on conversion volume or features accessed. Make sure the pricing model aligns with your business size and growth trajectory. Review ad tracking platform pricing plans to compare your options.
Read reviews from marketers in similar industries. A platform that works well for e-commerce might not be ideal for B2B SaaS, and vice versa. Look for case studies or testimonials from businesses with similar attribution challenges to yours.
Step 3: Create Your Account and Configure Basic Settings
Once you have selected your platform, the signup process begins. Navigate to the platform's website and locate the signup or free trial button. Most platforms offer a trial period so you can test the system before committing.
Enter your business email address and create a strong password. Avoid using personal email addresses since you will likely need to add team members later. Use your company domain email to maintain professional account ownership.
Verify your email address through the confirmation link sent to your inbox. This step activates your account and ensures the platform can send you important notifications about tracking issues or data discrepancies.
Set up your workspace or organization structure. If you manage multiple businesses or clients, create separate workspaces for each. This keeps data isolated and makes reporting cleaner. For agencies, separate workspaces per client prevent data mixing and simplify client reporting. Many conversion tracking platforms for agencies offer specialized workspace management features.
Configure your timezone setting to match your business location. This ensures that conversion timestamps align with your actual business hours and makes day-parting analysis accurate. If you run campaigns globally, choose your primary business timezone as the default.
Set your currency preference to match your ad spend and revenue reporting. This prevents confusion when comparing platform costs to attributed revenue. If you run campaigns in multiple currencies, check whether the platform can handle multi-currency reporting.
Configure your attribution window preferences. This determines how long after an ad interaction the platform will credit that touchpoint for a conversion. Common settings range from 7 to 30 days for clicks and 1 to 7 days for views. Choose windows that match your typical sales cycle length.
Add team members who need platform access. Enter their email addresses and assign appropriate permission levels. Media buyers might need full access to campaign data and settings, while executives might only need view-only access to reports. Proper permission management prevents accidental changes to tracking configuration.
Complete any required billing information if you are moving past a trial period. Even if you are on a free trial, having billing details on file ensures uninterrupted service when the trial ends.
Step 4: Install Tracking on Your Website
Your ad tracking platform needs to capture visitor behavior on your website. This step connects your site to the attribution system.
Locate the tracking pixel or script code in your platform dashboard. This is typically found in a "Setup" or "Installation" section. Copy the provided code snippet exactly as shown, including all characters and formatting.
Add this tracking code to your website's header section, ideally in the head tag before the closing head tag. If you use WordPress, you can paste it into your theme's header.php file or use a plugin like Insert Headers and Footers. For Shopify, add it to the theme.liquid file. For custom-built sites, work with your developer to place it correctly.
The tracking code needs to load on every page of your site, not just your homepage. Verify that you have placed it in a template file that appears across all pages, not on individual page files.
Implement server-side tracking for improved accuracy beyond browser limitations. This typically involves installing a server-side container or connecting your platform's API to your backend. Server-side tracking captures conversions even when browser-based pixels fail due to ad blockers or privacy settings.
Many platforms provide detailed setup guides for server-side implementation. Follow these instructions carefully, as server-side tracking requires more technical configuration than simple pixel installation. If you are not comfortable with backend development, involve your technical team at this stage. Our cross-platform tracking setup guide covers the technical details step by step.
Set up conversion events for key actions visitors take on your site. Common events include purchases, form submissions, demo requests, account signups, and add-to-cart actions. Each event tells your attribution platform when something valuable happened.
Configure event parameters to capture additional data with each conversion. For purchases, track the order value, product categories, and customer ID. For leads, capture the form type and source page. This enriched data makes your attribution reports far more actionable.
Use your platform's built-in testing tools to verify tracking fires correctly. Most platforms offer a test mode or real-time event viewer. Open this tool, then navigate to your website and trigger a test conversion by filling out a form or making a test purchase.
Watch the event viewer to confirm the conversion appears with all the correct parameters. If nothing shows up, double-check your code placement. If events appear but are missing data, review your event parameter configuration.
Test across different browsers and devices. What works in Chrome on desktop might fail in Safari on iPhone due to tracking prevention features. Thorough testing now prevents data gaps later.
Step 5: Connect Your Ad Platforms and CRM
With website tracking in place, you need to connect your advertising accounts so the platform can match ad interactions to conversions.
Start with your Meta advertising account. Navigate to the integrations section of your tracking platform and select Meta or Facebook Ads. You will be prompted to log in to your Meta Business Manager account and grant permission for the tracking platform to access your ad data.
Select which ad accounts you want to connect. If you manage multiple ad accounts, you can typically connect all of them under one integration. The platform will begin importing your campaign structure, ad spend data, and click information.
Connect Google Ads using a similar process. Authorize the tracking platform to access your Google Ads account, then select which accounts to link. The integration pulls campaign data, keyword information, and click details to match against your conversion events.
Add TikTok Ads, LinkedIn Campaign Manager, or any other advertising platforms you use. Each integration follows a similar pattern: authorize access, select accounts, and allow data syncing to begin. Proper ad tracking across multiple platforms requires connecting every channel where you spend budget.
Connect your CRM to track the full journey from click to closed deal. This step is critical if you run a business where conversions happen offline or have a multi-step sales process. Navigate to your CRM integration options and select your system.
For Salesforce, HubSpot, Pipedrive, or other major CRMs, you will authorize API access and map your CRM fields to the tracking platform's data structure. This connection allows the platform to see when a lead becomes an opportunity, then a closed deal, and attribute that revenue back to the original ad interactions.
Enable conversion sync to send enriched data back to your ad platforms. This feature takes the accurate conversion information your tracking platform captures and feeds it back to Meta, Google, and other channels. When ad platforms receive better conversion data, their algorithms optimize more effectively.
Configure which events to sync back to each platform. You might send all purchases back to Meta but only high-value conversions to Google. Customize based on what helps each platform's algorithm perform best.
Map your conversion events to match your sales funnel stages. Define which events represent top-of-funnel actions like content downloads, middle-funnel actions like demo requests, and bottom-funnel actions like purchases or contract signatures. This mapping creates a complete view of how ads influence each funnel stage. A customer journey tracking platform visualizes this entire path from first touch to conversion.
Allow 24 to 48 hours for initial data syncing to complete. The platform needs time to import historical campaign data and establish connections with all integrated systems. During this period, new conversions will be tracked, but historical attribution reports might be incomplete.
Step 6: Verify Your Setup and Run Your First Attribution Report
Before you trust your new tracking system, you need to verify everything works correctly. Start with your platform's diagnostic tools or connection status dashboard.
Check that all integrations show as active and syncing properly. Look for green checkmarks or "Connected" status indicators next to each ad platform and your CRM. If any show errors or disconnected status, revisit those integration steps to troubleshoot.
Run a test conversion to see the full attribution path in action. Visit your website as if you were a customer. Click through from an actual ad if possible, or simulate the journey by visiting your site with UTM parameters in the URL.
Complete a conversion action like filling out a form or making a test purchase. Then check your platform's real-time event viewer or recent conversions report to confirm it captured the event with all the correct attribution data.
Verify that the conversion shows the correct source, campaign, ad set, and ad creative. If you clicked a Meta ad, the attribution should reflect Meta as the source with the specific campaign details. If any attribution data is missing or incorrect, review your UTM parameter setup and integration configuration. Understanding multiple ad platforms tracking issues helps you troubleshoot common problems.
Generate your first multi-touch attribution report. Navigate to your platform's reporting section and select a multi-touch attribution model like linear, time decay, or position-based. Run the report for the past 7 or 30 days, depending on how much historical data has synced. Our multi-touch marketing attribution platform complete guide explains how to interpret these models.
Review how the platform distributes conversion credit across multiple touchpoints. You should see conversions attributed to various ads and channels throughout the customer journey, not just the final click. This view reveals which ads assist conversions even when they don't get the last touch.
Compare your new attribution data with what your ad platforms report natively. Open Meta Ads Manager and Google Ads and compare their reported conversions to what your tracking platform shows. Expect some discrepancies, especially for iOS traffic where platform-reported numbers are typically lower than server-side tracking captures.
Document any significant differences between platform-reported and attributed conversions. Large gaps might indicate tracking issues that need resolution, while moderate differences are normal due to attribution window variations and tracking methodology differences.
Test your AI chat or query features if your platform includes them. Ask questions like "Which campaign drove the most revenue last week?" or "What's my return on ad spend by channel?" Verify that the AI returns accurate answers based on your attribution data.
Create a custom dashboard with the metrics that matter most to your business. Pin key reports like revenue by channel, top-performing campaigns, and conversion funnel analysis. This dashboard becomes your daily command center for marketing performance.
Your Attribution System Is Ready
You now have a fully configured ad tracking platform ready to capture every touchpoint in your customer journey. Your setup checklist: assessed tracking gaps, selected a platform with the features you need, created and configured your account, installed website tracking with server-side capabilities, connected all ad platforms and your CRM, and verified everything works with a test report.
The real value comes in the weeks ahead as you accumulate data and start seeing which ads and channels truly drive revenue. You will discover that some campaigns you thought were underperforming actually assist high-value conversions earlier in the journey. Other campaigns that looked successful based on last-click data might contribute less than you assumed.
Use your attribution insights to reallocate budget toward high-performing campaigns. When you see which ads consistently appear in conversion paths, scale those aggressively. When certain campaigns rarely contribute to actual revenue, reduce or pause them regardless of what the ad platform's native reporting suggests.
Let AI recommendations guide your optimization decisions. Instead of manually analyzing hundreds of data points, rely on AI-powered insights to identify patterns and suggest actions. This approach saves time and often reveals opportunities you would miss in manual analysis.
Review your attribution reports weekly at minimum. Marketing performance shifts constantly, and what worked last month might not work this month. Regular review keeps you ahead of performance changes and allows quick budget adjustments.
Share attribution data with your sales team if you run a business with a sales cycle. When sales reps can see which marketing touchpoints influenced their leads, they gain context that improves conversations and close rates. This alignment between marketing and sales drives better overall results.
Ready to stop guessing and start scaling with confidence? Get your free demo to see exactly which marketing efforts generate real results.