
You've been running ads across Meta, Google, and maybe TikTok. Your CRM is capturing leads. Your website is converting visitors. But here's the problem: you have no idea which marketing touchpoint actually drives revenue. You're making budget decisions based on gut feeling instead of data, and that's costing you money.
The solution? A marketing analytics tool that connects every piece of your marketing puzzle. But signing up for the right platform and configuring it correctly can feel like navigating a maze blindfolded. Choose wrong, and you'll waste weeks implementing a tool that doesn't answer your most important questions. Set it up incorrectly, and your data will be incomplete or misleading.
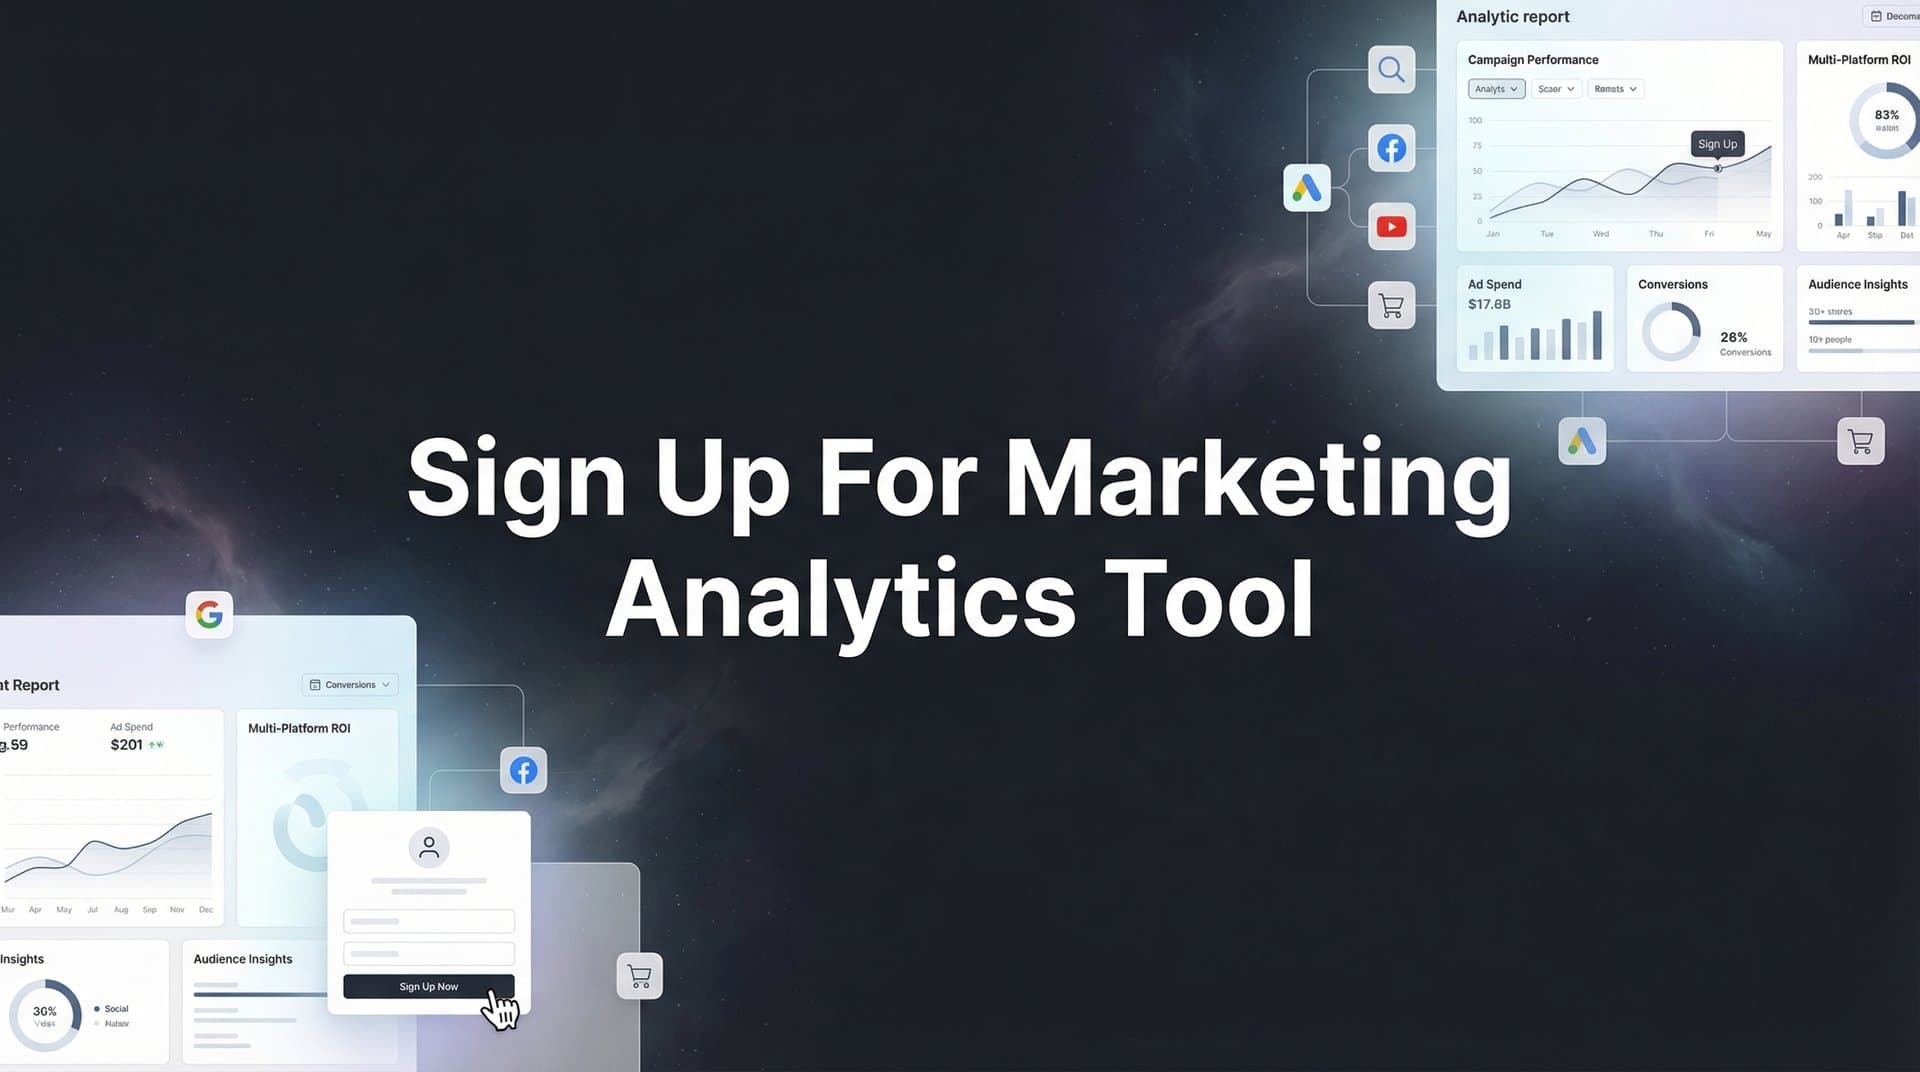
This guide walks you through the complete signup and setup process—from evaluating what you actually need to verifying that your first conversion is tracked correctly. Whether you're a marketing team tired of attribution guesswork or an agency managing multiple client accounts, these steps will help you go from signup to actionable insights in hours, not weeks.
By the end of this guide, you'll have a fully connected analytics platform tracking your customer journey across every touchpoint. No more wondering which ads work. No more budget allocation based on hunches. Just clear, accurate data showing exactly what drives results.
Step 1: Define Your Attribution Goals and Requirements
Before you even look at platform features, you need to know what questions you're trying to answer. This isn't about picking the tool with the most bells and whistles. It's about finding the platform that solves your specific attribution challenges.
Start by writing down your biggest marketing data gaps. Are you struggling to see which ads generate qualified leads versus tire-kickers? Do you need to understand the complete customer journey from first click to closed deal? Are you trying to justify marketing spend to executives who only care about revenue attribution? Your answers here will determine which features actually matter.
Next, inventory your current tech stack. List every ad platform you're running: Meta Ads, Google Ads, LinkedIn, TikTok, Pinterest—whatever you're using. Then document your CRM system, whether that's HubSpot, Salesforce, Pipedrive, or something else. Note your website platform and any existing analytics tools. This inventory becomes your integration requirements checklist.
Now define your key success metrics. If you're in e-commerce, you probably care about ROAS and cost per purchase. If you're B2B SaaS, you might focus on cost per qualified lead and customer acquisition cost. If you're an agency, you need client-specific metrics across multiple accounts. Write these down—these metrics should be front and center in your dashboard.
Consider your team structure too. How many people need access? Do you need role-based permissions so your media buyers see different data than your executives? Will you need white-label reporting for clients? These operational requirements matter just as much as technical features.
Think about your attribution complexity. If you have a seven-day sales cycle with mostly direct response ads, your needs differ dramatically from a B2B company with six-month sales cycles involving multiple touchpoints. Understanding your typical customer journey length helps you choose appropriate attribution models later.
Finally, be honest about your technical comfort level. Some platforms require developer involvement for implementation. Others offer plug-and-play integrations. If you're a solo marketer without engineering support, ease of setup becomes a critical requirement.
Success indicator: You should have a document listing your must-have integrations, key metrics, team access requirements, and deal-breaker limitations. This becomes your evaluation rubric for the next step.
Step 2: Evaluate Platform Features Against Your Needs
Now that you know what you need, it's time to evaluate which platforms actually deliver. This isn't about reading marketing copy—it's about verifying specific capabilities that match your requirements list.
Start with multi-touch attribution capabilities. Single-touch attribution models only give you part of the story. You need a platform that can show the entire customer journey—from awareness ads to retargeting campaigns to the final conversion event. Check whether the platform supports first-touch, last-touch, linear, time-decay, and position-based models. The ability to compare different attribution models side-by-side reveals insights that single-model platforms miss entirely.
Verify integration support for your specific tech stack. Don't just check if they integrate with "Google Ads"—confirm they support the specific features you use. Can they pull campaign-level data? Do they capture ad creative performance? Can they sync conversions back to the platform? Generic integrations often miss the nuanced data you actually need. For deeper insights on Google-specific tracking, explore marketing analytics for Google Ads to understand what capabilities matter most.
Server-side tracking has become essential, not optional. Browser-based tracking faces increasing limitations from iOS privacy features, ad blockers, and cookie restrictions. Platforms offering server-side tracking capture more complete data because they're not dependent on client-side pixels that browsers can block. This directly impacts data accuracy and your ability to make confident decisions.
Look for AI-powered features that go beyond basic reporting. The best platforms don't just show you data—they analyze patterns and surface recommendations. Can the platform identify which ads are underperforming? Does it suggest budget reallocation opportunities? Can it predict which campaigns are likely to scale successfully? An AI marketing analytics platform transforms raw data into actionable intelligence.
CRM connectivity determines whether you can attribute revenue, not just conversions. Marketing qualified leads don't pay the bills—customers do. Your analytics platform needs to connect ad clicks to CRM opportunities to closed revenue. This end-to-end visibility shows true marketing ROI, not just top-of-funnel metrics that might not correlate with actual revenue.
Check for conversion sync capabilities. Modern ad platforms use machine learning to optimize delivery, but they need accurate conversion data to learn effectively. Platforms that can send enriched conversion events back to Meta, Google, and other ad platforms help those algorithms optimize better. Look for marketing analytics platforms that offer real-time conversion syncing to create a feedback loop where better data leads to better ad performance.
Don't overlook data visualization and reporting flexibility. You'll spend significant time in dashboards, so they need to be intuitive and customizable. Can you build the exact reports your stakeholders need? Can you schedule automated reports? Is the interface clean enough that you'll actually use it daily? Review the best data visualization tools for marketing analytics to understand what features drive daily usability.
Success indicator: You've identified two or three platforms that check all your must-have boxes and offer the integrations your tech stack requires. You're ready to create an account and start the actual setup process.
Step 3: Create Your Account and Configure Initial Settings
You've chosen your platform. Now it's time to create your account and establish the foundation for accurate attribution. This step moves quickly, but getting these initial settings right prevents headaches later.
Navigate to the signup page and have your business information ready. You'll typically need your company name, website URL, business email address, and basic contact information. Some platforms require additional details like industry, company size, or estimated ad spend. Use your business email, not a personal one—this ensures you maintain access even if you change roles.
Choose your plan tier carefully. Most platforms offer multiple pricing levels based on features, data volume, or ad spend. If you're just starting, you might be tempted to choose the cheapest option. But if that tier lacks critical integrations or has data limits you'll hit quickly, you'll end up migrating plans mid-setup. Review what each tier includes and pick the one that matches your current needs with room to grow. Understanding marketing analytics platform cost structures helps you budget appropriately from the start.
During signup, you'll often be asked to verify your email address. Complete this step immediately—some platforms restrict functionality until verification is complete. You don't want to spend time configuring settings only to discover you can't save changes until you click a verification link.
Once inside your new account, start with workspace configuration. Set your workspace name to something clear—if you're an agency managing multiple clients, use the client name. If you're in-house, your company name works. This matters more than you think when you're juggling multiple dashboards or sharing access with team members.
Configure your timezone and currency settings next. These seem minor but impact every report you'll ever run. Set your timezone to match where your business operates or where your team is based. Choose the currency you use for financial reporting. Changing these later can cause historical data to display incorrectly, creating confusion when comparing time periods.
Set your attribution window preferences at this stage too. Attribution windows determine how long after someone clicks or views an ad you'll credit that touchpoint for a conversion. Standard defaults are often seven days for clicks and one day for views, but your business might need different windows. B2B companies with longer sales cycles often extend click windows to 30 or even 90 days. E-commerce brands with impulse purchases might keep shorter windows.
Now invite your team members. Add colleagues who need dashboard access, assigning appropriate permission levels. Your media buyers might need full access to campaigns and settings. Executives might only need view-only access to reports. Agencies should set up client-specific permissions so clients can see their data without accessing other accounts.
Take a moment to explore the dashboard layout. Familiarize yourself with where key features live—integrations, reports, settings, attribution models. Understanding the navigation now saves time when you're trying to troubleshoot connections or build reports later.
Success indicator: Your account is created, verified, and configured with correct timezone and currency settings. Team members have appropriate access levels. You're ready to start connecting your actual data sources.
Step 4: Connect Your Ad Platforms and Data Sources
This is where your analytics platform transforms from an empty shell into a powerful attribution engine. Connecting your data sources correctly ensures you capture every touchpoint in your customer journey. Miss a connection, and you'll have blind spots in your attribution data.
Start with your ad platforms. Navigate to the integrations section and look for your primary ad channels. Most platforms use OAuth authentication, which means you'll click a "Connect" button, get redirected to the ad platform's login page, authorize access, and get redirected back. This process is straightforward, but have your ad account login credentials ready before you start.
Connect Meta Ads first if you're running Facebook or Instagram campaigns. Click the Meta integration, authenticate with your Facebook Business Manager credentials, and select which ad accounts you want to track. If you manage multiple ad accounts, you can usually connect them all at once. The platform will start pulling historical data, which can take anywhere from a few minutes to a few hours depending on your account size.
Repeat this process for Google Ads. Authenticate with your Google account, grant the necessary permissions, and select your ad accounts. Google's OAuth process is generally smooth, but if you manage accounts across multiple Google logins, you'll need to connect each one separately.
Connect any additional ad platforms you're using—TikTok Ads, LinkedIn Ads, Pinterest Ads, Snapchat Ads. Each platform has its own authentication flow, but the process is similar: authenticate, authorize, select accounts, confirm connection. Don't skip platforms just because they're smaller parts of your budget. Incomplete data leads to incomplete attribution. A cross-platform marketing analytics dashboard only works when all your channels are connected.
Now install tracking on your website. This step varies significantly depending on whether you're using client-side pixels or server-side tracking. For client-side tracking, you'll typically copy a JavaScript snippet and paste it into your website's header. If you're using Google Tag Manager, you can add the tracking code as a custom HTML tag. If you're using WordPress, many platforms offer plugins that handle installation automatically.
Server-side tracking requires more technical setup but delivers more reliable data. You'll need to configure your server to send conversion events directly to the analytics platform, bypassing browser-based tracking entirely. This usually involves installing a server-side SDK or configuring webhook endpoints. If this sounds intimidating, most platforms offer detailed documentation or implementation support.
Connect your CRM next. This integration is critical for revenue attribution. Navigate to the CRM integrations section and select your platform—HubSpot, Salesforce, Pipedrive, or whatever you use. Authenticate using your CRM credentials and configure which data you want to sync. At minimum, sync deal stages, deal values, and contact information. This allows the analytics platform to match ad clicks to CRM opportunities to closed revenue.
Set up conversion sync to feed better data back to your ad platforms. This feature sends enriched conversion events from your analytics platform back to Meta, Google, and other ad channels. The ad platforms use this data to optimize delivery and targeting. Configure which conversion events you want to sync—typically purchases, qualified leads, or other high-value actions.
If you encounter connection issues, start with the basics. Verify you're using the correct login credentials. Check that you've granted all necessary permissions during OAuth. Confirm your ad accounts are active and not suspended. For tracking pixel issues, use browser developer tools to verify the pixel is firing correctly. Many platforms offer connection testing tools that help diagnose problems.
Success indicator: All your ad platforms show "Connected" status with data flowing in. Your website tracking is installed and firing on key pages. Your CRM is syncing contact and deal data. Conversion sync is configured and sending events back to ad platforms. You're ready to configure how this data gets attributed.
Step 5: Configure Attribution Models and Conversion Events
You're collecting data from every touchpoint. Now you need to tell your analytics platform which events matter and how to attribute credit across your customer journey. This step determines whether your reports show meaningful insights or just noise.
Start by defining your key conversion events. These are the actions that matter to your business—not just any form submission or page view. For e-commerce, your primary conversion event is typically a purchase. For B2B SaaS, it might be a demo request or trial signup. For lead generation businesses, it's usually a qualified lead form submission. List your conversion events in order of importance.
Navigate to the conversion tracking configuration section. Create a conversion event for each action you want to track. Give each event a clear name that your team will understand—"Purchase," "Demo Request," "Free Trial Signup," "Contact Form." Avoid vague names like "Conversion 1" or "Event A" that will confuse you three months from now.
Assign values to your conversion events. If you're tracking purchases, the value is straightforward—it's the transaction amount. For lead-based businesses, assign an estimated value based on your average deal size and close rate. If your average customer is worth five thousand dollars and you close twenty percent of demos, assign a demo request a value of one thousand dollars. These values allow you to calculate true ROAS, not just conversion counts.
Now select your attribution models. This is where you decide how credit gets distributed across touchpoints. First-touch attribution gives all credit to the initial interaction—useful for understanding awareness channels. Last-touch attribution credits the final touchpoint before conversion—helpful for understanding what closes deals. But neither tells the complete story. Understanding attribution tools for digital marketing helps you select the right model for your business.
Multi-touch attribution models distribute credit across the entire customer journey. Linear attribution splits credit evenly across all touchpoints. Time-decay gives more credit to recent interactions. Position-based gives extra weight to the first and last touches while splitting remaining credit among middle touchpoints. The best approach is to enable multiple models and compare them side-by-side.
Configure your attribution models based on your typical sales cycle. If you have a short, transactional sales process, last-touch or linear models work well. If you have a long B2B cycle with multiple nurture touchpoints, time-decay or position-based models provide better insights. Most platforms let you switch between models instantly, so you're not locked into one perspective.
Map your CRM stages to conversion events for accurate revenue attribution. This tells the platform which CRM stage changes represent meaningful conversions. When a contact moves from "Lead" to "Marketing Qualified Lead," that's one conversion event. When an opportunity moves to "Closed Won," that's your revenue event. This mapping connects your ad data to actual revenue, not just top-of-funnel metrics.
Set custom attribution windows that match your buying cycle. If customers typically convert within three days, a seven-day click window works fine. If you have a thirty-day consideration period, extend your attribution window accordingly. You can often set different windows for different conversion events—shorter windows for impulse purchases, longer windows for high-consideration items.
Configure lookback windows for view-through attribution if your platform supports it. This determines how long after someone views your ad without clicking you'll still credit that impression for a conversion. View-through windows are typically shorter than click windows—often one day—because view impressions are weaker signals than clicks.
Success indicator: Run a test conversion by completing a conversion action yourself. Check that it appears correctly in your dashboard, attributed to the right source. Verify the conversion value is captured accurately. Confirm the event appears in your chosen attribution model. If everything shows up correctly, your attribution configuration is working.
Step 6: Verify Data Accuracy and Launch Your First Report
Your analytics platform is configured, connected, and tracking conversions. But before you start making budget decisions based on this data, you need to verify everything is working correctly. Trust but verify—especially when it comes to data that will drive thousands of dollars in ad spend decisions.
Start with end-to-end testing. Run test conversions for each of your key events. If you're tracking purchases, make a test purchase on your website. If you're tracking demo requests, submit a test form. If you're tracking app installs, install your app. Watch these test events flow through your entire system—from ad click to website action to analytics platform to CRM if applicable.
Check that test conversions appear in your dashboard within the expected timeframe. Some platforms show conversions in near real-time, others may have a delay of a few minutes or hours. Verify the conversion is attributed to the correct source. If you clicked a Meta ad before converting, the conversion should be attributed to that Meta campaign. If the attribution is wrong, you likely have a tracking configuration issue. Platforms with real-time marketing performance monitoring capabilities make this verification process much faster.
Compare your analytics platform data against ad platform native reporting. Pull the last seven days of campaign data from your analytics platform and compare it to the same data in Meta Ads Manager or Google Ads. The numbers won't match exactly—different attribution methods and tracking approaches create discrepancies. But they should be in the same ballpark. If your analytics platform shows dramatically different numbers, investigate why.
Common discrepancies are normal and expected. Ad platforms use last-click attribution by default while your analytics platform might use multi-touch. Ad platforms count view-through conversions differently. Different attribution windows create different results. What you're looking for is directional alignment—both systems should show the same campaigns as your top performers, even if the exact numbers differ.
Build your first dashboard with the metrics that matter most to your business. Don't try to track everything—focus on the five to ten KPIs that drive decisions. For most marketers, this includes metrics like total conversions by source, cost per conversion, ROAS, conversion rate, and top-performing campaigns. Arrange these metrics in a logical flow that tells the story of your marketing performance.
Customize your dashboard visualization to make insights obvious at a glance. Use trend lines to show performance over time. Add comparison metrics to see week-over-week or month-over-month changes. Include breakdowns by campaign, ad set, or creative to identify what's working at a granular level. The best dashboards answer your most important questions without requiring you to dig through multiple reports.
Set up automated reports for stakeholders who need regular updates. Configure weekly or monthly reports that automatically email your key metrics to executives, team members, or clients. Choose report formats that match your audience—executives want high-level summaries, media buyers want campaign-level details. Schedule these reports to send at consistent times so stakeholders know when to expect them.
Schedule your first optimization review based on real attribution data. Block time on your calendar—maybe a week from now—to review your first batch of complete data. This gives your platform time to collect enough conversions to identify meaningful patterns. During this review, look for campaigns that are underperforming, audiences that convert better than expected, and budget allocation opportunities you couldn't see before.
Document any anomalies or questions that come up during verification. If something looks wrong, note it now while the setup is fresh in your mind. Create a running list of data quality checks to perform regularly—comparing platform data to ad native reporting, checking for missing conversions, verifying attribution looks reasonable. Regular data quality checks catch problems before they corrupt your decision-making.
Success indicator: Your dashboard shows real-time data across all connected sources. Test conversions are appearing correctly and attributed appropriately. Key metrics are trending in expected directions. You feel confident the data is accurate enough to inform real budget decisions. You're ready to start using this platform to optimize your marketing.
Your Complete Setup Checklist and Next Steps
You've gone from signup to a fully functional marketing analytics platform. Let's recap what you've accomplished: You defined your attribution goals and requirements, giving you a clear picture of what you needed. You evaluated platform features against those needs, ensuring you chose a tool that actually solves your problems. You created your account and configured initial settings, establishing the foundation for accurate tracking. You connected all your ad platforms and data sources, creating a complete view of your customer journey. You configured attribution models and conversion events, telling the platform how to analyze your data. And you verified data accuracy and launched your first reports, confirming everything works correctly.
This setup process transforms how you make marketing decisions. Instead of guessing which campaigns drive revenue, you have data showing exactly what works. Instead of spreading budget evenly across channels hoping something sticks, you can allocate spend based on actual performance. Instead of reporting vanity metrics that don't correlate with business outcomes, you can show stakeholders true marketing ROI.
But having accurate attribution data is only valuable if you act on it. Your next step is to establish a regular optimization cadence. Review your attribution data weekly, looking for campaigns that are outperforming or underperforming expectations. Shift budget toward high-performing campaigns and pause or adjust low performers. Test new audiences, creatives, and offers based on what your data reveals about your best customers. Learn how to leverage analytics for marketing strategy to maximize the value of your new platform.
Explore advanced features that take your analytics beyond basic reporting. Many platforms offer AI-powered recommendations that identify optimization opportunities automatically. Conversion sync features that feed better data back to ad platforms can improve their optimization algorithms. Custom attribution models let you weight touchpoints based on your specific business logic. These advanced capabilities turn your analytics platform from a reporting tool into an optimization engine.
Consider how you'll scale your analytics as your marketing grows. If you're planning to expand into new ad channels, verify your platform supports those integrations. If you're adding team members, establish processes for dashboard access and report distribution. If you're launching new products or services, configure tracking for those conversion events now rather than scrambling later. For growing organizations, analytics tools for marketing teams need to scale with your operations.
Remember that attribution is a journey, not a destination. Your first attribution model might not be perfect, and that's okay. As you learn more about your customer journey, you'll refine your models, adjust your attribution windows, and add new conversion events. The platform you've set up today gives you the foundation to continuously improve your marketing intelligence.
The real value of marketing analytics isn't the data itself—it's the confident decisions that data enables. You can now answer questions that were impossible before: Which campaigns actually drive revenue? What's the true cost of acquiring a customer across all touchpoints? Where should you invest your next dollar for maximum return? These insights transform marketing from an expense to a predictable growth engine.
Ready to elevate your marketing game with precision and confidence? Discover how Cometly's AI-driven recommendations can transform your ad strategy—Get your free demo today and start capturing every touchpoint to maximize your conversions.


