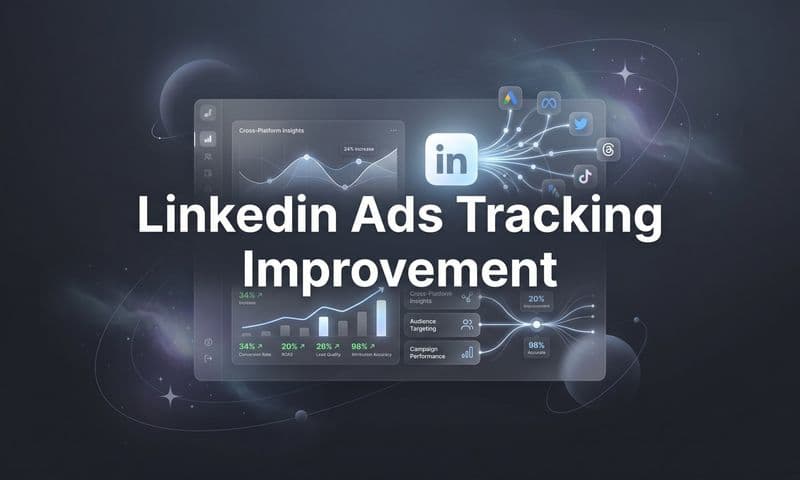
Every marketer knows the frustration of seeing sales come in without knowing which ads actually drove them. You're spending thousands on Meta, Google, and other platforms, but when your CRM shows a closed deal, you're left guessing which campaign deserves the credit. This disconnect isn't just annoying—it's costing you money through wasted ad spend on underperforming campaigns and missed opportunities to scale what actually works.
The good news? Tracking sales back to ads is entirely possible when you have the right system in place.
This guide walks you through the exact steps to connect your advertising efforts to real revenue, from initial click to closed deal. By the end, you'll have a clear framework for attributing every sale to its source, allowing you to make confident budget decisions and scale your winning campaigns. Whether you're running ads for an ecommerce brand or generating leads for a SaaS company, these steps apply across industries and platforms.
Let's break down how to build an attribution system that actually works.
Step 1: Map Your Customer Journey from Ad Click to Sale
Before you can track sales back to ads, you need to understand every touchpoint between the moment someone clicks your ad and the moment they become a paying customer. This isn't about theory—it's about documenting the actual path your customers take through your funnel.
Start by identifying every stage in your customer journey. For most businesses, this includes the ad click, landing page visit, form submission, email nurture sequence, sales conversations, and finally the closed deal. Each of these stages represents a potential point where attribution data can get lost or disconnected.
Walk through your funnel as if you were a customer. Click one of your ads. Where does it take you? What happens when you fill out a form? Does that information flow into your CRM with the original ad source attached? Most marketers discover significant gaps at this stage—places where the connection between ad and customer simply disappears.
Create a visual map showing how data should flow through your systems. Draw boxes for each platform: your ad accounts, website, forms, email tools, and CRM. Then draw arrows showing how customer data moves between them. This exercise reveals where information gets stuck or lost entirely.
Document the specific tools you're using at each stage. If you're running Meta ads that send traffic to a landing page built in Unbounce, which submits leads to HubSpot, which your sales team uses to close deals—write that down. You need to know every system involved before you can connect them properly. Understanding how to track sales leads through each system is essential for building this foundation.
Pay special attention to handoff points. The moment a lead moves from marketing to sales is where attribution often breaks down. Does your sales team know which ad campaign generated each lead they're calling? If not, you've found a critical gap to address.
Success looks like this: You can trace a hypothetical customer through every stage of your funnel with no gaps in attribution data. When someone clicks your ad, you know exactly how their information flows through each system until they become a customer in your CRM.
Step 2: Implement UTM Parameters Across All Ad Campaigns
UTM parameters are the foundation of tracking sales back to ads. These simple tags added to your URLs tell your analytics tools exactly where traffic came from, which campaign drove it, and what specific ad or creative was clicked.
Start by establishing consistent UTM naming conventions. This matters more than most marketers realize. If one campaign uses "utm_source=facebook" and another uses "utm_source=meta," your reporting will split that traffic into separate sources. Create a naming document that everyone on your team follows.
Your UTM structure should include five parameters: source (the platform like facebook or google), medium (the type of traffic like cpc or social), campaign (your campaign name), content (the specific ad or ad set), and term (keywords for search campaigns). Keep names lowercase, use hyphens instead of spaces, and be descriptive enough that you'll understand what each parameter means six months from now.
Apply UTM parameters to every ad link across all platforms. Meta Ads Manager, Google Ads, LinkedIn Campaign Manager—every platform lets you add tracking parameters to your destination URLs. Most have built-in fields for this, so you don't need to manually append them to every ad. A marketing campaign tracking spreadsheet can help you maintain consistency across all your campaigns.
Here's where it gets critical: Your website needs to capture and store this UTM data. When someone clicks your ad, those parameters appear in the URL, but they disappear as soon as the visitor navigates to another page on your site. You need to grab that data and save it.
Configure your website to store UTM parameters in cookies or pass them through hidden form fields. This ensures that when someone fills out a form three pages deep into your site, you still know which ad brought them there. Most modern form tools and marketing platforms can handle this automatically, but you need to set it up.
Test your implementation before rolling it out across all campaigns. Create a test ad with UTM parameters, click it yourself, and fill out a form on your site. Check whether the UTM data appears in your form submission. If it doesn't, your tracking isn't working yet.
Success indicator: Test clicks show UTM data flowing correctly from your ads through your website and into your forms and CRM. When you submit a test lead, you should see the source, medium, campaign, and content data attached to that record.
Step 3: Connect Your Ad Platforms to Your CRM
UTM parameters tell you where website traffic came from, but they don't automatically connect ad clicks to closed deals in your CRM. This step bridges that gap by ensuring lead source data flows from your ads into the CRM records your sales team actually uses.
The simplest approach is using direct integrations between your ad platforms and CRM. Many CRMs offer native connections to Meta, Google, and LinkedIn that automatically capture lead source data. If your CRM supports these integrations, start there. They're easier to set up and maintain than custom solutions.
For businesses with more complex funnels, an attribution platform provides a more robust connection. Tools like Cometly sit between your ad platforms and CRM, capturing data from every touchpoint and ensuring it flows through to your final conversion records. This approach works especially well when you're running ads across multiple platforms and need a unified view of attribution.
Configure your integration to pass the specific data points you need. At minimum, you want lead source (which platform), campaign name, ad set or ad group, and ideally the specific ad that was clicked. The more granular your data, the better you can optimize individual ads rather than just entire campaigns. Learning to track sales from paid ads at this level of detail transforms your optimization capabilities.
Set up offline conversion tracking to complete the loop. This sends data from your CRM back to your ad platforms, telling them which leads actually converted into customers. When Meta or Google knows that a specific ad generated a paying customer, their algorithms can find more people like that customer.
For offline conversion tracking to work, you need to match CRM records back to ad clicks. This typically happens through email addresses or phone numbers. When someone clicks your ad, the platform captures their identifier. When they convert in your CRM, you send that same identifier back to the platform so it can match the conversion to the original ad click.
Test the full flow with a small campaign first. Run ads, generate leads, mark one as closed in your CRM, and verify that the conversion appears in your ad platform's reporting. This confirms that data is flowing in both directions correctly.
Success indicator: New leads in your CRM automatically show their original ad source, campaign, and ad. When your sales team looks at a lead record, they can see exactly which marketing effort generated it without having to ask the lead or check a separate system.
Step 4: Set Up Server-Side Tracking for Accurate Data
Browser-based tracking pixels have become increasingly unreliable. iOS privacy updates, browser restrictions, and ad blockers mean that traditional pixels miss a significant portion of your actual conversions. This creates a false picture of campaign performance and makes it impossible to track sales back to ads accurately.
Server-side tracking solves this by sending conversion data directly from your server to ad platforms, bypassing browsers entirely. Instead of relying on a pixel that loads in someone's browser (which can be blocked), your server communicates directly with Meta, Google, and other platforms through their APIs. Understanding what server-side tracking for ads entails is crucial for modern attribution.
Think of it this way: Browser-based tracking asks the customer's device to report back to ad platforms. Server-side tracking has your own systems do the reporting instead. This captures conversions that pixels miss because the customer had an ad blocker enabled, used a privacy-focused browser, or simply had their iOS device set to limit tracking.
Implementing server-side tracking requires technical setup, but the payoff is substantial. You'll need to configure your server to send conversion events to platforms like Meta Conversions API and Google Enhanced Conversions. These APIs accept data about purchases, leads, and other conversion events directly from your backend systems.
The key is matching website visitors to conversion events. When someone clicks your ad, ad platforms assign them a unique identifier. Your server-side tracking needs to capture this identifier and include it when sending conversion data back to the platform. This allows the platform to connect the conversion to the original ad click.
Configure your tracking to work alongside existing pixel setups for redundancy. The best approach uses both browser-based pixels and server-side tracking. When both fire for the same conversion, platforms deduplicate the event automatically. When the pixel is blocked but server-side tracking fires, you still capture the conversion. The tracking challenges after iOS updates make this dual approach essential.
Many businesses see their tracked conversion counts increase by 20-30% after implementing server-side tracking simply because they're finally capturing events that pixels were missing. This doesn't mean you're getting more actual conversions—it means you're finally seeing the conversions that were always there but invisible to your reporting.
Success indicator: Your tracked conversions increase compared to pixel-only tracking, and the conversion data in your ad platforms more closely matches the actual sales you see in your CRM or order management system.
Step 5: Choose and Configure Your Attribution Model
Not all attribution models are created equal, and the one you choose significantly impacts which campaigns get credit for your sales. Understanding the difference between models helps you make better optimization decisions.
First-touch attribution gives all credit to the first interaction someone had with your brand. If a customer clicked a Facebook ad six weeks ago, then clicked three more ads from different campaigns before finally purchasing, first-touch attributes the entire sale to that initial Facebook ad. This model favors top-of-funnel awareness campaigns.
Last-touch attribution does the opposite—it gives all credit to the final interaction before purchase. Using the same example, last-touch would attribute the sale entirely to whichever ad the customer clicked right before buying. This model favors bottom-of-funnel conversion campaigns and retargeting.
Multi-touch attribution splits credit across multiple touchpoints in the customer journey. Linear multi-touch gives equal credit to every interaction. Time-decay multi-touch gives more credit to interactions closer to the conversion. Position-based multi-touch gives extra credit to the first and last touches while distributing some credit to middle interactions. Exploring Google Ads attribution tracking options can help you understand how different models work in practice.
Select a model that matches your sales cycle and buying behavior. If you're selling low-cost products with short sales cycles, last-touch often works well because customers typically convert quickly after discovering you. If you're in B2B SaaS with a 90-day sales cycle and multiple touchpoints, multi-touch attribution provides a more accurate picture of what's actually working.
Configure your attribution tool to apply the model consistently across all channels. This is where many businesses struggle—they might use last-touch for Google Ads but first-touch for Meta, making it impossible to compare performance fairly across platforms. Choose one model as your primary view and stick with it.
The beauty of sophisticated attribution platforms is that you can view the same sale attributed differently across models to compare insights. You might discover that a campaign looks mediocre in last-touch attribution but is actually a strong first-touch performer that starts customer journeys. This insight changes how you optimize and budget.
Success indicator: You can view the same sale attributed differently across multiple models and understand how each campaign contributes at different stages of the customer journey, rather than relying on a single attribution view that might hide important performance patterns.
Step 6: Sync Conversion Data Back to Ad Platforms
Tracking sales back to ads isn't just about your internal reporting—it's about feeding better data to the ad platforms themselves so their algorithms can optimize for actual buyers, not just clickers. This step completes the feedback loop that makes your advertising more effective over time.
Set up conversion APIs to send purchase and revenue data to Meta, Google, and other platforms. Meta Conversions API and Google Enhanced Conversions are the two most critical integrations for most businesses. These APIs allow you to send conversion events from your server directly to the platforms, including details like purchase amount, product purchased, and customer information.
Configure value-based optimization by passing actual sale amounts, not just conversion counts. When you tell Meta that an ad generated three conversions, the platform optimizes for getting more conversions. When you tell Meta that an ad generated $500, $2,000, and $150 in revenue from those three conversions, the platform can optimize for finding more high-value customers like the one who spent $2,000.
This distinction matters enormously for campaign performance. Ad platforms use machine learning to identify patterns in who converts and who doesn't. When you only send conversion counts, the algorithm treats a $50 customer the same as a $5,000 customer. When you send revenue values, the algorithm learns to prioritize finding more $5,000 customers. Understanding offline conversion tracking for online ads helps you implement this correctly.
Ensure data flows in near real-time to help ad platform algorithms optimize effectively. Older offline conversion tracking methods involved uploading CSV files of conversions once per day or week. Modern conversion APIs send data within minutes of a purchase or conversion happening, allowing platforms to optimize much faster.
For businesses with longer sales cycles, you can send multiple conversion events for the same customer. Send a "lead" event when someone fills out a form, an "opportunity" event when your sales team qualifies them, and a "purchase" event when they become a customer. This gives ad platforms multiple signals to optimize against throughout the funnel.
Include as much customer data as possible in your conversion events while respecting privacy regulations. Email addresses, phone numbers, and other identifiers help platforms match conversions back to ad clicks with higher accuracy. The better the match rate, the more accurate your attribution and optimization becomes.
Success indicator: Your ad platforms show revenue data that matches your CRM reports, and you can see conversion values (not just conversion counts) in your campaign reporting. When you look at a campaign in Meta Ads Manager or Google Ads, you should see total revenue attributed to that campaign alongside conversion counts.
Step 7: Build Reports That Connect Ad Spend to Revenue
All the tracking infrastructure in the world means nothing if you can't easily see which ads are actually driving revenue. This final step is about creating dashboards and reports that make attribution data actionable for daily optimization decisions.
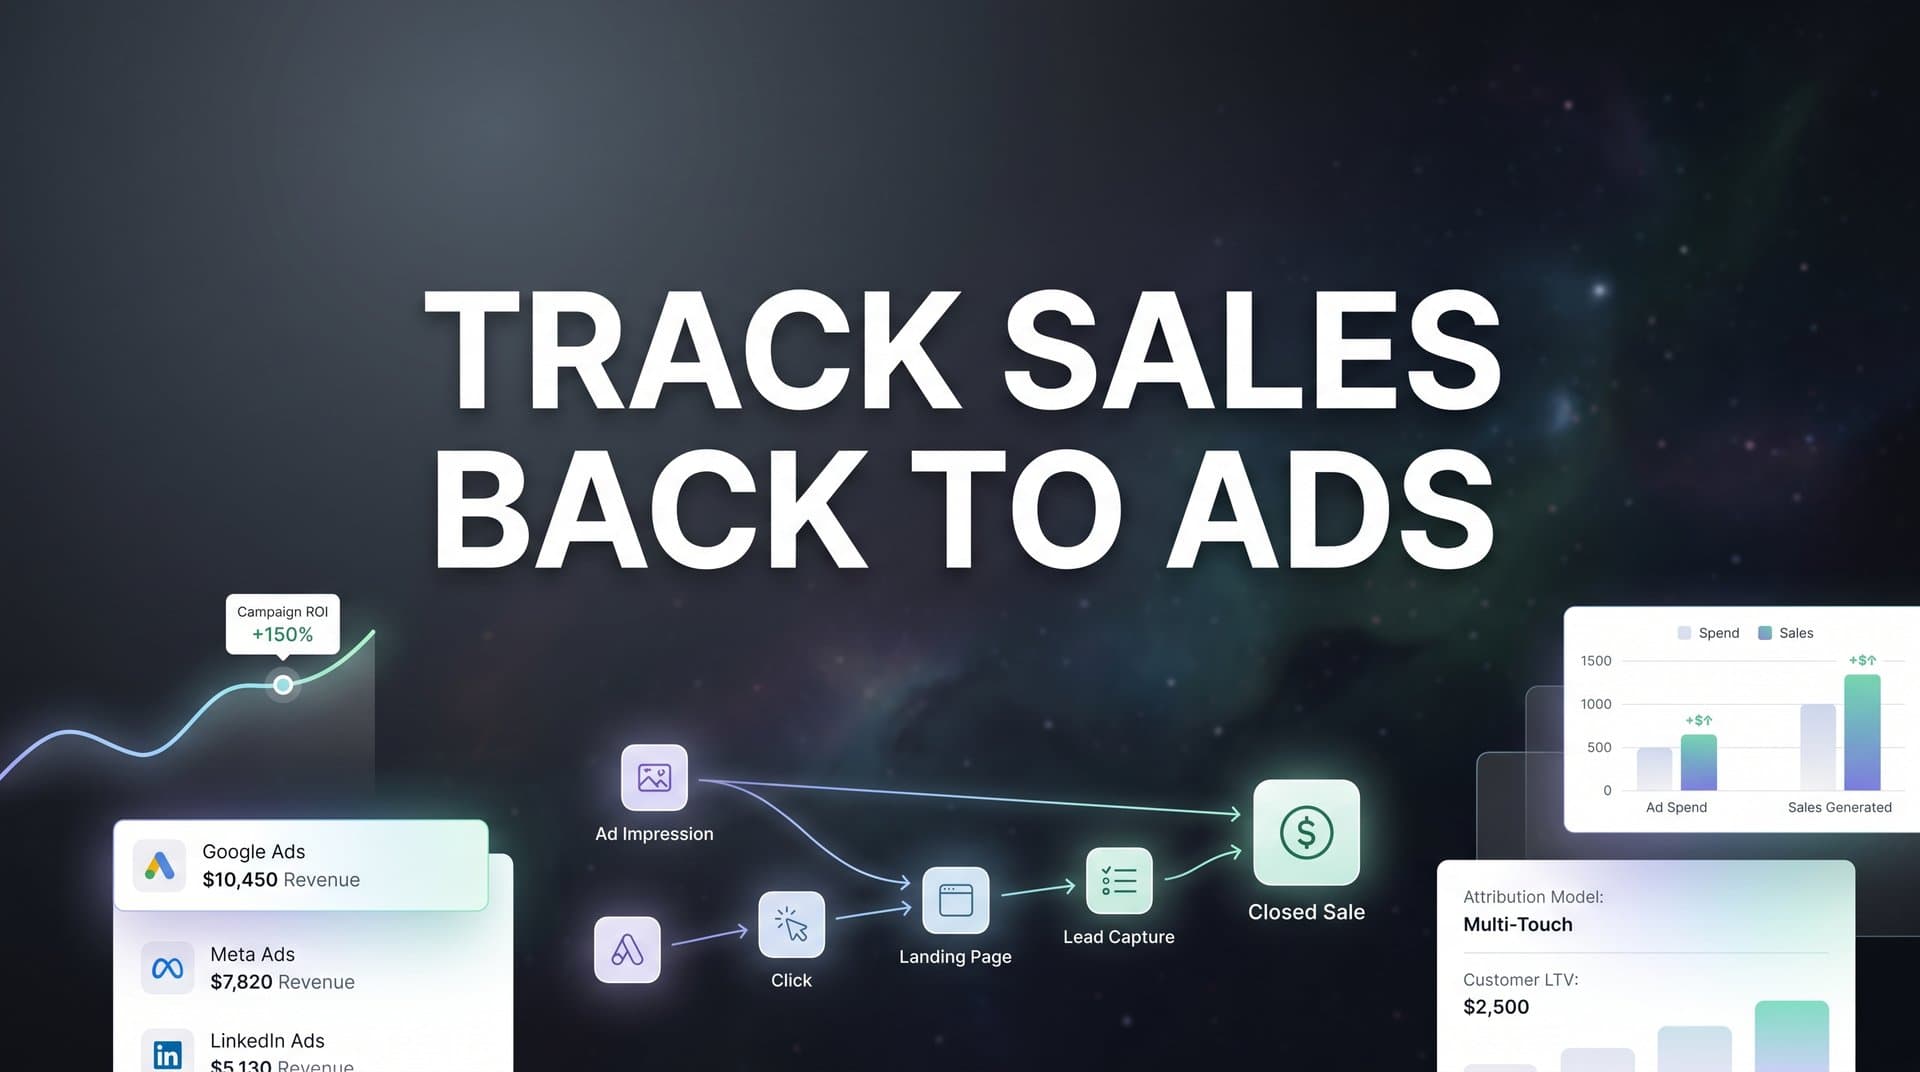
Create dashboards showing true ROAS by campaign, ad set, and individual ad. Return on ad spend is the metric that matters most—it tells you how many dollars of revenue you generated for every dollar you spent on advertising. Your dashboard should calculate this automatically by dividing attributed revenue by ad spend for each campaign.
Compare attributed revenue against ad spend to identify your most profitable campaigns. Sort your campaigns by ROAS to see which are crushing it and which are burning money. This seems obvious, but many marketers still optimize based on cost per click or cost per lead without connecting those metrics to actual revenue. Learning how to prove which ads drive sales gives you the confidence to make bold budget decisions.
Break down performance by multiple dimensions. Look at ROAS by campaign, by ad set, by individual ad creative, by audience, by placement, and by time period. Different cuts of the data reveal different insights. You might discover that your best campaign has one ad set that's wildly profitable and two that are losing money, or that your ads perform better on weekends than weekdays.
Set up regular reporting cadence to catch performance changes quickly. Daily checks for high-spend campaigns, weekly deep dives into what's working and what's not, and monthly strategic reviews of overall attribution trends. The faster you spot problems or opportunities, the faster you can act on them.
Include attribution comparison views in your reports. Show the same time period using different attribution models side by side. This helps you understand which campaigns are strong at starting customer journeys versus closing deals, informing budget allocation across your funnel.
Build reports that answer specific questions your team actually has. "Which specific ad generated the most revenue last month?" "What's our average ROAS by platform?" "How does attribution change when we use multi-touch versus last-touch?" If your reports don't answer the questions you're asking every week, rebuild them until they do.
Success indicator: You can answer which specific ad generated the most revenue last month within 30 seconds of opening your dashboard, and you can confidently tell your CEO or client exactly which campaigns are worth scaling and which should be paused based on actual revenue data, not proxy metrics.
Putting It All Together
Tracking sales back to ads requires connecting multiple systems, but each step builds on the previous one to create a complete attribution picture. Start by mapping your customer journey to identify where data gets lost. Implement proper UTM parameters so you can track traffic sources accurately. Connect your ad platforms to your CRM so lead source data flows through to closed deals.
Add server-side tracking to capture conversions that browser-based pixels miss due to privacy updates and ad blockers. Choose an attribution model that fits your business and sales cycle. Sync conversion data back to your ad platforms so their algorithms can optimize for actual buyers. Finally, build reports that show exactly which ads drive revenue, not just clicks or impressions.
Quick checklist before you start: Document your current customer journey touchpoints and identify gaps in data flow. Establish UTM naming conventions that your entire team will follow consistently. Verify your CRM can receive and store source data from your ad platforms. Test one campaign end-to-end before scaling to all campaigns to ensure data flows correctly at every stage.
With accurate sales attribution in place, you can stop guessing and start scaling the campaigns that actually drive your business forward. You'll know which platforms deserve more budget, which audiences convert best, and which ad creatives generate the highest-value customers. That's the difference between hoping your ads work and knowing exactly what's working.
Ready to elevate your marketing game with precision and confidence? Discover how Cometly's AI-driven recommendations can transform your ad strategy. Get your free demo today and start capturing every touchpoint to maximize your conversions.