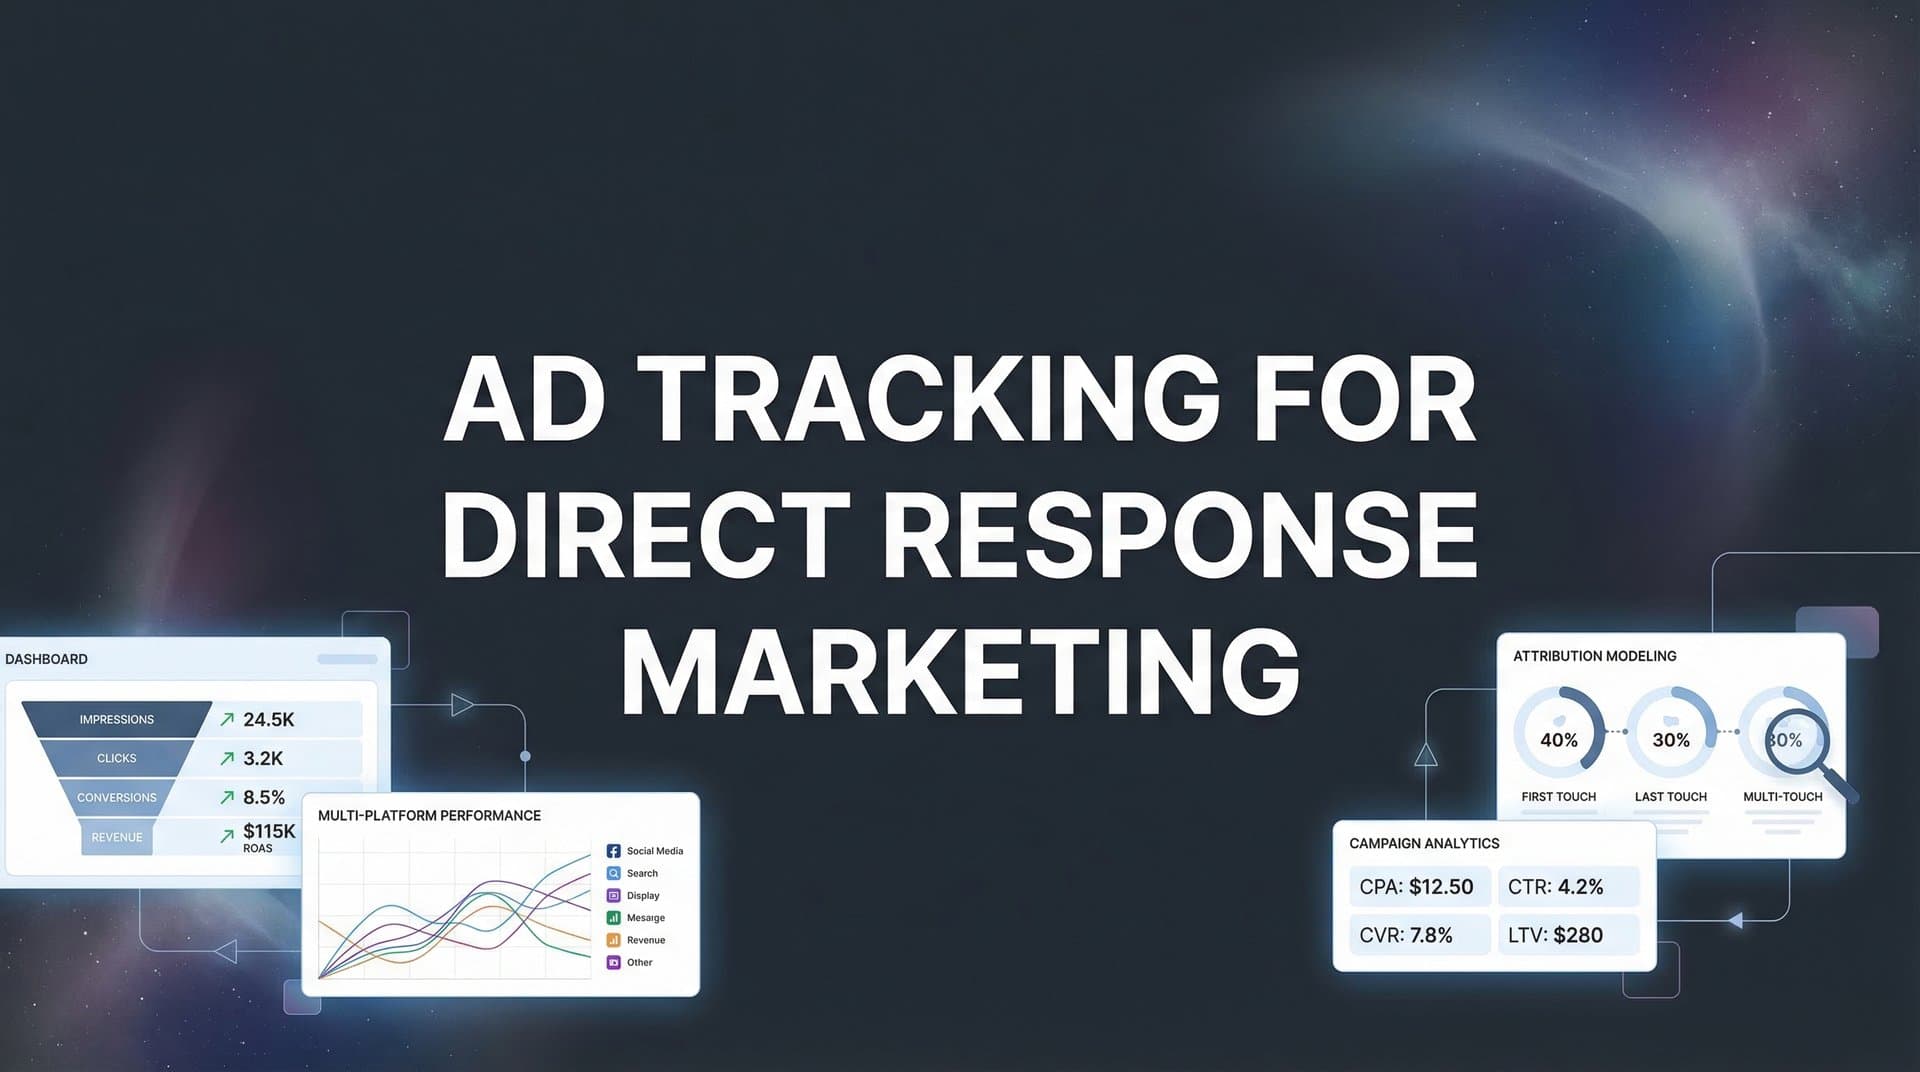
Direct response marketing lives or dies by one thing: knowing exactly which ads drive action. Unlike brand awareness campaigns where fuzzy metrics might suffice, direct response demands precision. Every dollar you spend should connect directly to a measurable outcome—a purchase, a signup, a booked demo.
Yet many marketers struggle with fragmented data, iOS tracking limitations, and the gap between ad platform reports and actual revenue. You're running campaigns across Meta, Google, and TikTok, but when you try to connect the dots between ad spend and actual sales, the numbers don't add up. Platform dashboards show one thing, your CRM shows another, and your revenue reports tell a completely different story.
This guide walks you through building a robust ad tracking system specifically designed for direct response campaigns. You'll learn how to capture every touchpoint, connect ad clicks to real conversions, and finally see which campaigns actually move the needle. Whether you're running lead generation for SaaS or driving e-commerce sales, these steps will help you track with confidence and scale what works.
The difference between guessing and knowing which ads drive revenue? A tracking system that captures the complete customer journey from first click to final purchase.
Step 1: Define Your Conversion Events and Revenue Goals
Before you install a single tracking pixel, you need absolute clarity on what you're tracking and why. This isn't about capturing every possible action on your website. It's about identifying the specific events that signal progress toward revenue.
Start by mapping your conversion funnel from top to bottom. For a SaaS company, this might look like: ad click → landing page view → demo request → demo attended → trial started → paid subscription. For e-commerce: ad click → product page → add to cart → checkout initiated → purchase completed.
Primary Conversion Events: These are the money moments. A completed purchase. A booked sales call. A signed contract. These events directly generate revenue or represent high-intent actions that reliably lead to revenue. Every primary conversion should have a clear monetary value attached.
Micro-Conversions: These are the stepping stones. Email signups. Product page views. Items added to cart. Form starts. While they don't generate immediate revenue, they indicate movement through your funnel. Track them, but don't confuse them with primary conversions when calculating ROAS.
Now comes the critical part: assigning monetary values. For direct purchases, this is straightforward—use the actual transaction amount. For lead-based businesses, calculate the average customer lifetime value and multiply by your lead-to-customer conversion rate. If 20% of demo requests become customers worth $5,000 each, assign each demo request a value of $1,000.
Document everything in a conversion taxonomy spreadsheet. List each event name, its position in the funnel, whether it's primary or micro, its assigned value, and any specific parameters you need to capture (like product category or plan type). This becomes your single source of truth when setting up marketing attribution platforms for revenue tracking.
Think of this step as building your measurement foundation. Without clear definitions, you'll end up with messy data that creates more confusion than clarity. With proper structure, every number you see later will have clear meaning.
Success indicator: You have a documented list of 3-5 primary conversion events with assigned monetary values, plus 5-8 micro-conversions that map to specific funnel stages. Your team agrees on what each event means and when it should fire.
Step 2: Implement Server-Side Tracking Infrastructure
Browser-based tracking is dying. iOS App Tracking Transparency has already gutted pixel accuracy, and privacy regulations continue tightening. If you're still relying solely on Meta Pixel or Google Tag firing in the browser, you're missing significant conversion data.
Server-side tracking solves this by capturing events on your server before they ever reach the user's browser. When someone completes a purchase, your server records the event and sends it directly to your tracking platform and ad networks. No browser restrictions. No ad blockers. No cookie deletion wiping out attribution data.
The technical setup varies by platform, but the concept remains consistent: route conversion events through your server instead of relying on client-side JavaScript alone. For many marketers, this means implementing a performance marketing tracking software solution that sits between your website, CRM, and ad platforms.
Start by identifying all the systems that capture conversion data. Your website checkout process. Your CRM when leads are created. Your payment processor when transactions complete. Your email platform when subscriptions happen. Each of these represents a conversion event source that needs to feed into your tracking infrastructure.
Modern attribution platforms can connect to these systems via API, creating a central hub that captures every conversion regardless of where it happens. When a lead fills out a form on your website, the event fires server-side. When a sales rep marks an opportunity as closed-won in your CRM, that event gets captured too. When a customer makes a repeat purchase, the full customer journey data flows through.
The critical advantage: Server-side tracking captures the complete picture even when browser-based pixels fail. A customer might browse on mobile with tracking blocked, then convert on desktop days later. Server-side tracking connects these touchpoints because it's capturing data from your systems of record, not just browser cookies.
For direct response marketers, this means finally seeing accurate conversion data. No more wondering why your CRM shows 50 new leads but Meta only reports 30. No more revenue mysteriously appearing with no attributed source. Server-side tracking closes the gap between what actually happened and what your tracking systems report.
Implementation typically involves installing tracking SDKs in your application code or connecting APIs between your platforms. The technical lift is real, but the data accuracy improvement makes it worthwhile. Many attribution platforms handle the heavy lifting, providing simple integration options that don't require extensive development resources.
Success indicator: Test a conversion event with ad blockers enabled and tracking disabled in browser settings. The event still fires and appears in your tracking dashboard. Your conversion data matches actual records in your CRM and payment systems.
Step 3: Connect Your Ad Platforms with Proper UTM Architecture
UTM parameters are the breadcrumbs that connect ad clicks to conversions. Without them, you know someone converted, but you can't trace them back to the specific campaign, ad set, or creative that brought them in. With proper UTM architecture, every click carries complete attribution data.
The key word here is "architecture." Random UTM tagging creates chaos. A structured naming convention creates clarity. Your UTM strategy needs to be consistent across every platform, every campaign, and every team member who launches ads.
Start with the five standard UTM parameters and define exactly how you'll use each one. Campaign source identifies the platform (facebook, google, tiktok). Campaign medium specifies the ad type (cpc, display, video). Campaign name represents your campaign identifier. Campaign content differentiates individual ads. Campaign term captures keywords for search campaigns.
Here's where most marketers go wrong: they build UTM parameters that make sense today but become unreadable at scale. "summer_sale_2" means nothing three months later when you're analyzing historical data. Instead, use descriptive, hierarchical naming that stays meaningful over time.
Example UTM structure for a Meta campaign: utm_source=facebook, utm_medium=paid_social, utm_campaign=q1_lead_gen_saas, utm_content=video_testimonial_v2, utm_term=marketing_managers. Six months later, you can instantly understand what this campaign was about and which creative variation drove the conversion.
Most ad platforms offer auto-tagging features that automatically append tracking parameters to your URLs. Google Ads auto-tagging adds gclid parameters. Meta has fbclid. Use these alongside your manual UTM parameters for redundancy. If one tracking method fails, you still have attribution data from the other. This approach is essential for attribution tracking across multiple campaigns.
Build UTM templates for each platform and campaign type. When launching a new Facebook lead generation campaign, your team pulls up the template, fills in the specific campaign details, and generates properly formatted URLs. This prevents typos, maintains consistency, and ensures every ad carries complete tracking data.
Don't forget about URL shorteners and redirects. If you're using Bitly or similar services, make sure your UTM parameters survive the redirect. Test the full click path from ad to landing page, verifying that parameters arrive intact.
The real power of proper UTM architecture shows up in your reporting. Instead of seeing generic "Facebook traffic," you can filter by campaign objective, creative format, and audience segment. You can compare video ads to image ads. You can identify which campaign themes drive the highest-value customers. All because your UTM structure captures granular attribution data.
Success indicator: Click through five different ads across three platforms. Check the landing page URLs and confirm all UTM parameters are present and correctly formatted. Your analytics platform receives and parses the parameters, allowing you to segment traffic by campaign, ad set, and creative.
Step 4: Sync Conversions Back to Ad Platforms
Tracking conversions in your own system is only half the equation. The other half? Feeding that conversion data back to your ad platforms so their algorithms can optimize toward actual results.
Think about how ad platform optimization works. Meta's algorithm learns from conversion signals to find more people likely to convert. Google's Smart Bidding adjusts bids based on conversion probability. TikTok's delivery system optimizes toward your conversion events. But if these platforms only see browser-based pixel data—which misses 30-40% of actual conversions—they're optimizing on incomplete information.
Conversion APIs solve this by sending server-side conversion data directly back to ad platforms. When someone converts on your website or in your CRM, that event gets transmitted to Meta, Google, TikTok, and any other platform that contributed to the journey. The platforms receive accurate conversion signals including customer value, conversion type, and attribution data.
Meta Conversions API (CAPI): Sends server-side events to Meta, supplementing or replacing pixel data. You can transmit purchase events with exact revenue amounts, lead events with form details, and custom events specific to your business. Meta combines this data with pixel information for the most complete conversion picture possible.
Google Enhanced Conversions: Uploads hashed customer data (email, phone, address) alongside conversion events, helping Google match conversions to ad clicks even when cookies are blocked. This improves both attribution accuracy and Smart Bidding performance. For deeper insights into Google campaign optimization, explore marketing analytics for Google Ads.
The setup process varies by platform but follows a similar pattern. Generate API credentials in your ad account. Configure your tracking system to send conversion events via API. Map your conversion events to platform-specific event types. Include enrichment data like customer lifetime value, product categories, and custom parameters.
Here's what makes conversion sync powerful for direct response marketing: you can send the actual revenue value, not just a generic conversion signal. When someone buys a $500 product, the platform learns that this type of customer is worth $500. When someone signs up for a free trial that converts to a $2,000 annual subscription, you can send that full value back. The algorithms optimize toward high-value conversions, not just conversion volume.
Timing matters too. The faster you sync conversions back, the quicker platforms can optimize. Set up real-time or near-real-time syncing so conversion data flows back within minutes or hours, not days. This is especially critical for campaigns with daily budgets and rapid iteration cycles.
One often-overlooked benefit: conversion sync helps platforms attribute conversions they wouldn't otherwise see. Someone clicks your ad on mobile, then converts on desktop three days later. The browser-based pixel might miss this cross-device journey. But when you sync the conversion back with matched customer data, the platform can properly attribute it to the original ad click.
Success indicator: Check your ad platform dashboards 24 hours after implementing conversion sync. You should see an increase in reported conversions as server-side data fills in gaps that browser-based tracking missed. Compare the conversion counts to your actual revenue records—they should align within 5-10%.
Step 5: Build Your Attribution Model for Direct Response
Attribution models determine how credit gets assigned when multiple touchpoints contribute to a conversion. For direct response marketing, choosing the right model is critical because it shapes which campaigns you scale and which you cut.
Last-click attribution gives 100% credit to the final touchpoint before conversion. Someone clicks a retargeting ad and purchases immediately—that retargeting campaign gets full credit. This model is simple and emphasizes bottom-of-funnel performance, but it ignores the awareness and consideration touchpoints that made the final conversion possible.
First-click attribution does the opposite, crediting the initial touchpoint that introduced the customer to your brand. That top-of-funnel Facebook campaign that generated the first click gets full credit, even if a Google search ad closed the deal weeks later. This model values customer acquisition but underweights conversion-focused campaigns.
Multi-touch attribution distributes credit across multiple touchpoints in the customer journey. Linear attribution splits credit evenly. Time-decay gives more weight to recent interactions. Position-based (U-shaped) emphasizes first and last touch while acknowledging middle touchpoints. For direct response marketers running full-funnel campaigns, a multi-touch marketing attribution platform provides the most complete picture.
Here's how to choose: Consider your typical sales cycle length and touchpoint frequency. If most customers convert within 24 hours of first click with minimal touchpoints, last-click attribution might suffice. If your sales cycle spans weeks or months with multiple ad interactions, multi-touch attribution reveals which campaigns work together to drive conversions.
Attribution windows matter just as much as the model itself. A 7-day click window means conversions get attributed to ad clicks within the past week. A 30-day window captures longer consideration cycles. Match your attribution window to your actual sales cycle. If the average customer takes 14 days from first click to purchase, a 7-day window will undercount your conversions while a 90-day window will overcount.
Don't forget about view-through attribution. Someone sees your ad but doesn't click, then converts later through direct traffic or organic search. Should that conversion count toward your ad performance? For direct response campaigns, view-through attribution is controversial—some marketers exclude it entirely, others use short windows (1-day) to capture legitimate ad influence without over-attributing.
Cross-device and cross-channel journeys complicate attribution further. A customer discovers you through a TikTok ad on mobile, researches on desktop via Google search, and converts through an email link days later. Your attribution model needs to connect these touchpoints across devices and channels to understand the complete journey. Understanding channel attribution in digital marketing helps you navigate these complexities.
Modern attribution platforms use identity resolution to match users across devices and sessions. By combining logged-in user data, device fingerprinting, and probabilistic matching, they can reconstruct customer journeys that span multiple devices and channels. This gives you a more accurate view of how your marketing mix works together.
Success indicator: Run the same conversion data through different attribution models (last-click, first-click, multi-touch) and compare results. You should see meaningful differences in campaign performance rankings. Choose the model that best reflects how your customers actually move through the funnel, then stick with it consistently for decision-making.
Step 6: Validate Your Tracking Setup and Troubleshoot Gaps
Theory meets reality in this final step. You've built a comprehensive tracking system, but does it actually work? Validation separates marketers who think they have accurate data from those who know they do.
Start with controlled test conversions. Place a test order on your website using a specific ad campaign link. Track the conversion through your entire system: Does it appear in your analytics platform? Does it sync back to the ad platform? Does the revenue amount match? Does the attribution data correctly identify the source campaign?
Run these tests across every ad platform and conversion type you're tracking. Test a Meta ad click to purchase. Test a Google search ad to lead form. Test a TikTok video ad to email signup. Each test should flow through your complete tracking stack, validating that every component works as expected. If you're running TikTok campaigns, review the best tools for tracking TikTok ads to ensure proper integration.
Next, compare tracked conversions against your source of truth: actual revenue records. Pull your conversion data from your tracking platform for the past 30 days. Pull actual sales data from your CRM, payment processor, or order management system for the same period. The numbers should match within a reasonable margin—typically 5-10% variance is acceptable given timing differences and refunds.
If you find significant discrepancies, start troubleshooting systematically. Common issues include duplicate events firing from both client-side and server-side tracking, missing UTM parameters on certain traffic sources, conversion events firing on the wrong page or action, and delayed syncing causing attribution window mismatches.
Duplicate Events: Check if your server-side and browser-based tracking are both firing the same conversion event. This inflates your conversion counts and skews your ROAS calculations. Implement deduplication logic that uses transaction IDs to ensure each conversion is counted only once.
Missing UTM Parameters: Audit your traffic sources and identify any that arrive without proper tracking parameters. This often happens with email campaigns, direct traffic misattribution, and third-party referrals. Implement default parameter handling for these edge cases.
Attribution Window Mismatches: Your tracking platform might use a 30-day attribution window while your ad platform uses 7 days. This creates reporting discrepancies that look like tracking errors but are actually configuration differences. Align your windows across platforms for consistent reporting.
Set up ongoing monitoring to catch tracking issues before they corrupt your data. Configure alerts for sudden drops in conversion volume, unusual traffic patterns, or discrepancies between expected and actual conversion counts. Weekly audits comparing platform data to actual revenue help you spot problems early. A cross-platform marketing analytics dashboard makes this monitoring process significantly easier.
Document your validation process and results. When you onboard new team members or launch new campaigns, they need to understand what "good" tracking looks like and how to verify it. A validation checklist ensures consistency as your team and campaigns scale.
Success indicator: Your tracked conversions match actual revenue records within 5% variance. Test conversions flow through your complete tracking stack successfully. You have documented processes for ongoing validation and troubleshooting. Your team trusts the data enough to make budget decisions based on it.
Putting It All Together
With these six steps complete, you now have an ad tracking system built specifically for direct response marketing. Your quick-start checklist: conversion events defined with values, server-side tracking capturing every touchpoint, UTMs consistently applied across platforms, conversion sync feeding data back to algorithms, attribution model matching your sales cycle, and validation confirming accuracy.
The real power comes from what you do next. Use this data to double down on winning campaigns and cut underperformers fast. When you know with confidence that Campaign A drives $5 ROAS while Campaign B delivers $2, the decision becomes obvious. When you can trace revenue back to specific ad creatives, you scale what works and kill what doesn't.
This level of tracking precision transforms how you approach direct response marketing. No more guessing which channels deserve more budget. No more relying on platform-reported metrics that don't match your bank account. No more wondering if your ads actually drive revenue or just vanity metrics.
The marketers who win in direct response are those who track with precision and act on accurate data. They know which ads drive revenue because they've built systems that capture the complete customer journey from first click to final purchase. They optimize based on actual results, not proxy metrics. They scale with confidence because their tracking tells them exactly what's working.
Platforms like Cometly can accelerate this entire process by connecting your ad platforms, CRM, and website in one place, giving you the complete picture of what's actually driving revenue. From server-side tracking that bypasses iOS limitations to AI-powered insights that identify your best-performing campaigns, modern attribution platforms handle the technical complexity so you can focus on optimization and growth.
Ready to elevate your marketing game with precision and confidence? Discover how Cometly's AI-driven recommendations can transform your ad strategy. Get your free demo today and start capturing every touchpoint to maximize your conversions.