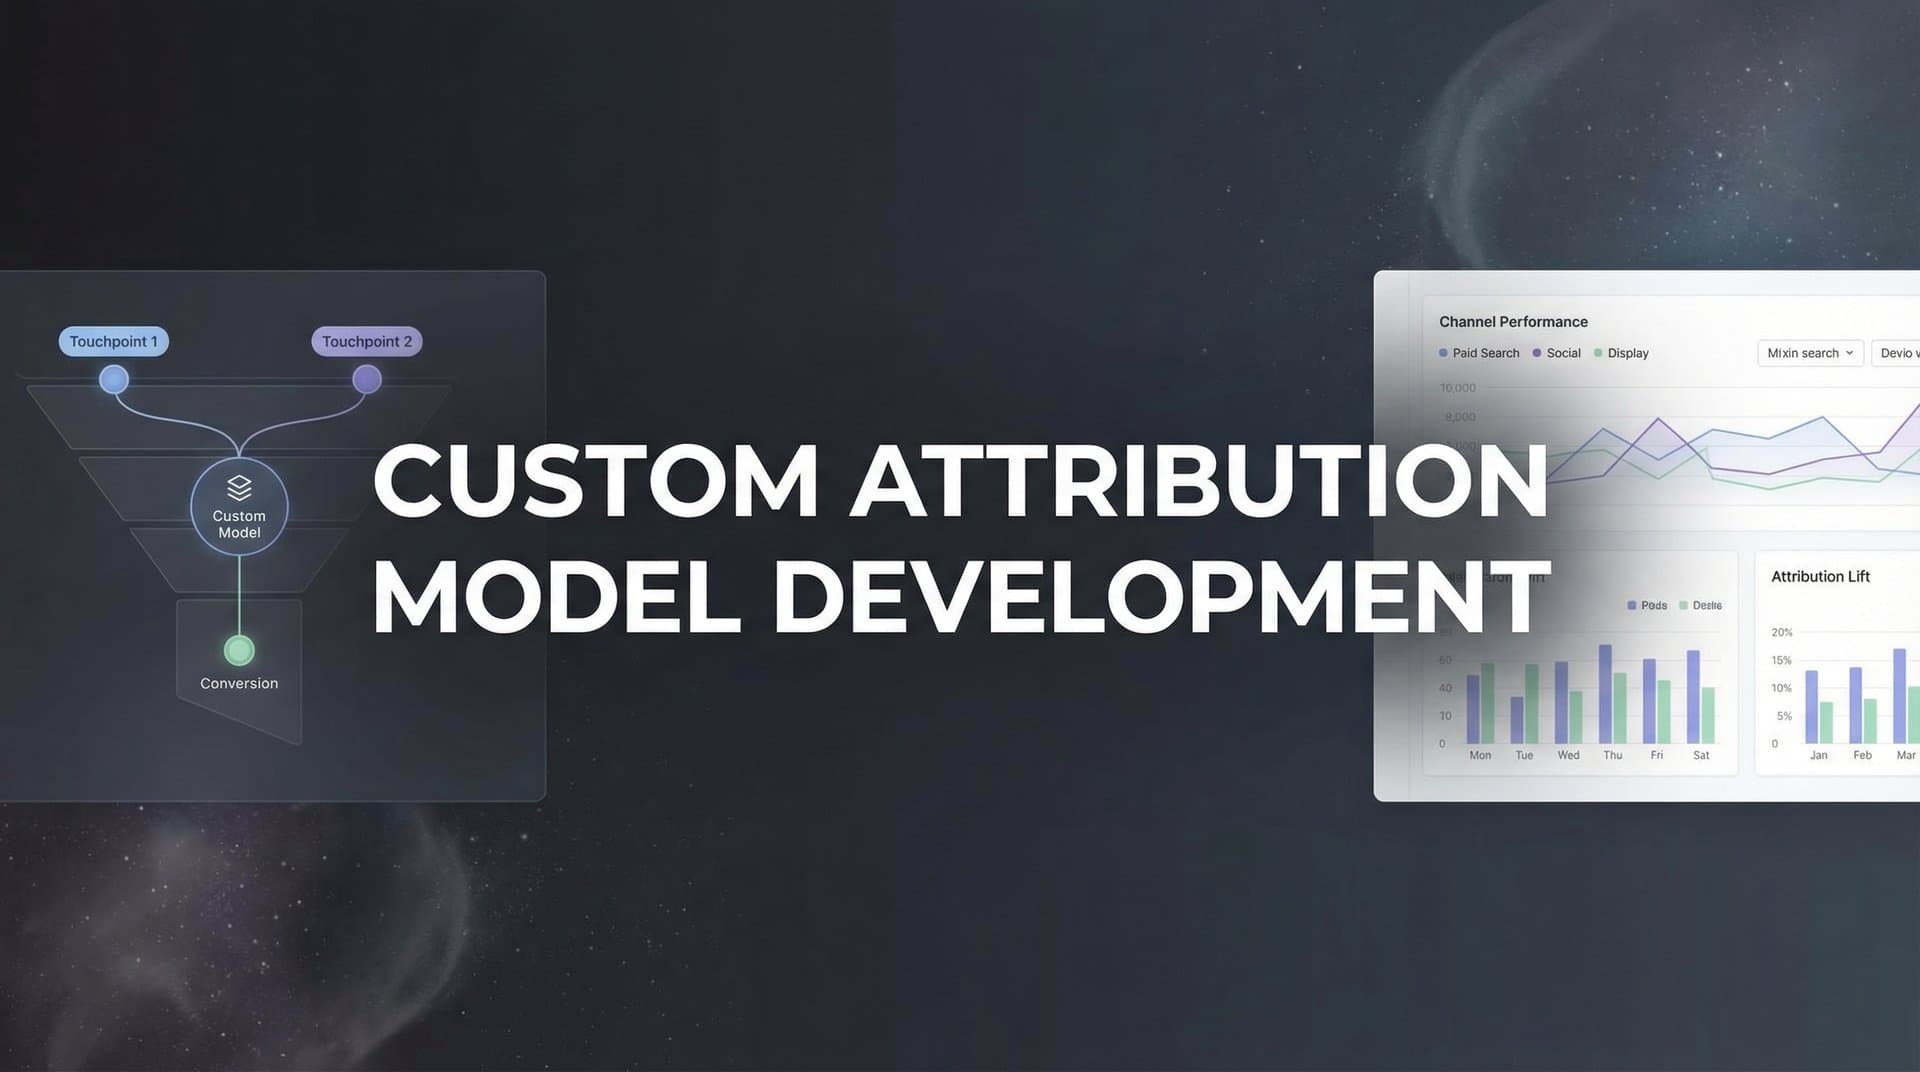
Most marketing teams rely on attribution models that were never designed for their business. First-touch gives all the credit to the initial ad click. Last-touch hands everything to the final conversion source. Linear splits credit evenly across every interaction, as if a brand awareness video and a retargeting ad deserve equal weight. These standard models exist because they're simple to implement, not because they reflect how your customers actually make buying decisions.
The problem gets worse as your marketing grows. When you're running campaigns across Meta, Google, LinkedIn, email, content marketing, and direct outreach, generic attribution formulas create blind spots. They tell you what happened, but they don't tell you what mattered. You end up cutting budgets from channels that play crucial supporting roles, or doubling down on touchpoints that look good in reports but don't actually move the needle.
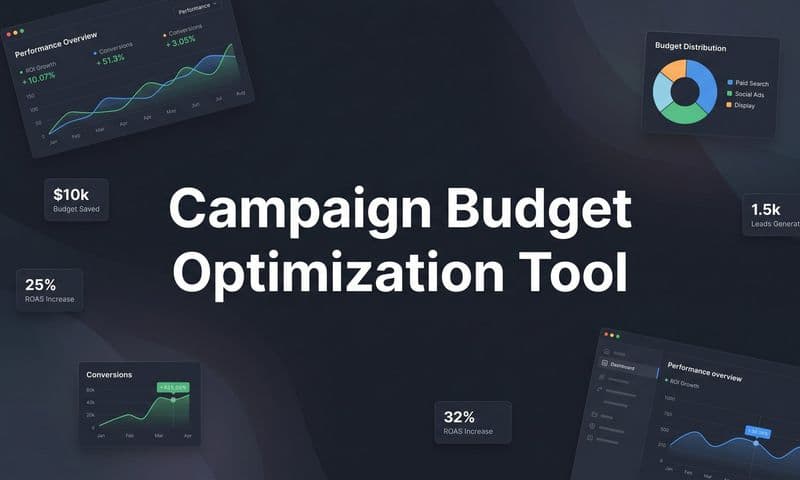
A custom attribution model changes this. Instead of forcing your data into a one-size-fits-all framework, you build a model that reflects your actual sales cycle, your channel mix, and the way your customers move from awareness to purchase. You assign credit based on what drives revenue for your business, not what a default algorithm assumes.
This guide walks you through the complete process of building a custom attribution model from scratch. You'll learn how to map every touchpoint in your customer journey, define weighting rules that align with your business reality, connect your data sources for complete visibility, implement the model using your existing infrastructure, validate that it produces actionable insights, and iterate as your marketing evolves. By the end, you'll have a framework that gives you confidence in every budget decision you make.
Step 1: Map Your Complete Customer Journey
Before you can assign credit intelligently, you need to see the full picture of how customers move toward conversion. This means identifying every touchpoint across paid ads, organic search, social media, email, content, direct traffic, and offline interactions that contribute to a sale.
Start by pulling conversion path data from your analytics platform. Most tools can show you the sequence of interactions that led to each conversion. Export data for your highest-volume conversion paths over the past 90 days. Look for patterns: Do most customers interact with three touchpoints before converting? Five? Ten? Are certain channels consistently present early in the journey, while others appear closer to purchase?
Next, segment your journey data by customer type, product category, or campaign goal. B2B journeys often look different from B2C. High-ticket purchases involve more touchpoints than impulse buys. Enterprise deals might include multiple decision-makers interacting with different content assets. By segmenting, you uncover patterns that a blended view would hide.
Document typical journey lengths for each segment. If your average B2B customer interacts with seven touchpoints over 45 days before converting, your attribution model needs to account for that timeline. If your e-commerce customers convert after two or three interactions within a week, your weighting logic should reflect that shorter cycle.
Create a visual map showing the most common paths to conversion. This doesn't need to be complex. A simple flowchart showing paid search leading to blog content, then retargeting ads, then demo requests works. The goal is to make patterns visible so you can design weighting rules that make sense. Understanding how to value the customer journey helps you identify which touchpoints deserve the most attention.
Your success indicator for this step: you should be able to trace at least 80% of your conversions through identifiable touchpoint sequences. If large portions of your conversion paths show up as "direct" or "unknown," you have data collection gaps that need fixing before you build your model.
Step 2: Define Your Attribution Goals and Weighting Logic
A custom attribution model only works if it answers a specific business question. Are you trying to optimize budget allocation across channels? Compare the effectiveness of different campaign types? Understand which content assets drive pipeline? Your weighting logic should align with what you're trying to learn.
Start by clarifying your primary goal. If you need to decide where to shift budget next quarter, your model should highlight which channels contribute most to revenue, not just conversions. If you're evaluating whether brand awareness campaigns justify their cost, your model needs to give appropriate credit to early-stage touchpoints that don't directly convert but influence later decisions.
Choose a weighting approach that matches your journey complexity. Position-based models give more credit to first and last touchpoints, with less to middle interactions. This works well when you know that initial awareness and final conversion moments matter most. Time-decay models give more weight to recent touchpoints, assuming interactions closer to purchase have more influence. This fits businesses with short sales cycles where momentum matters. Reviewing the types of attribution models in digital marketing can help you select the right foundation.
For longer, more complex journeys, consider hybrid approaches. You might assign 30% credit to the first touchpoint, 40% to the last, and split the remaining 30% across middle interactions. Or you might use time-decay for the final 30 days of the journey, but give bonus weight to specific high-value interactions like demo requests or pricing page views.
The most common mistake at this stage is overcomplicating your weighting rules before you have enough data to validate them. Start with a simple framework you can explain in one sentence. Test it against historical data. Refine based on what you learn. A model that's 80% accurate and fully understood by your team beats a mathematically sophisticated model that no one trusts.
Document your weighting logic clearly. Write down exactly how credit flows between touchpoints, including edge cases like same-day conversions or journeys with only one interaction. This documentation becomes your reference point when results look unexpected or when team members question why certain channels receive the credit they do.
Set thresholds for when weights should adjust. If you add a new channel, you'll need to incorporate it into your logic. If your sales cycle shortens or lengthens significantly, your time-decay parameters might need updating. Build flexibility into your model from the start so iteration doesn't require rebuilding everything.
Step 3: Connect Your Data Sources for Full Visibility
Your custom attribution model is only as good as the data feeding it. If you're missing touchpoints because of tracking gaps, your model will assign credit incorrectly no matter how sophisticated your weighting logic is.
Start by integrating all your ad platforms into a unified tracking system. Meta, Google Ads, LinkedIn, TikTok, and any other paid channels should send conversion data to a central location where you can see the complete journey. This usually means implementing tracking pixels, conversion APIs, or server-side tracking that captures events regardless of browser restrictions.
Server-side tracking has become essential for accurate attribution. Browser-based tracking misses conversions when users block cookies, switch devices, or interact across different browsers. Privacy changes in iOS and browser updates have made client-side tracking increasingly unreliable. Many teams have found their attribution model broken after iOS updates, making server-side solutions critical. Server-side tracking captures events at the infrastructure level, giving you visibility into touchpoints that traditional analytics would miss.
Connect your CRM system to your marketing data. When a lead converts to a customer, your attribution model needs to trace that revenue back through every touchpoint. If your CRM and marketing platforms don't talk to each other, you're attributing based on leads or form fills instead of actual revenue, which skews your understanding of what drives business outcomes.
Standardize your UTM parameters and naming conventions across all campaigns. If one team uses "utm_source=facebook" and another uses "utm_source=meta," your data fragments. If campaign names follow inconsistent formats, segmentation becomes impossible. Create a UTM taxonomy and enforce it across every channel and team member. Proper customer attribution tracking depends on consistent data collection practices.
Test your tracking setup by running controlled conversions. Click through your own ads, interact with content, and complete conversions while monitoring whether every touchpoint gets captured correctly. Check that data flows from ad platforms to analytics to CRM without dropping interactions along the way.
Your success indicator: every conversion should be traceable through multiple touchpoints with complete data integrity. If you see large numbers of conversions attributed to "direct" or "unknown," you still have tracking gaps to fix before your custom model can be reliable.
Step 4: Build and Configure Your Custom Model
With your journey mapped, weighting logic defined, and data sources connected, you're ready to implement your custom attribution model. This step translates your framework into actual configuration within your analytics or attribution platform.
Most advanced analytics platforms let you create custom attribution models by defining rules for how credit distributes across touchpoints. You'll typically specify weights for different positions in the journey, time-decay parameters, or conditional logic based on touchpoint types. Input the weighting rules you documented in Step 2, translating your framework into the platform's configuration interface.
Apply your model to historical data as a test run. Pull conversion data from the past 90 days and run your custom model alongside standard models like last-touch or linear. Compare the results. Your custom model should show different credit distribution, but the differences should make sense based on your weighting logic. If results look wildly inconsistent or if certain channels get zero credit when you know they contribute, revisit your configuration. A thorough comparison of attribution models helps you understand how your custom approach differs from standard options.
Create segments to compare model performance across different customer cohorts. Run your attribution model separately for high-value customers versus low-value, or for different product lines, or for customers acquired through different primary channels. This reveals whether your weighting logic works consistently or if you need different models for different segments.
Set up side-by-side comparisons between your custom model and at least one standard model. This benchmark helps you explain to stakeholders why your custom approach matters. When you can show that last-touch gives 60% credit to retargeting ads while your custom model shows they actually contribute 25%, with the remaining credit going to earlier awareness touchpoints, the value becomes clear.
Document your model configuration in detail. Capture screenshots of your settings, write down every parameter, and note any platform-specific quirks or limitations you encountered. This documentation protects you when someone questions results months later or when you need to replicate the model in a different tool.
Step 5: Validate Your Model Against Business Outcomes
A mathematically sound attribution model means nothing if it doesn't align with business reality. Validation ensures your model produces insights that match what your sales team sees, what your revenue data shows, and what your marketing instincts tell you about channel performance.
Start by comparing attributed revenue to actual revenue by channel. Your model should show total attributed revenue that's reasonably close to your actual revenue. If your custom model attributes $500,000 to paid search but your total revenue was $400,000, something's wrong with your credit distribution logic. Small discrepancies are normal, but large gaps indicate configuration errors. Understanding common attribution model accuracy problems helps you identify what might be causing discrepancies.
Check for anomalies where credit seems misaligned with known performance. If you know from sales conversations that most enterprise customers discover you through organic content, but your model shows minimal credit to blog posts and SEO, your weighting logic might be undervaluing early-stage touchpoints. If a channel that barely drives traffic gets disproportionate credit, investigate whether tracking issues are inflating its importance.
Gather feedback from your sales and marketing teams. Show them the attribution results and ask whether the insights match their experience. Sales teams often have qualitative knowledge about what influences deals. If they consistently hear prospects mention webinars but your model shows webinars contributing minimally, you might need to adjust how you weight educational content.
Run your model on a known successful campaign with clear outcomes. If you launched a campaign that definitively drove a revenue spike, your attribution model should reflect that. If it doesn't, you have a validation problem that needs fixing before you trust the model for decision-making.
Your success indicator: model insights should lead to testable hypotheses you can act on. If your model suggests shifting budget from channel A to channel B, you should feel confident enough in the data to actually make that change. If you're hesitant to act on the insights, your model needs more refinement.
Step 6: Iterate and Optimize Based on Results
Attribution modeling is not a one-time setup. Your marketing mix changes. New channels emerge. Customer behaviors shift. Your model needs to evolve alongside your business or it becomes outdated and unreliable.
Schedule regular reviews to assess model accuracy. Quarterly reviews work well for most businesses. Look at whether attribution patterns have changed, whether new channels need incorporation, and whether your weighting logic still reflects how customers actually convert. If your sales cycle has shortened from 60 days to 30, your time-decay parameters might need adjustment.
Adjust weights when you add new channels or significantly change your marketing mix. If you start running podcast ads or launch a referral program, these touchpoints need to fit into your attribution framework. Define how they should be weighted relative to existing channels based on where they typically appear in the customer journey. Understanding marketing channel attribution modeling helps you incorporate new channels effectively.
Use AI-powered attribution modeling to identify optimization opportunities your manual analysis might miss. Advanced attribution platforms can analyze patterns across thousands of conversion paths and surface insights about which touchpoint combinations drive the highest value customers, or which sequence of interactions leads to fastest conversions. These insights help you refine both your attribution model and your actual marketing strategy.
Document every change you make to your model. Track when you adjusted weights, why you made the change, and what impact it had on attribution results. This change log prevents confusion when results shift and provides historical context for future optimization decisions.
Test model variations before fully committing to major changes. If you're considering a significant shift in weighting logic, run the new version alongside your current model for a month. Compare results. Make sure the new approach produces more actionable insights before you switch completely.
Putting It All Together
Building a custom attribution model requires upfront investment in mapping your customer journey, defining clear weighting logic, and connecting your data sources for complete visibility. But the payoff is significant. You gain clarity on which touchpoints actually drive revenue, not just which ones happen to be first or last. You make budget decisions based on your business reality instead of generic formulas that were never designed for your specific sales cycle and channel mix.
Use this checklist to track your progress: Journey mapped with all touchpoints identified. Weighting logic defined and documented. Data sources connected with server-side tracking in place. Model configured and tested against historical data. Validation complete with team alignment. Iteration schedule established.
Start with your highest-volume conversion paths. These give you the most data to validate your assumptions and refine your approach. Don't try to build the perfect model on day one. Build a simple model that you understand completely, test it against real outcomes, and refine as you learn. The goal is not mathematical perfection, but a model that gets better over time and gives you confidence in every budget decision you make.
The most successful custom attribution models share one trait: they're built on complete data. When you capture every touchpoint across all channels, from initial awareness through final conversion and beyond, your model has the raw material it needs to assign credit accurately. Server-side tracking ensures you're not missing interactions that browser-based tracking would drop. CRM integration connects marketing touchpoints to actual revenue. Standardized UTM parameters keep your data clean and segmentable.
As your model matures, you'll discover insights that standard attribution would never reveal. You might find that certain content assets consistently appear in high-value customer journeys even though they don't directly convert. You might learn that specific touchpoint sequences predict faster sales cycles or higher lifetime value. These insights let you optimize not just budget allocation, but your entire marketing strategy.
Ready to elevate your marketing game with precision and confidence? Discover how Cometly's AI-driven recommendations can transform your ad strategy. Get your free demo today and start capturing every touchpoint to maximize your conversions.