You're spending thousands on Facebook ads, Google Shopping campaigns, and TikTok promotions for your Shopify store. Your dashboard shows clicks, impressions, and "conversions"—but when you check your actual sales, the numbers don't match. Some purchases appear in Shopify but not in your ad platforms. Others show up twice. And you're left wondering: which campaigns actually made money?
This disconnect isn't just frustrating—it's expensive. When tracking breaks down, you can't tell which ads drive revenue and which burn budget. You might kill profitable campaigns or double down on losers. With iOS privacy updates blocking cookies, ad blockers filtering pixels, and customers switching devices mid-journey, traditional browser-based tracking often misses a significant portion of conversions.
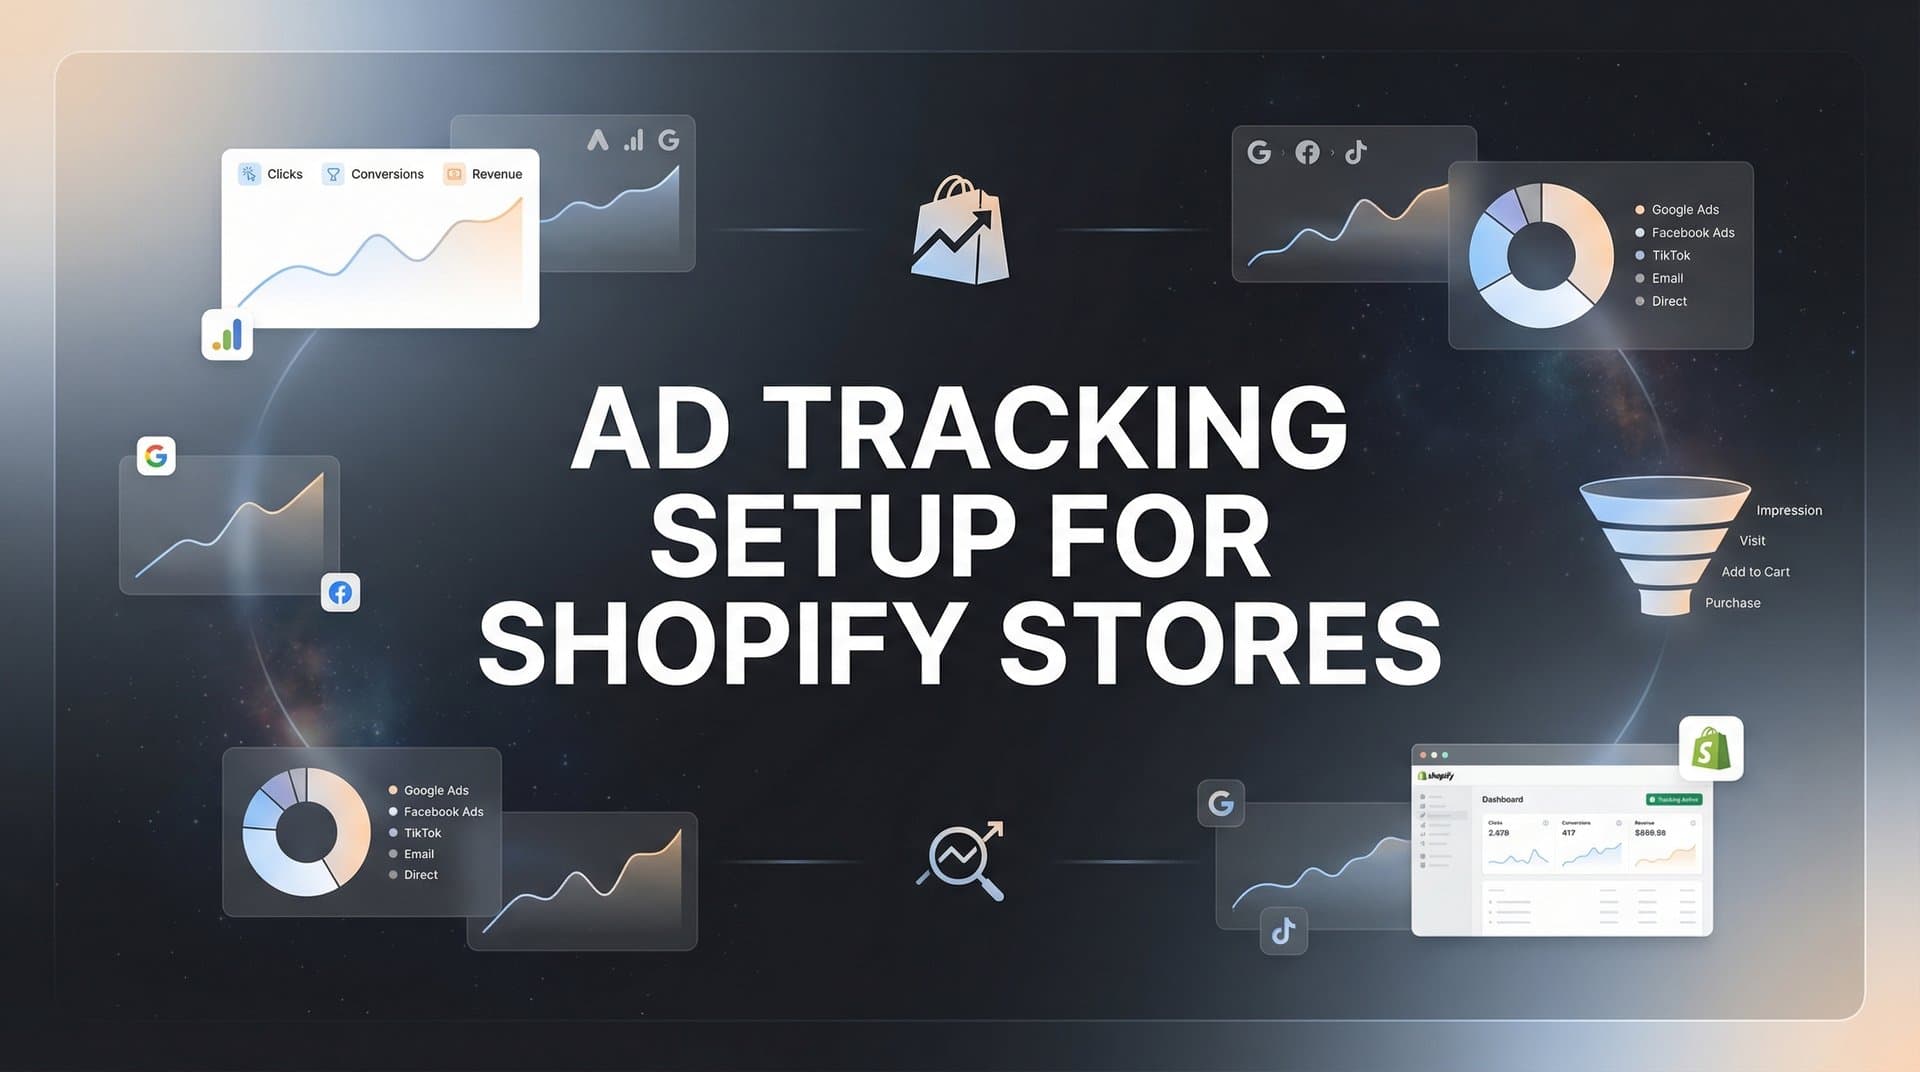
The solution isn't complicated, but it does require a systematic approach. This guide walks you through building a comprehensive tracking system for your Shopify store—from auditing what you have now to implementing server-side tracking that captures the full customer journey. You'll learn exactly which pixels to install, how to configure them correctly, and how to validate that everything works before you spend another dollar on ads.
Whether you're managing a $500 monthly ad budget or scaling to six figures, accurate tracking transforms guesswork into data-driven decisions. Let's build a system that shows you precisely which ads generate revenue.
Step 1: Audit Your Current Tracking Setup and Identify Gaps
Before adding new tracking, you need to understand what's already installed and where it's failing. Many Shopify stores accumulate tracking codes over time—some working, some broken, some firing duplicate events that skew your data.
Start by logging into your Shopify admin and navigating to Settings > Apps and Sales Channels. Review every app that has access to your store's data. Look specifically for Facebook & Instagram, Google & YouTube, TikTok, Pinterest, and any third-party tracking or analytics apps. Make a list of what's currently connected.
Next, visit your live storefront and open your browser's developer tools (right-click anywhere and select "Inspect" or press F12). Navigate to the Network tab, then filter by "XHR" or "Fetch" requests. As you browse your store—viewing products, adding items to cart, and reaching checkout—watch for tracking requests being sent to Facebook (facebook.com/tr), Google (google-analytics.com/collect), and other platforms.
Install browser extensions that make this easier. The Meta Pixel Helper for Chrome shows you exactly which Facebook events fire on each page. Google Tag Assistant does the same for Google tags. These tools reveal not just what's installed, but whether it's working correctly.
Now compare your ad platform data against reality. Pull your conversion reports from Facebook Ads Manager, Google Ads, and any other platforms you use. Note the number of purchases each platform claims to have driven over the past 30 days. Then check your actual Shopify orders for the same period under Analytics > Reports > Sales over time. Understanding Shopify reporting and Google Analytics for ad tracking helps you identify where discrepancies originate.
The gap between these numbers tells you how broken your tracking is. If Facebook reports 100 conversions but you only had 80 total orders, something's firing duplicate events. If platforms report 50 conversions but you had 100 orders, you're missing half your attribution data. Document these discrepancies—they're your baseline for measuring improvement.
Common red flags include: purchase events firing on the thank-you page but not matching order totals, the same conversion counted by multiple pixels, tracking codes in your theme's code AND in apps (creating duplicates), or conversion values that don't match actual order amounts. Each of these issues sends bad data to ad platforms, which then optimize toward the wrong signal. Many store owners fall into the common pitfalls of Shopify tracking without realizing it.
Step 2: Install and Configure Native Ad Platform Pixels
With a clear picture of what's broken, start fresh with proper pixel installation. Shopify's native sales channels provide the cleanest way to connect major ad platforms without coding or theme edits.
For Meta (Facebook and Instagram), go to Settings > Apps and Sales Channels in your Shopify admin, then click "Add app" and search for "Facebook & Instagram by Meta." Install it and follow the connection flow. You'll link your Facebook Business Manager account, select your ad account and pixel, and grant permissions. This integration automatically installs the Meta Pixel and configures standard ecommerce events: PageView, ViewContent, AddToCart, InitiateCheckout, and Purchase.
If you're evaluating vendors, our Shopify ad variation generator breakdown can help.
The native channel handles event parameters correctly—sending product IDs, values, and currency without manual configuration. It also implements Automatic Advanced Matching, which hashes customer email addresses and phone numbers to improve attribution when users are logged in.
For Google, install the "Google & YouTube" sales channel the same way. Connect your Google Ads account and link Google Analytics 4. Our guide on how to set up Google Ads conversion tracking for Shopify walks through this process in detail. This sets up the Google Ads conversion tag and GA4 measurement, tracking key ecommerce events automatically. Configure your conversion actions in Google Ads to match your business goals—typically focusing on purchases, but potentially including add-to-cart or begin-checkout for remarketing.
TikTok requires installing their official "TikTok" app from the Shopify App Store. Connect your TikTok Ads Manager account and the app installs the TikTok Pixel with standard events configured. Similarly, Pinterest offers a native integration through their "Pinterest" app that sets up the Pinterest Tag. For comprehensive TikTok measurement, explore the best tools for tracking TikTok ads beyond native pixels.
After installing each pixel, verify it's working. Use the Meta Pixel Helper to confirm Facebook events fire correctly. Visit a product page—you should see ViewContent. Add to cart—AddToCart should fire with the correct product details and value. Proceed to checkout—InitiateCheckout fires. Complete a test purchase using Shopify's Bogus Gateway (a test payment method)—Purchase should fire with the exact order total.
Check Google's setup using Google Tag Assistant. You should see both Google Ads conversion tracking and GA4 events firing. For GA4, verify that ecommerce events include product details, transaction IDs, and revenue values. Our GA4 setup guide for Shopify covers the verification process thoroughly.
The key advantage of native integrations is that Shopify maintains them. When platforms update their tracking requirements or Shopify changes its checkout flow, these connections update automatically. You avoid the technical debt of custom code that breaks during theme updates.
Step 3: Implement Server-Side Tracking to Capture Lost Conversions
Browser-based pixels have a fundamental problem: they rely on the customer's device to send data. When ad blockers filter requests, iOS privacy settings block cookies, or customers close their browser before the pixel fires, that conversion disappears from your reporting. For many stores, this means 20-40% of actual purchases never get attributed to the ads that drove them.
Server-side tracking solves this by sending conversion data directly from your server to ad platforms—bypassing browser limitations entirely. Your Shopify store registers the purchase, then your server tells Facebook, Google, and other platforms about it, regardless of what's happening in the customer's browser. Understanding pixel tracking alternatives for iOS users is essential given the ongoing privacy changes.
Meta's Conversions API (CAPI) is the server-side companion to the Meta Pixel. While the pixel fires from the browser, CAPI sends the same events from your server. When both work together, Meta deduplicates events using the event_id parameter, keeping one record while filling in data the other method missed. This redundancy dramatically improves attribution accuracy.
Setting up CAPI manually requires technical expertise—generating access tokens, configuring server endpoints, and handling event formatting. However, Shopify's native Facebook & Instagram channel includes automatic CAPI implementation. When you install it, Shopify sends server-side events to Meta alongside browser pixel events. Verify this is active by checking your Meta Events Manager—you should see both "Browser" and "Server" as event sources.
Google offers Enhanced Conversions, which works similarly. It sends hashed customer data (email, phone, address) from your server to improve conversion matching when cookies fail. Enable this in Google Ads under Tools > Conversions > Settings. The Google & YouTube sales channel supports Enhanced Conversions automatically when you enable the setting.
For stores running multiple ad platforms or needing more sophisticated attribution, platforms like Cometly automate server-side tracking across all channels. Rather than configuring CAPI, Enhanced Conversions, and other platform-specific solutions separately, attribution platforms connect to your Shopify store once and handle server-side event delivery to every ad platform you use.
This approach provides several advantages. First, it captures conversions that browser tracking misses—recovering attribution for customers using ad blockers or privacy-focused browsers. Second, it sends enriched data. When someone purchases, the server knows their full order history, lifetime value, and CRM status—context that browser pixels can't access. Third, it's more reliable. Server-side events aren't affected by page load issues, JavaScript errors, or customers closing tabs before pixels fire.
The result is that ad platforms receive more complete, accurate data. Their algorithms can better identify which campaigns drive valuable customers, leading to improved targeting and optimization. You stop leaving money on the table by missing conversions that actually happened.
Step 4: Set Up UTM Parameters and First-Party Data Collection
Pixels tell you someone converted, but UTM parameters tell you exactly which campaign, ad, and keyword brought them to your store. Without consistent UTM tagging, you can't compare performance across platforms or understand the full customer journey.
Start by creating a UTM naming convention that you'll use across every platform. The five standard parameters are: utm_source (the platform), utm_medium (the channel type), utm_campaign (the specific campaign), utm_term (for keywords), and utm_content (for ad variations). Consistency is critical—decide on lowercase, underscores vs. hyphens, and abbreviations, then stick to it.
For example: utm_source=facebook, utm_medium=paid_social, utm_campaign=spring_sale_2026, utm_content=carousel_ad_v2. Never mix formats like "Facebook" and "facebook" or "paid-social" and "paid_social"—inconsistency fragments your data.
Build UTM templates for each ad platform. Most platforms let you add UTM parameters automatically to destination URLs. In Facebook Ads Manager, edit your ad's destination URL to include parameters: https://yourstore.com/products/example?utm_source=facebook&utm_medium=paid_social&utm_campaign={{campaign.name}}&utm_content={{ad.name}}. Facebook's dynamic parameters automatically populate campaign and ad names.
Google Ads offers ValueTrack parameters. Use: utm_source=google&utm_medium=cpc&utm_campaign={campaign}&utm_term={keyword}&utm_content={creative}. Google automatically fills in the actual values when someone clicks.
For email campaigns, your ESP should support UTM parameters. Tag every link with utm_source=klaviyo (or whatever platform you use), utm_medium=email, and utm_campaign matching your email campaign name.
The challenge is that Shopify doesn't natively store UTM parameters with orders. When someone clicks an ad with UTM tags, those parameters appear in the URL—but when they complete checkout, that data disappears unless you capture it. You need to grab UTM values when users arrive and associate them with their eventual purchase. Implementing first-party data tracking ensures you maintain attribution even as third-party cookies disappear.
Several Shopify apps solve this, like Littledata or Elevar. They capture UTM parameters on arrival, store them in cookies, and attach them to the order when someone purchases. This lets you see in your order details exactly which campaign drove each sale.
Alternatively, attribution platforms like Cometly automatically capture and store UTM data alongside every touchpoint. They track the full journey—first click, middle touches, and final click—then connect it all to the eventual purchase and customer lifetime value.
First-party cookies are essential here. They persist across sessions, so when someone clicks your ad on Monday but purchases on Friday, you maintain the connection. Configure your tracking to set first-party cookies that survive 30-90 days, capturing longer consideration cycles common in ecommerce.
Step 5: Connect Your CRM and Backend Systems for Full-Funnel Tracking
A purchase isn't the end of the customer journey—it's the beginning of the relationship. If your tracking stops at checkout, you're missing critical data that affects which ads actually drive profitable customers.
Consider two customers who both purchased after clicking the same Facebook ad. Customer A returns the product three days later. Customer B becomes a repeat buyer, purchasing four more times over the next six months. If you only track initial purchases, both conversions look identical. But one cost you money while the other drove significant profit.
Connecting your CRM and email platform to your attribution system reveals this difference. Start by integrating Shopify with your email service provider—Klaviyo, Mailchimp, or whatever you use. This typically happens through native integrations or apps that sync customer data, order history, and lifecycle stage.
Configure your email platform to send engagement data back. When someone makes a repeat purchase, that event should flow back to your attribution system and ideally to your ad platforms. Meta and Google both accept offline conversion uploads that let you report purchases that happened outside the browser—in-store sales, phone orders, or subscription renewals. Understanding marketing attribution platforms for revenue tracking helps you connect these data streams effectively.
Set up customer lifetime value (LTV) tracking. Calculate the total revenue each customer generates over time, then feed this back to ad platforms. Meta's Conversions API and Google's Enhanced Conversions both accept custom parameters. Instead of just reporting a $50 purchase, you can send that this customer has $250 LTV after six months.
This data transforms ad optimization. Instead of optimizing for any purchase, platforms can optimize for high-LTV customers. The algorithm learns patterns—maybe customers who engage with video ads have higher repeat purchase rates, or certain demographics become brand advocates. Without LTV data, the algorithm treats all conversions equally.
Track refunds and returns accurately. When someone returns a product, send a negative conversion value to your ad platforms. This prevents you from optimizing toward campaigns that drive high return rates. Some attribution platforms automate this—when a Shopify order status changes to "refunded," they automatically update the conversion value across all platforms.
Sync offline conversions too. If you run both online and retail stores, or if customers call to place orders, those conversions need attribution. Use your CRM to match phone orders or in-store purchases back to the customer record, then upload those conversions with the original UTM parameters or click IDs.
The goal is unified data. Every system—Shopify, your CRM, email platform, and ad platforms—should share a consistent view of customer value. When they do, you can confidently increase spend on campaigns that drive profitable customers rather than just one-time buyers.
Step 6: Validate Your Tracking and Establish Baseline Metrics
With everything configured, you need to verify it actually works before trusting it with budget decisions. Broken tracking that reports false positives is worse than no tracking—it actively misleads you.
Run a complete test purchase. Visit your store in an incognito browser window, click through a real ad (or simulate one with UTM parameters in the URL), browse products, add items to cart, and complete checkout using Shopify's Bogus Gateway test payment method. This simulates a real customer journey without charging a real card.
As you go, watch the tracking fire. Use Meta Pixel Helper to confirm each event—ViewContent on the product page, AddToCart when you add items, InitiateCheckout when you start checkout, and Purchase when you complete the order. Check that values match: if you added a $50 product, the AddToCart event should show value: 50.
Verify the purchase appears everywhere it should. Check Facebook Events Manager—you should see the Purchase event with the correct value. Check Google Ads conversions. Check your analytics platform. If you're using an attribution tool like Cometly, verify the journey appears there with all touchpoints captured. Following best practices for tracking conversions accurately ensures your validation process catches issues before they impact decisions.
Now compare platforms against reality. Pull conversion reports from each ad platform for the past 7 days. Compare the total reported conversions against your actual Shopify orders for the same period. Calculate the attribution gap: if platforms report 80 conversions but you had 100 orders, you have a 20% gap. If they report 120 conversions but you had 100 orders, you have duplicate tracking inflating numbers by 20%.
Document your baseline metrics. Record your current cost per acquisition (CPA) from each platform, your blended CPA across all channels, and your overall return on ad spend (ROAS). These numbers will shift once tracking improves—typically, you'll see more conversions attributed as server-side tracking captures previously missed events, which lowers your reported CPA and increases ROAS.
Set up a tracking validation dashboard. Create a simple spreadsheet or use a tool that compares daily: total Shopify orders, total conversions reported across all platforms, and the variance between them. Check this weekly. If variance suddenly increases, investigate immediately—something broke.
Create alerts for tracking failures. Many attribution platforms offer anomaly detection that notifies you when event volume drops unexpectedly. If you normally see 50 Purchase events daily but suddenly see 5, you want to know immediately rather than discovering it after wasting a week's budget.
Test regularly, especially after making changes. Every time you update your theme, install a new app, or modify checkout settings, run another test purchase. Shopify updates can break custom tracking code, and app conflicts can cause pixels to stop firing.
Your Ad Tracking Setup Checklist and Next Steps
You now have the framework for tracking that reveals which ads actually drive revenue. Let's recap what you've built: native platform pixels installed through Shopify's sales channels, server-side tracking configured to capture conversions browsers miss, UTM parameters standardized across every campaign, CRM and email systems connected for full-funnel visibility, and validation processes to catch issues before they waste budget.
This foundation changes how you scale. Instead of guessing which campaigns work, you have data showing exactly where revenue comes from. You can confidently increase spend on profitable campaigns while cutting losers. You stop leaving money on the table by missing conversions that actually happened. Learn how to grow your Shopify store with better ad tracking and data-driven decisions once your foundation is solid.
The difference between stores that scale profitably and those that burn through budget often comes down to tracking accuracy. When ad platforms receive complete, accurate data, their algorithms find better customers. When you can see the full customer journey, you make smarter strategic decisions. When you track lifetime value instead of just initial purchases, you optimize for profit rather than vanity metrics.
Start with the basics if you're just beginning: install native pixels correctly, verify they fire on test purchases, and document your baseline metrics. Layer in server-side tracking next—it's the biggest improvement for most stores, recovering conversions that browser-based pixels miss. Then standardize UTM parameters and connect your backend systems for complete attribution.
Continuously validate your data. Check weekly that reported conversions align with actual orders. Run test purchases after any site changes. Monitor for anomalies that signal tracking issues. The best tracking system is one you trust enough to base budget decisions on.
As your tracking matures, you'll unlock advanced capabilities. Multi-touch attribution shows the full journey, not just last-click. Cohort analysis reveals which acquisition sources drive the highest LTV. Incrementality testing measures true ad impact beyond correlation. But all of this requires the foundation you've built here—accurate, comprehensive tracking that captures every touchpoint.
When you know exactly which ads drive revenue, scaling becomes a matter of math rather than guesswork. You can confidently invest in channels that work and cut those that don't. You optimize campaigns based on profit, not proxy metrics. You build a sustainable acquisition engine rather than gambling with ad spend.
Ready to elevate your marketing game with precision and confidence? Discover how Cometly's AI-driven recommendations can transform your ad strategy—Get your free demo today and start capturing every touchpoint to maximize your conversions.