
Browser-based tracking is becoming increasingly unreliable. With iOS privacy updates, ad blockers, and cookie restrictions affecting data accuracy, many marketers find themselves making decisions based on incomplete information.
The gap between what your analytics shows and what actually happened can be substantial. Ad blockers prevent pixels from firing. Safari's Intelligent Tracking Prevention limits cookie duration. iOS users who opt out of tracking simply disappear from your conversion data.
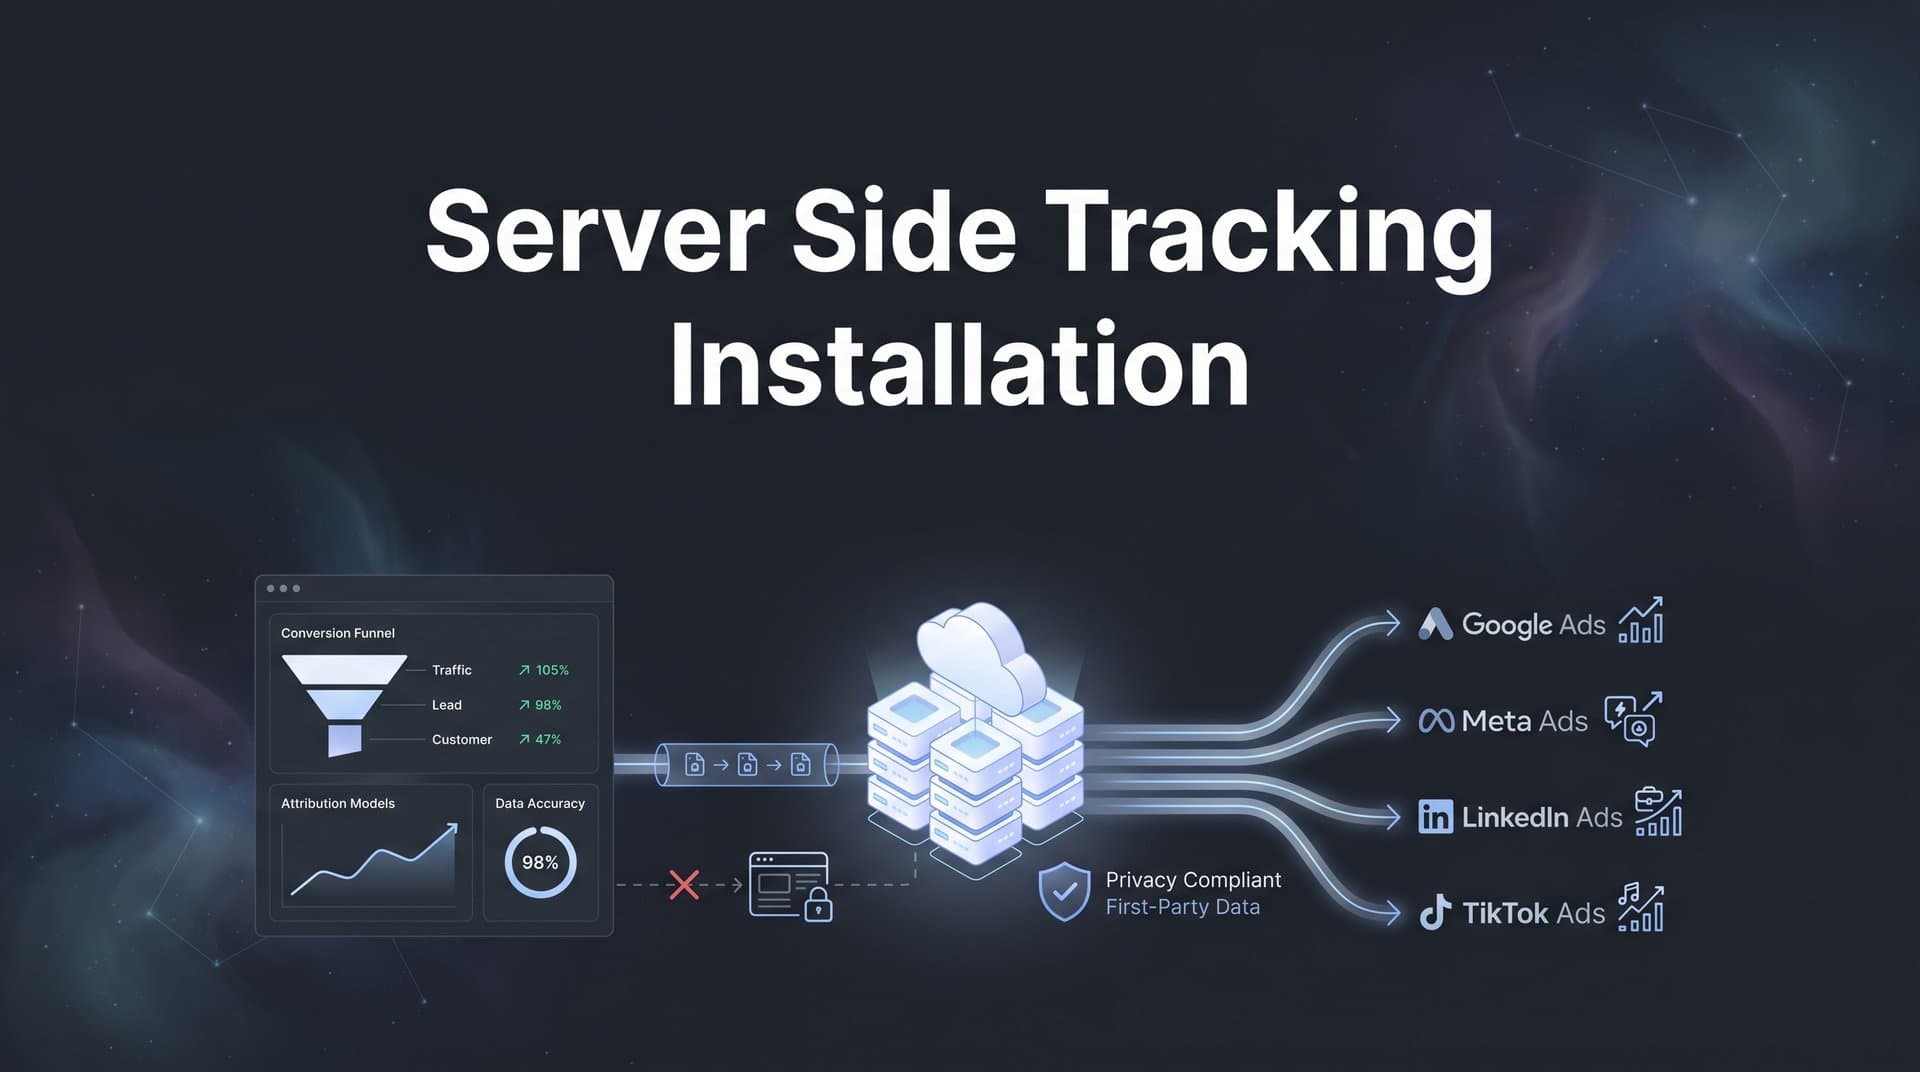
Server side tracking offers a solution by moving data collection from the browser to your own server, bypassing many of these limitations. Instead of relying on browser pixels that can be blocked or restricted, you send conversion data directly from your server to ad platforms through secure API connections.
This guide walks you through the complete server side tracking installation process, from initial planning to verification. Whether you're setting up tracking for Meta, Google Ads, or multiple platforms simultaneously, you'll learn exactly what to do at each stage.
By the end, you'll have a fully functional server side tracking setup that captures more conversions and feeds better data back to your ad platforms. Let's get started.
Step 1: Audit Your Current Tracking Setup and Identify Gaps
Before you install anything new, you need to understand what's already happening with your tracking. This audit reveals exactly where data loss occurs and which conversions you're missing.
Start by reviewing all pixel and tag implementations across your advertising platforms. Log into Meta Events Manager, Google Ads conversion tracking, and any other platforms where you're running campaigns. Document which events each platform is currently tracking and how they're implemented.
Check Your Browser-Based Tracking Coverage: Look at your analytics data to identify iOS users, Safari traffic, and visitors with ad blockers enabled. These segments represent your biggest tracking blind spots. Many marketers discover that 30-50% of their mobile traffic comes from iOS devices where tracking is significantly limited.
Next, map out all the conversion events that matter to your business. Don't just focus on purchases. Include lead form submissions, trial sign-ups, consultation bookings, demo requests, and any other action that indicates customer intent.
For each conversion event, ask yourself: Where does this happen? Is it on my website, in my CRM, or in my backend system? How is it currently being tracked? What data points am I capturing about each conversion?
Identify Cross-Domain Tracking Issues: If your customer journey spans multiple domains (like moving from a marketing site to a checkout subdomain), you're likely losing attribution data at those transition points. Document every domain where conversions can occur.
Review your current data flow from website to ad platforms. Trace how a customer action becomes a conversion event in Meta or Google Ads. Understanding this flow helps you identify exactly what needs to change when you move to server side tracking. For a deeper understanding of the differences, explore server side vs client side tracking explained.
Create a simple spreadsheet listing each conversion event, its current tracking method, estimated data loss percentage, and priority level. This becomes your implementation roadmap. The events with the highest value and highest data loss should be your first priorities for server side tracking.
Pay special attention to post-purchase events and customer lifetime value data. These signals are incredibly valuable for ad platform optimization but are often completely invisible to browser-based tracking.
Step 2: Choose Your Server Side Tracking Architecture
You have several architectural options for server side tracking, and choosing the right one depends on your technical resources, budget, and complexity needs.
The first option is setting up your own first-party server using Google Tag Manager Server-Side or a custom-built solution. This gives you complete control and ownership of your data infrastructure. However, it requires significant technical expertise to configure, maintain, and troubleshoot. You'll need to manage server hosting, handle API updates from ad platforms, and ensure uptime and security.
Think of it like building your own house versus buying one. You get exactly what you want, but you're responsible for every detail of construction and maintenance.
Cloud Functions Approach: Some teams use cloud functions (AWS Lambda, Google Cloud Functions) to process and forward conversion data. This serverless approach scales automatically and reduces infrastructure management. However, you still need developers to write and maintain the code that handles data transformation and API calls.
The third option is using a dedicated attribution platform that handles server side tracking as part of its core functionality. Platforms like Cometly manage the entire server infrastructure, API connections, and data pipeline for you. You connect your data sources, configure your events, and the platform handles the technical complexity of sending data to multiple ad platforms.
This approach works well if you're tracking conversions across multiple ad platforms, need to integrate CRM data, or lack dedicated development resources. The platform handles API updates automatically, provides built-in deduplication, and typically includes analytics dashboards to visualize your attribution data.
Evaluate Based on Your Team's Capabilities: Do you have developers who can build and maintain custom tracking infrastructure? If yes, a DIY approach might work. If not, a managed solution saves months of development time and ongoing maintenance headaches. Review the best server side tracking platforms to compare your options.
Consider your number of ad platforms too. If you're only running Meta ads, setting up Meta Conversions API directly might be sufficient. But if you're running campaigns on Meta, Google, TikTok, and LinkedIn, managing separate API integrations for each platform becomes complex quickly.
Budget plays a role, but think long-term. A custom solution might seem cheaper initially, but factor in developer time for setup, ongoing maintenance, troubleshooting, and handling platform updates. Managed solutions have clear monthly costs that often prove more predictable.
Scalability Matters: Choose an architecture that can grow with your business. As you add more conversion events, data sources, or ad platforms, can your chosen solution scale without requiring a complete rebuild?
Most marketers find that managed attribution platforms offer the best balance of functionality, ease of implementation, and ongoing reliability. The time saved on technical setup and maintenance can be redirected to actually analyzing data and optimizing campaigns.
Step 3: Set Up Your Server Environment and API Connections
Now that you've chosen your architecture, it's time to establish the technical foundation. This step involves setting up your server endpoint and creating secure connections to each ad platform's API.
If you're using a managed attribution platform, this process is significantly streamlined. You'll typically connect your ad accounts through OAuth authentication, which handles API credentials automatically. For platforms like Cometly, you simply authorize access to your Meta Business Manager, Google Ads account, and other platforms through their respective permission flows.
For custom implementations, you'll need to generate API credentials manually for each platform. Let's walk through what this looks like for the two most common platforms.
Setting Up Meta Conversions API Access: Log into your Meta Business Manager and navigate to Events Manager. Select the pixel you want to connect to server side tracking. Under Settings, you'll find your Pixel ID and need to generate an Access Token. This token authenticates your server's requests to send conversion data to Meta.
Store this access token securely. Never hardcode it directly in client-side code or commit it to public repositories. Use environment variables or secure credential management systems. The token grants permission to send data to your Meta account, so treat it like a password.
Configuring Google Ads Enhanced Conversions: In Google Ads, navigate to Tools & Settings, then Conversions. Select the conversion action you want to enhance with server side data. Enable Enhanced Conversions and choose the API method rather than the tag-based method.
You'll need to set up Google Ads API access, which requires creating a developer token and OAuth credentials. Google's documentation walks through this process, but be prepared for multiple authentication steps and verification requirements. Understanding what server side conversion tracking entails will help you navigate these requirements.
Once you have credentials for each platform, configure your server endpoint. This is the URL that will receive conversion data from your website or backend systems and forward it to ad platforms. If you're using cloud functions, this means deploying your function and noting its invocation URL.
Establish Secure Data Transmission: All data transmission must happen over HTTPS to protect customer information. Configure SSL certificates for your server endpoint. Most cloud providers offer automated certificate management through services like Let's Encrypt.
Set up authentication for your endpoint so only authorized sources can send data to it. This might involve API keys, JWT tokens, or IP allowlisting depending on your architecture. You don't want unauthorized systems sending fake conversion data to your ad accounts.
Test basic connectivity before moving forward. Send a simple test event to your server endpoint and verify it can successfully forward that event to Meta or Google. Most platforms provide test modes where you can send data without it affecting your actual campaign reporting.
Document Everything: Create a reference document listing your API credentials, endpoint URLs, and configuration details. You'll need this information for troubleshooting and when team members change. Just ensure this documentation is stored securely since it contains sensitive access credentials.
This foundation work might feel tedious, but getting it right now prevents authentication errors and data transmission failures later. Take your time to verify each connection is working before moving to event configuration.
Step 4: Configure Event Tracking and Data Mapping
With your infrastructure in place, you need to define exactly which events to track and how to format the data for each platform. This is where server side tracking gets powerful but also requires careful planning.
Start by prioritizing your conversion events. Not every website interaction needs to be sent server side. Focus on the events that directly indicate business value: purchases, qualified leads, trial sign-ups, booking completions, or subscription starts.
For e-commerce businesses, your priority list might look like this: Purchase events with revenue data, Add to Cart actions for retargeting, Initiate Checkout events, and View Content for high-value product pages. For lead generation businesses, focus on Form Submit events, Consultation Booking, Download events for gated content, and Contact attempts.
Map Your Data Fields to Platform Requirements: Each ad platform expects conversion data in specific formats. Meta Conversions API requires certain parameters like event_name, event_time, and user_data. Google Enhanced Conversions needs hashed email addresses and phone numbers in SHA-256 format.
Create a data mapping document that shows which fields from your website or CRM correspond to each platform's required parameters. For example, your internal "order_total" field maps to Meta's "value" parameter and Google's "conversion_value" field. Learn more about server side event tracking to understand these requirements better.
Pay special attention to customer matching parameters. The more data points you can provide about the customer (email, phone, address, user agent), the better ad platforms can match your server events to the right user profiles. This matching determines how effectively platforms can optimize for your conversions.
Configure Event Deduplication: This is critical. When you run browser-based tracking alongside server side tracking, the same conversion can be reported twice—once from the browser pixel and once from your server. This inflates your conversion counts and ruins your data accuracy.
Implement deduplication using event IDs. Generate a unique identifier for each conversion event and send it with both your browser pixel and server side event. Ad platforms use this ID to recognize duplicate events and count them only once.
For a purchase, your event ID might be the order number. For a lead form submission, it could be a combination of timestamp and user ID. The key is ensuring the same event generates the same ID whether it's sent from browser or server.
Hash Personally Identifiable Information: Before sending customer data like email addresses or phone numbers, you must hash them using SHA-256. This protects customer privacy while still allowing platforms to match events to user profiles.
Normalize data before hashing. Convert emails to lowercase, remove spaces from phone numbers, and strip special characters. The hash of "John@Example.com" differs from "john@example.com", so inconsistent formatting breaks matching.
Set up your event matching parameters to maximize match quality scores. Include as many matching parameters as you can collect: email, phone, first name, last name, city, state, zip code, and country. More parameters mean better matching and more accurate attribution.
Test Your Data Mapping: Send test events through your system and verify they appear correctly in each platform's event debugging tools. Check that all required fields are populated, values are formatted correctly, and hashing is working properly.
This configuration work determines the quality of data your ad platforms receive. Spend time getting it right, because poor data mapping leads to low match rates and wasted server side tracking effort.
Step 5: Implement Tracking Code and Connect Your Data Sources
Now you're ready to implement the actual tracking code that captures conversion data and sends it to your server endpoint. This step connects your website, CRM, and backend systems to your server side tracking infrastructure.
Start with your website. You need to add first-party data collection code that captures conversion events as they happen. This code should fire when key actions occur—when someone completes a purchase, submits a form, or reaches a thank-you page.
If you're using Google Tag Manager, create custom tags that send conversion data to your server endpoint. Configure triggers based on form submissions, button clicks, or page views of confirmation pages. The tag should collect all relevant data points: user information, event details, and transaction data.
Implement Client-Side Data Collection: Add JavaScript to your conversion pages that gathers customer information and event details. This might look like collecting form field values, extracting order details from your e-commerce platform, or reading data from your page's data layer.
Ensure you're collecting customer identifiers that will help with event matching. Capture email addresses from logged-in users, form submissions, or checkout processes. Collect user agent strings, IP addresses, and click IDs from ad platforms (fbclid for Meta, gclid for Google).
Send this data to your server endpoint via secure POST requests. Don't send sensitive data through URL parameters where it could be logged or exposed. Use HTTPS and include authentication tokens to verify the request is coming from your legitimate website.
Connect Your CRM or Backend System: Many valuable conversions happen outside your website—in your CRM when a lead becomes qualified, in your backend when a trial converts to paid, or in your support system when a customer upgrades.
Set up webhooks or API integrations that send these offline conversion events to your server side tracking system. When your CRM marks a lead as "qualified," it should trigger an event that gets sent to your ad platforms through server side tracking.
For e-commerce platforms like Shopify, WooCommerce, or custom solutions, integrate at the order confirmation stage. Capture complete transaction data: order ID, revenue, products purchased, customer details, and any discount codes used. If you're running a Shopify store, check out our guide on server side tracking for Shopify.
Ensure Customer Identifiers Flow Through the Journey: The biggest challenge in server side tracking is maintaining customer identity across touchpoints. Someone might click an ad on their phone, research on their laptop, and purchase on their tablet. You need to connect these actions to the same person.
Use first-party cookies to store user identifiers across sessions. When someone arrives from an ad, capture the click ID and store it in a cookie. When they convert later, include that click ID with your server side event so platforms can attribute the conversion correctly.
If you have user accounts, leverage logged-in status. When users are authenticated, you have a consistent identifier (user ID or email) that persists across devices and sessions. Send this identifier with every server side event for the most accurate attribution.
Integrate Form Handlers: For lead generation, your form submission handler needs to capture form data and send it server side. This might involve modifying your form processing code to make an additional API call to your tracking endpoint after successfully processing the submission.
Test each integration point individually. Submit a test form and verify the event reaches your server endpoint with all expected data. Complete a test purchase and confirm the transaction details are captured accurately. This incremental testing catches issues before they affect real conversion data.
Remember that server side tracking works best when combined with browser-based tracking, not as a complete replacement. Keep your browser pixels active for users who allow tracking, and use server side to fill the gaps where browser tracking fails. Understanding server side tracking vs pixel tracking helps you implement this hybrid approach effectively.
Step 6: Test, Validate, and Troubleshoot Your Installation
Your server side tracking is configured, but before you rely on this data for campaign decisions, you need to verify everything works correctly. This testing phase catches configuration errors, data formatting issues, and integration problems.
Start with platform-specific testing tools. Meta provides Events Manager with a Test Events feature that shows incoming server events in real-time. Send a test conversion through your system and watch it appear in Events Manager. Verify all parameters are populated correctly and the event matches your configuration.
For Google Ads, use the conversions dashboard to check that enhanced conversions are being received. Google also provides real-time reporting for conversion actions, though there may be a slight delay before events appear.
Check Event Match Quality Scores: This metric tells you how well your server side events are matching to user profiles in the ad platform. Meta displays Event Match Quality in Events Manager, typically as a score from 1 to 10. Higher scores mean better matching and more accurate attribution.
If your match quality is low, review your customer information parameters. Are you sending hashed email addresses? Are phone numbers formatted correctly? Are you including multiple matching parameters like name, location, and user agent?
Test your deduplication setup by triggering the same conversion event through both browser and server paths. Check your platform reporting to confirm the event is only counted once. If you see duplicate conversions, verify your event IDs are identical across both methods.
Troubleshoot Common Issues: Missing parameters are the most frequent problem. Review your server logs or use debugging tools to inspect the actual data being sent to ad platforms. Compare it against the platform's required format. Our guide on server side tracking setup challenges covers the most common pitfalls.
Failed API calls usually indicate authentication problems. Verify your access tokens are valid and haven't expired. Check that your API credentials have the necessary permissions to send conversion data.
If events aren't appearing in platform reporting at all, confirm your server endpoint is actually receiving data from your website. Add logging to your server code to see incoming requests. If data reaches your server but not the ad platform, the issue is in your API integration.
Validate Data Accuracy: Compare your server side conversion counts against actual business results. If your e-commerce platform shows 100 orders but your ad platform only shows 75 conversions, you have a tracking gap to investigate.
Check that revenue values match between your server side events and actual transaction amounts. Incorrect value tracking leads to poor ROAS calculations and misguided budget decisions.
Test edge cases like international orders, partial refunds, or subscription renewals. Make sure your tracking handles these scenarios correctly rather than sending incorrect data or failing silently.
Monitor Ongoing Performance: Set up alerts for sudden drops in conversion volume or match quality scores. These often indicate API connectivity issues, expired credentials, or changes to your website that broke tracking integration.
Review your server side tracking health weekly during the first month. Check that events are flowing consistently, match rates remain high, and no error patterns emerge in your logs.
If you're using a managed attribution platform, leverage their built-in monitoring and alerting. These platforms typically provide dashboards showing API health, event volume trends, and data quality metrics that help you spot issues quickly.
Document any issues you encounter and their solutions. When your payment processor updates its API, when you launch a new product, or when you add a new conversion event, you'll have a troubleshooting reference to speed up resolution.
Your Next Steps to Better Marketing Measurement
With your server side tracking installation complete, you now have a more reliable foundation for marketing measurement. The data flowing to your ad platforms is more complete, more accurate, and less affected by browser restrictions and privacy changes.
Your immediate next steps should focus on optimization and monitoring. Check your event match quality scores weekly and work to improve them by adding more customer matching parameters. Gradually increase the percentage of events sent server side as you gain confidence in your setup.
Review your attribution data regularly to identify optimization opportunities. With more complete conversion tracking, you'll start seeing which campaigns, ad sets, and creative variations truly drive results. Use these insights to reallocate budget toward your best performers.
Quick Implementation Checklist: Verify that API connections are active and authenticated for all platforms. Confirm all critical conversion events are firing correctly and appearing in platform reporting. Check that deduplication is preventing double-counting across browser and server events. Ensure match quality scores are above platform-recommended thresholds. Validate that data is flowing to your analytics dashboard with accurate values.
As you collect more accurate data, you'll be able to make better budget allocation decisions. The improved signal quality also helps ad platform algorithms optimize more effectively. When Meta and Google receive complete conversion data with strong user matching, their AI can identify patterns and find more customers who look like your best converters.
Monitor how your campaigns perform with enhanced tracking. Many marketers discover that certain campaigns were actually driving more conversions than browser-based tracking showed. Others find that some channels they thought were working well were actually getting credit for conversions that originated elsewhere.
Keep your tracking infrastructure maintained. As ad platforms update their APIs, as you add new products or conversion events, and as your business grows, your server side tracking needs to evolve too. Regular audits ensure nothing breaks silently.
Ready to elevate your marketing game with precision and confidence? Discover how Cometly's AI-driven recommendations can transform your ad strategy—Get your free demo today and start capturing every touchpoint to maximize your conversions.


