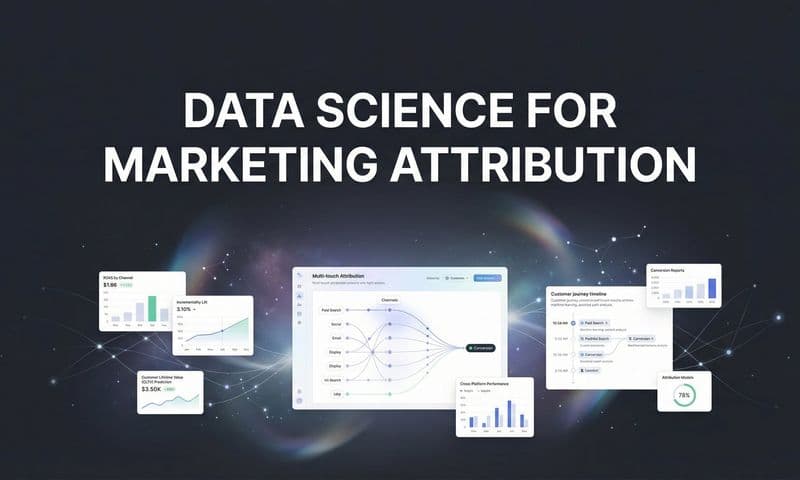
If you are running paid ads across Meta, Google, TikTok, and other platforms, you already know the frustration of mismatched data. Each platform takes credit for the same conversions, your CRM tells a completely different story, and you are left guessing where to put your next dollar.
Attribution software solves this by connecting every touchpoint in the customer journey so you can see exactly which ads, campaigns, and channels drive real revenue. But getting started with attribution software can feel overwhelming. Between connecting ad accounts, installing tracking, choosing attribution models, and syncing conversion data, there are a lot of moving parts.
The good news is that the setup process is more straightforward than most marketers expect, especially when you follow a clear sequence. Think of it like assembling furniture: the individual pieces are not complicated, but doing them out of order creates headaches. Follow the right sequence and everything clicks into place.
This guide walks you through the entire process of getting started with attribution software, from defining your goals and connecting your data sources to choosing the right attribution model and optimizing your campaigns based on accurate data. By the end, you will have a fully functional attribution setup that gives you confidence in every budget decision you make.
Whether you are a solo media buyer, part of a marketing team, or running an agency managing multiple client accounts, these steps apply to you. Let's get your attribution software up and running.
Step 1: Define Your Attribution Goals and KPIs Before You Touch Any Software
Here is where most marketers go wrong: they jump straight into connecting accounts and installing pixels without ever asking what problem they are actually trying to solve. Setting up attribution software without clear goals is like building a dashboard with no idea what you need to see on it.
Start with the core question your attribution setup needs to answer: which ads and channels actually drive revenue, not just clicks or impressions? That distinction matters more than it sounds. A channel can generate enormous click volume while contributing almost nothing to closed deals or completed purchases. Attribution software reveals that gap.
Before you open any software, map out your current reporting gaps. Write down the specific discrepancies you encounter today. Maybe your Meta Ads dashboard claims 80 conversions this week, Google Analytics shows 45, and your CRM logged 30 actual customers. That gap represents real money you are either misattributing or missing entirely. Documenting these gaps gives you a baseline to measure your attribution setup against, and understanding the differences between tools like Google Analytics vs an attribution platform helps clarify why those discrepancies exist.
Next, define the specific KPIs you want to track through attribution. The most useful ones for most teams include ROAS broken down by channel, cost per acquisition at the campaign level, and revenue contribution by touchpoint. Be specific. "Improve our marketing data" is not a KPI. "Know our true cost per acquisition for Google Search versus Meta Prospecting" is a KPI you can act on.
Also consider the complexity of your customer journey. If you are running ecommerce, customers often convert within a few days of first contact, which means your attribution window and model choices will look different from a B2B SaaS team where the sales cycle spans weeks or months. Understanding your typical journey length shapes every decision you make in the steps that follow.
Practical tip: Write down the top three budget decisions you struggle with today. These become the primary use cases your attribution setup should solve first. If your biggest question is whether to scale Meta or Google, your setup should prioritize accurate cross-platform ROAS visibility. If you are trying to justify ad spend to leadership, CRM revenue integration becomes your top priority.
This step takes an hour, not a week. But skipping it means your attribution setup will generate data you do not know how to use.
Step 2: Connect Your Ad Platforms and Traffic Sources
With your goals defined, you are ready to start pulling data into your attribution platform. This step is about creating a centralized, neutral view of all your paid traffic, because the alternative is letting each ad platform grade its own homework.
Start by integrating your primary paid channels. For most teams, that means Meta Ads, Google Ads, and TikTok Ads at minimum. If you are also running LinkedIn Ads, Pinterest, Snapchat, or any other paid channels, connect those too. The goal is to have every dollar of ad spend represented in one place.
The typical connection process follows a consistent pattern across platforms. You authenticate your ad account by logging in through the attribution platform's OAuth flow, grant read access so the software can pull spend, impression, click, and campaign data, and then verify that data is flowing correctly by checking that recent campaigns appear in your dashboard. Most modern attribution platforms make this process straightforward, often completing in under ten minutes per platform.
Why does centralizing these connections matter so much? Each ad platform is built to report its own performance favorably. Meta counts a conversion if someone saw your ad and converted within a certain window, even if they clicked a Google ad first. Google does the same. When you look at platform-reported numbers in isolation, the total conversions often add up to far more than your actual sales, because every platform is taking full credit for the same customers. This is exactly why cross-channel marketing attribution software is essential for accurate reporting.
A neutral attribution platform sits outside this ecosystem and applies consistent rules across all channels. That is what makes it a true source of truth.
Do not overlook organic and referral traffic sources if your attribution tool supports them. Email campaigns, organic search, direct traffic, and referral links all play a role in your customer journeys. Including them gives you a complete picture rather than just a paid media view.
Common pitfall: Teams often skip smaller channels like Pinterest or Snapchat during setup because they represent a smaller share of budget. Then they wonder why a portion of their conversions appear unattributed or get misassigned to other channels. Even if a channel accounts for a small percentage of your spend, connect it. Unattributed conversions create noise in your data that makes every other channel look less accurate.
Once all your platforms are connected, do a quick sanity check. Compare total spend in your attribution dashboard against what each platform reports. They should be close. Large discrepancies at this stage usually indicate a connection issue worth resolving before moving forward.
Step 3: Install Server-Side Tracking on Your Website
This step is where your attribution setup gets its real foundation. Without accurate on-site tracking, all the ad platform connections in the world will not give you reliable conversion data.
In 2026, server-side tracking is no longer optional. It is essential. Here is why: browser privacy changes, iOS restrictions introduced in recent years, and widespread ad blocker adoption have made client-side pixels increasingly unreliable. A browser-based pixel fires from the user's browser, which means it can be blocked, delayed, or stripped of key identifiers by privacy settings. Server-side tracking fires from your server instead, which means it is not subject to the same browser-level restrictions. The result is more complete, more accurate conversion data from the start.
The installation process typically involves adding a tracking script to your website. Place it on all pages, not just your homepage. You want visibility across the entire journey, including landing pages, product pages, and especially confirmation or thank-you pages where conversions are recorded. Reliable performance marketing tracking software makes this process significantly easier to manage across complex sites.
For ecommerce teams, this step also means connecting your storefront. If you are running on Shopify, WooCommerce, or a similar platform, your attribution software will typically offer a native integration or a plugin that ensures purchase events fire accurately and include order value data. Accurate order values are what make ROAS calculations meaningful. Without them, you are tracking conversion counts but not revenue, which limits your ability to make smart budget decisions.
After installation, verify that tracking is working before moving on. Run a test conversion, whether that is a test purchase, a form submission, or whatever your primary conversion event is. Then check your attribution dashboard to confirm the event appeared with the correct data attached. This verification step saves significant troubleshooting time later.
Tip: Server-side tracking captures data that browser-based pixels miss entirely. Customers using Safari with Intelligent Tracking Prevention, users on iOS devices, and anyone running an ad blocker all become visible again through server-side methods. This means your attribution data starts more complete from day one, which makes every downstream analysis more reliable.
If your website uses multiple subdomains or has a complex funnel structure, make sure tracking is consistent across all of them. A gap in coverage creates gaps in your attribution data, and those gaps tend to appear exactly where you need the most clarity.
Step 4: Integrate Your CRM and Revenue Data
This is the step most marketers skip, and it is the one that transforms attribution from a reporting tool into a genuine revenue intelligence system.
Connecting your CRM, whether that is HubSpot, Salesforce, Pipedrive, or another platform, extends attribution beyond the initial click all the way to closed deals and actual revenue. Without this integration, you can see which ads drive leads. With it, you can see which ads drive customers who pay and stay. For B2B companies, dedicated B2B revenue attribution software makes this connection especially powerful.
The difference matters enormously. A campaign that generates a high volume of leads at a low cost per lead can look like a winner in surface-level reporting. But if those leads rarely convert to paying customers, the campaign is actually destroying margin. CRM integration reveals this reality. You can trace a closed deal backward to the original ad click, the campaign it came from, and the channel that started the journey.
The integration process involves connecting your CRM to your attribution platform and then mapping your pipeline stages to attribution events. For example, you might map "Lead Created" to a top-of-funnel event, "Opportunity Created" to a mid-funnel event, and "Closed Won" to your primary revenue event. This mapping allows your attribution platform to report on the full funnel, not just the top of it.
For B2B teams with longer sales cycles, this step is not optional. When the gap between an ad click and a closed deal spans weeks or months, you cannot rely on short attribution windows to connect the dots. CRM integration bridges that gap by creating a persistent link between the original touchpoint and the eventual outcome, regardless of how much time passes.
Success indicator: You should be able to open your attribution dashboard, find a specific closed deal, and trace it back to the exact ad, campaign, and channel that started the customer journey. If you can do that, your CRM integration is working correctly. If you cannot, check that your pipeline stages are mapped properly and that your CRM records include the lead source data your attribution platform needs to make the connection.
For ecommerce teams, this step may look slightly different. Instead of CRM pipeline stages, you are connecting order data so that revenue figures in your attribution dashboard reflect actual purchase values rather than estimated or proxy metrics. Teams running Shopify stores can benefit from specialized ecommerce marketing attribution software that handles this integration natively. The principle is the same: connect real revenue data so your attribution reports reflect business outcomes, not just marketing activity.
Step 5: Choose the Right Attribution Model for Your Business
Now that your data sources are connected and tracking is in place, you need to decide how credit gets assigned across the customer journey. This is where attribution models come in, and choosing the right one has a direct impact on which channels look like winners and which ones appear to underperform.
Let's walk through the main models so you understand what each one does.
First-touch attribution gives 100% of the credit to the first interaction a customer had with your brand. It is useful for understanding which channels are best at creating awareness and bringing new prospects into your funnel. The downside is that it ignores everything that happened after that first touch.
Last-touch attribution gives 100% of the credit to the final interaction before conversion. It is simple and easy to act on, but it tends to over-credit bottom-of-funnel channels like branded search or retargeting while ignoring the channels that built awareness earlier in the journey.
Linear attribution distributes credit equally across every touchpoint in the customer journey. It acknowledges that multiple interactions contributed to the conversion, though it does not differentiate between a high-impact touchpoint and a minor one.
Time-decay attribution gives more credit to touchpoints that occurred closer to the conversion. The logic is that more recent interactions had more influence on the final decision. This model works well for shorter purchase cycles where recency genuinely correlates with influence.
Data-driven or AI-powered attribution uses machine learning to assign credit based on the actual patterns in your conversion data. Rather than applying a fixed rule, it learns which touchpoints most consistently appear in converting journeys and weights them accordingly. For a deeper dive into how these models compare, explore multi-touch attribution modeling software options that support data-driven approaches.
For ecommerce with short purchase cycles, last-touch or time-decay models often provide actionable insights quickly because the journey from first click to purchase is relatively compressed. For B2B SaaS or service businesses with longer journeys, multi-touch models like linear or data-driven give credit across the full funnel and provide a more honest picture of how different channels contribute.
Practical recommendation: Start with one model, but use your attribution dashboard to compare it against others. Many teams benefit from viewing the same conversion data through multiple models side by side before committing to one for optimization decisions. Seeing how credit shifts between channels when you switch models is itself a valuable insight.
Step 6: Activate Conversion Sync to Supercharge Ad Platform Algorithms
Most marketers set up attribution for reporting and stop there. That is a missed opportunity. This step is where your attribution setup stops being passive and starts actively improving your ad performance.
Conversion sync, sometimes called CAPI integration or enhanced conversions, sends enriched and accurate conversion data back to Meta, Google, TikTok, and other ad platforms. Instead of relying on the platform's own pixel to detect conversions, which is increasingly limited by privacy restrictions, you are feeding it clean, server-verified conversion signals directly.
Why does this matter so much? Ad platform algorithms optimize delivery based on the conversion data they receive. When that data is incomplete or inaccurate, the algorithm makes suboptimal decisions about who to show your ads to and when. When you feed it better data, it targets better, optimizes more efficiently, and typically delivers lower costs over time. This is one of the most impactful ways conversion attribution software directly improves campaign performance.
The process involves enabling conversion sync for each connected platform within your attribution software. You map the conversion events you want to send back, verify that the platform is receiving them, and confirm that event match quality scores are healthy. Most attribution platforms make this configuration straightforward through a guided setup flow.
This step closes the loop between attribution insights and ad platform performance. You are not just observing what works. You are actively using that knowledge to make the platforms work harder for you.
Common pitfall: Setting up attribution for reporting only and never enabling conversion sync. Teams that do this are using half the system. They gain visibility into what is working, but they are not feeding that improved signal back to the platforms that control ad delivery. Activating conversion sync is what separates teams that use attribution to report on performance from teams that use it to actively drive better performance.
Step 7: Read Your Dashboard and Take Action on What the Data Tells You
Your setup is complete. Now comes the part that actually moves the needle: using the data to make better decisions.
When you open your attribution dashboard for the first time with live data flowing, here is what to focus on. Start with ROAS by channel. Compare what each platform reports as its own ROAS against what your attribution platform shows. In most cases, you will see meaningful differences. Channels that looked strong in platform reporting may show weaker true ROAS once duplicate credit is removed. Other channels that seemed modest may reveal themselves as stronger contributors than their self-reported numbers suggested.
Next, look at cost per acquisition at the campaign level. Attribution data often reveals that within a single channel, some campaigns are highly efficient while others are significantly underperforming. This granularity is what allows you to reallocate budget intelligently rather than making broad channel-level decisions based on incomplete data. Pairing attribution insights with budget optimization software can accelerate this reallocation process significantly.
Also examine revenue contribution by touchpoint if you have CRM data integrated. This view shows you which channels and campaigns are contributing to actual closed revenue, not just top-of-funnel activity. For B2B teams especially, this is often where the most surprising insights live.
If your attribution platform includes AI-powered recommendations, use them. These features analyze your performance data and surface high-performing ads and campaigns that may deserve more budget, as well as underperformers that are consuming spend without delivering proportional results. Think of it as having an analyst review your data continuously and flag the decisions that matter most.
Set a recurring review cadence and stick to it. A weekly review works well for campaign-level decisions: pausing underperformers, scaling winners, and adjusting bids. A monthly review is appropriate for channel-level budget shifts and strategic reallocations. Strong attribution reporting software makes these recurring reviews faster and more actionable.
Success indicator: Within the first two to four weeks of having your attribution setup running, you should be able to make at least one confident budget reallocation decision based on attribution data rather than gut feeling or platform-reported numbers. That first decision, backed by accurate cross-channel data, is the moment attribution software pays for itself.
The goal is not to review data for its own sake. The goal is to make decisions faster, with more confidence, and with less wasted spend. Every time you open your dashboard, ask yourself: what does this data tell me to do differently?
Your Attribution Setup Checklist and Next Steps
Getting started with attribution software does not have to be a months-long project. By following these seven steps in sequence, you move from scattered and unreliable data to a clear picture of what is actually driving revenue across every channel.
Use this checklist to confirm your setup is complete before you start making optimization decisions based on the data.
1. Goals and KPIs are defined, with specific budget questions your attribution setup needs to answer.
2. All ad platforms are connected and spending data is flowing accurately into your dashboard.
3. Server-side tracking is installed on your website, verified with a test conversion, and confirmed to be capturing events correctly.
4. CRM and revenue data are integrated, with pipeline stages mapped to attribution events so you can trace closed deals back to original ad clicks.
5. An attribution model is selected that fits your business type and sales cycle, with a plan to compare it against other models over time.
6. Conversion sync is active and sending enriched conversion signals back to Meta, Google, and any other connected ad platforms.
7. You have a recurring dashboard review cadence in place and have made at least one data-driven budget decision based on attribution insights.
The sooner you complete this setup, the sooner you stop wasting budget on underperforming channels and start scaling the campaigns that actually convert. Every week without accurate attribution is a week of budget decisions made on incomplete information.
Cometly is built to make this entire process fast and intuitive. It connects your ads, website, and CRM in one place so you can track every touchpoint, compare attribution models, and optimize with confidence. The AI-powered recommendations surface the decisions that matter most, and conversion sync feeds better data back to your ad platforms so their algorithms work harder for you.
Ready to see which ads truly drive your revenue? Get your free demo today and start capturing every touchpoint to maximize your conversions.