
Your ad campaigns are running. Your pixel is firing. Your dashboard shows conversions. Everything looks good, right? Not quite. If you're relying solely on browser-based tracking in 2026, you're probably missing 20-40% of your actual conversions. iOS privacy updates, cookie restrictions, and ad blockers have created blind spots in your data that cost you money every single day.
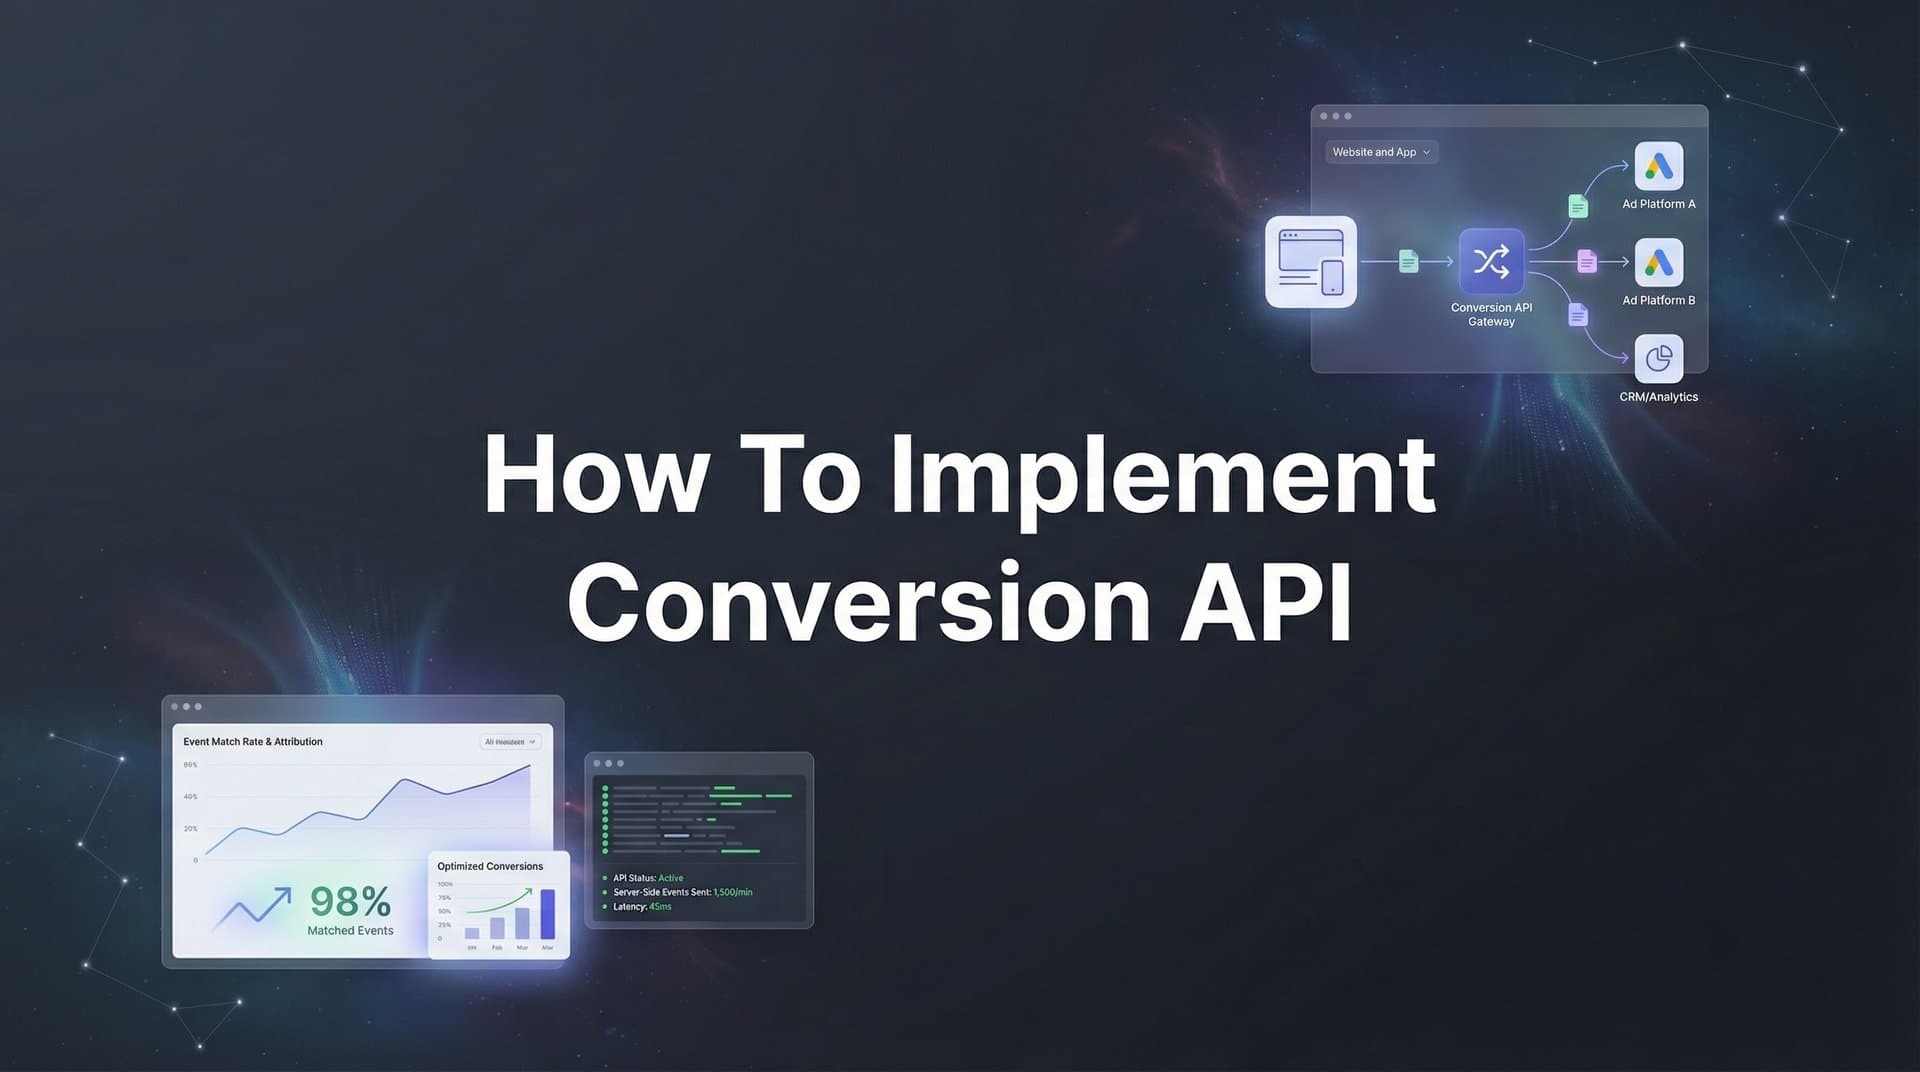
The Conversion API changes that. Instead of hoping browsers will track your conversions, CAPI sends conversion data directly from your server to ad platforms like Meta and Google. No browser required. No cookies needed. No iOS restrictions blocking your data.
This matters because incomplete data doesn't just hide your results. It actively hurts your campaigns. When ad platforms can't see which ads drive conversions, their algorithms optimize blindly. You waste budget on underperforming ads while scaling winners becomes guesswork.
This guide walks you through implementing Conversion API from start to finish. You'll learn how to set up Meta's Conversions API, configure Google's Enhanced Conversions, audit your current tracking gaps, build your first server-side event, and validate that data flows correctly. Whether you're a performance marketer managing six-figure ad budgets or an agency scaling campaigns for multiple clients, you'll have a working implementation that captures conversions your pixel misses and feeds better data back to ad platform algorithms.
Let's fix your tracking.
Step 1: Audit Your Current Tracking Setup and Identify Gaps
Before you build anything new, you need to understand what's actually broken. Start by comparing conversion numbers in your ad platforms against your source of truth: your CRM, payment processor, or backend database.
Pull last month's conversion data from Meta Ads Manager or Google Ads. Then pull the same timeframe from your CRM or order management system. Look at the gap. If your ad platform shows 100 conversions but your backend recorded 140 purchases, you're losing 40% attribution. That's 40% of conversions that ad platforms can't see, which means their algorithms are optimizing with incomplete information.
Document which conversion events matter most for your business. E-commerce brands need accurate purchase tracking. B2B SaaS companies need demo bookings and trial signups. Lead gen businesses need form submissions and phone calls. Write down your top three to five conversion events that directly impact revenue.
Next, identify where tracking breaks down. Check your analytics for iOS users versus Android. iOS conversions are often significantly underreported due to App Tracking Transparency restrictions. Look at conversion paths that cross devices or involve multiple sessions. Browser-based tracking struggles when someone clicks an ad on mobile but converts on desktop three days later. Understanding how to fix iOS conversion tracking issues is essential for accurate attribution.
Review your conversion funnel for offline touchpoints. If prospects call your sales team, visit a physical location, or convert through channels your pixel can't track, those conversions disappear from your ad platform data. Server-side tracking can capture these by sending conversion events from your CRM or phone system directly to ad platforms.
Check for common tracking failures: ad blockers preventing your pixel from loading, users who clear cookies between sessions, cross-domain tracking issues if your checkout is on a different domain, and attribution windows that expire before longer sales cycles complete.
Success indicator: You have a spreadsheet or document listing your critical conversion events, the current gap between ad platform reporting and actual conversions, and specific scenarios where tracking fails (iOS users, cross-device journeys, offline conversions, ad blockers). This becomes your implementation roadmap.
Step 2: Set Up Your Server Environment and Access Credentials
Server-side tracking requires API access to your ad platforms. For Meta, navigate to Events Manager and select the pixel you want to connect to Conversions API. Click Settings, then scroll to Conversions API. Click "Generate Access Token" and copy it immediately. This token authorizes your server to send conversion data to Meta. Store it securely—treat it like a password.
In Meta Business Manager, verify you have the correct permissions. You need either Admin or Advertiser access to the ad account and Admin access to the pixel. Without proper permissions, your API calls will fail with authorization errors.
For Google Ads, you'll implement Enhanced Conversions rather than a separate CAPI. Navigate to your Google Ads account, go to Tools & Settings, then Conversions. Select the conversion action you want to enhance. Enable Enhanced Conversions and choose your implementation method: Google Tag Manager, Google Ads API, or Google Ads tag.
Now decide your implementation approach. You have three main options. Direct API integration means your backend server sends events directly to Meta or Google APIs using their SDKs or HTTP requests. This gives you complete control but requires developer resources. Google Tag Manager Server-Side uses a server container that receives events from your website and forwards them to ad platforms. This works well if you already use GTM and want a lower-code solution. Third-party platforms like Cometly handle server-side tracking across multiple ad platforms automatically, sending enriched conversion data without custom development.
If you're building a custom integration, set up your server endpoint. This could be a cloud function (AWS Lambda, Google Cloud Functions), a dedicated API route in your application, or a webhook processor. The endpoint needs to receive conversion events from your website or backend, format them according to platform requirements, and POST them to the ad platform API.
Configure secure credential storage. Never hardcode API tokens in your source code. Use environment variables, secret management services (AWS Secrets Manager, Google Secret Manager), or encrypted configuration files. Your server will need to retrieve these credentials securely when sending events.
Set up logging infrastructure before you send your first event. You'll need to track successful API calls, failed submissions, and error responses. This becomes critical when troubleshooting why events aren't appearing in Events Manager.
Success indicator: You have valid API credentials stored securely, a server endpoint capable of making HTTP requests to ad platform APIs, and logging configured to capture API responses. Test your credentials by making a simple API call to verify authentication works.
Step 3: Map Your Conversion Events and Required Parameters
Conversion APIs use standardized event names. Meta provides a list of standard events: Purchase, Lead, CompleteRegistration, AddToCart, InitiateCheckout, ViewContent, Search, and others. Google uses similar conventions. Start by mapping your business events to these standard names.
If someone completes a purchase on your site, that's a Purchase event. A demo booking is a Lead event. Creating an account is CompleteRegistration. Use standard event names whenever possible because ad platforms optimize better when they understand the event type.
Every event requires specific parameters. At minimum, you need event_name (Purchase, Lead, etc.), event_time (Unix timestamp of when the conversion happened), and action_source (where the event occurred: website, app, phone_call, physical_store, etc.).
User data parameters enable ad platforms to match conversions back to specific users. This is how they attribute conversions to the right ads. Critical parameters include email address, phone number, first name, last name, city, state, zip code, country, date of birth, gender, external ID (your customer ID), client IP address, client user agent, fbc (Facebook click ID from the URL), and fbp (Facebook browser ID from the cookie).
Not every parameter is required, but more data means better matching. Email and phone are the strongest identifiers. IP address and user agent help when email isn't available. The fbc and fbp parameters are crucial because they link server events back to browser pixel events for deduplication. Understanding the conversion API vs Facebook pixel differences helps you maximize both tracking methods.
Custom data varies by event type. Purchase events need value (purchase amount) and currency. They should also include content_ids (product SKUs), content_type (product or product_group), and num_items. Lead events benefit from predicted_ltv (estimated customer lifetime value) if you can calculate it.
Before sending any personally identifiable information, you must hash it using SHA-256. This applies to email addresses, phone numbers, first names, last names, cities, states, zip codes, countries, dates of birth, and gender. The hashing must happen on your server before transmission.
Format matters for hashing. Email addresses must be lowercase with no leading or trailing spaces. Phone numbers should include country code with no spaces, dashes, or parentheses. Remove all non-numeric characters. For example, +1 (555) 123-4567 becomes 15551234567 before hashing.
Create a data mapping document. List each conversion event you're tracking. For each event, document the event name, all required parameters, all optional parameters you'll include, where that data comes from in your system (order database, CRM, form submission), and the exact format needed before hashing.
Success indicator: You have a complete mapping document showing exactly which data points you'll send for each event type, where that data lives in your systems, and confirmation that you can access all required parameters. If you're missing critical data like customer email for purchases, you need to capture that before proceeding.
Step 4: Build and Send Your First Conversion Event
Let's send a test Purchase event to Meta's Conversions API. Your server will POST a JSON payload to the endpoint: https://graph.facebook.com/v19.0/{pixel_id}/events. Replace {pixel_id} with your actual pixel ID from Events Manager.
The payload structure looks like this. You need a data array containing event objects, and a test_event_code if you're using Meta's Test Events feature. Each event object includes event_name, event_time, action_source, event_source_url, user_data, and custom_data.
Event_time must be a Unix timestamp in seconds. If a purchase happened at 2:30 PM on April 4, 2026, convert that to Unix time: 1743782400. The timestamp should reflect when the conversion actually occurred, not when your server sends the API call. Ad platforms use this for attribution windows.
Event_source_url is the page where the conversion happened, like https://yoursite.com/checkout/success. This helps with attribution and appears in Events Manager for debugging.
User_data contains the hashed customer information. Before hashing, normalize the data. For the email "User@Example.com ", convert to lowercase and trim spaces: "user@example.com". Then hash with SHA-256. The resulting hash for that email is a 64-character string: "b4c9a289323b21a01c3e940f150eb9b8c542587f1abfd8f0e1cc1ffc5e475514".
Generate a unique event_id for this conversion. This could be your order ID, a UUID, or any unique identifier. The event_id is critical for deduplication. If your browser pixel also fires a Purchase event for this same transaction with the same event_id, Meta will count it only once.
Custom_data for a Purchase event includes value, currency, content_ids, and content_type. Value should be the purchase amount as a number, not a string. Currency uses three-letter ISO codes: USD, EUR, GBP. Content_ids is an array of product SKUs purchased.
Your HTTP request needs an access_token parameter in the URL or headers. Use the token you generated in Step 2. Send the request as a POST with Content-Type: application/json. For a complete walkthrough, refer to this Facebook Conversion API setup guide.
Meta's Test Events tool lets you verify your implementation before sending real data. In Events Manager, go to Test Events and generate a test_event_code. Include this code in your API payload. When you send the event, it appears immediately in the Test Events tab. You can see the exact parameters Meta received, whether hashing was correct, and if any required fields are missing.
Handle API responses properly. A successful request returns HTTP 200 with a JSON response containing events_received and messages. If events_received equals the number of events you sent, it worked. If you get an error response, log the full error message. Common errors include invalid access token, incorrect pixel ID, malformed JSON, or missing required parameters.
Implement retry logic for failed events. Network issues happen. If an API call fails, queue the event and retry with exponential backoff. Don't lose conversion data because of a temporary network glitch.
For Google Enhanced Conversions, the process differs slightly. You'll send hashed user data along with your existing conversion tracking. If using Google Ads API, include UserData in your ClickConversion upload. If using Google Tag Manager Server-Side, configure the Google Ads Conversion Tracking tag with Enhanced Conversions enabled and user_data variables mapped.
Success indicator: You see your test event appear in Meta Events Manager or Google Ads with all parameters correctly formatted. The event shows a successful status, not an error. Customer parameters show as matched, not missing or invalid. If using Meta's Test Events, you receive a score of 8 or higher.
Step 5: Configure Event Deduplication Between Pixel and Server
Running both browser pixel and Conversion API is the recommended approach. The pixel captures conversions that happen in-browser, while CAPI catches conversions the pixel misses. But you need deduplication to avoid counting the same conversion twice.
Deduplication works through the event_id parameter. When the same event_id appears in both a pixel event and a CAPI event within a specific time window, ad platforms count it only once. The platform typically prioritizes the server event because it's more reliable.
Generate the event_id on your server when the conversion happens. For e-commerce purchases, use your order ID. For lead forms, create a unique ID when the form submits. This ID needs to be passed to both your server and your browser pixel.
In your browser pixel code, include the event_id when firing the conversion event. For Meta Pixel, it looks like: fbq('track', 'Purchase', {value: 99.99, currency: 'USD'}, {eventID: 'order_12345'}). The third parameter is event data, the fourth parameter is an options object containing eventID.
Your server-side event must include the exact same event_id value. If your pixel sent eventID: 'order_12345', your CAPI payload must include event_id: 'order_12345'. Case sensitivity matters. Spelling matters. They must match exactly.
Timing matters for deduplication. Meta's deduplication window is typically 48 hours. If your pixel fires a Purchase event with event_id "order_12345" and your server sends the same event_id within 48 hours, Meta deduplicates them. If your server event arrives 72 hours later, it might be counted separately.
For conversions that happen primarily server-side (phone calls, CRM updates, offline purchases), you might not have a corresponding pixel event. That's fine. Send the CAPI event without worrying about deduplication. The event_id is still required, but it won't match anything from the pixel. Learn more about how to track offline conversions online for these scenarios.
Test deduplication by triggering a conversion that fires both pixel and server events. Check Events Manager and look at the event details. You should see "Deduplication Status: Deduplicated" or similar indication. The event count should be one, not two.
Common deduplication failures include mismatched event_id values (typos, different formats), events arriving outside the deduplication window, different event names between pixel and server (pixel sends "Purchase" but server sends "purchase"), and missing event_id on either the pixel or server side.
Monitor your deduplication rate in Events Manager. Navigate to your pixel's overview and check the percentage of events that are deduplicated versus unique. A healthy setup shows some deduplicated events (proving both pixel and server are working) but not 100% deduplication (which would mean you're not capturing any incremental conversions via CAPI).
Success indicator: Events Manager shows deduplicated events when you trigger conversions that fire both pixel and CAPI. Your total conversion count doesn't double after implementing server-side tracking. Event details confirm that duplicate events are being properly identified and counted only once.
Step 6: Validate Data Quality and Optimize Match Rates
Event Match Quality (EMQ) is Meta's score for how well your server events can be matched back to individual users. Scores range from 1.0 to 10.0. Higher scores mean better attribution and improved ad optimization. Meta recommends achieving a score above 6.0.
Check your EMQ score in Events Manager. Select your pixel, click on the Overview tab, and look for Event Match Quality. You'll see an overall score and a breakdown by event type. Click into the details to see which customer parameters are being received and which are missing.
EMQ scores improve when you send more customer matching parameters. Email and phone provide the strongest matching. External ID (your customer ID) helps when users are logged in. IP address and user agent add incremental value. Client user agent and client IP address should come from the user's browser, not your server's IP.
If your EMQ score is below 6.0, identify which parameters you're missing. The most common gaps are email addresses (not captured at conversion time), phone numbers (not requested in forms), and browser data (not passed from client to server). Prioritize capturing email addresses for all conversions if possible. Addressing poor conversion API data quality is critical for campaign optimization.
Hashing errors tank your EMQ score. Meta can't match users if the hashed data doesn't follow exact formatting rules. Email addresses must be lowercase before hashing. Remove all whitespace. For "User@Example.com ", the correct process is: trim spaces → "User@Example.com" → convert to lowercase → "user@example.com" → hash with SHA-256.
Phone numbers need country codes. A US phone number "555-123-4567" should become "15551234567" before hashing. Remove parentheses, dashes, and spaces. Include the country code (1 for US). If you're sending international phone numbers, ensure the country code is correct for each region.
First name, last name, city, state, and country all need to be lowercase and trimmed before hashing. Remove special characters. For cities with spaces like "New York", keep the space but convert to lowercase: "new york".
The fbc and fbp parameters significantly improve matching because they directly link server events to pixel events. The fbc parameter comes from the fbclid URL parameter when users click Meta ads. The fbp parameter is the _fbp cookie value set by the Meta Pixel. Pass these from your client-side code to your server when conversions happen.
Monitor match quality trends over time. If your score drops suddenly, something changed in your implementation. Check recent code deployments, form changes, or data pipeline updates that might have broken parameter collection.
Compare match rates across different conversion events. Purchase events might have high match rates because you collect email during checkout. Lead form submissions might have lower match rates if you only ask for name and company. Consider adding optional email fields to improve matching.
Success indicator: Your Event Match Quality score is above 6.0 and stable or improving. Events Manager shows that critical parameters like email, phone, and browser identifiers are being received and matched. You understand which parameters drive your score and have a plan to capture missing data points.
Step 7: Monitor Performance and Scale Your Implementation
The real test of Conversion API is whether it improves your ad performance. Compare attributed conversions before and after implementation. Pull conversion data for the 30 days before CAPI launch and the 30 days after. Look for an increase in total conversions attributed to your ads.
Many advertisers see a 15-30% increase in attributed conversions after implementing server-side tracking, though results vary based on your audience and tracking gaps. The increase comes from conversions that were always happening but couldn't be tracked via browser pixels alone. If you're still seeing discrepancies, learn how to fix underreporting conversions in your setup.
Set up monitoring dashboards to track your CAPI health. Key metrics include API success rate (percentage of events successfully delivered), API latency (time between conversion and event delivery), error rate by error type, Event Match Quality score trends, and conversion volume by event type. Use your logging infrastructure from Step 2 to feed these dashboards.
Alert on critical failures. If your API success rate drops below 95%, something is broken. If EMQ score suddenly drops by more than 1 point, investigate immediately. Set up alerts so you catch issues before they impact campaign performance.
Watch for common ongoing issues. Rate limiting happens if you send too many events too quickly. Meta allows 100 events per batch and recommends staying under 1000 events per second. If you're hitting rate limits, implement batching to group multiple events into single API calls. Authentication failures mean your access token expired or was revoked. Tokens don't expire automatically, but if someone regenerates the token in Events Manager, your old token stops working.
Expand CAPI to additional conversion events once your initial implementation is stable. If you started with Purchase events, add Lead events next. Then add AddToCart and InitiateCheckout to capture upper-funnel actions. Each event type gives ad platforms more data to optimize against.
Scale to additional ad platforms. If you implemented Meta Conversions API, add Google Enhanced Conversions next. TikTok, Pinterest, and Snapchat all have server-side tracking solutions. The more platforms that receive accurate conversion data, the better each platform can optimize your campaigns. Learn how to sync conversions to ad platforms across your entire marketing stack.
For teams managing multiple ad platforms, building and maintaining separate CAPI integrations becomes complex. Each platform has different API requirements, parameter formats, and authentication methods. Tools like Cometly simplify this by handling server-side tracking across all major ad platforms automatically. Cometly captures conversion events from your website, CRM, and backend systems, then syncs that data to Meta, Google, TikTok, and other platforms with proper formatting and deduplication. This approach ensures every platform receives enriched conversion data without custom development for each API.
The shift toward server-side tracking is permanent. As browser-based tracking becomes less reliable, ad platforms increasingly rely on Conversion API data for attribution and optimization. Advertisers who implement server-side tracking early gain a competitive advantage through more accurate data and better-optimized campaigns.
Success indicator: You see measurable improvement in attributed conversions after CAPI implementation. Your monitoring dashboards show consistent API success rates above 95%. You've expanded beyond your initial conversion events to capture a complete view of customer journeys. Ad platforms are using your server-side data to improve targeting and optimization, reflected in better ROAS or cost per conversion.
Your Server-Side Tracking Foundation
You've built a complete Conversion API implementation that captures conversions browser pixels miss. Your server now sends conversion data directly to ad platforms, bypassing iOS restrictions and cookie limitations. You've configured deduplication to avoid double-counting, validated data quality through Event Match Quality scores, and established monitoring to maintain performance over time.
Quick implementation checklist. API credentials configured and secured in environment variables or secret management. Conversion events mapped with all required parameters documented. Test events successfully received by ad platforms with proper formatting. Deduplication working between pixel and server with matching event_id values. Event Match Quality score at 6.0 or higher with critical parameters being matched. Monitoring dashboards tracking API success rate, latency, and error patterns.
The impact goes beyond better tracking. When ad platforms receive accurate conversion data, their algorithms optimize better. They learn which audiences convert, which creative drives results, and how to allocate budget for maximum return. Your campaigns become more efficient because the platforms have complete information instead of partial data.
Server-side tracking is particularly valuable for businesses with complex customer journeys. If your prospects research on mobile but convert on desktop, CAPI captures that cross-device path. If leads call your sales team after clicking an ad, CAPI can send those phone conversions back to the ad platform. If customers complete purchases in your CRM or offline, CAPI ensures those conversions get attributed correctly.
For teams managing multiple ad platforms, maintaining separate CAPI integrations for Meta, Google, TikTok, Pinterest, and others creates ongoing development overhead. Each platform updates their APIs, changes requirements, and introduces new features. Keeping everything synchronized becomes a full-time job. This is where attribution platforms like Cometly add value by automating server-side tracking across all channels, handling API updates automatically, and feeding enriched conversion data to every platform without custom code.
Ready to elevate your marketing game with precision and confidence? Discover how Cometly's AI-driven recommendations can transform your ad strategy. Get your free demo today and start capturing every touchpoint to maximize your conversions.


