When you invest in a marketing attribution platform, the first few days of setup determine whether you get accurate data or misleading insights that cost you real ad budget. Most marketers rush through onboarding, skip key configuration steps, and then wonder why their attribution numbers do not match reality.
The good news is that proper onboarding is not complicated. It just requires doing things in the right order, without cutting corners on the steps that matter most.
This guide walks you through the complete onboarding process for a marketing attribution platform, from connecting your first data source to reading your first multi-touch attribution report. Whether you are setting up Cometly or evaluating what proper onboarding should look like, these steps will help you build a tracking foundation that captures every touchpoint, feeds accurate conversion data back to your ad platforms, and gives your team the clarity to make confident budget decisions.
By the end of this guide, you will have a fully configured attribution environment where your ad platforms, website, and CRM are all speaking the same language. You will know which campaigns are driving real revenue, not just clicks. And your ad platform algorithms will be receiving the enriched conversion signals they need to optimize effectively.
The payoff is significant. Better data means better decisions, and better decisions mean more efficient ad spend. Let us get started.
Step 1: Audit Your Existing Tracking Setup Before You Touch Anything
Before you connect a single integration, you need a clear picture of what you already have in place. Skipping this audit is the most common reason marketers end up with double-counted conversions, missing channels, or attribution data that simply does not add up.
Start by listing every ad platform you are currently running. This typically includes Meta, Google Ads, TikTok, LinkedIn, and any others where you have active spend. Each one likely has its own pixel or tag firing on your website, and each one may be tracking conversions differently.
Next, document where conversions are currently being tracked. Are you relying solely on platform pixels? Do you have server-side tracking in place? Are conversions being recorded in GA4, your CRM, or some combination of all three? Write it all down. This map becomes your reference point throughout the rest of onboarding.
Once you have documented your current setup, look for gaps. Common issues include events that fire inconsistently, duplicate conversions being counted across multiple systems, and entire touchpoints that have zero visibility. If someone clicks a LinkedIn ad, fills out a form, and converts two weeks later after a Google remarketing ad, can your current setup see that full journey? Most basic setups cannot.
Identify your primary conversion events. These are the actions that represent real business value: purchases, form fills, demo bookings, free trial signups. These are the events your attribution platform needs to track with precision.
Pay close attention to whether your current setup relies exclusively on client-side pixels. Browser-based tracking has become significantly less reliable due to iOS privacy changes and widespread ad blocker usage. If your entire conversion tracking stack depends on pixels firing in the browser, you are almost certainly missing a meaningful portion of your conversion data.
Finally, flag every CRM or e-commerce platform integration you will need to set up. Common ones include Shopify, HubSpot, and Salesforce. Knowing these in advance prevents surprises mid-setup.
Success indicator: You have a written map of every data source that needs to connect to your attribution platform, including ad platforms, your website, and your CRM. This document will guide every step that follows.
Step 2: Connect Your Ad Platforms and Enable Server-Side Tracking
With your audit complete, it is time to start connecting data sources. Begin with your highest-spend ad platform. Getting attribution data flowing on your most important channel first means you are capturing real business-critical data from day one.
Most attribution platforms, including Cometly, offer native integrations for Meta Ads, Google Ads, TikTok Ads, and LinkedIn Ads. Connect each platform using the available API connection or native integration. This pulls in your campaign structure, ad spend, and click data so the attribution platform can begin matching those clicks to the conversion events you will configure in the next step.
The critical piece of this step is enabling server-side tracking for each platform. Here is why this matters: browser-based pixels send conversion data from the user's browser to the ad platform. But if that user has an ad blocker installed, is browsing on iOS with privacy settings enabled, or has cookies disabled, that conversion signal never reaches the platform. The conversion happened, but the ad platform has no record of it.
Server-side tracking solves this by sending conversion events directly from your server to the ad platform's API. The data bypasses the browser entirely, which means browser restrictions and ad blockers have no impact on your data completeness.
For Meta specifically, server-side events sent through the Conversions API directly affect your Facebook Event Match Quality scores. Higher match quality means Meta can more accurately attribute conversions to the right ads and optimize delivery toward users who are more likely to convert. This is not a minor technical detail. It has a direct impact on how well your Meta campaigns perform.
While connecting your ad platforms, verify that UTM parameters are being captured correctly. Every ad platform should be passing UTM source, medium, campaign, content, and term parameters through your links. Without consistent UTM tagging, your cross-platform attribution platform cannot reliably assign clicks to the correct campaign and ad creative.
Common pitfall: Relying solely on platform pixels means losing a significant portion of conversion signals, especially on mobile. Server-side tracking is not optional if you want accurate data.
Success indicator: Each connected ad platform shows active data flow in your attribution dashboard, and your server-side events are confirmed as received by each platform's API.
Step 3: Install Website Tracking and Define Your Conversion Events
Now that your ad platforms are connected, your attribution platform needs visibility into what happens on your website. This is where you install the tracking script and define the specific events that represent meaningful actions in your customer journey.
Install the attribution platform tracking script on your website. Using a tag manager like Google Tag Manager makes this easier to manage and update without requiring developer involvement every time you need to make a change. Once the script is live, your attribution platform can begin capturing page views and session data.
The more important work is defining your conversion events. Be intentional here. You want to track page views, button clicks, form submissions, purchases, and any custom micro-conversions that are meaningful to your business. But the events you prioritize for attribution purposes should be the ones that map directly to revenue: demo requests, free trial signups, purchases, and similar high-value actions.
Set up event parameters to capture additional context alongside each conversion. For e-commerce, this means capturing order value, product category, and transaction ID. For SaaS, it might mean capturing plan type, lead source, or whether the signup came from a paid or organic channel. This additional context makes your e-commerce attribution reports significantly more actionable.
Once your events are configured, test every single one. Trigger each conversion event manually and confirm it appears in your attribution dashboard within a few minutes. Do not assume events are firing correctly just because the setup looks right. Manual testing is the only way to be certain.
For e-commerce teams, make sure your checkout flow fires events at each stage: product view, add to cart, checkout initiation, and purchase. This gives you visibility into where users drop off and ensures abandoned cart behavior is captured.
After your events are validated, map each website event to the corresponding conversion action in each connected ad platform. This alignment ensures that the optimization signals flowing back to Meta, Google, and other platforms reflect the same conversion definitions you are using in your attribution reports.
Common pitfall: Tracking too many events without defining which ones represent real business value creates noisy data that is hard to interpret and act on. Focus on quality over quantity.
Success indicator: Your primary conversion events are firing consistently and appearing in your attribution platform within minutes of occurring, with the correct parameters attached.
Step 4: Connect Your CRM and Close the Lead-to-Revenue Loop
This step is what separates surface-level click attribution from true revenue attribution. Connecting your CRM transforms your attribution platform from a traffic analysis tool into a genuine revenue intelligence system.
Without CRM integration, your attribution data stops at the lead stage. You can see which campaigns generated form fills, but you have no way of knowing which of those leads actually turned into paying customers. For B2B and SaaS businesses where the sales cycle spans days or weeks, this gap makes attribution data nearly useless for real budget decisions. You can learn more about why this matters in the context of lead attribution and the full B2B customer journey.
Start by integrating your CRM, whether that is HubSpot, Salesforce, or another platform. Once connected, map your CRM deal stages to attribution events. This allows your attribution platform to track not just when a lead enters the funnel, but when it moves through pipeline stages and ultimately closes as revenue.
For B2B teams, this connection is particularly revealing. It shows you which ad campaigns generate leads that actually close versus campaigns that generate high lead volume but poor close rates. Understanding pipeline velocity by channel gives you a much more honest view of where your ad budget is actually producing returns. This is the foundation of strong B2B revenue attribution.
Set up lead ID passing so that when a form is filled on your website, the CRM record carries the attribution data from that session. This is the technical mechanism that links the original marketing touchpoint to everything that happens downstream in the sales process.
Configure revenue syncing so that when a deal closes in your CRM, the attributed revenue flows back into your attribution reports. This is what allows you to calculate true ROAS and CPA based on actual closed revenue rather than estimated lead value. For teams evaluating the best attribution tools for B2B SaaS, CRM integration is a non-negotiable requirement.
Common pitfall: Skipping CRM integration means your attribution data stops at the lead stage and you cannot connect ad spend to actual revenue. For any business with a sales process longer than a single session, this is a critical gap.
Success indicator: Closed deals in your CRM are appearing in your attribution dashboard with the correct originating campaign and channel, and revenue figures are flowing into your reports accurately.
Step 5: Choose Your Attribution Model and Configure Reporting
With your data flowing, you now need to decide how credit gets assigned across the customer journey. This decision shapes everything you see in your reports, so it is worth understanding your options before you configure anything.
The five most common attribution models each tell a different story about how your marketing works. You can explore them in detail in this breakdown of the 5 most common ad attribution models, but here is a practical summary:
First-touch attribution gives full credit to the channel that first introduced the customer to your brand. This is useful for understanding which channels are most effective at driving awareness and top-of-funnel discovery.
Last-touch attribution gives full credit to the final interaction before conversion. This model tends to overvalue retargeting and branded search while undervaluing the channels that started the customer journey.
Linear attribution distributes credit equally across every touchpoint in the customer journey. It is a balanced starting point that avoids over-crediting any single channel.
Time-decay attribution gives more credit to touchpoints that occurred closer to the conversion, which can be useful when recency of engagement is a meaningful signal in your sales process.
Data-driven attribution uses algorithmic analysis to assign credit based on which touchpoints actually influenced conversions in your specific data set. This is the most accurate model but requires sufficient conversion volume to produce reliable results.
For most paid media teams just getting started with attribution, a linear or position-based multi-touch attribution model provides a balanced view while you accumulate enough data to consider data-driven attribution. The key is choosing a model that reflects how your customers actually behave, not one that simply makes your favorite channel look best.
Configure your reporting dashboard to surface the metrics that matter most: ROAS, CPA, revenue by channel, conversion volume, and any channel-specific metrics your team tracks. Set up comparison views so you can toggle between attribution models and understand how credit shifts across channels when you change the model. This comparison capability is one of the most valuable features of a modern attribution platform.
Success indicator: Your attribution reports show a clear breakdown of revenue and conversions by channel, campaign, and ad with your chosen model applied, and you can compare model outputs side by side.
Step 6: Activate Conversion Sync to Feed Ad Platforms Better Data
This step closes the feedback loop that makes your entire attribution setup compound in value over time. Once your attribution data is flowing accurately, use conversion sync to send enriched conversion events back to Meta, Google, TikTok, and other connected platforms.
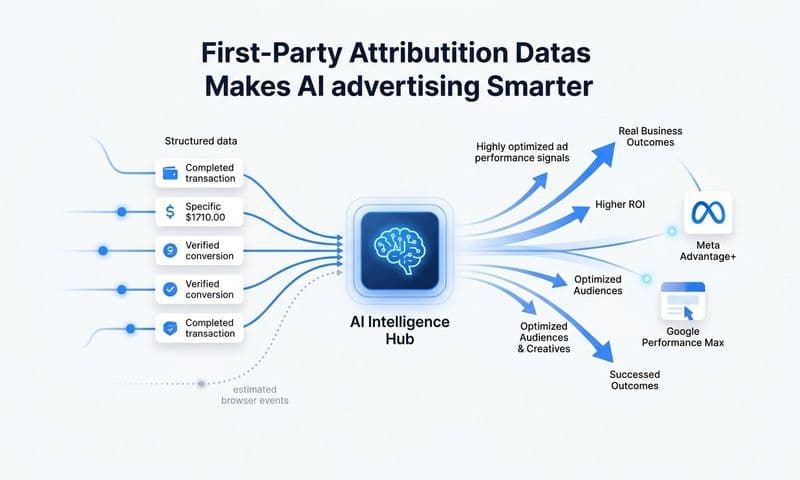
Here is the logic: your attribution platform has now captured accurate, complete conversion data that the ad platforms themselves could not see on their own. Conversion sync takes that data and sends it back to the platforms so their algorithms can use it to optimize your campaigns. Better inputs produce better outputs. The ad platform algorithms become smarter because they are working with more complete and accurate conversion signals.
Enriched conversion events go beyond basic event data. They include additional customer information such as email address, phone number, and location that improve audience matching rates. When Meta or Google can match a conversion event to a specific user profile with higher confidence, the algorithm can more effectively find other users who resemble your actual buyers.
For Meta, this directly improves your Conversions API signal quality. The algorithm gains a clearer picture of who is converting and can optimize ad delivery toward users with similar characteristics. This is especially valuable after iOS privacy changes reduced the effectiveness of browser-based pixel data. Teams running Facebook Ads attribution will see the most immediate impact from enabling this sync.
For Google, syncing offline conversions allows Smart Bidding to optimize toward real revenue rather than just form fills or page events. If your sales cycle involves a human conversation between the form fill and the closed deal, this sync is the mechanism that connects that offline revenue to the original ad click.
When configuring conversion sync, be deliberate about which events you send back to each platform. Prioritize your highest-value conversion actions. Sending every micro-conversion back to the platforms can create noise that confuses the algorithm rather than helping it.
Common pitfall: Sending low-quality, duplicate, or inconsistently defined conversion events back to ad platforms can degrade algorithm performance. Quality and consistency matter more than volume here.
Success indicator: Your ad platforms show improved event match quality scores, and your automated bidding strategies are working with richer, more complete conversion data than before.
Your Attribution Platform Is Live: What to Do in Week One
You have completed the core setup. Now the work shifts from configuration to validation and interpretation. Here is how to spend your first week productively.
Resist the urge to make major budget decisions immediately. Spend the first week validating your data. Compare your attribution reports against your ad platform dashboards and look for discrepancies. Some differences are expected and explainable. Others may point to a configuration issue worth investigating before you act on the data.
Use any AI chat or analysis features your attribution platform offers. Cometly's AI capabilities let you ask questions about your data and surface insights you might not have spotted through manual review. This is especially useful in the early days when you are still learning how to read your attribution reports. Exploring growth marketing analytics through an AI-assisted lens can accelerate your learning curve significantly.
Use this quick-start checklist to confirm your setup is complete before moving into active optimization:
1. All ad platforms connected with active data flow
2. Server-side tracking active and confirmed for each platform
3. Primary conversion events firing consistently with correct parameters
4. CRM integrated with revenue syncing configured
5. Attribution model selected and reporting dashboard configured
6. Conversion sync enabled and sending enriched events back to ad platforms
Set a weekly review cadence where your team reviews attribution reports, identifies top-performing campaigns, and flags underperformers. Use the data to have more informed budget conversations: move spend toward channels that drive revenue, not just traffic or impressions.
Share a summary of your attribution setup with stakeholders so everyone understands how performance is now being measured. Attribution changes how you interpret results, and alignment across your team prevents confusion when numbers look different from what the ad platforms report directly.
Finally, treat onboarding as an ongoing process. Revisit your setup when you launch new campaigns, add new channels, or change your conversion goals. Your attribution environment should evolve alongside your marketing strategy.
The Bottom Line: Attribution That Actually Works
Proper onboarding for a marketing attribution platform is the difference between having data and having clarity. When every ad platform is connected, server-side tracking is active, your CRM is synced, and conversion data is flowing back to your ad algorithms, you have built a system that makes every marketing dollar more accountable.
The steps in this guide are designed to get you from zero to a fully operational attribution environment without cutting corners that will cost you accuracy later. Each step builds on the last, and together they create a foundation where your team can make confident, data-backed decisions rather than educated guesses.
Understanding how attribution software improves digital marketing efforts is one thing. Having it set up correctly is another. The setup is where the value actually gets unlocked.
Cometly is built specifically for this kind of setup, giving marketing teams a single place to capture every touchpoint, understand what is really driving revenue, get AI-powered recommendations, and feed better data back to ad platforms. The entire onboarding process described in this guide is designed to be fast, accurate, and built for scale.
If you are ready to stop guessing and start scaling with confidence, your attribution foundation starts here. Get your free demo today and start capturing every touchpoint to maximize your conversions.