If you are running paid ads but cannot tell which campaigns are actually driving revenue, you are making decisions in the dark. Every dollar you spend is essentially a guess until you can trace it to a pipeline stage, a closed deal, or an actual dollar of revenue.
Marketing attribution tracking solves this by connecting every ad click, form fill, and CRM event to the deals your sales team closes. For B2B SaaS companies especially, where sales cycles are long and touchpoints are many, setting up attribution tracking is not optional. It is the foundation of every smart budget decision you will make.
The challenge is that most teams either skip this setup entirely or piece it together in ways that leave major gaps. They track clicks but not revenue. They run pixels but miss server-side events. They connect ad platforms but forget the CRM. The result is reporting that looks complete but is fundamentally unreliable.
This guide walks you through exactly how to setup marketing attribution tracking from scratch. Whether you are starting fresh or rebuilding a broken setup, these steps will give you a clear, reliable system that shows which channels and campaigns are generating pipeline and revenue.
By the end, you will have tracking in place that captures every touchpoint, feeds accurate conversion data back to your ad platforms, and gives your team a single source of truth for marketing performance. Let's get into it.
Step 1: Define Your Conversion Events and Goals
Before you install a single pixel or write a single UTM, you need to know what you are actually trying to measure. Jumping straight into technical setup without a clear conversion map is one of the most common reasons attribution tracking fails to deliver useful insights.
Start by identifying the specific actions that matter most to your business. For B2B SaaS companies, these typically include demo requests, free trial signups, MQL form fills, and closed-won deals. Each of these represents a meaningful step in your funnel, and each one deserves its own tracked event.
Next, map out your funnel stages so you understand which events represent top-of-funnel awareness, mid-funnel intent, and bottom-of-funnel revenue. This matters because attribution in marketing is not just about counting conversions. It is about understanding which touchpoints contribute to progression through the funnel at every stage.
As part of this mapping, distinguish between micro-conversions and macro-conversions. Micro-conversions are actions like page visits, content downloads, or webinar registrations. They signal interest but do not directly generate revenue. Macro-conversions are the revenue-generating actions: a signed contract, a completed trial that converts to paid, a demo that leads to a closed deal. Your attribution system should prioritize macro-conversions as the primary success signal, with micro-conversions providing supporting context.
Once you have identified your events, document each one with three pieces of information: a name, a trigger condition, and an assigned value. The name should be consistent and descriptive. The trigger condition describes exactly when the event fires (for example, "form submission on /demo page"). The assigned value reflects the business importance of that event, which helps your attribution platform and ad platforms weight conversions correctly.
Common pitfall: Tracking too many events without weighting them by importance leads to noisy data. When everything is a conversion, nothing is meaningful. Focus on three to five high-value events first and expand from there once your core setup is stable.
Success indicator: You have a written conversion map that lists each event, where it fires, and what business outcome it represents. This document becomes the blueprint for every technical step that follows.
Step 2: Implement Your Tracking Pixel and Server-Side Events
With your conversion map in hand, it is time to implement the actual tracking infrastructure. This is where most of the technical work happens, and where getting things right from the start saves you significant headaches later.
Begin by installing a first-party tracking pixel on your website. This pixel captures user behavior, session data, and ad click parameters from the moment someone lands on your site. It is the foundation of your attribution data collection and needs to be present on every page of your website, not just your landing pages.
Here is the critical issue with relying on pixel-only tracking in today's environment: browser-based (client-side) tracking alone is increasingly unreliable. Ad blockers prevent pixels from firing. iOS privacy changes limit cookie-based tracking. Browser restrictions reduce the window for tracking returning visitors. If you are only using a client-side pixel, you are likely missing a meaningful portion of your conversions.
This is where server-side tracking becomes essential. Instead of relying on a user's browser to send conversion data to ad platforms, server-side tracking sends that data directly from your server. The result is more complete, more accurate conversion data that bypasses browser-based limitations entirely.
The most important server-side integrations to set up are the Meta Conversions API (CAPI) and Google Enhanced Conversions. These allow you to send conversion events directly from your server to Meta and Google, where they are matched against user data with significantly higher accuracy than browser-only events. Higher match rates mean better ad platform optimization, which directly improves your targeting and cost per acquisition over time.
When implementing CAPI, you will connect your server to Meta's API endpoint and configure it to send the same conversion events you defined in Step 1. Each event should include as much matching data as possible: email, phone, name, and other identifiers that help Meta match the event to a user in their system.
Once both client-side and server-side tracking are running, you must implement deduplication logic. Without it, the same conversion will be reported twice: once from the browser pixel and once from the server event. Deduplication uses a unique event ID to tell the ad platform that these two signals represent the same conversion, not two separate ones.
Common pitfall: Duplicate event firing from both client-side and server-side tracking inflates conversion counts and corrupts your optimization signals. Always configure deduplication before going live with server-side events.
Success indicator: Your pixel is live, server-side events are firing, and you can see real-time event data flowing into your attribution platform with accurate event counts that match your expected conversion volume.
Step 3: Configure UTM Parameters Across All Campaigns
UTM parameters are the connective tissue between your ad platforms and your attribution system. Without them, your attribution platform cannot tell the difference between a visitor who came from a Google Ads campaign and one who typed your URL directly into their browser.
A UTM parameter is a tag appended to your ad URL that passes information about the traffic source to your analytics and attribution tools. The five standard UTM parameters are: source (where the traffic came from, such as google or facebook), medium (the channel type, such as cpc or email), campaign (the specific campaign name), content (the ad creative or variation), and term (the keyword for search campaigns).
Before you start tagging URLs, build a consistent UTM naming convention and document it in a shared spreadsheet. This is not a step to rush. Inconsistent naming is one of the most common causes of messy attribution data. If one team member tags a campaign as "Google_Ads" and another tags it as "google-ads" and a third uses "GoogleAds," your attribution platform will treat these as three separate sources. Enforce lowercase and standardized naming from day one.
Apply UTMs to every paid channel: Google Ads, Meta Ads, LinkedIn Ads, email campaigns, and any other traffic source you want to track. If a URL does not have a UTM, your attribution system cannot attribute that visit to the correct source. This means untagged campaigns will show up as direct traffic, which distorts your entire channel analysis. Learn more about how UTM tracking helps your marketing before building out your naming conventions.
Where available, use dynamic parameters to automate UTM population. Google Ads supports parameters like {campaignid} and {adgroupid} that automatically populate with the correct values when an ad is served. Meta supports dynamic parameters like {{campaign.name}} and {{adset.name}}. Using dynamic parameters reduces manual errors and ensures your UTMs stay accurate even as campaigns scale and change.
Once UTMs are in place, the data flows from the ad click into your attribution platform and CRM. When a visitor clicks an ad, the UTM parameters are captured and stored alongside their session data. If they later fill out a demo form, that UTM data is attached to the lead record. When the deal closes in your CRM, you can trace it all the way back to the original campaign, ad set, and creative that started the journey.
Common pitfall: Inconsistent capitalization or naming breaks grouping in reports. A campaign tagged as "Brand_Awareness" and "brand_awareness" will appear as two separate campaigns in your data.
Success indicator: Every active campaign URL includes a complete UTM string and your attribution platform is correctly categorizing traffic by source and campaign with no untagged paid traffic appearing as direct.
Step 4: Connect Your Ad Platforms, CRM, and Revenue Data
This is where attribution tracking transforms from a data collection exercise into a genuine business intelligence system. Pixels and UTMs give you traffic and conversion data. But when you connect your ad platforms, CRM, and revenue data into a single view, you get something far more valuable: the ability to see which campaigns are actually generating revenue, not just leads.
Start by connecting your ad accounts. Link your Google Ads, Meta Ads, and LinkedIn Ads accounts to your attribution platform so that spend data flows in alongside conversion data. This is what makes true ROI calculation possible. Without spend data, you can see which campaigns drive conversions, but you cannot determine whether those conversions were acquired efficiently.
Next, integrate your CRM. This is a step many teams skip, and it is the most costly omission in any attribution setup. When your CRM is connected, your attribution platform can receive lead status updates, pipeline stage changes, and deal values as they progress through your sales process. A lead that came from a LinkedIn campaign and eventually became a $50,000 annual contract should show up in your attribution data as a $50,000 revenue outcome, not just a form fill.
HubSpot and Salesforce are the most common CRM integrations for B2B SaaS teams. The connection typically works by passing a unique identifier (such as an email address or contact ID) between your attribution platform and CRM so that marketing touchpoints can be matched to CRM records as deals progress. For a deeper look at how this works in practice, see our guide on Salesforce marketing attribution integration.
Finally, connect your billing or payment platform. Integrating Stripe or a similar payment tool allows actual subscription revenue to flow back into your attribution system. This closes the loop completely: you can now see the full journey from first ad click to paid customer, with real revenue values attached to every campaign that contributed to that outcome.
Cometly's 70+ native integrations make this connection process straightforward. You can link your ad accounts, CRM, and billing platform without custom engineering work, which means your team gets end-to-end visibility from first ad click to closed-won revenue without a lengthy technical implementation.
Common pitfall: Connecting ad platforms but skipping CRM integration means you can track leads but not revenue. Lead volume is a lagging indicator of campaign quality. Revenue is the truth. Always close the loop with CRM and billing data.
Success indicator: Your attribution dashboard shows ad spend, leads, pipeline value, and revenue in a single view with no manual data stitching required. You can answer the question "which campaign generated the most revenue this quarter?" in seconds.
Step 5: Choose and Configure Your Attribution Models
With your data flowing in from all sources, the next decision is how to assign credit for conversions. This is what attribution models do: they determine how credit for a conversion is distributed across the multiple touchpoints in a customer journey.
The three most common models are first-touch, last-touch, and multi-touch. First-touch attribution gives all credit to the first interaction a prospect had with your brand. This model favors awareness channels like display advertising or top-of-funnel content. Last-touch attribution gives all credit to the final interaction before conversion. This model favors bottom-funnel channels like branded search or retargeting. Multi-touch attribution distributes credit across all touchpoints in the journey, giving a more balanced view of how each channel contributed to the outcome.
For B2B SaaS companies with long sales cycles and multiple decision-maker touchpoints, multi-touch attribution typically gives the most accurate picture of what is working. A prospect might first discover your product through a LinkedIn ad, engage with a retargeting campaign two weeks later, attend a webinar, and then convert after clicking a Google branded search ad. Last-touch attribution would give all credit to the branded search ad and completely ignore the LinkedIn ad that started the journey. Multi-touch attribution recognizes all four touchpoints and distributes credit accordingly.
Within multi-touch, there are several variations: linear (equal credit to all touchpoints), time-decay (more credit to touchpoints closer to conversion), and position-based or U-shaped (more credit to the first and last touchpoints). The right choice depends on your sales cycle length, your channel mix, and your reporting goals.
To configure your attribution model, set a default model in your attribution platform that will be used for primary reporting and budget decisions. Then use model comparison as an auditing tool. Running first-touch and multi-touch side by side often reveals significant differences in how budget allocation would change under each model. This comparison is one of the most valuable exercises you can run when reviewing channel performance.
Common pitfall: Choosing a model and never revisiting it. As your channel mix evolves and your sales cycle changes, your attribution model should be reviewed at least quarterly to ensure it still reflects how your customers actually buy.
Success indicator: You have a primary attribution model configured, you understand how it assigns credit across your top-performing channels, and you can articulate why that model is the right fit for your current sales cycle and channel mix.
Step 6: Validate Your Data and Audit for Accuracy
Here is a rule worth internalizing before you make a single budget decision based on attribution data: attribution data is only as reliable as the tracking setup behind it. A setup that looks complete can still have silent failures that corrupt your reporting without any obvious warning signs.
The most important validation step is running a test conversion. Click a tracked ad URL (or a URL with UTM parameters), complete a form on your site, and then check your attribution platform to confirm the event appeared with the correct UTM parameters attached. This end-to-end test confirms that the full chain is working: the UTM is captured on landing, the event fires on conversion, and the data appears in your platform with the correct attribution.
Next, cross-reference conversion counts between your attribution platform, your ad platform dashboards, and your CRM. These numbers will rarely be identical due to differences in attribution windows and counting methodologies, but they should be in a reasonable range of each other. Significant discrepancies are a signal that something in your tracking setup is broken or misconfigured. Understanding the dilemma of attribution in marketing can help you interpret these gaps more accurately.
Check specifically for these common data quality issues: missing UTMs on some campaigns (which causes those conversions to appear as direct traffic), events firing on incorrect pages (which inflates conversion counts), and CRM leads not being matched to ad data (which means pipeline and revenue are not flowing back to your attribution system).
Set up a regular audit cadence to catch tracking drift before it corrupts your reporting. Monthly audits are the minimum for most teams. During each audit, check that all active campaigns have UTMs, verify that key conversion events are still firing correctly, and compare conversion counts across your platforms to catch any new discrepancies.
Common pitfall: Assuming data is accurate because it looks reasonable. Actively test and validate rather than passively trust. Silent tracking failures are the most dangerous kind because they allow bad data to influence budget decisions over time without triggering any obvious alert.
Success indicator: Conversion counts in your attribution platform are within an acceptable variance of your CRM and ad platform data, and you have a documented validation process that your team runs on a regular schedule.
Step 7: Activate Insights and Feed Data Back to Ad Platforms
Here is where the investment in attribution tracking starts to compound. Most teams think of attribution as a reporting tool. The most sophisticated teams use it as an optimization engine. The difference in outcomes between these two approaches is significant.
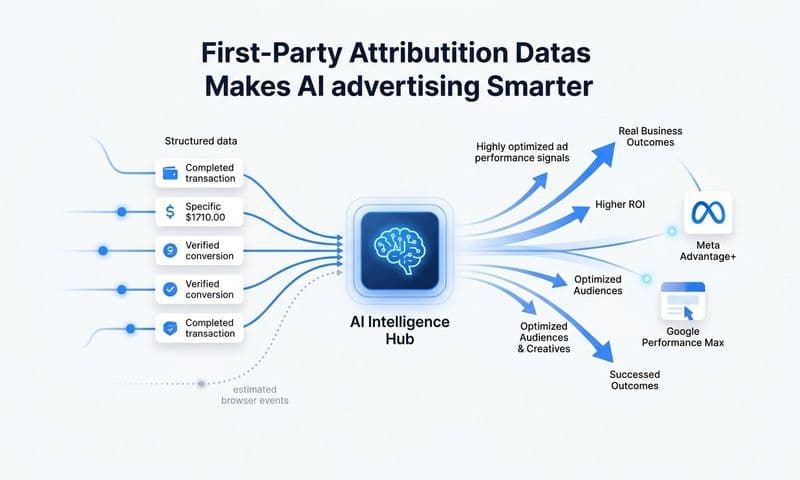
The key insight is this: attribution tracking is not just about understanding what happened. It is about feeding better data back into your ad platforms so their machine learning algorithms optimize toward real revenue, not just clicks or form fills. When your ad platform only sees form fills as the conversion signal, it optimizes for people who fill out forms. When it sees closed-won revenue as the conversion signal, it optimizes for people who actually become customers. These are very different audiences.
Use your attribution platform to send enriched conversion events back to Meta CAPI and Google Enhanced Conversions, including revenue values tied to closed deals. When Meta's algorithm sees that a specific audience segment consistently generates high-value customers, it will find more people like them. This improves lookalike modeling, audience targeting, and automated bidding in ways that browser-only conversion data simply cannot achieve.
Beyond feeding data back to ad platforms, use your attribution insights to make active budget decisions. Identify your highest-ROI channels and campaigns by looking at revenue generated per dollar spent, not just cost per lead. Shift budget toward what is actually driving revenue and away from channels that generate lead volume but poor downstream conversion rates.
This is where AI-driven recommendations within your attribution platform become genuinely useful. Rather than manually analyzing performance across every campaign and channel, Cometly's AI ads manager analyzes your attribution data across all channels and surfaces actionable recommendations. It identifies which ads and campaigns are generating the best return and flags which ones to scale or pause, so your team can act on insights quickly rather than spending hours in spreadsheets.
The compounding effect here is real. Better conversion data feeds better ad platform optimization. Better optimization generates higher-quality leads. Higher-quality leads close at better rates. Better close rates produce more revenue data. More revenue data further improves your attribution accuracy. Each cycle makes the next one more effective.
Success indicator: You are actively using attribution insights to make budget decisions at least bi-weekly, and your ad platforms are receiving enriched conversion data that reflects actual revenue outcomes rather than just top-of-funnel form fills.
Putting It All Together
Setting up marketing attribution tracking is one of the highest-leverage investments a B2B SaaS marketing team can make. When every touchpoint is captured, every conversion is tied to a revenue outcome, and your ad platforms are receiving accurate data, you stop guessing and start scaling with confidence.
To recap the seven steps: define your conversion events and goals, implement your pixel and server-side tracking, configure UTM parameters across all campaigns, connect your ad platforms and CRM, choose the right attribution model, validate your data, and feed enriched conversion data back to your ad platforms. Each step builds on the last, and together they give you a complete, reliable attribution system.
The common thread across all seven steps is data quality. A technically complete setup with inconsistent UTMs, missing CRM integration, or unvalidated events will still produce misleading reports. Invest the time to do each step correctly, and the payoff is a marketing operation that can make confident, data-driven decisions at every stage of growth.
Cometly brings all of these capabilities into a single platform built specifically for B2B SaaS teams. From server-side conversion tracking and Conversion API integration to multi-touch attribution and AI-powered recommendations, it gives your team the accurate data and actionable insights needed to grow revenue efficiently. You get end-to-end visibility from first ad click to closed-won revenue, without stitching together multiple tools or relying on manual reporting.
If you are ready to move from fragmented tracking to a true single source of truth for your marketing data, Get your free demo today and start capturing every touchpoint to maximize your conversions.