Snapchat is no longer just a platform for disappearing selfies and teen trends. B2B SaaS marketers are increasingly running campaigns on Snapchat to reach younger decision-makers, build brand awareness at the top of the funnel, and capture audiences that are harder to reach on LinkedIn or Google. But running ads without proper tracking is essentially flying blind.
Without accurate conversion data, you cannot tell which campaigns are generating leads, which creatives are driving signups, or how Snapchat fits into your broader revenue picture. You end up making budget decisions based on impressions and clicks rather than pipeline and revenue, which is a fast way to waste ad spend.
This guide walks you through the complete Snapchat ads tracking setup process, from installing the Snap Pixel to connecting your conversion data back to real pipeline and revenue. Whether you are setting up tracking for the first time or auditing an existing configuration, these steps will help you build a reliable data foundation.
By the end, you will have a fully functional tracking setup that captures every meaningful conversion event, feeds clean data back to Snapchat's algorithm, and integrates with your attribution workflow so you can make confident, data-driven decisions about your ad spend. Let's get into it.
Step 1: Set Up Your Snap Pixel in Snapchat Ads Manager
The Snap Pixel is your starting point. It is a small piece of JavaScript code that lives on your website and sends behavioral data back to Snapchat, allowing the platform to match site visitors to Snapchat user profiles and attribute conversions to your ads.
Start by logging into Snapchat Ads Manager and navigating to the Events Manager section in the left-hand menu. From there, click New Event Source and select Snap Pixel from the options presented.
Give your pixel a clear, descriptive name tied to your brand or property. Something like "YourBrand-Main-Site" works well. This matters more than it seems, especially if you manage multiple properties or work across client accounts. Ambiguous pixel names create confusion fast.
Once created, Snapchat will provide you with a base pixel code snippet. You have two installation options. You can install it manually by pasting the code into the <head> section of every page on your website, or you can deploy it through a tag manager like Google Tag Manager, which gives you more flexibility and control without touching your codebase directly.
For most B2B SaaS teams, Google Tag Manager is the preferred route. It lets you manage all your tracking tags in one place, update them without developer involvement, and maintain cleaner version control.
After installation, verify that the pixel is firing correctly using the Snap Pixel Helper Chrome extension. Install it, visit your homepage and key landing pages, and confirm that the extension shows a green status with the correct pixel ID. This is a quick but essential check before moving forward.
Common pitfall: One of the most frequent mistakes is installing the pixel only on specific pages, such as the homepage or a single landing page, rather than site-wide. This creates gaps in your visitor data and limits Snapchat's ability to build accurate audiences for retargeting and lookalike campaigns. Install it everywhere.
Success indicator: The Snap Pixel Helper extension shows the pixel firing on your homepage and key landing pages with a green status and the correct pixel ID displayed.
Step 2: Define and Configure Your Conversion Events
Installing the pixel gets your foot in the door, but conversion events are where the real tracking value lives. Events tell Snapchat exactly which actions matter to your business, which is what allows the platform to optimize ad delivery toward users most likely to take those actions.
Before touching the Events Manager, spend a few minutes mapping out your B2B SaaS funnel and identifying the specific actions you want to track. For most B2B SaaS companies, the highest-priority events are:
Free trial signups: The moment a user creates an account or starts a trial. This is typically the most important top-of-funnel conversion for SaaS businesses.
Demo requests: A form submission requesting a product demo, which signals high purchase intent.
Paid conversions: When a user completes a purchase or upgrades to a paid plan.
In Events Manager, navigate to your pixel and select Add Events. Snapchat offers two categories of events. Standard Events are pre-defined by Snapchat and include actions like SIGN_UP, PURCHASE, ADD_TO_CART, and PAGE_VIEW. Custom Events allow you to define unique actions that do not fit neatly into Snapchat's standard taxonomy.
For B2B SaaS, prioritize SIGN_UP for trial starts and demo requests, and PURCHASE for paid conversions. Using standard events where possible is generally recommended because Snapchat's algorithm is trained to optimize toward them more effectively than custom events.
When configuring each event, add event parameters to enrich the data Snapchat receives. The most important parameters for B2B SaaS are:
value: The monetary value associated with the conversion, useful for ROAS calculations.
currency: The currency code (e.g., USD) corresponding to the value parameter.
client_dedup_id: A unique identifier for each conversion event, which you will need in Step 3 to prevent duplicate counting when running both pixel and server-side tracking simultaneously.
Once your events are configured, use the Test Events tool inside Events Manager to fire test conversions and confirm they are registering correctly. Trigger each event manually by completing the corresponding action on your site, then watch for it to appear in the test panel in real time.
Common pitfall: Using vague or overly broad events makes optimization difficult. If you fire a SIGN_UP event for every form submission on your site, including newsletter signups and contact forms, you are mixing high-intent and low-intent actions into the same signal. Be specific about what each event represents and what it means for your funnel. A proper conversion tracking setup requires precision at the event definition stage.
Success indicator: Test events appear in real time inside Events Manager with the correct event names and parameter values populated as expected.
Step 3: Implement the Snap Conversions API for Server-Side Tracking
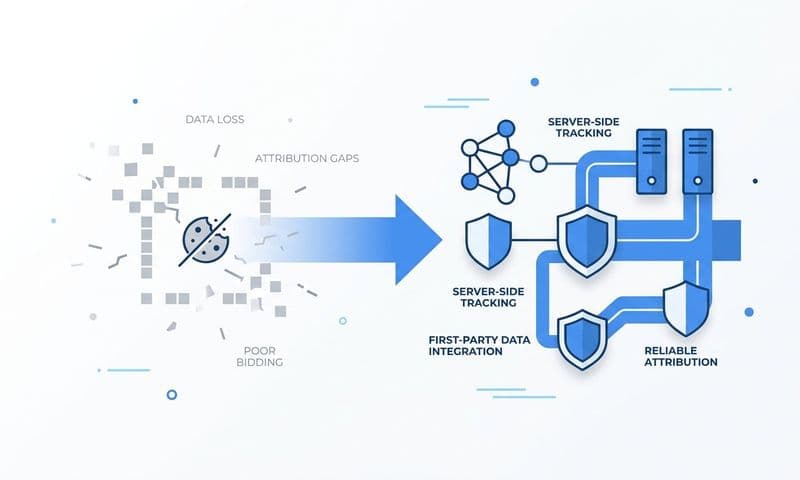
If you are relying solely on the Snap Pixel for conversion tracking, you are already working with incomplete data. Browser-based tracking is increasingly limited by ad blockers, browser-level privacy restrictions, and the ongoing effects of iOS privacy changes that restrict third-party cookie tracking. The Snap Conversions API (CAPI) is how you close that gap.
The Conversions API sends conversion events directly from your server to Snapchat, bypassing the browser entirely. This means conversions that would have been missed by the pixel, because a user had an ad blocker enabled or their browser blocked the tracking script, are still captured and sent to Snapchat. Understanding why server-side tracking is more accurate helps clarify why this layer is non-negotiable for reliable attribution. The result is a more complete, more accurate conversion dataset.
To get started, go to Events Manager, select your pixel, and navigate to the Conversions API tab. Generate your API token from this section. Store it securely because you will need it to authenticate your server-side requests.
Next, decide on your implementation method. You have three main options:
Direct API integration: Your development team builds a direct connection between your server and Snapchat's CAPI endpoint. This gives you the most control but requires engineering resources.
Third-party integration partner: Platforms like Segment, Zapier, or a dedicated attribution tool can handle the CAPI connection without custom development work. This is often the fastest path for lean teams.
Customer Data Platform (CDP): If you already use a CDP, check whether it supports Snapchat CAPI as a destination. Many do, and this can be the cleanest implementation if your data infrastructure is already centralized.
Whichever method you choose, pass the same standard events through CAPI that you configured via the pixel in Step 2. Consistency between your pixel events and CAPI events is essential for accurate reporting.
To improve your match rate, include customer matching parameters in your CAPI events. These include hashed email addresses, hashed phone numbers, IP addresses, and user agent strings. Snapchat uses these signals to match conversion events back to Snapchat user profiles. The higher your match rate, the more conversions Snapchat can attribute to your ads and the better it can optimize delivery.
The most critical technical detail in this step is event deduplication. When you run both the pixel and CAPI simultaneously, the same conversion can be reported twice, once from the browser and once from the server. To prevent this, use the client_dedup_id parameter you set up in Step 2. Pass the same unique identifier for a given conversion through both the pixel and CAPI. Snapchat will recognize the matching IDs and count it as a single conversion.
Common pitfall: Skipping deduplication logic is one of the most costly mistakes in this setup. It inflates your conversion counts, distorts your ROAS reporting, and causes Snapchat's algorithm to optimize based on inaccurate data. Do not skip this step.
Success indicator: Events Manager shows both browser and server events firing for the same conversion, with deduplication working correctly so only one conversion is logged per action.
Step 4: Configure UTM Parameters and URL Tracking
The Snap Pixel and CAPI tell Snapchat what happened. UTM parameters tell your analytics tools and attribution platform where it came from and which specific campaign, ad set, and creative drove the action. Both layers of tracking are necessary, and they serve different purposes.
Apply UTM parameters to every destination URL in your Snapchat ads. A standard UTM structure for Snapchat campaigns looks like this:
utm_source=snapchat identifies Snapchat as the traffic source.
utm_medium=paid-social categorizes it as paid social traffic, consistent with how you likely tag other social channels.
utm_campaign=[campaign name] identifies the specific campaign driving the traffic.
utm_content=[ad name] identifies the specific creative or ad variant, which is useful for creative performance analysis.
Where available, use Snapchat's dynamic URL parameters to auto-populate campaign and ad names without manual entry. This reduces the risk of human error and keeps your UTM data consistent even as you scale the number of active campaigns. If you are new to this layer of tracking, a deeper look at what UTM tracking is and how it helps your marketing will give you the full context for why this step matters.
Consistency is the most important principle in UTM management. Your Snapchat UTM naming convention needs to align with how you tag every other paid channel. If you use "paid-social" as the medium for LinkedIn but "ppc" for Google Ads, you will end up with fragmented data that makes cross-channel comparison unreliable. Establish a naming convention document and enforce it across your team.
Once UTM parameters are in place, connect your UTM data to your CRM so that lead source information is captured at the contact level. This is what allows you to trace a closed deal back to the Snapchat campaign that first touched that prospect. Without this connection, you can see Snapchat-driven traffic in your analytics platform, but you cannot connect it to revenue in your CRM.
Common pitfall: Inconsistent UTM naming across campaigns is one of the most common causes of fragmented attribution data. Even small variations like "Snapchat" versus "snapchat" or "paid_social" versus "paid-social" create separate entries in your analytics reports and make aggregation difficult. Using a marketing campaign tracking spreadsheet to standardize your naming conventions before launch can prevent these issues entirely.
Success indicator: Snapchat traffic appears as a distinct, clearly labeled source in your analytics platform and attribution dashboard, with campaign-level and ad-level granularity visible and consistent with how other channels are reported.
Step 5: Connect Snapchat Data to Your Attribution Platform
Here is the limitation that Snapchat's native reporting cannot solve on its own. Snapchat Ads Manager shows you conversions attributed to Snapchat. But it cannot show you how Snapchat interacts with your other channels across the full customer journey. It does not know that the user who converted on Snapchat also clicked a Google Search ad two weeks earlier and read three LinkedIn posts in between.
That cross-channel context is where the real insight lives, and it requires a dedicated attribution tracking setup built to unify data across every channel you run.
A platform like Cometly connects your Snapchat ad data with your CRM, website events, and other ad platforms to give you a unified view of every customer journey. Instead of looking at Snapchat performance in isolation, you can see exactly where Snapchat fits in the path to conversion and how it contributes to pipeline and revenue alongside every other channel you run.
To get started, connect your Snapchat Ads account to Cometly through the native integration. This pulls in campaign spend, impressions, clicks, and conversion data directly from Snapchat Ads Manager. From there, map your Snapchat conversion events to the corresponding pipeline stages in your CRM. This mapping is what allows Cometly to show you which Snapchat campaigns are generating qualified leads and, ultimately, closed revenue, not just top-of-funnel conversions.
With this connection in place, you can apply multi-touch attribution models to understand Snapchat's true role in the customer journey. Depending on your funnel and audience, Snapchat might function primarily as an awareness touchpoint that introduces prospects to your brand, as a mid-funnel channel that re-engages users who have already shown interest, or occasionally as a last-touch converter. Multi-touch attribution lets you see which role it is actually playing rather than assuming.
Cometly's AI-driven insights layer on top of this data to surface which Snapchat campaigns and creatives are contributing most to pipeline and revenue. This goes well beyond click-through rates and cost-per-click. You can identify which ad formats and audience segments are generating the highest-quality leads, then reallocate budget accordingly.
This is also where feeding enriched data back to Snapchat pays dividends. When Cometly captures conversion signals with full customer journey context, you can send higher-quality events back to Snapchat via CAPI, which improves the platform's ability to optimize ad delivery toward users most likely to convert further down the funnel.
Common pitfall: Relying solely on Snapchat's native last-touch attribution can significantly distort how you perceive the channel's value. If Snapchat primarily plays an awareness role in your funnel, last-touch attribution will make it look ineffective. Reviewing how the best marketing attribution software handles multi-touch models will help you choose the right approach for your business.
Success indicator: Cometly shows Snapchat campaign performance alongside all other channels, with pipeline and revenue attribution data visible at the campaign and ad level, and multi-touch models applied across the full customer journey.
Step 6: Test, Validate, and Optimize Your Tracking Setup
Before you launch a single live campaign, run a full end-to-end test of your entire tracking setup. This is the step that most marketers skip in the rush to get campaigns live, and it is the step that saves you from discovering a broken pixel three weeks into a campaign when you have already spent significant budget.
The end-to-end test works like this. Click a Snapchat ad (or simulate the click by visiting your landing page with the correct UTM parameters appended to the URL). Complete a conversion action, such as submitting a demo request form or starting a free trial. Then verify the following:
Events Manager: The conversion event appears with the correct event name, parameters, and timestamp. Both pixel and CAPI events fire, and deduplication removes the duplicate so only one conversion is logged.
CRM: The new lead or contact record includes the UTM source, medium, and campaign data captured at the point of conversion. This confirms that your UTM-to-CRM connection is working correctly.
Attribution platform: The conversion appears in Cometly with the correct source attribution and is mapped to the appropriate pipeline stage.
After the initial validation, review your match rate in Events Manager. Match rate measures how effectively Snapchat can match your conversion events back to Snapchat user profiles using the customer data parameters you passed. A higher match rate means better attribution accuracy and better algorithmic optimization. If your match rate is lower than expected, check whether you are passing all available matching parameters through CAPI, including hashed email, hashed phone, IP address, and user agent.
Tracking is not a set-it-and-forget-it task. Website updates, CMS changes, new page deployments, and A/B testing tools can all break pixel implementations without any obvious warning signs. Set up a regular tracking audit cadence, at minimum monthly, to catch these breaks before they cause significant data loss. The same discipline applies to any ad tracking tools you rely on to scale campaigns with accurate data.
In Cometly, monitor your attribution data for anomalies on an ongoing basis. Sudden drops in tracked conversions, unexpected spikes in unattributed traffic, or inconsistencies between Snapchat Ads Manager and your attribution dashboard are all signals that something in your tracking stack has broken and needs attention.
Over time, the validated data you feed back to Snapchat via CAPI will improve the platform's ability to optimize ad delivery. Snapchat's algorithm learns from conversion signals. The richer and more accurate those signals are, the better it can identify and target users who are likely to convert, which drives better campaign efficiency over time.
Common pitfall: Setting up tracking once and never revisiting it is one of the most common causes of data degradation. Website changes break pixels regularly. Build the audit habit from the start.
Success indicator: Conversion data in Snapchat Ads Manager, your CRM, and your attribution platform all align within an acceptable variance range, and your match rate in Events Manager reflects complete customer data being passed through CAPI.
Your Snapchat Tracking Checklist and Next Steps
A properly configured Snapchat ads tracking setup gives you the data foundation you need to run campaigns with confidence. Before you go live, run through this checklist to confirm every layer is in place:
Snap Pixel installed site-wide and verified with the Snap Pixel Helper Chrome extension showing a green status on all key pages.
Conversion events defined and firing correctly for your key B2B SaaS funnel actions, including trial signups, demo requests, and paid conversions, with event parameters populated.
Snap Conversions API implemented with customer matching parameters included and deduplication logic using client_dedup_id in place to prevent double-counting.
UTM parameters applied consistently across all Snapchat ad destination URLs, with a naming convention that aligns with your other paid channels and connects through to your CRM.
Snapchat ad data connected to your attribution platform for cross-channel visibility, with conversion events mapped to CRM pipeline stages and multi-touch attribution models applied.
Full end-to-end test completed and tracking validated across Events Manager, your CRM, and your attribution dashboard before launching live campaigns.
Tracking setup alone is not enough. The real value comes from connecting your Snapchat data to the rest of your marketing stack so you can see how the channel contributes to pipeline and revenue. When your tracking is accurate and your attribution is unified, you stop guessing and start scaling with data.
Cometly makes this possible by pulling your Snapchat campaigns into a single attribution view alongside every other channel you run, giving your team a true picture of what is driving growth. When you are ready to see how Snapchat fits into your full revenue picture, Get your free demo and start capturing every touchpoint to maximize your conversions.