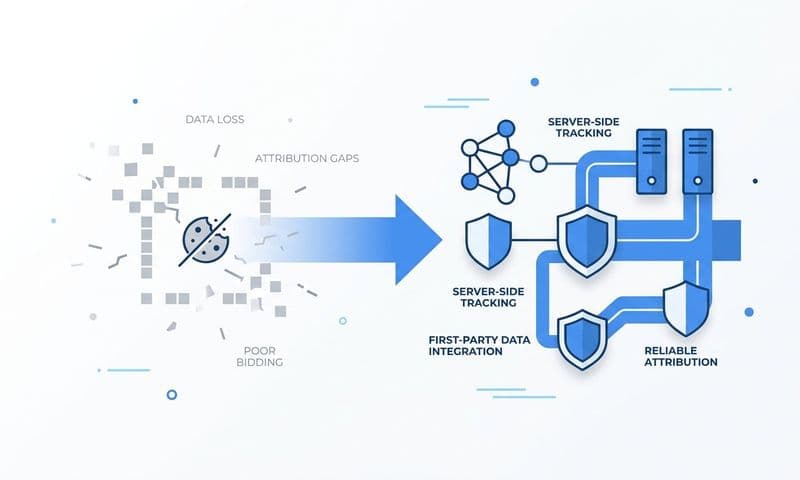
Third-party cookies are fading out, ad platform pixels are losing signal, and browser restrictions keep tightening. For B2B SaaS marketing teams running paid campaigns, this creates a real problem: the data you rely on to make budget decisions is becoming less reliable by the day.
First party tracking is the solution that puts accurate, durable data back in your hands. Unlike third-party cookies that depend on browser permissions you do not control, first party tracking collects data directly from your own domain and server infrastructure. You own the data, the signal quality improves for ad platforms, and you get a more complete picture of how your campaigns are actually performing.
This guide walks you through how to set up first party tracking from scratch. Whether you are running ads on Meta, Google, or LinkedIn, these steps will help you capture cleaner conversion data, send it back to ad platforms through server-side events, and connect it to your attribution reporting.
By the end, you will have a tracking foundation that does not break when browsers update their privacy policies. Each step builds on the last, so follow them in order for the cleanest setup possible.
Step 1: Audit Your Current Tracking Setup
Before you build anything new, you need a clear picture of what you already have. Skipping this step is one of the most common mistakes marketers make, and it leads directly to duplicate events and inflated conversion counts down the road.
Start by documenting every tracking mechanism currently active on your website. This includes browser-based pixels from Meta, Google, and LinkedIn, any tags firing through Google Tag Manager, and any server-side connections you may have already configured. If you are not sure what is running, use a browser extension like Tag Inspector or check your Tag Manager container for a full list of active tags.
Next, check your event match quality scores. In Meta Events Manager, look at the match quality rating for each event you are sending. In Google Ads, open your conversion diagnostics to see if conversions are being recorded with enhanced match applied. Low match quality scores are a strong signal that your current tracking is underperforming.
Now identify which conversion events actually matter to your business. For most B2B SaaS companies, the key events are:
Form submissions: Demo requests, contact forms, and content downloads that represent top-of-funnel intent.
Trial signups: Free trial or freemium account creation events that signal product interest.
Demo completions: Confirmation that a prospect attended or completed a scheduled demo.
Purchases and upgrades: Actual revenue events tied to a subscription or one-time purchase.
Finally, note which tools are currently sending data. Is your pixel the only source? Does your CRM pass any events? Is your payment processor connected? Understanding the full picture helps you avoid rebuilding what already works and focus your effort on the gaps.
Success indicator: You have a written list of your key conversion events, their current tracking status, and a clear view of where data gaps exist.
Step 2: Set Up Your First Party Domain and Data Layer
This step creates the technical foundation that everything else sits on. Get this right and the rest of the setup becomes significantly cleaner.
The first task is configuring a first party subdomain for tracking. Instead of sending data to a third-party domain like a pixel vendor's server, you route it through a subdomain you control, such as track.yourdomain.com. This means all tracking requests originate from your own domain, which browsers treat with far more trust than third-party domains. It also means Safari's Intelligent Tracking Prevention and similar browser restrictions have much less impact on your data collection.
To set this up, you will create a CNAME DNS record pointing your subdomain to your tracking infrastructure. If you are using a tag management or server-side tracking platform, they will provide the destination address for this CNAME. Your DNS provider (wherever you manage your domain) is where you make this change, and it typically propagates within a few hours.
The second task is implementing a data layer on your website. Think of the data layer as a structured object that sits on your web pages and holds information about what is happening: which page the user is on, what action they just took, and what data should be passed to your tracking tools. A basic data layer looks like a JavaScript object that gets populated as users interact with your site.
Define a standard event schema before you write a single line of code. For each conversion event, decide which fields you will capture. A solid schema for B2B SaaS typically includes:
Event name: A consistent label like "demo_request" or "trial_signup" that maps to your ad platform event names.
User identifiers: Email address and phone number, which should be hashed before being passed anywhere outside your own infrastructure. Hashing means converting the raw value into a one-way encrypted string using SHA-256, which is the standard format ad platforms accept.
Event value: A dollar amount if applicable, or a lead score if you have one.
Event ID: A unique identifier for each conversion instance. This becomes critical in Step 3 when you implement deduplication.
A consistent data layer makes it far easier to send enriched, accurate events to multiple ad platforms without rebuilding your setup each time you add a new channel. Understanding the difference between first party vs third party cookies helps clarify why this architecture matters so much for long-term data reliability.
Success indicator: Your subdomain resolves correctly, and your data layer fires on key pages without JavaScript errors. You can verify this using your browser's developer console.
Step 3: Implement Server-Side Event Tracking
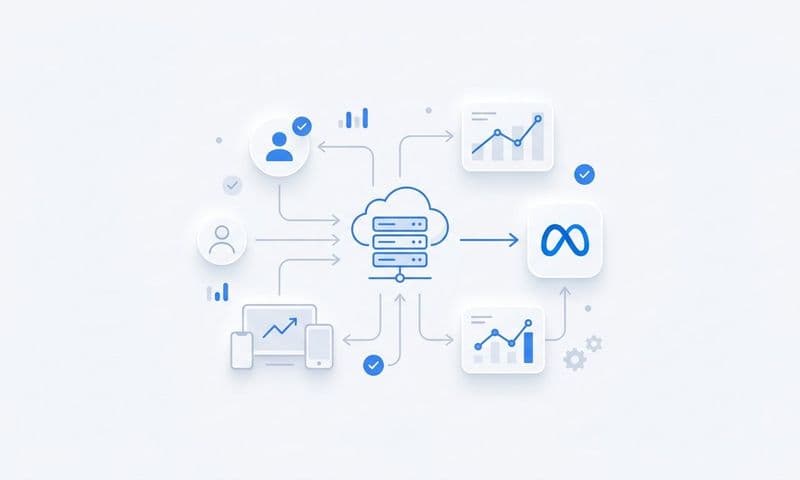
This is the step that makes the biggest difference in data quality. Server-side tracking moves conversion events from the browser to your server, bypassing ad blockers, browser restrictions, and the signal degradation that comes with client-side pixels.
Here is the core idea: instead of relying on a JavaScript pixel that fires in the user's browser (which can be blocked, delayed, or prevented by privacy settings), your server directly sends conversion data to ad platforms via their APIs. The user's browser never has to be involved in the conversion event at all.
The two primary connections to configure for most B2B SaaS companies are:
Meta Conversion API (CAPI): Meta's server-to-server API allows you to send events directly from your server to Meta's platform. You will need a Meta pixel ID and an access token, both available in your Meta Events Manager. Events are sent as HTTP POST requests containing the event name, event time, event ID, and user data parameters.
Google Enhanced Conversions: Google's equivalent allows you to send hashed user data alongside your standard conversion tags. This improves match rates and attribution accuracy across Google's ad network, including Search, Display, and YouTube.
When mapping your conversion events to API event names, use the standard naming conventions each platform expects. For Meta, common event names include Lead, CompleteRegistration, and Purchase. For Google, these map to your conversion action names configured in Google Ads.
For each event you send, include as many user data parameters as you have available. The most impactful parameters are hashed email address, hashed phone number, first name, last name, user agent, and IP address. More parameters means higher event match quality, which directly improves how well ad platforms can attribute conversions to the right users and optimize your campaigns accordingly. If you want a deeper technical breakdown, this guide on how to set up server-side tracking covers the implementation in detail.
Now for the most important technical detail in this entire guide: deduplication. If you run both a browser pixel and a server-side API simultaneously (which is common during transition), you will send the same conversion event twice unless you implement deduplication logic. Ad platforms will count both events, inflating your conversion numbers and confusing your optimization algorithms.
The solution is straightforward. Assign a unique event ID to each conversion instance in your data layer. Pass this same event ID in both the browser pixel event and the server-side API event. Meta and Google use this shared event ID to recognize that both events represent the same conversion and discard the duplicate. Without this, your data becomes unreliable fast.
Success indicator: Meta Events Manager shows high event match quality scores for your key events, and Google Ads reports conversions with enhanced match applied. Both platforms should show the correct event volume without duplicates.
Step 4: Connect Your CRM and Payment Data
This is where first party tracking moves from useful to genuinely powerful for B2B SaaS companies. The previous steps capture what happens on your website. This step connects what happens in your sales process and payment system, which is where the real revenue signal lives.
Start with your CRM. Whether you use HubSpot, Salesforce, or another platform, the goal is the same: when a deal closes, you want to know which ad campaign started the conversation. The way you make this work is by capturing UTM parameters at the point of lead creation and storing them on the contact or lead record in your CRM. Setting up HubSpot attribution tracking correctly ensures those UTM values persist through the full sales cycle.
When someone fills out a demo request form after clicking a Meta ad, your form should capture the UTM values from the URL (utm_source, utm_medium, utm_campaign, utm_content) and write them to hidden fields that get saved to the CRM record. This is the connective tissue between your ad data and your sales data.
Next, connect your payment processor. If you use Stripe, connecting it to your tracking setup allows you to capture actual revenue events, not just lead events. This matters because ad platforms optimize based on the signals you send them. If you only send lead events, they optimize for leads. If you send revenue events with actual deal values, they optimize for the users most likely to become paying customers. That is a fundamentally different and more valuable optimization signal.
Once your CRM and payment data are connected, you can send offline conversion events back to ad platforms. When a deal closes in your CRM or a payment processes in Stripe, your server sends a conversion event to Meta CAPI or Google's offline conversion import tool, referencing the original click ID (fbclid or gclid) that was stored when the lead first came in. This closes the loop between an ad click that happened weeks ago and a revenue event that happened today.
For B2B SaaS companies with longer sales cycles, this is especially important. The gap between a first ad click and a closed deal can span weeks or months. Storing click IDs at the point of lead capture ensures you can still attribute that revenue back to the correct campaign when the deal eventually closes. This is the core challenge that SaaS revenue attribution is designed to solve.
Success indicator: CRM records show UTM source data on contact records, and your ad platforms receive offline conversion events within 24 to 48 hours of a deal closing.
Step 5: Configure Attribution Tracking Across Channels
You now have clean data flowing from your website, CRM, and payment processor. This step ensures that data is properly tagged and structured so you can see the full customer journey across every paid channel.
UTM parameters are the foundation. Every paid campaign you run on Meta, Google, LinkedIn, YouTube, or any other channel needs consistent UTM tagging. Understanding what UTM tracking is and how it helps your marketing will make this step significantly easier to implement correctly. A reliable naming convention that works well for B2B SaaS looks like this:
utm_source: The platform (meta, google, linkedin)
utm_medium: The channel type (cpc, paid-social, display)
utm_campaign: The campaign name or ID, ideally matching what you see in the ad platform
utm_content: The ad set or ad creative identifier
utm_term: The keyword or audience segment
Consistency matters more than the specific convention you choose. Inconsistent naming, such as using "Meta" in some campaigns and "Facebook" in others, breaks your attribution reporting and makes it impossible to aggregate data cleanly.
Beyond UTM parameters, implement click ID capture. When someone clicks a Meta ad, Meta appends an fbclid to the URL. When someone clicks a Google ad, Google appends a gclid. These click IDs are the most precise identifiers available for matching a website visit back to a specific ad click. Store them in your CRM alongside your UTM parameters so you can use them for enhanced matching and offline conversion attribution.
Now configure your attribution model. Last-click attribution is the default in most ad platforms, but it systematically undervalues top-of-funnel channels. For B2B SaaS with multi-touch sales cycles, consider:
Linear attribution: Distributes credit equally across all touchpoints. Good for understanding the full channel mix.
Time decay attribution: Gives more credit to touchpoints closer to the conversion. Useful when your later-stage touchpoints are more intentional.
Data-driven attribution: Uses your actual conversion data to assign credit based on observed patterns. Requires sufficient conversion volume to be reliable.
One important caution: do not rely solely on the attribution data reported inside ad platforms. Each platform reports attribution from its own perspective and typically inflates its own contribution. Your first party data, tracked through your own infrastructure, gives you a more objective view of channel contribution. When discrepancies appear across platforms, knowing how to fix attribution discrepancies in data will save you significant time and budget.
Success indicator: You can see a customer journey report showing multiple touchpoints from first ad click to closed deal in a single view, with UTM and click ID data present on CRM records.
Step 6: Validate Your Tracking and Go Live
You have done the hard work. Before you flip the switch on live traffic, run a thorough validation to confirm everything is working as expected. Catching issues now is far easier than diagnosing them after your data has been flowing for two weeks.
Start with platform-native testing tools. Meta Events Manager has a Test Events tool that lets you send test events and see exactly how they appear in the platform, including which user data parameters were received and what match quality score was assigned. Google Tag Assistant lets you verify that your tags are firing correctly on the right pages and passing the right data.
Run end-to-end tests by completing the conversion actions yourself. Submit a test demo request form. Trigger a test signup. Walk through the full conversion flow and then check three places: your attribution platform, your ad platform event data, and your CRM. The event should appear in all three, with consistent data across each.
Check specifically for deduplication. After completing a test conversion, look at your ad platform event data and confirm the event appears exactly once, not twice. If you see duplicates, your event ID deduplication logic is not working correctly and needs to be fixed before going live.
Verify that user data parameters are being passed correctly. In Meta Events Manager, click into a specific event and check which parameters were received. You should see hashed email, phone, and name fields if your data layer is configured correctly.
Set up monitoring alerts in your attribution platform or ad platform dashboards. Configure a notification that fires if event volume drops significantly below your baseline. A sudden drop in events is almost always a tracking break, and catching it within hours rather than days saves you from making budget decisions on incomplete data. Using the right ad tracking software makes this monitoring significantly easier to maintain at scale.
Once validation is complete, go live and allow 48 to 72 hours of real data to accumulate before drawing any conclusions about data quality or performance.
Success indicator: Test events appear correctly in all connected platforms, deduplication is confirmed, and real conversion data begins flowing within the first day of going live.
Step 7: Connect Everything to Your Attribution Dashboard
You have built a clean, reliable first party data pipeline. This final step brings all of that data together into a single reporting view so you can actually use it to make better decisions.
The goal is a unified attribution dashboard that connects ad spend, leads, pipeline, and closed revenue in one place. Without this, you are still looking at data in silos: Meta Ads Manager in one tab, Google Ads in another, your CRM in a third. Each platform tells its own version of the story, and none of them give you the full picture.
This is where a platform like Cometly adds significant value. Cometly connects your ad platforms, CRM, server-side events, and payment data into a single attribution view. Instead of reconciling numbers across four different dashboards, you can see which campaigns are driving actual closed revenue, not just clicks or leads, in one place. With 70+ native integrations covering major ad platforms, CRMs, and Stripe, it is designed specifically for B2B SaaS companies who need this level of attribution depth without building custom data pipelines.
Configure your attribution dashboard to show multi-touch attribution across the full customer journey. You want to see every touchpoint a contact had with your ads before becoming a customer, with credit distributed across those touchpoints according to the attribution model you selected in Step 5.
Use AI-driven recommendations to identify which ads and campaigns are performing best across channels. When your attribution data is clean and complete, AI can surface patterns that are difficult to spot manually: which creative types drive the highest-value customers, which audiences have the shortest sales cycles, which campaigns generate pipeline that actually closes.
The enriched conversion data you have built through this setup also feeds back into ad platform AI. When Meta and Google receive server-side events with rich user data and actual revenue values, their delivery algorithms can find more users who resemble your best customers. This creates a compounding performance benefit over time.
Review your attribution reports on a weekly cadence. Look specifically at revenue contribution by channel and campaign, not just lead volume. Use this data to reallocate budget toward what is actually driving closed deals and away from what is generating leads that never convert.
Success indicator: You can answer the question "which campaign drove the most closed revenue this month" with confidence, using data you own and trust.
Your First Party Tracking Checklist
Setting up first party tracking is not a one-time task. It is a foundational investment that makes every marketing decision more accurate and every dollar you spend more accountable.
By following these seven steps, you have built a tracking infrastructure that collects data directly from your domain, sends enriched server-side events to ad platforms, connects your CRM and revenue data, and surfaces everything in a unified attribution view.
Before you call this done, run through this quick checklist:
First party subdomain: Live and resolving correctly under your own domain.
Data layer: Firing on key pages with a consistent event schema and unique event IDs.
Server-side events: Connected to Meta CAPI and Google Enhanced Conversions with deduplication logic in place.
CRM and payment data: UTM parameters and click IDs stored on CRM records, offline conversions flowing back to ad platforms.
UTM naming convention: Consistent across every paid channel you run.
Tracking validation: End-to-end tests completed, deduplication confirmed, monitoring alerts active.
Attribution dashboard: Pulling from all data sources with multi-touch attribution configured.
The marketers who will have a clear advantage going forward are the ones who own their data pipeline. First party tracking is how you build that ownership.
If you are ready to connect your first party tracking setup to a platform built specifically for B2B SaaS attribution, Get your free demo today and start capturing every touchpoint to maximize your conversions.