Most B2B SaaS marketing teams know their landing pages are converting. What they don't know is which ads, channels, or campaigns are actually driving those conversions. That gap between "someone filled out the form" and "this specific campaign drove this specific revenue" is where budget gets wasted and growth stalls.
Landing page attribution tracking closes that gap. When set up correctly, it connects every visitor who lands on your page to the source that brought them there, the actions they took, and the downstream revenue they generated. Without it, you're making budget decisions based on incomplete data, scaling campaigns that might be generating noise rather than revenue.
This guide walks you through a complete, practical setup process for landing page attribution tracking. Whether you're running paid ads on Meta, Google, or LinkedIn, or trying to understand which organic channels convert best, the steps here will help you build a reliable attribution foundation.
You'll learn how to prepare your landing pages for tracking, configure UTM parameters correctly, set up server-side event tracking, connect your CRM data, and analyze the results in a way that actually informs budget decisions.
By the end of this guide, you'll have a system that captures every meaningful touchpoint from the first ad click through to closed revenue, giving your team a single source of truth for landing page performance. Let's get into it.
Step 1: Audit Your Landing Pages and Define Conversion Events
Before you configure a single tracking script or UTM parameter, you need a clear picture of what you're actually measuring. This step is about building the map before you start the journey.
Start by creating an inventory of every active landing page in your campaign portfolio. For each page, document the associated campaign or traffic source, the primary conversion action the page is designed to drive, and what happens after a visitor converts. This might sound basic, but many teams discover they have orphaned pages, duplicate URLs, or pages where the conversion event was never formally defined.
Define your conversion events precisely. A conversion on a demo request page is not the same as a conversion on a free trial signup page, and both are different from a gated content download. Each page should have one primary conversion event tied to a specific user action: form submission, button click, or payment completion. Get specific about what triggers the event.
Map the full user flow. For each landing page, trace the complete path from ad click to conversion. Where does the user land? What action do they take? Where do they go after? Most B2B flows include a landing page, a form submission, and a thank-you or confirmation page. That entire sequence needs to be tracked, not just the first page load.
Decide what gets tracked at the page level versus what gets passed downstream. Some conversion events are self-contained, like a free trial signup that happens entirely on your site. Others, like a demo request that flows into your CRM as a qualified lead, need to be tracked at the page level and then passed into your pipeline tracking system. Knowing the difference now saves significant rework later.
Common pitfall: Many teams track page views as a proxy for conversions. Page views tell you someone arrived. They don't tell you someone converted. Tracking the wrong event creates attribution data that looks plausible but is fundamentally misleading. Always track the actual conversion action, not the page load.
Success indicator: You have a documented map of every active landing page, its primary conversion event, and the downstream action that event triggers. This document becomes the reference point for every tracking configuration in the steps that follow.
Step 2: Build a Consistent UTM Parameter Framework
UTM parameters are the backbone of landing page attribution tracking. They're the mechanism that tells your analytics platform where a visitor came from, which campaign sent them, and which specific ad or piece of content they clicked. Without them, traffic from paid campaigns shows up as direct or unattributed, and your attribution data is immediately compromised.
The five standard UTM parameters each serve a distinct purpose. utm_source identifies the platform sending traffic, such as google, meta, or linkedin. utm_medium describes the type of traffic, such as cpc, email, or organic. utm_campaign names the specific campaign. utm_content differentiates between ads or creative variations within a campaign. utm_term captures the keyword for search campaigns.
Create a naming convention document and make it non-negotiable. This is where most teams fail. One person uses "Google" and another uses "google." One campaign is named "Q2-2026-Demo" and another is "q2_demo_2026." These inconsistencies fragment your channel data in attribution reports, making it impossible to accurately aggregate performance across campaigns. Store your naming conventions in a shared spreadsheet that every team member and agency partner uses before launching any campaign.
Structure your UTMs for each paid channel. For Google Ads, you can use ValueTrack parameters to auto-populate campaign and ad group names dynamically. For Meta Ads, manual tagging or Meta's URL parameter fields in the ad setup give you control over how campaigns are labeled. For LinkedIn, manual UTM tagging is standard. Each platform has its own approach, and your naming convention document should include channel-specific examples for each.
Understand the difference between manual tagging and auto-tagging. Google Ads auto-tagging appends a gclid parameter to your URLs, which Google Analytics uses to import campaign data automatically. This is convenient but creates a dependency on the GA4 integration. For platforms outside Google's ecosystem, and for any multi-platform attribution setup, manual UTM tagging gives you more control and portability across tools.
Build your tagged URLs using a URL builder. Google's Campaign URL Builder is a simple tool for constructing properly formatted UTM strings. Enter your landing page URL, fill in each parameter using your naming convention, and copy the output. Paste the tagged URL into your ad platform as the destination URL. Do this for every ad before it goes live, not after. Understanding how UTM tracking helps your marketing is essential before scaling any paid campaign.
Tip: Treat your UTM naming convention document as a living reference. Add new channels, campaign types, and content labels as your program grows. The goal is that anyone on the team can look at a UTM string and immediately understand what campaign, channel, and ad it represents.
Common pitfall: Inconsistent capitalization is the most common and most damaging UTM mistake. "Google" and "google" are treated as two different sources in most analytics platforms. Enforce lowercase as a standard rule across all parameters.
Success indicator: Every active landing page URL has a properly structured UTM string attached before traffic is sent, and every team member is working from the same naming convention document.
Step 3: Install and Configure Your Attribution Tracking Script
UTM parameters tell you where visitors came from. Your tracking script is what actually captures that data when someone lands on your page and records the conversion event when they take action. This step is about getting that infrastructure in place correctly.
First, understand the difference between client-side and server-side tracking. Client-side tracking, typically delivered via a JavaScript pixel or tag, fires in the user's browser when they load a page or complete an action. It's easy to implement but increasingly unreliable. Ad blockers, browser privacy settings, and cookie restrictions can prevent these scripts from firing, meaning a meaningful portion of your conversions may go unrecorded.
Server-side tracking routes events through your own server before sending them to analytics platforms and ad networks. Because the event originates from your server rather than the user's browser, it's not affected by ad blockers or browser restrictions. For B2B SaaS companies where each lead has real revenue potential, missing conversions due to client-side limitations is a significant problem.
Install a first-party tracking script on your landing pages. The script should capture UTM parameters from the URL on page load and store them in a first-party cookie or local storage. This ensures that even if a visitor navigates away and returns, the original source data is preserved. The script should also capture referrer data and session information to support multi-touch attribution.
Pass UTM data through hidden form fields. This is a critical step that many teams skip. When a visitor fills out your landing page form, the UTM parameters they arrived with should be automatically populated into hidden fields in the form and submitted alongside their contact information. This is what allows you to associate a specific lead with a specific campaign in your CRM. Most form platforms, including HubSpot Forms, Typeform, and custom HTML forms, support hidden fields that can be pre-populated via JavaScript.
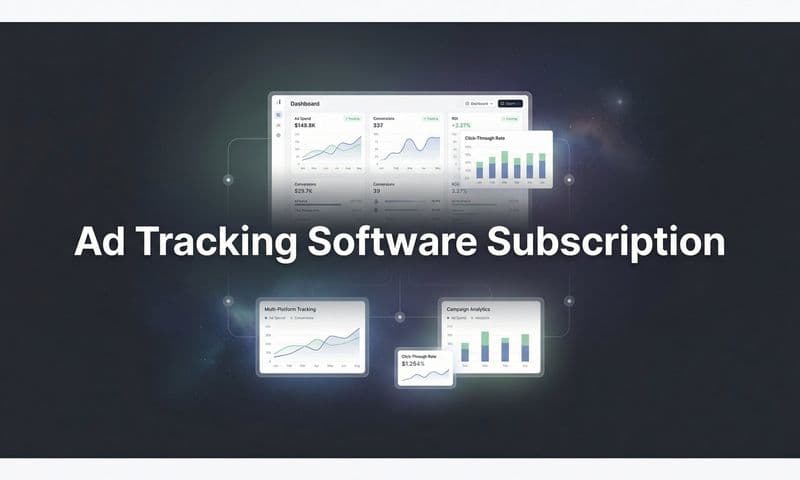
Platforms like Cometly handle both client-side and server-side tracking in one integrated system, capturing landing page events and connecting them to the full customer journey across your ad platforms, CRM, and revenue data. This eliminates the need to stitch together separate tools for each layer of tracking.
Tip: After installing your tracking script, open your browser's developer tools and navigate to the Network tab. Load your landing page and look for the tracking events firing in real time. This confirms the script is installed correctly and capturing the data you expect before you send any live traffic.
Common pitfall: Installing tracking only on the landing page but not on the thank-you or confirmation page. The conversion event, the moment a visitor submits a form or completes a signup, typically happens on the confirmation page. If that page isn't tracked, the conversion never gets recorded and your attribution data shows traffic without outcomes.
Success indicator: Conversion events are firing and capturing UTM data on both the landing page and the post-conversion confirmation page, and UTM parameters are being passed through form hidden fields into your lead data.
Step 4: Set Up Server-Side Conversion Tracking and Conversion API
Client-side pixels are a starting point, not a complete solution. Browser-based tracking alone misses a meaningful portion of conversions because ad blockers are widely used, browsers like Safari restrict third-party cookies by default, and iOS privacy updates limit pixel matching. For B2B SaaS teams where each lead represents significant pipeline value, those missed conversions add up quickly.
Server-side conversion tracking addresses this directly. Instead of relying on a script in the user's browser to fire an event, your server sends the conversion data directly to the ad platform's API after the event occurs. The user's browser settings and ad blocker status become irrelevant because the event originates from your infrastructure, not theirs. Understanding why server-side tracking is more accurate helps make the case for this investment internally.
Configure Meta Conversion API (CAPI) for your landing page events. Meta's CAPI allows you to send conversion events, including lead form submissions and trial signups, directly from your server to Meta's data infrastructure. To set this up, you'll need to generate an access token in Meta Events Manager, configure the events you want to send, and map the event parameters, including email, phone, and other identifiers when available, to improve match quality.
Set up Google Enhanced Conversions. Google's equivalent to CAPI is Enhanced Conversions, which supplements your standard Google Ads conversion tags by sending hashed first-party data from your server. This improves conversion measurement accuracy, particularly for users who have ad blockers or are browsing in privacy mode. Enhanced Conversions are configured through Google Ads settings and require passing hashed customer data alongside conversion events.
Implement event deduplication. When you run both a client-side pixel and server-side API events simultaneously, which is the recommended approach for maximum coverage, you need deduplication to prevent the same conversion from being counted twice. Both Meta and Google require you to pass a unique event ID with each event. The pixel fires with an event ID, and the server-side event fires with the same event ID. The platform uses this to recognize they represent the same conversion and counts it only once. Skipping this step inflates your conversion counts and corrupts your ad platform optimization data.
Cometly's server-side integration handles this entire process, sending enriched conversion events back to Meta and Google with proper deduplication keys and high-quality first-party data. This improves the match quality of your events and gives the ad platform algorithms better signals for optimization and audience targeting.
Tip: After configuring CAPI, check your Event Match Quality (EMQ) score in Meta Events Manager. Meta scores each event on how well it can be matched to a Facebook user profile. Higher scores generally lead to better ad optimization. If your EMQ is low, it typically means you need to pass more identifiers, such as email address or phone number, with your server-side events.
Common pitfall: Sending server-side events without deduplication event IDs causes inflated conversion counts in your ad platforms. This corrupts your campaign performance data and leads the ad platform's algorithm to over-optimize toward phantom conversions.
Success indicator: Server-side events are appearing in Meta Events Manager and Google Ads with high match quality scores, and your total conversion counts are consistent with what you'd expect rather than doubled.
Step 5: Connect Your CRM to Close the Attribution Loop
Landing page tracking captures the acquisition event. It tells you a visitor arrived from a specific campaign and submitted a form. But for B2B SaaS companies with sales cycles that span weeks or months, the conversion on the landing page is just the beginning of the journey. The real question is which campaigns generate pipeline and closed revenue, not just form fills.
Connecting your CRM to your attribution data is what answers that question.
Pass UTM parameters from your landing page forms into your CRM. When a visitor submits a form with hidden UTM fields populated, that data should flow directly into your CRM as lead source fields on the contact or lead record. This creates a direct link between the campaign that drove the visit and the contact it created. Most CRM platforms, including HubSpot, Salesforce, and Pipedrive, support custom fields where this data can be stored. Setting up HubSpot attribution tracking correctly ensures this data flows without gaps.
Create an immutable "original source" field. This is one of the most important architectural decisions in your attribution setup. Create a dedicated field in your CRM that captures the first UTM touch for each contact and is never overwritten by subsequent interactions. When a lead comes back to your site three times before booking a demo, you want to preserve the original acquisition source, not replace it with the most recent touchpoint. This field becomes the foundation of your first-touch attribution reporting.
Map CRM deal stages back to attribution data. Once UTM source fields are populated on contacts, you can connect those fields to deal records as leads progress through your pipeline. This allows you to report on which campaigns generate not just leads, but qualified pipeline and closed-won revenue. The difference between "this campaign generated 200 leads" and "this campaign generated $180,000 in pipeline" is the difference between vanity metrics and SaaS revenue attribution.
Cometly connects ad platform data with CRM pipeline events and Stripe revenue data to show full-funnel attribution from first click to closed-won. This means you can see, in one place, which landing pages and campaigns are generating the highest-value customers, not just the highest volume of form submissions.
Common pitfall: Overwriting lead source data when a contact has multiple touchpoints. Many CRM workflows are set up to update the lead source field every time a contact interacts with a campaign. This erases the original acquisition channel and makes it impossible to accurately attribute revenue back to the campaigns that first generated the lead.
Success indicator: Each lead in your CRM has a populated source field that traces back to a specific campaign, ad, or channel from your landing page, and those fields are connected to pipeline and revenue reporting so you can see the full downstream value of each acquisition source.
Step 6: Analyze Attribution Data and Make Smarter Spend Decisions
You've built the tracking infrastructure. Now it's time to use it. Attribution data is only valuable if it changes how you allocate budget and optimize campaigns. This step is about reading your reports correctly and making decisions that improve revenue outcomes.
Look beyond click volume and conversion counts. The metrics that matter most in landing page attribution reporting are cost per lead by source, lead-to-pipeline conversion rate by channel, and pipeline and revenue contribution by campaign. A channel that generates a high volume of form fills but low pipeline value is not performing well. A channel with fewer leads but higher average deal values may deserve more budget. Attribution data surfaces these distinctions. Using the right marketing attribution tools for B2B SaaS makes this analysis significantly more efficient.
Compare attribution models to understand channel contribution. Different attribution models tell different stories. First-touch attribution gives full credit to the channel that drove the initial landing page visit, which is useful for understanding which channels are best at generating awareness and bringing new prospects into your funnel. Last-touch gives credit to the final touchpoint before conversion. Linear distributes credit across all touchpoints. Data-driven attribution uses algorithmic weighting based on actual conversion patterns.
For B2B SaaS companies with longer sales cycles, multi-touch models typically give a more accurate picture of how channels work together. A prospect might first discover you through a LinkedIn ad, return via a Google search, and convert after clicking a retargeting ad. Single-touch models would give all the credit to one of those touchpoints and zero credit to the others.
Identify landing pages with traffic-to-quality mismatches. Some landing pages attract high traffic volumes but generate low-quality leads. Others have lower traffic but produce leads that convert to customers at higher rates. Attribution data helps you identify both patterns. Pages with high traffic but low downstream revenue may need copy or offer adjustments. Pages with high lead quality but low traffic may deserve more budget behind them.
Cometly's AI surfaces high-performing campaigns and channels automatically, giving marketers actionable recommendations on where to scale spend based on actual revenue contribution rather than surface-level metrics. Instead of manually cross-referencing ad platform data, CRM pipeline, and revenue reports, you get a unified view with clear signals about what's working.
Tip: Segment your attribution reports by traffic source to compare lead quality and downstream revenue across paid, organic, and referral channels. Paid channels often generate higher lead volume, but organic and referral sources sometimes produce leads with higher close rates and larger deal values. Knowing this shapes how you balance your acquisition mix.
Common pitfall: Optimizing for conversion volume rather than revenue contribution. Scaling campaigns that generate a high number of leads but low average deal values can actually decrease your overall marketing efficiency. Always connect conversion data to pipeline and revenue before making scaling decisions.
Success indicator: You can identify your top revenue-generating campaigns and the specific landing pages they drive traffic to, with enough confidence in the data to make meaningful budget reallocation decisions based on what you find.
Putting It All Together
Landing page attribution tracking is not a one-time setup task. It's an ongoing system that gets more valuable as more data flows through it. The six steps in this guide give you a foundation that captures every touchpoint from the first ad click to the final conversion, connects that data to your CRM and revenue systems, and gives your team the clarity to make confident budget decisions.
The key principles to maintain going forward: keep your UTM naming conventions consistent, audit your tracking scripts whenever you update your landing pages, and review your attribution reports regularly to catch data gaps before they compound into larger blind spots.
For B2B SaaS teams running paid campaigns across multiple channels, the difference between guessing and knowing which landing pages drive revenue is the difference between scaling what works and burning budget on what doesn't. Start with your highest-traffic landing pages, get the tracking right there first, and then expand the system across your full campaign portfolio.
Platforms like Cometly are built specifically to give marketing teams this clarity, connecting ad spend directly to pipeline and revenue in one place, with AI-driven recommendations that help you act on what the data is telling you.
Ready to stop guessing and start knowing exactly which campaigns are driving revenue? Get your free demo today and start capturing every touchpoint to maximize your conversions.