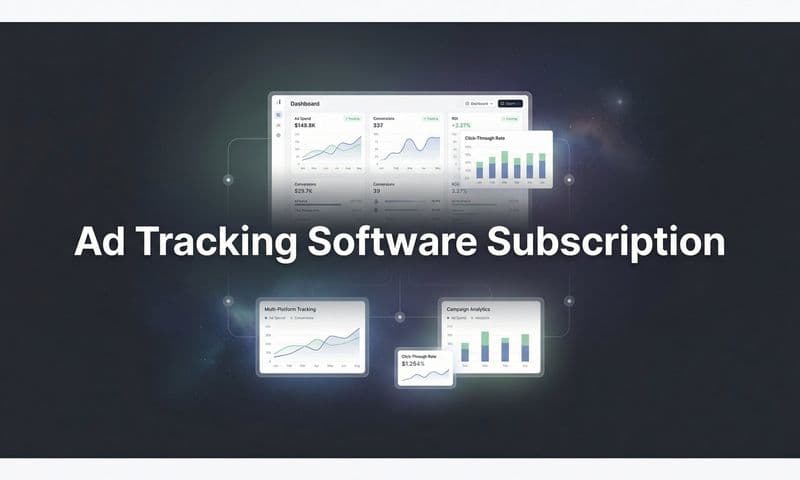
Most marketing teams are spending thousands on ads across Meta, Google, TikTok, and other platforms but have no clear picture of which campaigns actually generate revenue. The result is wasted budget, misallocated spend, and scaling decisions built on incomplete data.
Sound familiar? You check your Meta Ads dashboard and it shows a strong ROAS. Then you look at your CRM and the numbers tell a completely different story. You are not sure which channel actually closed the deal, so you just keep spending on everything and hope for the best.
Setting up proper ad attribution changes everything. It connects the dots between ad clicks, website visits, lead submissions, and closed deals so you can finally see which channels deserve more budget and which ones are quietly draining it.
This ad attribution setup guide walks you through the entire process from start to finish. Whether you are launching attribution tracking for the first time or rebuilding a broken setup, you will learn how to define your goals, connect your platforms, implement tracking, choose the right attribution model, and validate that your data is accurate.
By the end, you will have a working attribution system that captures every touchpoint in the customer journey and feeds reliable data back to your ad platforms for smarter optimization. Let's get into it.
Step 1: Define Your Attribution Goals and Map the Customer Journey
Before you touch a single pixel or integration, you need to get clear on what you are actually trying to measure. Skipping this step is the number one reason attribution setups fail. Teams rush to install tracking code without first defining what "success" looks like for their business.
Start by identifying your primary conversion events. For an ecommerce brand, that might be completed purchases. For a B2B SaaS company, it could be demo bookings, free trial signups, or qualified lead form submissions. For an agency, it might be inbound calls or proposal requests. Be specific. Vague goals produce vague data.
Next, map out the full customer journey from first touchpoint to final conversion. Walk through every stage a prospect typically encounters: seeing a paid social ad, clicking through to a landing page, downloading a lead magnet, receiving a nurture email, booking a demo, and eventually becoming a paying customer. Include both paid and organic touchpoints in this map.
Once you have the journey mapped, decide what questions your attribution setup needs to answer:
Revenue by channel: Which ad platforms and campaigns are actually driving closed revenue, not just clicks or form fills? Understanding revenue attribution is essential for answering this question accurately.
Funnel drop-off points: Where are prospects falling out of the funnel, and which channels produce leads that never convert?
True cost per acquisition: What does it actually cost to acquire a paying customer when you account for all touchpoints, not just the last click?
Creative performance: Which ad creatives and messages resonate most at each stage of the journey?
Finally, document your full marketing stack. List every ad platform you run (Meta, Google Ads, TikTok, LinkedIn), your CRM, your website platform, and any landing page tools. This inventory becomes your connection checklist in the steps ahead. Knowing what needs to be connected prevents you from discovering missing integrations weeks after launch.
The time you invest here pays dividends throughout the rest of the setup. Clear goals mean you track the right events. A documented stack means you know exactly what to connect. A mapped customer journey means you can identify gaps in your data before they become problems.
Step 2: Set Up Server-Side Tracking and Pixel Implementation
Here is the reality of modern ad tracking: browser-based pixels alone are no longer reliable. Since Apple introduced App Tracking Transparency with iOS 14.5, a large portion of mobile users have opted out of cross-app tracking. Add browser-level cookie restrictions from Safari and Firefox, plus the growing use of ad blockers, and traditional client-side pixels are missing a meaningful share of your conversions.
This is not a minor data quality issue. When your pixels miss conversions, your ad platforms optimize toward incomplete signals. They think your campaigns are performing worse than they actually are, which leads to poor targeting decisions and inflated cost-per-acquisition numbers.
Server-side tracking solves this problem by moving data collection from the user's browser to your own server. Instead of relying on a JavaScript pixel firing in someone's browser (which can be blocked or restricted), server-side tracking sends conversion data directly from your server to the ad platform's API. The result is more complete, more accurate data that is not subject to browser limitations.
Here is how to approach the implementation:
Install platform pixels as a foundation: Start by installing the Meta Pixel, Google Tag, and TikTok Pixel on your website. These still capture data for users who have not opted out, and they serve as a baseline layer. Use each platform's native tag manager integration where possible to keep implementation clean.
Layer in server-side infrastructure: Connect each platform's server-side API alongside the pixel. Meta calls this the Conversions API (CAPI). Google offers Enhanced Conversions. TikTok has its Events API. Each requires sending event data (page views, add-to-cart events, purchases, lead submissions) directly from your server to the platform.
Use deduplication logic: When running both a browser pixel and server-side tracking simultaneously, you need deduplication to prevent the same conversion from being counted twice. Most platforms handle this through event ID matching. Make sure your implementation passes a consistent event ID from both the browser and server layers.
Leverage a platform like Cometly for server-side tracking: Setting up server-side infrastructure manually for every ad platform is technically complex. Cometly's server-side tracking handles this across all major platforms in one place, filling the gaps left by traditional pixel setups and ensuring you capture conversions that browser-based tracking would miss entirely. For a deeper walkthrough, see our guide on attribution tracking setup.
To confirm your setup is working, use each platform's test event tool. Meta's Events Manager, Google's Tag Assistant, and TikTok's Events Manager all have testing interfaces where you can trigger events and verify they are being received. Your success indicator here is seeing test events fire correctly in both your attribution platform and each ad platform's event manager before you go live.
Step 3: Connect Your Ad Platforms, CRM, and Website
Tracking pixels capture on-site behavior, but attribution only becomes truly powerful when you connect all three layers of your marketing ecosystem: your ad platforms, your website, and your CRM. Each layer holds a different piece of the customer journey puzzle, and without all three connected, you are working with an incomplete picture.
Think of it this way. Your ad platforms know who saw and clicked your ads. Your website knows what visitors did after they clicked. Your CRM knows which of those visitors became actual paying customers. Attribution connects these three data sources into a single, coherent view of the customer journey.
Connecting ad platforms: Start by integrating each ad platform you run with your attribution tool. For Meta, Google Ads, TikTok, and LinkedIn, this typically involves OAuth-based connections that pull in campaign, ad set, and ad-level spend and performance data. Once connected, your attribution platform can match ad click data against on-site conversion events.
Connecting your CRM: This step is critical for B2B businesses and anyone with a longer sales cycle. Your CRM holds the offline conversion data that ad platforms never see on their own. When a lead submits a form, gets nurtured over several weeks, and eventually closes as a customer, that revenue needs to flow back into your attribution system. Connect HubSpot, Salesforce, Pipedrive, or whichever CRM you use so that deal stage updates and closed-won revenue are mapped back to the original ad touchpoints. B2B companies in particular benefit from dedicated B2B revenue attribution software to handle these complex sales cycles.
Connecting your website or ecommerce platform: If you run on Shopify, WooCommerce, or a custom-built site, connect it directly to your attribution platform. This captures purchase events, order values, and on-site behavior that enriches your conversion data beyond simple form fills.
Use UTM parameters consistently across all campaigns: This deserves special emphasis here because it underpins the entire connection between your ad platforms and your attribution data. Every ad URL should include UTM parameters that identify the source, medium, campaign, and creative. Without consistent UTMs, clicks arrive on your site without context, and your attribution platform cannot correctly assign credit. We will cover UTM structure in detail in the next step.
The payoff for connecting all three layers is full-funnel visibility. You can trace a closed deal back through every touchpoint: the Google Search ad that first introduced the prospect to your brand, the retargeting ad on Meta that brought them back, and the email that pushed them to book a demo. This is the power of cross-channel attribution in action, and it separates teams that scale confidently from teams that guess.
Step 4: Implement UTM Parameters and Naming Conventions
UTM parameters are the backbone of campaign tracking. They are the small tags you add to your ad URLs that tell your analytics and attribution platform exactly where each visitor came from. Without them, a click from your Meta campaign looks identical to a click from a Google ad or an organic social post. Everything becomes "direct" traffic and attribution falls apart.
A standard UTM structure covers five parameters:
utm_source: The platform driving the traffic. Examples: facebook, google, tiktok, linkedin, email.
utm_medium: The marketing channel type. Examples: cpc, paid-social, organic, email, display.
utm_campaign: The specific campaign name. This should match your campaign naming convention in the ad platform.
utm_content: The specific ad or creative. Use this to differentiate between multiple ads within the same campaign.
utm_term: The keyword or audience segment. Most commonly used for Google Search campaigns to capture the keyword that triggered the ad.
Naming conventions are where most teams cut corners, and it costs them later. When your campaign names are inconsistent (sometimes "Q1_Prospecting", sometimes "q1 prospecting", sometimes "prospecting-q1"), filtering and analyzing data becomes a nightmare. Establish a standard naming format and enforce it across your entire team.
A practical naming convention template to adapt for your campaigns:
Campaign level: platform_objective_audience_date. Example: meta_leadgen_coldprospect_may2026
Ad set level: audience_placement_budget. Example: lookalike1pct_feed_50daily
Ad level: creative-type_hook_variant. Example: video_painpoint_variantA
Consistent naming feeds cleaner data into your attribution reports and enables creative-level insights. When you can filter your attribution dashboard by creative type or audience segment, you start to understand not just which platform drives revenue but which specific messages resonate with which audiences. Leveraging strong marketing analytics practices ensures this data translates into actionable insights.
The most common pitfall here is "dark traffic," which occurs when UTMs are missing or broken. A visitor arrives on your site with no UTM data, and your attribution platform cannot assign credit to any source. Over time, dark traffic accumulates and distorts your channel-level reporting. Audit your ad URLs regularly to catch missing or malformed UTMs before they create reporting gaps.
Step 5: Choose and Configure Your Attribution Model
Once your tracking is in place and your platforms are connected, you need to decide how credit gets distributed across the touchpoints in a customer's journey. This is your attribution model, and the choice you make here shapes every insight your data produces.
Here is a quick breakdown of the main models:
First-touch attribution: All credit goes to the first interaction a prospect had with your brand. Useful for understanding which channels drive awareness and top-of-funnel entry. Ignores everything that happened after the first click.
Last-touch attribution: All credit goes to the final touchpoint before conversion. This is the default model in most ad platforms. It overvalues bottom-of-funnel channels and completely ignores the awareness and consideration stages that built the relationship.
Linear attribution: Credit is distributed equally across all touchpoints. Simple and fair, but it treats a quick homepage visit the same as a 20-minute product demo page session.
Time-decay attribution: More credit is given to touchpoints that occurred closer to the conversion. This model reflects the reality that recent interactions often have more influence on the final decision, while still acknowledging earlier touchpoints.
Multi-touch or data-driven attribution: Credit is distributed across all touchpoints based on their actual contribution to conversion, often weighted by algorithmic analysis of your historical data. This is the most complete model for teams running campaigns across multiple channels with longer sales cycles. Our guide to attribution models covers each approach in much greater depth.
For most teams running paid ads across multiple platforms, multi-touch attribution gives the most accurate picture. Single-touch models create a distorted view where one channel appears to drive all results while others look ineffective, even though those channels were essential earlier in the journey.
When configuring your attribution model, also set your attribution window. This defines how far back the system looks when assigning credit. A 7-day click window is common for short sales cycles. B2B businesses with longer evaluation periods often need 30-day or 90-day windows to capture the full journey.
Cometly lets you compare attribution models side by side so you can see exactly how credit shifts between channels depending on the model you apply. This comparison view is particularly valuable when you are making budget reallocation decisions and want to understand how different attribution approaches tell different stories about the same data.
Step 6: Enable Conversion Syncing to Feed Better Data Back to Ad Platforms
Setting up attribution is not just about improving your own reporting. It also creates an opportunity to make your ad platforms smarter. This is where conversion syncing comes in, and it is one of the most impactful steps in this entire guide.
Here is the concept: ad platforms like Meta, Google, and TikTok use machine learning to optimize your campaigns. Their algorithms decide who to show your ads to, when to show them, and how much to bid. The quality of those decisions depends entirely on the quality of the conversion data you feed them. Garbage in, garbage out.
When your pixel misses conversions due to iOS restrictions or ad blockers, the ad platform's algorithm thinks your campaign is performing worse than it actually is. It optimizes toward incomplete signals, which means it targets the wrong people and overbids or underbids in the wrong situations. Understanding these attribution challenges is the first step toward solving them.
Conversion syncing solves this by sending enriched, server-side validated conversion events back to each ad platform. Instead of the platform only seeing the conversions its own pixel captured, it receives a more complete picture of actual conversions, including the ones the browser pixel missed.
The process involves:
Collecting conversion events server-side: Your attribution platform captures conversions through its server-side infrastructure, which is more complete than browser-only tracking.
Enriching the data: Match conversions with customer data like email addresses or phone numbers (hashed for privacy) so the ad platform can match them to user profiles more accurately.
Sending data back via API: Use Meta's Conversions API, Google's Enhanced Conversions, or TikTok's Events API to push this enriched conversion data back to each platform.
Cometly's Conversion Sync feature automates this entire loop. It feeds real revenue data back to Meta, Google, and other platforms automatically, so their algorithms have the accurate signals they need to optimize targeting, improve lookalike audience quality, and refine automated bidding strategies.
The success indicator for this step is visible in two places. First, your ad platforms will show improved event match quality scores (Meta shows this directly in Events Manager). Second, over time, your CPA and ROAS metrics in the ad platforms will begin aligning more closely with the actual revenue numbers in your CRM and attribution dashboard, because the platform is now optimizing toward real outcomes rather than partial data.
Step 7: Validate Your Data and Optimize Based on Real Attribution Insights
You have done the setup work. Now comes the step that separates teams who have attribution from teams who actually use it: validation and optimization.
Before you trust any number in your attribution dashboard, run a data validation check. Compare your attribution platform's reported conversions against three sources: the ad platform dashboards, your website analytics, and your CRM. Some variance is normal and expected, particularly between ad platforms (which count view-through and click-through conversions differently) and your attribution tool. But large, unexplained gaps signal a problem in your setup.
Common discrepancies to investigate:
Duplicate conversions: If your attribution platform shows significantly more conversions than your CRM, check for duplicate event firing. This often happens when both a browser pixel and server-side tracking fire without proper deduplication logic.
Missing UTMs: If a large percentage of your conversions show as "direct" or "unknown" source, your UTM implementation has gaps. Audit your active ad URLs and check for broken or missing parameters.
Broken integrations: If CRM data is not flowing into your attribution platform, check the integration connection status and verify that deal stage updates are triggering the correct events. Our article on fixing attribution discrepancies walks through the most common causes and solutions in detail.
Once your data is validated and clean, start making optimization decisions based on what attribution is actually telling you. Look at which channels and campaigns drive revenue all the way through the funnel, not just clicks or top-of-funnel leads. Reallocate budget toward channels with strong multi-touch attribution performance. Pause campaigns that generate volume but no downstream revenue. Scale creatives that appear consistently across the journeys of your best customers.
Set up a recurring review cadence, either weekly or biweekly, to keep your attribution data clean and actionable. Check for new UTM gaps, verify integrations are still firing correctly, and review any significant changes in channel performance.
Cometly's AI recommendations surface optimization opportunities automatically within the platform. Instead of manually digging through reports to find where to reallocate budget or which ads to scale, the AI analyzes your attribution data across all channels and surfaces specific, actionable recommendations so you can act faster and with more confidence.
Putting It All Together: Your Ad Attribution Setup Checklist
You now have a complete framework for building an attribution system that actually works. Here is a quick-reference checklist to keep your setup on track:
Step 1: Define goals and map the journey. Identify your conversion events, map every touchpoint, and document your full marketing stack.
Step 2: Implement server-side tracking. Install platform pixels and layer in server-side infrastructure to capture conversions that browser-based tracking misses.
Step 3: Connect all three layers. Integrate your ad platforms, CRM, and website so data flows freely between all parts of your marketing ecosystem.
Step 4: Standardize UTMs and naming conventions. Create a consistent UTM structure and naming format that keeps your data clean and filterable.
Step 5: Choose your attribution model. Select a model that fits your sales cycle, configure your attribution window, and use side-by-side model comparison to understand how credit shifts.
Step 6: Enable conversion syncing. Feed enriched conversion data back to your ad platforms so their algorithms optimize toward real revenue signals.
Step 7: Validate and optimize. Run a data quality check, fix discrepancies, and use attribution insights to make smarter budget and creative decisions on a regular cadence.
Proper attribution is not a one-time project. It is an ongoing practice that improves over time as you collect more data, refine your models, and deepen your integrations. Start with the fundamentals: get your tracking in place, connect your platforms, and get your UTMs consistent. Then layer in more advanced capabilities like multi-touch modeling and conversion syncing as your setup matures.
The teams that win are the ones who stop guessing and start making decisions grounded in complete, accurate data. Every dollar you spend on ads deserves to be tracked, attributed, and optimized.
Ready to elevate your marketing game with precision and confidence? Discover how Cometly's AI-driven recommendations can transform your ad strategy. Get your free demo today and start capturing every touchpoint to maximize your conversions.