Marketplace sellers face a tracking problem that most analytics tools were never built to solve. You are running ads on Meta, Google, or TikTok, sending traffic to a marketplace listing or your own storefront, and then trying to figure out which campaign actually drove the sale. The problem is that marketplaces often strip UTM parameters, block pixel fires, and return fragmented data that makes it nearly impossible to connect ad spend to revenue.
The result is a marketing team flying blind, scaling budgets based on incomplete signals, and making decisions that erode profitability rather than build it.
This guide walks you through a practical, step-by-step process for setting up reliable tracking as a marketplace seller. Whether you are selling through your own SaaS-connected storefront, a B2B platform, or a multi-channel setup, the same attribution principles apply. You will learn how to define the conversion events that matter, configure your tracking infrastructure correctly, connect your ad platforms to first-party data, and build a reporting framework that gives you a clear view of what is driving revenue.
By the end of this guide, you will have a tracking system that captures every meaningful touchpoint, feeds better data back to ad platform algorithms, and lets you make confident, data-driven budget decisions. Each step builds on the last, so work through them in order for the best results.
Step 1: Define Your Conversion Events and Revenue Goals
Before you configure a single pixel or touch your ad platform settings, you need to know exactly what you are trying to measure. This sounds obvious, but most tracking problems start here: sellers set up tracking tools without first defining which actions in their funnel actually represent value.
Start by identifying the specific events in your marketplace funnel that signal either intent or revenue. For most sellers, these include product page views, add-to-cart events, checkout initiations, and completed purchases. Each of these events tells a different story about where a buyer is in their decision process.
The key is to map each event to a stage in your customer journey rather than treating them as an undifferentiated list of actions. A product page view signals early awareness. An add-to-cart event signals meaningful intent. A completed purchase signals revenue. When you understand the hierarchy, you can weight your attribution data accordingly and avoid treating a casual browse the same as a committed buyer.
Once you have your event list, assign monetary values or pipeline weights to each one. This step is what transforms your tracking from a raw count of actions into a revenue-connected reporting system. If you know that a checkout initiation converts to a completed purchase at a consistent rate, you can assign a fractional value to that event and use it for optimization even before the final sale is confirmed.
You also need to decide which events to send back to your ad platforms for algorithm optimization and which to keep internal for reporting purposes only. Not every event belongs in Meta or Google. Sending low-signal events like page views to your ad platforms can dilute your optimization signals and cause algorithms to target the wrong audiences.
Common pitfall: Tracking too many events creates noise. Focus on three to five high-signal conversion events that directly correlate with revenue. More is not better here. More is just more data to misinterpret.
Success indicator: You have a written event map that lists each conversion event, its trigger condition, its assigned value, and which platform or system it feeds. This document becomes the foundation for every tracking decision you make in the steps that follow.
Step 2: Audit Your Current Tracking Setup for Data Gaps
Most marketplace sellers assume their tracking is working because they see data in their analytics tools. This is one of the most dangerous assumptions in digital marketing. Partial data is often worse than no data because it creates false confidence in decisions that are built on an incomplete picture.
Start your audit by checking whether your existing pixel or tag fires correctly on every key page in your funnel. Pay particular attention to post-purchase confirmation pages. These are the pages that confirm a completed transaction, and they are exactly the pages that many marketplace platforms block or redirect away from, preventing your pixel from firing on the most important event in your funnel.
Next, test UTM parameter persistence across redirects. If your marketplace uses its own URL structure or passes traffic through a redirect layer, there is a strong chance that UTM parameters are being stripped before the final landing page loads. Open your UTM tracking URLs in a browser, follow the full redirect chain, and check whether the UTM values survive to the destination. Many sellers discover at this stage that their source attribution has been broken for months.
Look for sessions in your analytics tool that appear to start mid-funnel with no source attribution. These are direct indicators that your tracking is losing the thread somewhere between the ad click and the conversion. Sessions that show up as direct or unknown are often paid traffic that lost its attribution data along the way.
Review your ad platform attribution windows and compare them against your actual sales cycle length. If your buyers typically take two to three weeks from first click to purchase but your attribution window is set to seven days, you are systematically undercounting conversions and misrepresenting which channels are performing.
Use browser developer tools or a dedicated tag auditing tool to verify that events fire with the correct parameters and are not duplicating. Duplicate event fires inflate your conversion counts and corrupt the optimization signals you send back to ad platforms.
Common pitfall: Assuming your pixel is working because it shows data. Check the quality of that data, not just its presence. A pixel that fires on the wrong page or with the wrong parameters is providing misleading information.
Success indicator: You have a documented list of tracking gaps that specifies which pages, events, or parameters are missing or broken. This list becomes your repair roadmap for the next step.
Step 3: Implement Server-Side Tracking and Conversion APIs
Here is where the real infrastructure work begins. Browser-based pixels were the standard for years, but they have become increasingly unreliable in marketplace environments. Ad blockers, iOS privacy updates, and the ongoing deprecation of third-party cookies all reduce the percentage of conversions that a browser pixel can actually capture. In some environments, pixel match rates have dropped significantly, meaning a meaningful portion of your conversions are going untracked.
Server-side tracking solves this problem by sending conversion data directly from your server or CRM to ad platforms, bypassing the browser entirely. Instead of relying on a JavaScript tag in the buyer's browser to fire and report a conversion, your server sends the event data directly to Meta, Google, or any other platform via their Conversion APIs. The browser's privacy settings, ad blockers, and cookie restrictions become irrelevant because the data never travels through the browser at all.
To implement this for Meta, you will configure the Meta Conversion API to receive server-sent events. For Google, you will set up Enhanced Conversions, which works on a similar principle. Both systems support hashed customer data, meaning you can send identifiers like email addresses or phone numbers in an encrypted format for improved identity matching without exposing raw personal data.
Higher event match quality scores on these platforms translate directly into better ad delivery optimization. When the platform can confidently match a conversion event to a specific user, it can use that signal to find more buyers who look like your best customers. For a detailed walkthrough of this process, the server-side tracking implementation guide covers each configuration step in depth.
One critical technical detail: when you run both a browser-side pixel and server-side Conversion API simultaneously, you must implement event deduplication. Both Meta and Google use event ID parameters to match browser and server events and prevent double-counting. If you skip this step, your conversion counts will be inflated, your reported ROAS will look better than it actually is, and your ad platform algorithms will optimize toward the wrong signals.
Connect your CRM or order management system as the authoritative data source for server-side events. This ensures that offline conversions and purchases that happen after a delay are captured accurately, not just the immediate browser-session purchases that a pixel can see.
Common pitfall: Sending server-side events without deduplication keys causes inflated conversion counts that corrupt your optimization signals. Always implement event IDs before going live with server-side tracking.
Success indicator: Your ad platform event match quality scores improve after implementation, and you begin seeing server-side events confirming coverage for conversions that your browser pixel previously missed. This tells you that your tracking infrastructure is now capturing a more complete picture of your actual conversion activity.
Step 4: Choose and Configure Your Attribution Model
With your tracking infrastructure in place, you now need to decide how to distribute credit across the touchpoints that contributed to each conversion. This is your attribution model, and the choice you make here will directly influence which channels appear to be performing well and which appear to be underperforming.
The most common default is last-click attribution, which assigns 100 percent of the credit for a conversion to the final touchpoint before the purchase. It is simple to understand and easy to implement, which is why it became the default. But for marketplace sellers with longer consideration cycles, last-click attribution systematically undercredits awareness channels like TikTok, display advertising, or branded content that introduced the buyer to your product days or weeks before the final click.
First-touch attribution has the opposite problem. It gives all the credit to the channel that first brought the buyer to your funnel, ignoring everything that happened between that first visit and the eventual purchase.
Linear attribution distributes credit equally across all touchpoints in the journey. Data-driven attribution uses algorithmic weighting based on actual conversion path data to assign credit more precisely to the touchpoints that had the greatest influence on the outcome.
For most marketplace sellers, a multi-touch attribution model is the most accurate reflection of how buyers actually make decisions. It acknowledges that a buyer who saw your TikTok ad, clicked a Google search ad three days later, and then converted via a retargeting ad was influenced by all three channels, not just the last one.
Configure your attribution platform to match your typical sales cycle length. If your buyers typically take two weeks from first click to purchase, your attribution window must cover at least that span. A seven-day window will cut off a significant portion of legitimate conversions and make your upper-funnel channels look ineffective.
Before committing to a single model, compare attribution model outputs side by side. Look at how budget decisions would change under each model. You will often find that the channels that look best under last-click attribution look very different under a multi-touch model, and vice versa. Reviewing a breakdown of which attribution model best fits your ad campaigns can help you make a more informed choice.
Common pitfall: Defaulting to the attribution model that your ad platform recommends. Ad platform attribution is almost always biased toward crediting that platform's own touchpoints. Meta's attribution will favor Meta. Google's will favor Google. Neither gives you an objective view of your full channel mix.
Success indicator: You can see how different channels contributed to the same conversion, and you have a single source of truth that is not pulled from individual ad platform dashboards. This is the foundation of objective, channel-agnostic budget decisions.
Step 5: Connect Ad Spend Data to Revenue and Pipeline
Attribution data only becomes actionable when it is connected to actual revenue. Knowing which channels drove conversions is useful. Knowing which channels drove revenue at an acceptable cost is what drives real budget decisions.
Start by integrating your ad platforms with your revenue data source so you can see cost, revenue, and return on ad spend in a single view rather than switching between tools. This integration eliminates the manual data stitching that most marketing teams spend hours on each week and removes the human error that comes with copying numbers between spreadsheets. The right marketing attribution software can automate this integration and keep your revenue data synchronized in real time.
If you use Stripe or another payment processor, connect it directly to your attribution platform so actual revenue figures flow into your reporting automatically. This is a critical distinction: you want actual revenue from your payment processor, not estimated revenue from your ad platform's conversion value fields. Ad platform reported ROAS and actual revenue frequently diverge because of differences in attribution methodology, and you need to know which number reflects reality.
Build a channel-level view that shows ad spend, attributed conversions, revenue, and customer acquisition cost for each source. This view lets you compare channels on an equal footing rather than evaluating each one in isolation within its own platform dashboard.
Establish consistent UTM naming conventions across all campaigns before this step. If your UTM structures are inconsistent, your attribution platform cannot reliably group and compare traffic sources. A campaign that uses "meta" in one UTM and "facebook" in another will appear as two separate sources, fragmenting your data and making your channel-level view inaccurate.
Once your data is unified, identify your highest-revenue channels versus your highest-volume channels. These are often different, and they require different budget strategies. A channel that drives high volume at low revenue per conversion may need to be restructured, while a lower-volume channel with high revenue per conversion may deserve more budget.
Common pitfall: Relying on ad platform reported ROAS without cross-referencing against actual revenue data. The discrepancy between platform-reported and actual ROAS is often significant, and making budget decisions based on platform-reported numbers can lead you to over-invest in channels that look better on paper than they perform in reality.
Success indicator: You can pull a single report that shows every active campaign, its total spend, attributed revenue, and ROAS without any manual data stitching. If you still need to copy numbers from multiple tabs to build this view, your integration work is not yet complete.
Step 6: Build a Reporting Dashboard and Optimization Workflow
The final step is turning your tracking infrastructure into a consistent decision-making system. Data that lives in a platform no one checks regularly is not an asset. It is just noise. Your goal here is to create a workflow that keeps your team aligned on what is working and drives weekly budget decisions based on evidence rather than instinct.
Start by creating a marketing dashboard that surfaces your most important metrics daily: spend, attributed revenue, ROAS, cost per acquisition, and conversion rate by channel. Keep this dashboard focused. A dashboard that shows fifty metrics shows nothing. Prioritize the five to seven numbers that directly connect to your revenue goals and surface them prominently.
Set performance thresholds for each channel so you have clear rules for when to scale, pause, or reallocate budget. Without predefined thresholds, budget decisions become reactive and emotional. With them, your team knows exactly what a channel needs to achieve to justify continued investment, and what signals trigger a reallocation.
Schedule a weekly attribution review where you compare current performance against the previous period and identify which channels shifted. This cadence balances responsiveness with the discipline to avoid over-optimizing on short-term noise. Daily monitoring catches anomalies. Weekly reviews drive strategic decisions.
Use AI-driven insights to surface high-performing ad creatives and anomalies across channels. Manual analysis of large campaign sets is slow and prone to confirmation bias. AI-assisted analysis can surface patterns and signals that a human reviewer would miss, letting you act on opportunities faster. Tracking your digital marketing performance metrics within a unified dashboard makes this kind of analysis significantly more reliable.
Critically, feed your enriched conversion data back to Meta, Google, and other ad platforms on a regular basis. This is the feedback loop that makes your entire tracking investment compound over time. When ad platform algorithms receive accurate, enriched conversion signals, they optimize toward your highest-value buyers more effectively. Your tracking infrastructure does not just help you understand the past. It actively improves future ad performance.
Common pitfall: Building a dashboard and then never revisiting your attribution model or tracking setup as your channel mix evolves. Your tracking system needs periodic maintenance. As you add new channels, change your offer, or shift your sales cycle, your attribution configuration needs to keep pace.
Success indicator: Your team makes weekly budget decisions based on dashboard data rather than gut instinct, and your ad platform algorithms show improved performance from the enriched conversion signals you are feeding back. When both of these are true, your tracking system is doing exactly what it was built to do.
Putting It All Together
Tracking for marketplace sellers is not a one-time setup task. It is an ongoing system that requires the right infrastructure, a clearly defined attribution model, and a consistent review process. The six steps in this guide give you a framework to move from fragmented, unreliable data to a complete picture of which ads and channels are actually driving revenue.
Start with your conversion event map. Close the gaps in your current tracking. Implement server-side data collection to capture what browser pixels miss. Choose an attribution model that reflects your real sales cycle. Connect your spend to actual revenue. Then build a reporting workflow that keeps your team aligned on what is working.
When your tracking is accurate and complete, every budget decision becomes easier and more defensible. You stop guessing which channel deserves more investment and start knowing.
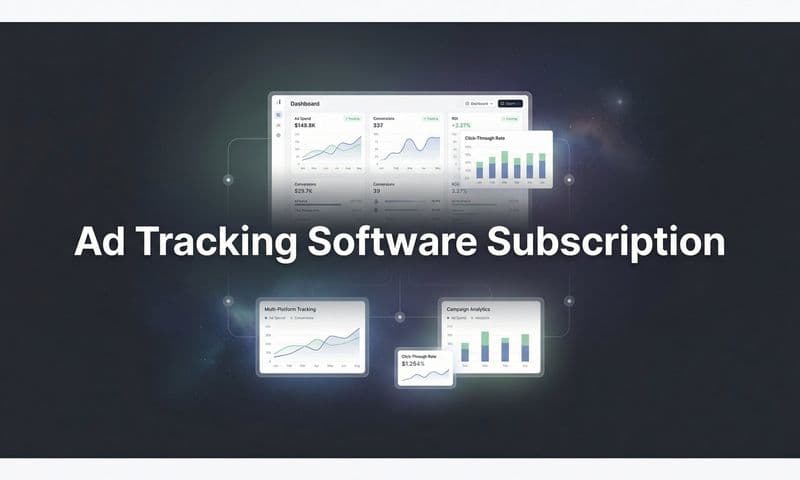
Platforms like Cometly are built specifically for this kind of attribution work, connecting your ad platforms, CRM, and revenue data into a single source of truth so you can scale what works and cut what does not. Cometly captures every touchpoint from ad click to closed revenue, feeds enriched conversion data back to your ad platforms, and surfaces AI-driven recommendations so your team can act on signals faster than manual analysis allows.
Ready to get started? Review your current tracking setup against the audit checklist in Step 2 and identify your biggest data gap. That is the highest-leverage place to begin. And when you are ready to build the full system, Get your free demo and see how Cometly can help you capture every touchpoint and maximize your conversions.