Your ad platform pixel stops firing. Suddenly, conversion events disappear from your Events Manager, your cost-per-acquisition data becomes unreliable, and the optimization algorithms powering your campaigns start working blind. If you manage paid media at any scale, this scenario is frustrating at best and catastrophic at worst.
The good news is that pixel failures follow predictable patterns. Whether you're dealing with a Meta Pixel, Google Ads tag, LinkedIn Insight Tag, or any other ad platform tracking code, the diagnostic process follows a consistent logic. You can work through it systematically and get your tracking restored.
This guide walks you through exactly that process: confirming the problem, isolating the cause, applying the right fix, and verifying that your tracking is fully restored. You'll also learn why pixel-dependent tracking alone creates structural fragility in your measurement setup, and how modern server-side approaches can protect your attribution data from the browser-level issues that cause most pixel failures in the first place.
One important thing to understand before you start: not all pixel failures are equal. Some are simple configuration errors you can fix in minutes. Others are symptoms of a broader shift in how browsers and operating systems handle tracking, and those require a fundamentally different solution. This guide will help you tell the difference.
If you're a marketer or growth leader managing paid campaigns, the steps below will help you stop guessing and start fixing. By the end, you'll have a working pixel, a cleaner tracking setup, and a clearer picture of how to prevent this from happening again.
Step 1: Confirm the Pixel Is Actually Not Firing
Before you start changing anything, confirm that the problem is real. This sounds obvious, but a surprising number of "broken pixel" investigations turn out to be false positives caused by the marketer's own browser setup during testing.
Start with your ad platform's native diagnostic tools. These browser extensions are built for exactly this purpose and give you immediate visibility into what's happening on any given page.
Meta Pixel Helper: Install this Chrome extension and open it on any page where your Meta Pixel should fire. It will show you whether a pixel was detected, which pixel ID is firing, which events are being sent, and any errors or warnings in the payload.
Google Tag Assistant: This Chrome extension works similarly for Google Ads tags and Google Analytics. It shows you which tags are firing, whether they're configured correctly, and flags common errors.
LinkedIn Insight Tag checker: LinkedIn provides its own diagnostic tool within Campaign Manager that shows recent tag activity and whether your domain is verified.
After running the browser extension check, cross-reference with your ad platform's Events Manager or tag dashboard. If the pixel is firing, you should see recent activity recorded there. A gap of more than a few hours with no events on an active site is a strong signal that something is wrong.
For a deeper look, open your browser's developer tools and navigate to the Network tab. Filter requests by the pixel's domain, for example "facebook.net" for Meta or "googleadservices.com" for Google Ads. If no request appears when you load the page or trigger an event, the pixel code is not executing at all.
Here's the critical caveat: always test in an incognito window with all browser extensions disabled before concluding the pixel is broken. Ad blockers, privacy extensions like uBlock Origin or Privacy Badger, and even some VPN tools can suppress pixel requests in your own browser while the pixel fires normally for other users. This is one of the most common sources of false alarms in pixel troubleshooting.
If the pixel fires correctly in incognito but not in your regular browser session, the issue is your own browser configuration, not the pixel itself. That's useful information, but it also means you need to think about how many of your actual users are experiencing the same suppression.
Success indicator: You can clearly confirm whether the pixel request is being sent from the page, and whether the ad platform is receiving it. You know whether you're dealing with a real failure or a browser-specific testing issue.
Step 2: Check the Installation and Code Placement
If you've confirmed the pixel genuinely isn't firing, the next place to look is the installation itself. Code placement errors are among the most common causes of tracking pixels not firing correctly, and they're often introduced by site updates or theme changes that teams don't immediately connect to their tracking setup.
The pixel base code should live in the head section of every page on your site. This ensures it loads early and is present regardless of which page a user visits. If the base code is only on certain pages, you'll see gaps in your tracking that can be easy to misdiagnose.
If you're using Google Tag Manager to deploy your pixel, there are two additional things to verify. First, confirm that the GTM container snippet itself is installed correctly on the site, both the head and body portions. Second, open your GTM container and check that the pixel tag is configured, that the trigger is set correctly, and critically, that the container has been published. A tag saved as a draft in GTM does not fire on your live site. This catches many marketers off guard.
Next, check the pixel ID. Open your ad platform's Events Manager and note the exact pixel ID. Then inspect the code on your site and confirm the ID matches character for character. A single transposed digit or letter will cause the pixel to fire to a non-existent or wrong pixel, resulting in silent failures where the request goes out but the data never appears in your account.
Review your site's recent deployment history. If your pixel stopped working around the same time as a theme update, a site migration, or a new deployment, there's a strong chance the pixel code was overwritten or removed during that change. Many CMS platforms and page builders can strip custom code from templates during updates.
For sites built with single-page application frameworks like React, Vue, or Next.js, standard pixel implementations frequently fail on route changes. Because the page doesn't fully reload when a user navigates between sections, the pixel base code only fires once on initial load and never again. Tracking conversion pages like a thank-you page or a demo confirmation screen requires implementing pixel event calls on route changes using the platform's JavaScript API. This is a known limitation of browser-side pixels in modern web architectures.
One more common pitfall: the pixel fires on the homepage but not on conversion pages. This often happens because conversion pages like checkout confirmations or thank-you pages use a different template that doesn't include the pixel base code. Always verify that every template used across your site includes the pixel, not just the primary template.
Success indicator: The pixel base code is confirmed present on all relevant pages, the pixel ID matches your Events Manager exactly, and the GTM container is published with the correct tag configuration.
Step 3: Diagnose Tag Manager Configuration Issues
If your pixel is deployed through Google Tag Manager, configuration errors inside the container are a frequent cause of firing failures. The good news is that GTM has built-in diagnostic tools that make these issues visible without requiring you to dig through raw code.
Start by opening your GTM container and reviewing the trigger conditions for the pixel tag. A trigger set to fire on "All Pages" should fire on every page load. But if the trigger is configured to fire only on specific page paths, URL patterns, or custom events, it may be silently excluding the conversion pages you care most about. Check the trigger logic carefully against the actual URLs of your conversion pages.
Use GTM's Preview and Debug mode to walk through the exact user journey where the pixel should fire. This mode shows you in real time which tags fired, which didn't, and which triggers activated on each page. Navigate to your conversion page and look for your pixel tag in the "Tags Fired" list. If it appears in "Tags Not Fired," you'll see exactly which trigger condition was not met, giving you a precise diagnosis.
Look for conflicting tags or tag sequencing rules. If another tag is set to block or pause the pixel tag, or if a tag firing priority is causing the pixel to load after a page navigation event it depends on, this can suppress firing in ways that are hard to spot without the debug view.
Check your GTM container's version history. If the pixel was working previously and stopped after a container update, navigate to the version history and compare the current published version against the last known working version. GTM's version comparison view will show you exactly what changed between versions, including any tags, triggers, or variables that were modified or removed.
It's also worth checking whether a recent container publish accidentally excluded the pixel tag. This can happen when multiple team members are working in the same container and a version is published with some tags in draft state or with incomplete configurations. Issues like these often surface alongside broader ad platform data accuracy issues that compound over time.
Tip: Give your pixel tags clear, descriptive names in GTM so they're easy to identify during debug sessions. Tags named "Meta Pixel Base Code" and "Meta Pixel Purchase Event" are much easier to track than "Tag 14" and "Tag 22."
Success indicator: In GTM Preview mode, the pixel tag shows as "Fired" on the correct pages with the correct event data passing through. No conflicting rules or trigger mismatches are present.
Step 4: Identify Browser-Side Blocking and Privacy Issues
Here's where pixel troubleshooting gets more complex. If your installation is correct, your tag manager is configured properly, and the pixel still isn't firing for a meaningful portion of your audience, you're likely dealing with browser-side blocking. This is structural, not a configuration error, and it requires a different kind of response.
Browser-level blocking has grown significantly as a source of pixel failures. Ad blockers, privacy-focused browsers, and operating system-level privacy changes have all reduced the reliability of browser-side pixels across the industry. This isn't a bug you can fix with a code change; it's the environment your pixels are operating in.
Start by testing across multiple browsers and devices. Load your conversion page in Chrome, Firefox, Safari, and a mobile browser. If the pixel fires in Chrome but not in Firefox, Firefox's Enhanced Tracking Protection is likely blocking it. If it fails on iOS Safari, Apple's Intelligent Tracking Prevention may be suppressing the request. This cross-browser testing helps you understand whether you're dealing with a universal failure or a browser-specific one.
Next, check your site's Content Security Policy headers. A CSP is a security feature that controls which external scripts and domains are allowed to execute on your site. If your CSP is configured restrictively and doesn't include the ad platform's pixel domains, the browser will block the pixel from loading entirely. You can inspect your CSP headers in the browser's developer tools under the Network tab, or use an online CSP checker tool.
Review your cookie consent implementation. If you recently added a consent management platform or cookie banner, it may be correctly blocking the pixel from firing until a user gives explicit consent. This is legitimate behavior under privacy regulations, but it can look like a broken pixel if you're testing before accepting cookies or if your consent acceptance rates are low. Check whether the pixel fires after you click "Accept" on the consent banner.
The key insight here is that browser-side blocking is not fully solvable at the configuration level. You can ensure your pixel is installed correctly and fires when the browser allows it, but you cannot force browsers to load scripts they've decided to block. When this blocking affects your conversion data, it also distorts how ad platform algorithms optimize your campaigns based on incomplete signals. This is precisely why server-side tracking has become essential for reliable attribution, and we'll cover that in Step 6.
Tip: Check your ad platform's event match quality scores and match rate metrics. A low match rate in Meta's Events Manager, for example, is a signal that a significant portion of your conversion events are not being captured by the browser pixel alone.
Success indicator: You can clearly distinguish between a configuration error and a structural browser-blocking issue. You know which browsers and devices are affected, and you understand whether a consent platform is involved.
Step 5: Fix the Root Cause and Restore Firing
With your diagnosis complete, you can now apply the right fix. The solution depends entirely on what you found in the previous steps, so don't skip to this section without working through the diagnosis first.
For missing or incorrect code: Re-install the pixel base code in the correct location in the head section of every page template. Verify the pixel ID character by character against your Events Manager. If you're using a tag manager, publish the updated container version after making changes. A saved draft does nothing on your live site.
For GTM trigger issues: Update the trigger to fire on the correct pages or events. Use the "Page Path contains" condition carefully, and test your trigger logic against the actual URLs of your conversion pages. Run Preview mode after making changes to confirm the tag now fires where it should, then publish the corrected container version.
For single-page application issues: Implement pixel event calls on route changes using the platform's JavaScript API. For Meta, this means calling fbq('track', 'PageView') on each route change rather than relying on the initial page load. Most SPA frameworks provide lifecycle hooks or router events where you can attach these calls. If your team uses GTM, there are also history change triggers designed specifically for this use case.
For CSP issues: Add the required ad platform pixel domains to your Content Security Policy whitelist. For Meta, this includes domains like connect.facebook.net and facebook.com. For Google Ads, include googleadservices.com and googlesyndication.com. Work with your development team to update and deploy the CSP headers, then verify the pixel loads without CSP errors in the browser console.
For consent-related blocking: Review your consent management platform configuration to ensure the pixel fires immediately upon user consent. Most CMP platforms have a callback or event you can use to trigger the pixel initialization at the moment consent is granted. If you're seeing low consent rates affecting your conversion data, this is also a strong argument for implementing server-side events for users who have consented but whose browser still interferes with the pixel.
After applying any fix, use the ad platform's test event tool alongside the browser extension to confirm the pixel is firing correctly and sending the expected event data with the correct parameters. Unresolved discrepancies at this stage often contribute to the broader problem of ad platform reporting not matching your actual conversion activity.
Success indicator: Your Events Manager shows live activity. The pixel helper browser extension shows no errors. Conversion events are being received with correct event names, parameters, and values. The fix is verified, not just assumed.
Step 6: Implement Server-Side Tracking to Prevent Future Failures
You've fixed the immediate problem. Now let's make sure you don't end up back here in three months because a browser update or a new ad blocker version breaks your pixel again.
Even a perfectly installed pixel is vulnerable. Browser blocking, ad blockers, iOS privacy changes, and evolving consent regulations all create ongoing pressure on browser-side tracking. The only reliable long-term solution for complete conversion data is server-side tracking.
Server-side tracking works by sending conversion events directly from your server to the ad platform's API, bypassing the browser entirely. Meta calls their implementation the Conversions API (CAPI). Google offers Enhanced Conversions. LinkedIn has its own Conversions API. These server-side channels receive conversion data regardless of what's happening in the user's browser, because the request originates from your server, not from their device.
This means that when a user converts with an ad blocker active, or on an iOS device with strict privacy settings, or in a browser that blocks third-party scripts, the conversion event is still captured and sent to the ad platform. Your attribution data stays intact. Your ad platform's optimization algorithms continue to receive accurate conversion signals, which directly affects their ability to find more users like your best converters. Setting up these integrations correctly is covered in detail in our guide to ad platform Conversion API setup.
Implementing server-side tracking from scratch requires engineering work: setting up a server-side endpoint, handling event deduplication between the browser pixel and the server-side API, and mapping your conversion data to the format each platform expects. For teams without dedicated engineering resources, this can be a significant barrier.
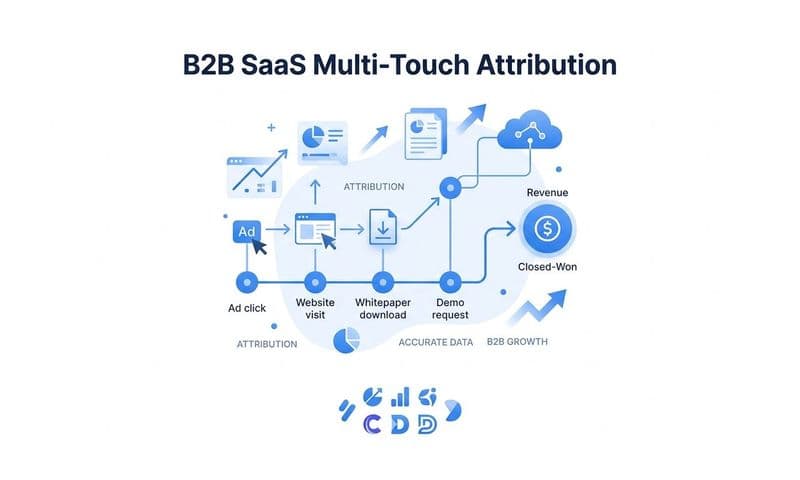
This is where platforms like Cometly remove the friction. Cometly is built to handle server-side conversion tracking natively, connecting your ad platforms, CRM, and website to track the full customer journey and send enriched conversion events server-side without requiring custom engineering work. It captures every touchpoint from ad clicks to CRM events, feeds that enriched data back to Meta, Google, and other ad platforms, and gives you a single source of truth for attribution even when browser-side pixels are blocked.
One important technical note: when you run both a browser pixel and server-side tracking in parallel, you must implement deduplication to avoid counting the same conversion twice. Both Meta's CAPI and Google's Enhanced Conversions support deduplication parameters. Pass a consistent event ID from both the browser and server events, and the platform will deduplicate them automatically.
Tip: After implementing server-side tracking, monitor your event match quality scores in Meta's Events Manager. Higher quality scores indicate that your server-side events contain enough customer information for Meta to match them to real users, which improves targeting and optimization performance.
Success indicator: Conversion events are being received by ad platforms through the server-side API. Your event match quality scores are improving. Conversion volume is more consistent and less affected by browser updates or ad blocker changes.
Putting It All Together: Your Pixel Troubleshooting Checklist
Pixel failures are stressful, but they're solvable. Here's the complete six-step diagnostic flow you can bookmark and return to any time your tracking goes dark.
Step 1: Confirm the issue. Test in an incognito window with extensions disabled. Use the platform's browser extension and check the Network tab. Cross-reference with Events Manager to confirm whether the pixel is firing or not.
Step 2: Check installation. Verify the base code is in the head section of every page template. Confirm the pixel ID matches exactly. Review recent deployments for anything that may have overwritten the code.
Step 3: Review tag manager config. Check trigger conditions in GTM. Use Preview and Debug mode to walk through conversion pages. Review version history for recent changes that may have removed or broken the tag.
Step 4: Identify browser blocking. Test across browsers and devices. Check CSP headers. Review your consent management setup. Determine whether you're dealing with a configuration error or structural browser-level suppression.
Step 5: Apply the fix. Match the solution to the diagnosis. Re-install code, fix trigger logic, handle SPA routing, update CSP headers, or adjust consent configuration. Verify the fix using test event tools before closing the issue.
Step 6: Implement server-side tracking. Protect your attribution data from future browser-level failures by sending conversion events directly from your server to ad platform APIs. Use deduplication parameters when running both pixel and server-side tracking in parallel.
The deeper lesson here is that pixel failures are symptoms of a broader fragility in browser-dependent tracking. A measurement setup that relies entirely on pixels will always be one browser update, one ad blocker install, or one consent policy change away from losing data. The real solution is a setup that doesn't depend on pixels alone.
Cometly is built for exactly that. It captures every touchpoint from first ad click to closed-won revenue, sends enriched conversion events server-side to keep your attribution data complete, and gives your team a single source of truth for campaign performance. Get your free demo and see how reliable conversion tracking looks when it's built to survive the modern web.