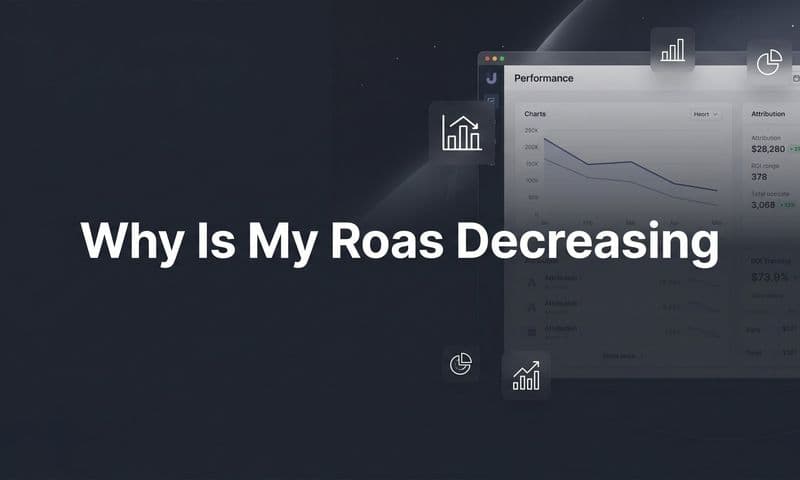
You're spending thousands—maybe tens of thousands—on ads every month. Your Facebook Ads Manager shows a 4x ROAS. Google Ads claims a 5x return. TikTok reports incredible conversion numbers. But when you check your actual bank account, the math doesn't add up. Revenue is growing, sure, but nowhere near what these platforms are promising.
Here's the uncomfortable truth: platform-reported metrics lie. Not intentionally, but they're counting conversions that never happened, crediting themselves for sales they didn't drive, and completely missing the complex journey your customers actually take before buying.
The result? You're flying blind. Scaling campaigns that lose money. Cutting budgets on channels that actually work. Making million-dollar decisions based on data that's fundamentally broken.
This guide walks you through building a complete ad spend ROI tracking system—one that shows exactly which advertising dollars generate real revenue and which ones drain your budget. You'll set up proper tracking infrastructure that works even when browsers block pixels, connect your CRM to see actual closed deals, implement multi-touch attribution to understand the full customer journey, and create optimization workflows that turn accurate data into profitable decisions.
No fluff. No theory. Just the exact steps to track true ROI across every ad platform you're running.
Step 1: Audit Your Current Tracking Setup and Identify Gaps
Before you fix anything, you need to know what's actually broken. Start by documenting every piece of tracking you currently have in place. Open each ad platform—Meta, Google, TikTok, LinkedIn, wherever you're spending—and check what conversion events they're receiving.
Look for the obvious failures first. Are your pixels firing correctly? Test this by using browser extensions like Meta Pixel Helper or Google Tag Assistant. Visit your own website, complete a conversion action, and verify the event fires. You'd be shocked how often pixels break after website updates and nobody notices for months.
Next, examine your UTM parameter strategy. Pull up your Google Analytics or tracking platform and filter by traffic source. Are you seeing "direct" or "unknown" traffic that you know came from paid ads? That's a tracking gap. Your ad clicks aren't being properly tagged, which means you're losing attribution data before it even reaches your analytics. Understanding event tracking in Google Analytics can help you identify where these gaps occur.
Now tackle the iOS problem. Check your conversion data from September 2021 onward—right after iOS 14.5 launched. You'll likely see a dramatic drop in tracked conversions, especially from mobile traffic. This isn't because your ads stopped working; it's because Apple's App Tracking Transparency framework blocks browser-based tracking for users who opt out. If 40-60% of your mobile traffic comes from iOS devices, you're probably missing half your conversions.
Here's where it gets interesting: compare platform-reported conversions against your actual revenue data. Pull your CRM or sales records for the last 90 days. How many customers actually closed? Now compare that to the total conversions your ad platforms are claiming credit for. The gap between these numbers reveals your attribution problem.
Document everything in a simple spreadsheet. List each ad platform, what tracking is in place, what's broken, and what's missing. Note where you're seeing double-counting—when multiple platforms claim credit for the same conversion. Create a column for "estimated tracking loss" where you calculate the percentage of conversions you're likely missing. If your paid ad tracking is not working properly, this audit will reveal exactly where the breakdowns occur.
Success indicator: You have a clear, written list of every tracking gap, broken pixel, missing UTM parameter, and attribution conflict in your current setup. This becomes your roadmap for the next steps.
Step 2: Set Up Server-Side Tracking for Accurate Data Collection
Browser-based tracking is dying. Ad blockers strip pixels. Privacy settings block cookies. iOS users opt out of tracking. Cookie deprecation is coming to Chrome. If you're relying solely on pixels that fire in the browser, you're already losing 30-50% of your conversion data.
Server-side tracking solves this by capturing conversion data on your server—before it ever reaches the user's browser. When someone converts, your server sends that event directly to ad platforms through their APIs. No browser involved. No pixels to block. No cookies to delete. Understanding the differences between Google Analytics vs server-side tracking helps you make the right infrastructure decisions.
Start by choosing your server-side tracking infrastructure. You have three options: build it yourself using ad platform APIs (time-intensive, requires developer resources), use Google Tag Manager Server-Side (moderate complexity, needs cloud hosting setup), or implement an attribution platform that includes server-side tracking built-in (fastest, but requires a tool investment).
If you're going the GTM Server-Side route, you'll need to set up a cloud container on Google Cloud Platform or another hosting provider. Configure your web container to send events to your server container instead of directly to ad platforms. Then set up server-side tags that forward conversion events to Meta's Conversions API, Google's Enhanced Conversions, TikTok Events API, and any other platforms you use.
The critical piece is matching users across the server-side connection. You need to pass identifiers that ad platforms can recognize—email addresses (hashed), phone numbers (hashed), click IDs from ad platforms, or IP addresses with user agents. Without proper matching, your server-side events won't connect to the original ad clicks. Implementing first-party data tracking setup ensures you capture these identifiers reliably.
Configure your conversion events with all available parameters. Don't just send "Purchase" events—include order value, product details, customer type (new vs. returning), and any other data that helps ad platforms optimize. The richer your event data, the better their algorithms can target similar high-value customers.
Test everything thoroughly before trusting your new setup. Complete test conversions on your website and verify they appear in your ad platform's Events Manager or conversion tracking dashboard. Check that the conversion values match what you expect. Confirm that events are being attributed to the correct campaigns and ads.
Run parallel tracking for at least two weeks. Keep your existing pixel-based tracking running while your server-side tracking starts capturing events. Compare the data. You should see significantly more conversions in your server-side data—that gap represents the conversions you were losing to browser-based tracking limitations.
Success indicator: Your server-side tracking is capturing 30-50% more conversions than your old pixel-based setup, especially from iOS mobile traffic. Test conversions appear correctly in ad platform dashboards even when browser tracking is blocked.
Step 3: Connect Your CRM and Revenue Data to Your Tracking System
Conversion counts mean nothing without revenue data. Someone who clicks your ad, downloads a free guide, then never buys anything is not the same as someone who becomes a $50,000 customer. Yet most tracking systems treat them identically.
Your CRM holds the truth about which leads actually turn into revenue. Connecting it to your ad tracking system transforms vanity metrics into actual ROI data. Start by identifying which CRM or sales platform contains your source of truth for closed deals—HubSpot, Salesforce, Pipedrive, or whatever system your sales team lives in. If you're using HubSpot, explore how HubSpot attribution tracking can streamline this integration.
Set up the technical integration between your CRM and tracking system. Most modern attribution platforms offer native integrations with major CRMs. If you're building custom, you'll use your CRM's API to pull deal data and match it back to the original ad interaction. The key is maintaining a consistent identifier—typically email address—that links the ad click to the CRM contact to the closed deal.
Map your customer journey stages as distinct events. At minimum, you need these four: Lead (initial conversion), Marketing Qualified Lead (meets your qualification criteria), Sales Qualified Lead (sales team accepts it), and Closed Won (actual revenue). Assign each stage a value so you can calculate ROI at different funnel points. Effective lead generation attribution tracking ensures each stage is properly credited.
Here's where most people mess up: they only track whether a conversion happened, not the revenue value. Configure your integration to pass actual deal amounts, not just conversion counts. When a $10,000 deal closes in your CRM, that $10,000 should flow back to your tracking system and be attributed to the ads that influenced that customer.
Pay special attention to the time lag between ad click and closed deal. If your sales cycle is 60 days, you can't evaluate campaign ROI after just two weeks. Set up your reporting windows to match your actual buying cycle. For B2B companies with long sales cycles, this might mean 90-180 day attribution windows.
Implement a regular sync schedule. CRM data should flow into your tracking system at least daily, ideally in real-time. Stale data leads to delayed optimization decisions. If a campaign is losing money but you don't know it for a week, you've wasted seven days of budget. Leveraging real-time data tracking eliminates these costly delays.
Create a data validation process. Spot-check that deals in your CRM are correctly attributed to ad sources in your tracking system. Pick ten recent closed deals, find them in your CRM, then verify the attribution in your tracking platform matches what your CRM shows as the original source.
Success indicator: When you look at a specific ad campaign, you can see not just how many conversions it drove, but exactly how much revenue those conversions generated. You can trace individual customers from first ad click through to closed deal with dollar amounts attached.
Step 4: Configure Multi-Touch Attribution to Credit the Right Channels
Last-click attribution is a lie. It tells you that the final touchpoint before conversion gets 100% of the credit, completely ignoring every other interaction that actually influenced the decision. Your customer saw your Facebook ad, clicked a Google search result, read three blog posts, downloaded a guide, attended a webinar, then finally converted through an email link. Last-click gives the email all the credit and tells you to cut your Facebook and Google budgets.
Multi-touch attribution fixes this by distributing credit across all the touchpoints that contributed to the conversion. But you need to choose the right model for your business. Linear attribution gives equal credit to every touchpoint—simple but often inaccurate since not all touches are equally valuable. Time-decay gives more credit to recent interactions, which works well for businesses where recency matters. Position-based (U-shaped) gives more weight to first and last touch, recognizing that discovery and final conversion are often most important. Our comprehensive attribution marketing tracking complete guide breaks down each model in detail.
For most businesses with moderate-to-complex sales cycles, position-based or time-decay models provide the most useful insights. They acknowledge that multiple channels work together while still recognizing that some touches matter more than others.
Configure your attribution windows to match your actual buying cycle. If customers typically convert within 7 days of first interaction, a 7-day window makes sense. But if you're in B2B with a 90-day sales cycle, you need a 90-day window or you'll miss most of the journey. Check your CRM data to see the average time between first touch and closed deal—that's your attribution window.
Set up separate attribution windows for different conversion types. Someone might download a guide within 1 day of seeing an ad, but take 60 days to actually purchase. Use shorter windows for top-of-funnel conversions and longer windows for revenue events. Implementing touchpoint tracking analytics helps you visualize these different journey lengths.
Now comes the revealing part: compare your ROI under different attribution models. Run the same date range with last-click, then linear, then position-based. You'll likely see dramatic differences. Channels that looked unprofitable under last-click suddenly show positive ROI under multi-touch. Upper-funnel awareness campaigns that seemed wasteful are actually driving significant assisted conversions.
Pay special attention to channel roles. Some channels are great at discovery (Facebook, YouTube), others excel at conversion (Google Search, retargeting). Last-click makes discovery channels look terrible because they rarely get credit for the final touch. Multi-touch reveals their true contribution.
Success indicator: You can view ROI data under multiple attribution models and understand how each channel contributes to conversions at different stages. You're no longer making decisions based solely on last-click data that misrepresents channel value.
Step 5: Build Your ROI Tracking Dashboard and Key Metrics
Data without a dashboard is just noise. You need a single view that shows true ROI across every channel, updated in real-time, accessible in under 60 seconds. No more logging into five different platforms, exporting CSVs, and manually calculating ROI in spreadsheets.
Start by defining your core metrics. At minimum, you need these five: ROAS (Return on Ad Spend), CAC (Customer Acquisition Cost), LTV:CAC ratio (Lifetime Value to CAC), Revenue Per Channel, and Attribution Comparison (platform-reported vs. actual attributed revenue). These metrics tell you what's working, what's not, and where the gaps exist between what platforms claim and what actually happened. The right marketing analytics software for revenue tracking makes building these dashboards significantly easier.
Set up your centralized dashboard to pull data from all sources automatically. Your ad platform spend data, your server-side conversion events, your CRM revenue data, and your attribution model calculations should all feed into one view. Most modern attribution platforms provide this out of the box. If you're building custom, you'll need a business intelligence tool like Looker, Tableau, or even Google Data Studio connected to your data warehouse.
Create comparison views that expose the truth. Build a widget that shows platform-reported ROAS next to actual attributed ROAS for each channel. The gap between these numbers reveals how much each platform is overcounting its own performance. Facebook might claim a 5x ROAS while your actual attributed ROAS is 2.8x—that 2.2x difference is critical information for budget allocation decisions.
Organize your dashboard by decision-making timeframes. Daily views should show quick-check metrics: spend pacing, conversion volume, any major anomalies. Weekly views should enable deeper analysis: campaign-level ROAS, channel performance trends, attribution model comparisons. Monthly views should support strategic decisions: overall marketing ROI, channel mix optimization, budget reallocation recommendations.
Set up automated alerts for when campaigns fall below ROI thresholds. If a campaign drops below your minimum acceptable ROAS, you should know immediately—not three weeks later when you finally check the dashboard. Configure alerts for dramatic spending increases, conversion rate drops, or any other signals that something needs attention.
Build separate views for different stakeholders. Your CEO needs high-level ROI and revenue metrics. Your CFO wants CAC and LTV:CAC ratios. Your marketing team needs campaign-level detail for optimization. Create role-specific dashboards so everyone sees the data they need without wading through irrelevant details.
Make your dashboard accessible. If checking ROI requires five clicks and two password resets, nobody will use it. Bookmark the URL. Set it as your browser homepage. Make it so easy to check that you actually check it daily.
Success indicator: You can open one dashboard and see true ROI across all channels in under 60 seconds. You know exactly which campaigns are profitable, which are losing money, and where platform-reported data diverges from reality.
Step 6: Optimize Campaigns Based on True ROI Data
Accurate tracking is worthless if you don't act on it. This step transforms your data into better campaigns, higher ROI, and more efficient budget allocation. Start by creating a weekly optimization workflow—a repeatable process that turns insights into action.
Every Monday morning, review your dashboard. Identify campaigns that fell below your minimum ROAS threshold in the past week. These are your first optimization targets. Dig into why they're underperforming: Is the audience wrong? Is the creative fatigued? Is the offer misaligned? Make specific changes based on the data, not hunches. Following best practices for tracking conversions accurately ensures your optimization decisions are based on reliable data.
Use your accurate ROI data to reallocate budget from underperforming to high-performing campaigns. If Facebook prospecting is delivering a 1.5x ROAS while Google Search is hitting 4x, shift budget accordingly. Most marketers are afraid to make bold moves, but when you have accurate data, you can confidently cut losers and scale winners.
Here's where it gets powerful: feed your enriched conversion data back to ad platforms to improve their targeting algorithms. When you send conversion events with actual revenue values, customer types, and detailed product information, platform algorithms learn what a valuable conversion looks like. They can then find more people who match those high-value customer patterns. Learn how ad tracking tools can help you scale ads by leveraging this feedback loop.
Set up Conversion Value Optimization on Facebook and Value-Based Bidding on Google. Instead of optimizing for any purchase, tell the algorithms to prioritize high-value purchases. Your server-side tracking should be passing actual order values, which enables these advanced bidding strategies.
Create a testing framework for continuous improvement. Every week, launch at least one new test: new audience, new creative angle, new landing page, new offer. Track each test's performance using your accurate attribution data. Winners get scaled. Losers get killed quickly before they waste significant budget.
Document your optimization decisions and their outcomes. When you increase budget on a campaign, note why you made that decision and what result you expected. Two weeks later, check whether your hypothesis was correct. This creates a feedback loop that improves your optimization instincts over time.
Set up quarterly budget allocation reviews. Look at channel-level ROI over the past 90 days. Are you overspending on channels with mediocre returns while underfunding channels that consistently deliver? Make bold reallocation decisions based on actual performance, not industry benchmarks or personal preferences.
Success indicator: You're making weekly optimization decisions based on actual revenue data, not platform-reported vanity metrics. Your overall marketing ROI is improving month-over-month as you systematically cut underperformers and scale winners.
Your ROI Tracking Implementation Checklist
You now have the complete framework for tracking true ad spend ROI. Here's your quick-reference checklist to ensure you've implemented everything correctly:
Step 1 Complete: You've documented all current tracking, identified gaps, and created a baseline of platform-reported versus actual revenue.
Step 2 Complete: Server-side tracking is capturing conversions that browser-based tracking misses, especially from iOS traffic and users with ad blockers.
Step 3 Complete: Your CRM is connected to your tracking system, and you can see actual revenue amounts attributed to specific ads and campaigns.
Step 4 Complete: You've configured multi-touch attribution that credits all contributing touchpoints, not just the last click before conversion.
Step 5 Complete: Your centralized dashboard shows true ROI across all channels in under 60 seconds, with automated alerts for underperforming campaigns.
Step 6 Complete: You have a weekly optimization workflow that turns accurate data into better campaigns and higher ROI.
Remember that ROI tracking isn't a one-time setup—it's an ongoing system that requires regular maintenance. Ad platforms change their APIs. Privacy regulations evolve. Your sales process shifts. Plan to audit your tracking quarterly and update your setup as needed.
The difference between marketers who scale profitably and those who burn budget comes down to one thing: knowing what's actually working. Platform-reported metrics will always overclaim their performance. Your job is to cut through the noise and make decisions based on truth.
Start with Step 1 today. Audit your current tracking and identify the gaps. Then work through each subsequent step systematically. Within a few weeks, you'll have a complete ROI tracking system that shows exactly which advertising dollars generate real revenue.
Tools like Cometly can automate much of this process, connecting your ad platforms, CRM, and revenue data in one place with server-side tracking built in. The platform captures every touchpoint, applies multi-touch attribution automatically, and feeds enriched conversion data back to ad platforms to improve their targeting algorithms.
Ready to elevate your marketing game with precision and confidence? Discover how Cometly's AI-driven recommendations can transform your ad strategy—Get your free demo today and start capturing every touchpoint to maximize your conversions.