Subscription businesses face a tracking challenge that most standard ad platforms were not built to solve. When someone clicks an ad and signs up for a free trial, that is not the conversion that matters. What matters is whether they become a paying subscriber, upgrade their plan, and stay.
The gap between that first click and recurring revenue can span weeks or months, and most ad tracking setups lose the thread entirely somewhere in between. The result is a marketing team making budget decisions based on incomplete data, crediting ads that drove signups but not revenue, and cutting campaigns that actually generated long-term customers.
This guide walks through exactly how to build an ad tracking system designed for the subscription model. You will learn how to connect your ad platforms to your billing data, track the events that actually predict revenue, and use attribution to make smarter decisions about where to invest your ad spend. Whether you are running paid search, paid social, or a mix of both, these steps apply.
By the end, you will have a clear framework for tracking the full customer journey from first ad click to paid subscriber and beyond. This is not about vanity metrics or surface-level reporting. It is about building the infrastructure that lets your growth team scale with confidence.
Step 1: Define the Conversion Events That Actually Matter for Subscriptions
Most ad tracking setups for subscription businesses start with the wrong events. A form fill, a signup, or a trial start feels like a meaningful conversion, and in isolation it is. But if your ad campaigns are optimizing toward those events without any visibility into what happens next, you are flying blind on the metrics that actually drive revenue.
The first step in building reliable ad tracking for subscription businesses is defining the full set of conversion events that map to real revenue outcomes. Think of these as the milestones your customers pass through on their way to becoming long-term subscribers.
Trial Start: The moment a prospect activates a free trial. This is a meaningful intent signal, but it is only the beginning of the journey. On its own, it tells you nothing about whether that user will pay.
Trial-to-Paid Conversion: This is the event that separates ad performance from ad illusion. When a trial converts to a paid plan, you have a real revenue signal. This event should be tracked and sent back to every ad platform you use.
First Payment Received: Distinct from the conversion event, the first payment confirms that billing is active and the subscription is live. This is the event you want to tie directly to your ad spend data.
Plan Upgrade: When a subscriber moves to a higher-tier plan, that is an expansion revenue signal. Campaigns that attract users who upgrade have higher effective LTV than campaigns that attract users who stay on entry-level plans indefinitely.
Churn Event: Tracking when subscribers cancel helps you identify which acquisition channels bring in customers who stick versus customers who leave quickly. This is essential for cohort-level analysis later.
Once you have mapped these events to your funnel, assign estimated revenue values to each one. A trial start might carry a low expected value, while a first payment carries the actual subscription amount. Sending these values to your ad platforms enables value-based bidding, which tells platform algorithms to find users who are more likely to become paying subscribers, not just anyone who will click a button.
The most common pitfall here is optimizing ad campaigns toward trial signups without ever tracking whether those trials convert to paid subscribers. Many teams discover months later that their highest-volume acquisition channel was generating trials with poor conversion rates, while a smaller channel was quietly driving their best customers. Using the right conversion tracking platforms from the start can prevent this costly mistake.
Step 2: Set Up First-Party Data Collection and Server-Side Tracking
Here is the uncomfortable truth about browser-based pixel tracking for subscription businesses: it was not built for your conversion window. A pixel fires when someone lands on a page. But your most important conversion events, the trial-to-paid conversion, the first payment, the plan upgrade, happen inside your app, sometimes weeks after the original ad click. Browser pixels cannot reliably capture those moments.
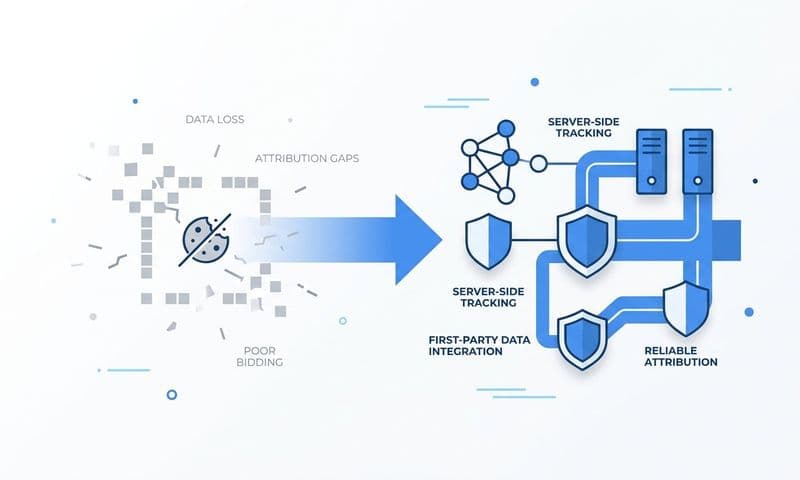
Add to that the growing impact of ad blockers, Safari's Intelligent Tracking Prevention, and iOS privacy changes, and you have a tracking environment where a meaningful portion of your conversion data simply never makes it back to your ad platforms. The result is underreported conversions, skewed optimization signals, and ad algorithms that do not have the data they need to find your best customers.
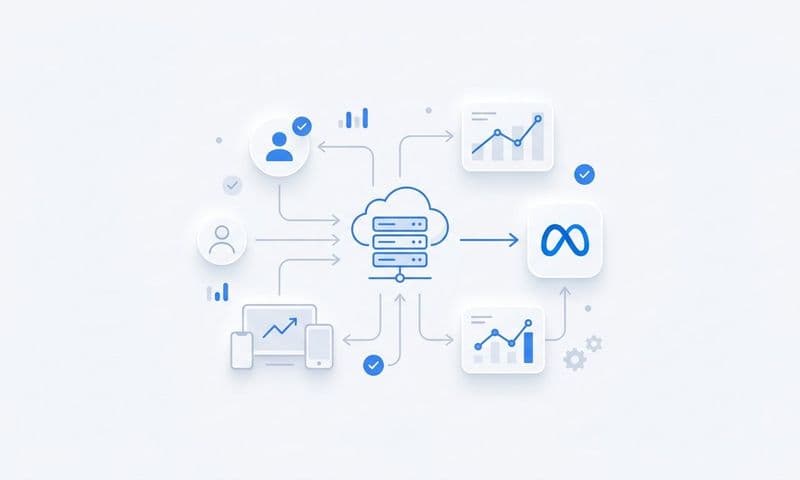
Server-side tracking solves this by moving event transmission from the browser to your backend infrastructure. Instead of relying on a pixel to fire in a user's browser, your server sends conversion data directly to ad platforms via their Conversion APIs. This approach is not affected by browser restrictions, ad blockers, or device-level privacy settings.
To implement server-side tracking for subscription events, you need to:
1. Identify the backend triggers for each conversion event you defined in Step 1. Your billing platform fires a webhook when a payment succeeds. Your app records a timestamp when a trial activates. These are your data sources.
2. Connect those backend events to your Conversion API endpoints. Meta's Conversion API (CAPI) and Google's Enhanced Conversions both accept server-side event data. Each platform has its own schema for event formatting, so you will need to map your internal event data to their required fields.
3. Include first-party identifiers with every event. Email addresses, user IDs, and phone numbers are the matching signals that allow ad platforms to connect a server-side event back to the original ad click. Without these identifiers, your match rates will be low and your attribution will be incomplete.
4. Validate that events are firing correctly. Each platform provides diagnostic tools that show whether events are being received and at what match rate. Aim to exceed each platform's recommended minimum match rate before moving forward.
This is where a tool like Cometly becomes genuinely useful. Rather than building and maintaining custom API integrations for every ad platform, Cometly manages server-side event tracking in one place, routing your conversion data to Meta, Google, and other platforms without requiring heavy engineering resources. It is the kind of infrastructure that used to require a dedicated data engineering team but is now accessible to any growth-focused marketing team.
Your success indicator for this step: conversion events are firing server-side with match rates above each platform's recommended threshold, and your reported conversion volume is noticeably higher than what browser pixels alone were capturing. Reviewing the top server-side tracking tools available can help you evaluate the right solution for your stack.
Step 3: Connect Your Billing and CRM Data to Your Ad Tracking
Ad platforms are inherently top-of-funnel tools. They see clicks, impressions, and the conversion events you send them. What they cannot see on their own is what happens after someone becomes a subscriber, whether they stay, upgrade, or churn, and how much revenue they generate over time.
Without connecting your billing and CRM data to your attribution system, you are left with a fundamental blind spot. You can see which campaigns drove the most signups, but you cannot see which campaigns drove the most revenue. Those are often very different answers. The right marketing attribution platform bridges this gap by tying billing outcomes directly to campaign performance.
Start with your billing platform. If you are using Stripe, the data you need is already there: subscription start dates, MRR per customer, plan tier, upgrade events, and churn dates. The goal is to pipe this data into your attribution tool so that every subscriber can be traced back to the ad campaign that acquired them.
Here is how to approach the integration:
1. Use your billing platform's webhook system to send payment and subscription events to your attribution tool in real time. Every time a payment succeeds or a subscription changes, that event should be logged with the user's identifier so it can be matched to their acquisition source.
2. Connect your CRM to capture the stages between signup and payment. For many B2B SaaS companies, there is a sales-assisted motion between trial start and closed-won. Your CRM holds that data. Syncing CRM stages like qualified lead, opportunity, and closed-won back to your ad reporting closes the loop between marketing activity and revenue outcomes.
3. Use the combined data to calculate revenue per campaign, not just cost per conversion. When you can see that Campaign A drove 200 trials at a low cost per trial but most churned within 30 days, while Campaign B drove 80 trials at a higher cost but most converted and stayed, the budget decision becomes obvious.
Cometly's Stripe revenue integration is a practical example of this approach. It connects your billing data directly to your ad performance reporting, giving you a single view of which campaigns are generating actual subscription revenue rather than just top-of-funnel activity.
The common pitfall to avoid: treating all signups as equal. Billing data consistently reveals that different acquisition channels attract customers with meaningfully different lifetime values. Ignoring this means optimizing for volume when you should be optimizing for value.
Step 4: Implement UTM Tracking and Attribution Across Every Ad Channel
Server-side tracking and billing integrations give you the event data you need. UTM parameters give you the context to understand where that data came from. Without consistent UTM tracking across every paid channel, your attribution system has gaps that make cross-channel analysis unreliable.
Every paid ad you run on Google, Meta, LinkedIn, TikTok, or any other platform should include UTM parameters that identify the source, medium, campaign, ad group, and creative. This is not optional infrastructure. It is the foundation that makes everything else in your attribution system work. Investing in dedicated marketing campaign tracking software ensures these parameters are applied and recorded consistently at scale.
Here is the structure to follow for every campaign:
utm_source: The platform the ad ran on. Use consistent values like "google", "meta", "linkedin", "tiktok". Never mix capitalization or use variations like "Google Ads" and "google-ads" interchangeably.
utm_medium: The type of traffic. Use "cpc" for paid search, "paid-social" for social ads, and stick to these values across all channels.
utm_campaign: The campaign name. Use a naming convention that includes the product, audience, and objective. For example: "product-trial-smb-awareness" is far more useful than "campaign-12".
utm_content: The specific ad creative or variation. This lets you compare performance at the ad level, not just the campaign level.
Inconsistent UTM naming is one of the most common causes of attribution breakdowns. When campaign names vary across team members or values change between campaigns, it becomes difficult to aggregate data accurately. Document your naming convention in a shared template and make it part of your campaign launch checklist.
On attribution models: subscription businesses typically have longer consideration windows than e-commerce. A prospect might click a LinkedIn ad, see a retargeting ad on Meta two weeks later, and then convert through a branded search. Last-click attribution gives all the credit to the branded search term and none to the channels that built awareness and intent.
Multi-touch attribution models distribute credit across the touchpoints that contributed to the conversion. For subscription businesses, this gives a more accurate picture of how upper-funnel channels contribute to the decision to subscribe. Data-driven attribution, where available, is often the best starting point because it uses actual conversion path data rather than a fixed weighting formula.
Your success indicator: every paid traffic source is tagged, traceable back to a specific campaign and ad, and your attribution tool shows a complete picture of the paths subscribers took before converting.
Step 5: Build a Subscription-Focused Attribution Dashboard
Most default ad platform dashboards are built around clicks, impressions, and surface-level conversions. For subscription businesses, those metrics are context, not conclusions. Your attribution dashboard needs to be built around the metrics that connect ad spend to subscription revenue.
The core metrics your dashboard should include:
Cost Per Trial: The baseline acquisition metric. Useful for comparing volume efficiency across channels, but never the final word on campaign performance.
Cost Per Paid Subscriber: The metric that actually matters. This is your cost per trial divided by your trial-to-paid conversion rate, calculated at the campaign level. Two campaigns with identical cost per trial can have dramatically different cost per paid subscriber.
Revenue Per Ad: When your billing data is connected to your attribution system, you can calculate the actual revenue generated by each ad. This is the most direct measure of ad ROI for subscription businesses.
LTV by Channel: Which acquisition channels bring in subscribers who stay and expand versus subscribers who churn quickly? This metric requires cohort-based analysis, but it is essential for long-term budget allocation.
Organize your dashboard in layers. Start at the channel level to see macro performance across Google, Meta, LinkedIn, and other platforms. Drill down to the campaign level to compare specific initiatives. Then go to the ad creative level to understand which messages and formats are driving the best subscribers. Using cross-platform analytics tools makes this multi-layer analysis far more manageable when you are running campaigns across several networks simultaneously.
Cohort-based reporting deserves special attention here. Because subscription revenue accrues over time, a campaign that looks expensive on a cost-per-signup basis might look excellent when you factor in 90-day retention. Build cohort views that show how subscribers acquired from different campaigns retain over time. This is the analysis that reveals which channels are actually building your business versus which ones are generating churn-prone signups.
Set up alerts for key thresholds. When cost per acquisition exceeds your target, you want to know immediately, not at the next weekly review. When conversion rates drop significantly, that is a signal worth investigating in real time.
Cometly's AI-driven recommendations are designed for exactly this kind of analysis. Rather than manually reviewing every campaign and ad combination, the platform surfaces the insights that matter most, flagging high-performing ads worth scaling and underperforming spend worth cutting. This is particularly valuable when you are managing campaigns across multiple channels simultaneously.
Step 6: Feed Enriched Conversion Data Back to Ad Platforms to Improve Targeting
Everything you have built so far serves a dual purpose. It gives you better visibility into what is working. And when you feed that data back to your ad platforms, it makes those platforms smarter about finding more customers like your best subscribers.
Ad platform algorithms optimize toward the conversion signals you send them. If you send trial starts, the algorithm finds people who will start trials. If you send paid subscription events with revenue values, the algorithm finds people who will become paying subscribers. The quality of your conversion data directly determines the quality of your ad targeting over time. This is why ad tracking tools built around accurate data are so critical for scaling subscription businesses.
Here is how to implement this feedback loop effectively:
1. Prioritize sending paid subscription events to Meta CAPI and Google Enhanced Conversions. Trial starts are useful context, but paid conversions are the signal that teaches platform algorithms to find buyers. If your only server-side event is a trial start, you are training the algorithm to find trial starters, not paying customers.
2. Include revenue values with every conversion event. When Meta or Google knows that one subscriber generated significantly more revenue than another, they can factor that into their optimization. Value-based bidding allows platforms to find users who are not just likely to convert but likely to convert at high value.
3. Pass as many first-party matching signals as possible with each event. Email addresses, phone numbers, and user IDs all improve the match rate between your server-side events and the users in the platform's system. Higher match rates mean more of your conversion data is actually being used for optimization.
4. Implement event deduplication carefully. When you are running both browser-side pixels and server-side API events, the same conversion can be counted twice if you do not deduplicate. Use event IDs to ensure each conversion is recorded once. Duplicate conversions inflate your reported numbers and skew your platform's optimization signals, leading to worse targeting over time.
The success indicator for this step is gradual improvement in ad delivery efficiency over time. As platform algorithms accumulate enriched conversion data, cost per paid subscriber typically decreases and the quality of acquired subscribers improves. This is not an overnight change. It is a compounding advantage that builds as your data volume grows.
Putting It All Together: Your Subscription Ad Tracking Checklist
Building a complete ad tracking system for a subscription business is not a one-afternoon project. But it is also not as complex as it might seem when you approach it step by step. Here is a quick-reference summary of everything covered in this guide:
Define your conversion events: Map trial start, trial-to-paid conversion, first payment, plan upgrade, and churn to your funnel. Assign revenue values to each event.
Implement server-side tracking: Move beyond browser pixels. Connect your backend to Meta CAPI and Google Enhanced Conversions. Include first-party identifiers with every event.
Connect billing and CRM data: Integrate Stripe or your billing platform with your attribution tool. Sync CRM stages to close the loop between ad spend and subscription revenue.
Set up UTM tracking: Apply consistent UTM naming conventions across every paid channel. Use multi-touch attribution models that reflect your actual consideration window.
Build a revenue-focused dashboard: Report on cost per paid subscriber, revenue per ad, and LTV by channel. Use cohort analysis to see retention by acquisition source.
Feed enriched data back to platforms: Send paid subscription events with revenue values to Meta and Google. Deduplicate events to keep optimization signals clean.
Subscription tracking is an ongoing process, not a one-time setup. As your product evolves, your conversion events and revenue values will need to be updated. As platform APIs change, your server-side integrations will need maintenance. The goal is a single source of truth that connects every dollar of ad spend to its downstream impact on subscription revenue.
If you are looking for a platform built to handle this entire workflow, Cometly was designed specifically for B2B SaaS companies that need to connect ad spend to pipeline and revenue. From server-side tracking and Stripe integration to multi-touch attribution and AI-driven recommendations, it brings all of these capabilities into one place. Get your free demo and start building the attribution infrastructure your subscription business actually needs.