
Most B2B SaaS marketing teams can tell you how many leads came in last month. Far fewer can tell you which specific ad, channel, or touchpoint actually drove those leads to become paying customers. That gap is where revenue gets lost.
Building a customer journey is not just about mapping out awareness and consideration stages on a whiteboard. It is about creating a data infrastructure that captures every interaction a prospect has with your brand, from the first ad click to the moment they sign a contract.
When done right, a well-built customer journey gives your team a single source of truth. You can see which campaigns are generating pipeline, which channels are closing deals, and where prospects are dropping off before they convert. This level of visibility changes how you allocate budget, write ad copy, and prioritize your growth efforts.
This guide walks you through the exact steps to build a customer journey that goes beyond theory and into measurable, trackable reality. You will learn how to define your stages, identify the data sources that feed each one, set up tracking across every channel, connect your ad platforms to your CRM, and use attribution to understand what is actually driving revenue.
Each step builds on the last, so by the end you will have a functional customer journey framework that your marketing and sales teams can act on every day. Whether you are starting from scratch or trying to fix a broken attribution setup, these steps will give you a clear path forward.
The goal is not a pretty diagram. The goal is a live, data-driven view of how your customers find you, evaluate you, and decide to buy.
Step 1: Define Your Customer Journey Stages With Precision
Before you track anything, you need to know what you are tracking toward. Vague stage names like "awareness" and "consideration" are not enough. In B2B SaaS, your stages need to reflect actual buyer behavior, and each one needs a measurable milestone that tells you a prospect has moved forward.
A practical framework for B2B SaaS looks like this: Awareness, Consideration, Evaluation, Decision, and Expansion. These are not just labels. Each stage should have a named trigger event that signals a prospect has entered or exited it.
Awareness: The prospect encounters your brand for the first time, typically through a paid ad, organic search result, or social post. The trigger event might be a first website visit or an ad impression that leads to a click.
Consideration: The prospect is actively researching solutions. Trigger events here include reading multiple blog posts, visiting your features page, or engaging with a comparison article.
Evaluation: The prospect is seriously comparing you against alternatives. A strong trigger event is a pricing page visit, a case study download, or a free trial start.
Decision: The prospect is ready to commit. The trigger event is a demo booking, a sales call, or a subscription activation.
Expansion: The customer is in your product and has potential to upgrade or expand their contract. Trigger events here come from product usage data and renewal activity.
The most important thing you can do at this step is align these stage definitions with your CRM pipeline. If your marketing team defines "Evaluation" one way and your sales team defines it another way, your data will never tell a coherent story. Sit down with both teams, agree on the trigger events, and map them directly to CRM deal stages.
Also think about the questions your prospects are asking at each stage. In Awareness, they are asking "do I have this problem?" In Evaluation, they are asking "is this the right solution for my team?" Those questions should inform your ad targeting and content strategy at each stage, not just your stage names.
A common pitfall here is defining stages based on your internal sales process rather than actual prospect behavior. Your internal process might have five handoff steps between SDR and AE, but a prospect does not experience those handoffs. Build your journey around how buyers actually move, not how your team is organized internally.
You will know this step is complete when every stage has a named trigger event, every trigger event is trackable in your CRM or analytics platform, and both marketing and sales agree on the definitions.
Step 2: Identify and Audit Every Touchpoint in Your Funnel
Once your stages are defined, the next task is to map every channel and content asset that touches a prospect along the way. This is your touchpoint inventory, and it is the foundation of any accurate attribution setup.
Start by listing your paid channels: Google Ads, Meta, LinkedIn, and any other platforms where you run campaigns. Then list your organic channels: SEO-driven blog content, YouTube, organic social, and podcast appearances. Finally, document your direct channels: email sequences, referral programs, partner integrations, and community participation.
Now audit your current tracking setup against that list. For each channel, ask: are we capturing this touchpoint in our analytics platform? Is it tagged with UTM parameters? Is it connected to our CRM? You will likely find gaps, and that is exactly what this step is designed to surface.
It helps to distinguish between two types of touchpoints. First-party touchpoints are channels you own directly, like your website, your email list, and your product. You have full control over tracking here. Third-party touchpoints are channels hosted on external platforms, like your LinkedIn ads or your Google campaigns. You need integrations to pull that data into your central attribution layer.
Map your content assets and ad campaigns to the specific journey stage they are designed to target. A top-of-funnel awareness ad should be tagged and tracked differently than a retargeting ad aimed at prospects who already visited your pricing page. When your content and your stage definitions are aligned, your attribution data becomes much more meaningful.
Do not ignore the dark funnel. A meaningful portion of B2B buyer research happens in places you cannot directly track: branded search queries, review sites like G2 and Capterra, peer recommendations in Slack communities, and direct navigation after someone heard your name at a conference. You cannot attribute these touchpoints with a pixel, but you can acknowledge them. Use multi-touch attribution to account for the fact that some prospects arrive looking ready to buy because of influences that happened before your tracked touchpoints.
A common pitfall at this stage is only tracking the last touchpoint before a conversion. This is how teams end up over-crediting branded search and demo request pages while completely undervaluing the awareness campaigns that put the brand on the prospect's radar in the first place.
You will know this step is done when you can list every channel and content type a prospect might encounter before converting, and you have documented which ones are currently tracked and which ones have gaps that need to be closed.
Step 3: Set Up Server-Side Tracking and Conversion Events
This is where your customer journey moves from theory into technical reality. Accurate tracking is the backbone of everything that follows, and browser-based pixels alone are no longer sufficient to get the job done.
Browser pixels have become increasingly unreliable. Ad blockers prevent them from firing. iOS privacy updates limit their ability to match users across sessions. Safari's Intelligent Tracking Prevention restricts cookie lifespans. The result is that a significant portion of your conversions may go unrecorded if you rely solely on client-side tracking.
Server-side tracking solves this by sending conversion events directly from your server to the ad platform, bypassing the browser entirely. The two most important implementations for B2B SaaS teams are the Meta Conversion API and Google Enhanced Conversions. Both allow you to pass first-party data directly from your server, which means conversions are captured even when a browser would have blocked the pixel.
To implement this, start by defining your core conversion events. For most B2B SaaS companies, these include form submissions, demo bookings, free trial starts, and subscription activations. Each event should have a clear definition and a consistent naming convention across all your platforms.
Once your events are defined, implement deduplication logic. When both your browser pixel and your server-side event fire for the same action, you risk counting one conversion twice. Most ad platforms support deduplication via an event ID. Send the same event ID from both the pixel and the server, and the platform will count it only once.
Enrich your conversion events with lead data wherever possible. When you pass an email address, company name, or job title alongside a conversion event, the ad platform can match that conversion to a real user profile with much greater accuracy. This improves your match quality scores and gives the platform's machine learning algorithm better signal to optimize toward similar high-value prospects.
Think of it like this: a raw form submission tells the ad platform "someone converted." An enriched server-side event tells it "a VP of Marketing at a 200-person SaaS company converted." That second signal is dramatically more useful for audience optimization.
A common pitfall at this stage is assuming your existing pixel setup is capturing everything. Run a conversion event audit. Compare the number of conversions your pixel reports against the number recorded in your CRM. If there is a meaningful discrepancy, you have data loss that server-side tracking can help recover.
You will know this step is working when your conversion events are firing accurately in your ad platforms, your match quality scores are high, and your reported conversion numbers align closely with what you see in your CRM and backend systems.
Step 4: Connect Your Ad Platforms, CRM, and Website Into One Data Layer
Tracking individual touchpoints is valuable. But the real power comes when all of your data sources talk to each other. This step is about building the integrations that create a single, connected view of your customer journey from first click to closed revenue.
Start with UTM parameters. Every paid campaign, every email link, and every partner referral should include UTM parameters that identify the source, medium, campaign, and ad creative. These parameters need to flow through your entire funnel without breaking. When a prospect clicks an ad, fills out a form, and gets added to your CRM, their UTM data should travel with them every step of the way.
UTM integrity is one of the most common failure points in B2B attribution. Redirects can strip parameters. Form builders sometimes do not pass hidden fields correctly. CRM imports can overwrite source data. Test your UTM flow end to end before you trust it. Click an ad, complete a form, and verify that the lead record in your CRM shows the correct source information.
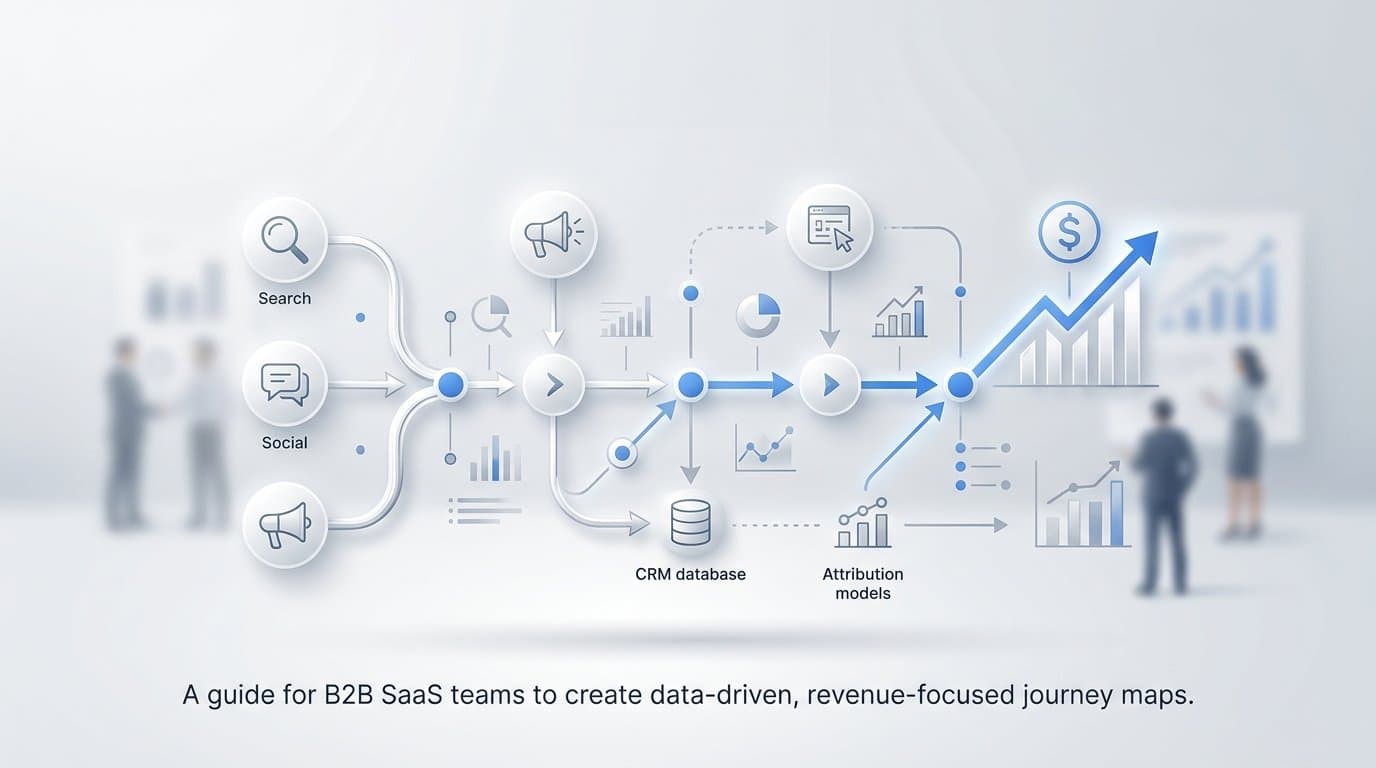
Next, integrate your ad platforms with your CRM. Most major CRMs support native integrations with Google Ads and LinkedIn, and tools like Cometly can serve as the central hub that pulls data from all your ad platforms into one place. The goal is that when a lead converts, the CRM record automatically reflects which campaign and channel drove that lead.
Then connect your billing or revenue system. This is where most attribution setups stop short. If you are using Stripe or another subscription billing tool, you can tie actual subscription revenue back to the original ad campaign that acquired that customer. This moves your attribution from "which channel generated leads" to "which channel generated revenue," which is a fundamentally different and more useful question.
A marketing attribution platform like Cometly is designed specifically for this workflow. It connects your ad platforms, CRM, and website to give you a real-time view of the entire customer journey, from the first ad impression through to closed-won revenue. Instead of pulling reports from five different tools and trying to reconcile the numbers manually, you get a single dashboard where ad spend, leads, pipeline, and revenue are all connected to their original sources.
A common pitfall here is building point-to-point integrations that are fragile and hard to maintain. If your Google Ads integration breaks, you lose visibility into an entire channel. A centralized attribution platform reduces this risk by handling the integrations in one place.
You will know this step is complete when you can open a single dashboard and see ad spend, leads, pipeline, and revenue all attributed to their original sources, with clean UTM data flowing through every stage of the funnel.
Step 5: Choose and Apply the Right Attribution Model for Your Business
With your tracking infrastructure in place, you now need to decide how credit gets distributed across the touchpoints in your customer journey. This is your attribution model, and the one you choose will significantly shape how you interpret your data and make budget decisions.
Here is a plain-language breakdown of the core models:
First-touch attribution gives 100% of the credit to the very first touchpoint a prospect had with your brand. It is useful for understanding which channels are generating initial awareness and bringing new prospects into your funnel. If you want to evaluate your top-of-funnel demand generation efforts, this model gives you a clear signal.
Last-click attribution gives 100% of the credit to the final touchpoint before conversion. It is useful for understanding what closes deals, but it systematically undervalues every earlier touchpoint that built trust and intent along the way. Teams that rely exclusively on last-click often end up over-investing in branded search and retargeting while starving their awareness channels.
Linear attribution distributes credit equally across every touchpoint in the journey. It is simple and avoids the extremes of first-touch and last-click, but it treats a quick blog visit the same as a demo booking, which may not reflect actual influence.
Time-decay attribution gives more credit to touchpoints that occurred closer to the conversion. This makes intuitive sense for short sales cycles, but in B2B SaaS where a prospect might spend two months in evaluation before booking a demo, it can undervalue the early touchpoints that first created awareness and intent.
Data-driven attribution uses machine learning to assign credit based on actual conversion patterns in your data. It is the most sophisticated model and typically the most accurate, but it requires a meaningful volume of conversion data to produce reliable results.
For B2B SaaS companies with longer sales cycles and multiple stakeholders, multi-touch or data-driven models typically provide the most complete and accurate view of channel performance. They account for the reality that a prospect might interact with a LinkedIn ad, read three blog posts, watch a webinar, and then book a demo after seeing a retargeting ad. Each of those touchpoints played a role.
The most important insight here is that no single model answers every question. Use first-touch to evaluate your awareness channels. Use last-click to understand what is closing deals. Use multi-touch to get the full picture when making budget allocation decisions. A platform that lets you compare models side by side gives you the flexibility to ask different strategic questions without being locked into one perspective.
A common pitfall is selecting one model during setup and never revisiting it. As your product evolves, your sales cycle changes, and your channel mix shifts, the model that served you well last year may no longer reflect how your customers actually buy.
You will know this step is working when you can compare attribution models side by side and use the differences to make confident, informed decisions about where to invest your budget.
Step 6: Analyze the Journey, Find Drop-Off Points, and Optimize
All of the infrastructure you have built exists to answer one question: what do I do differently to drive more revenue? This final step is where your customer journey framework pays off through continuous analysis and optimization.
Start by identifying where prospects are dropping off between stages. If a large percentage of prospects who visit your pricing page never book a demo, that is a signal worth investigating. Is the pricing page unclear? Is there a friction point in the booking flow? Is the traffic to that page coming from low-intent sources? Your attribution data will help you narrow down the cause.
Segment your journey analysis by channel, campaign, and audience. Not all leads are created equal, and aggregate data can mask important patterns. A channel that drives high volume but low close rates is very different from a channel that drives fewer leads but converts them at a much higher rate. Look at which sources produce the highest-quality leads, not just the most leads.
Time-to-convert data is another underused insight. How long do prospects typically spend in each stage? If prospects are sitting in "Evaluation" for an unusually long time, that might indicate a gap in your mid-funnel content, a slow sales follow-up process, or a pricing objection that is not being addressed. Journey data surfaces these delays so you can address them directly.
Use AI-driven recommendations to identify high-performing ads and campaigns that deserve more budget. Cometly's AI surfaces patterns across your ad channels, helping you scale what is working without having to manually sift through campaign-level data across multiple platforms. When you find a campaign that is consistently producing high-quality leads that convert to revenue, that is where you increase investment.
Feed your enriched conversion data back to Meta and Google. When you send detailed first-party data alongside your conversion events, the ad platforms' machine learning algorithms can optimize toward prospects who look like your best customers, not just anyone who clicks. This creates a compounding feedback loop: better data leads to better targeting, which leads to better conversions, which generates better data.
Review your journey map on a quarterly basis. Your product changes. Your pricing evolves. New competitors enter the market. Buyer behavior shifts. A journey map that accurately reflected how customers bought twelve months ago may be missing entirely new touchpoints or stages that have emerged since then.
A common pitfall at this stage is optimizing for lead volume rather than lead quality. It is easy to run campaigns that flood the top of your funnel with low-intent leads. Your pipeline and revenue metrics will tell a different story. Always trace your optimization decisions back to downstream revenue impact, not just form fills.
You will know this step is delivering value when you can point to specific changes made based on journey data, whether that is reallocating budget from a low-performing channel, improving a conversion rate at a specific stage, or reducing cost per acquisition by feeding better signals to your ad platforms.
Putting It All Together
Building a customer journey that actually drives decisions requires more than a diagram. It requires a connected data infrastructure where every touchpoint is tracked, every conversion event is captured accurately, and every dollar of ad spend can be traced to its downstream impact on pipeline and revenue.
The six steps in this guide give you a practical framework to get there. Start by defining precise stages and identifying all your touchpoints. Build the technical foundation with server-side tracking and platform integrations. Apply the attribution model that matches your sales cycle, and use the insights to continuously optimize.
Before you move forward, run through this checklist:
Customer journey stages defined: Every stage has a measurable trigger event and is aligned with your CRM pipeline.
Touchpoints documented and audited: Every channel is listed, tracked, and mapped to a specific journey stage.
Server-side tracking live: Meta Conversion API and Google Enhanced Conversions are implemented with enriched first-party data and deduplication logic.
Ad platforms and CRM connected: UTM data flows cleanly through your entire funnel, and revenue data is tied back to original ad sources.
Attribution model selected and applied: You are using a model appropriate for your sales cycle and comparing models for different strategic questions.
Optimization reviews scheduled: You have a quarterly cadence for reviewing your journey map and acting on attribution insights.
Cometly is built specifically for this workflow. It connects your ad platforms, CRM, and website to give you a real-time view of the entire customer journey, from the first ad impression to closed-won revenue. If you are ready to stop guessing and start making data-driven decisions, Get your free demo today and start capturing every touchpoint to maximize your conversions.