If your Google Ads campaigns are optimizing toward incomplete or delayed conversion data, you are essentially flying blind. Conversion sync for Google Ads is the process of sending accurate, real-time conversion signals from your website, CRM, or attribution platform back to Google so its Smart Bidding algorithms can optimize toward the outcomes that actually matter to your business.
For B2B SaaS companies, this is especially critical. Your conversion events are not just form fills or free trial signups. They include demo requests, qualified leads, pipeline opportunities, and closed-won revenue. When Google only sees the top-of-funnel events, it optimizes for volume rather than quality, which means you end up paying for leads that never convert to customers.
Conversion sync solves this by creating a feedback loop between your actual business outcomes and Google's bidding engine. The result is smarter campaign optimization, better lead quality, and a clearer picture of which campaigns are driving real revenue.
This guide walks you through the exact steps to set up conversion sync for Google Ads, from configuring your conversion actions to validating that data is flowing correctly. Whether you are using Google Tag Manager, server-side tracking, or a dedicated attribution platform like Cometly, each step is designed to get your campaigns optimizing toward revenue rather than vanity metrics.
By the end of this guide, you will have a functioning conversion sync setup that feeds Google's algorithm the signals it needs to find more of your best customers.
Step 1: Define Your Conversion Actions Before You Build Anything
The most common mistake teams make with conversion sync is jumping straight into tag implementation without first deciding what they actually want to measure. Before you open Google Ads or touch a single line of code, you need a clear map of which conversion events matter for your business and why.
For B2B SaaS, the relevant conversion events typically span multiple stages of the funnel. At the top, you have demo requests, free trial signups, and MQL form submissions. Further down, you have CRM events like opportunity created, SQL, and closed-won. Each of these tells Google something different about the quality of the traffic it is sending you.
Primary vs. Secondary Conversion Actions: Google Ads distinguishes between primary conversion actions, which are used to inform Smart Bidding, and secondary conversion actions, which are tracked for observation only. Getting this designation right is critical. If you mark both a form fill and a closed-won deal as primary conversions, you are sending Google conflicting signals about what you value most. As a rule, use your highest-quality, highest-confidence event as your primary conversion action, and treat earlier-funnel events as secondary.
Assigning Conversion Values: Where possible, assign a value to each conversion action. Even an estimated average deal value is more useful to Google's algorithm than no value at all. Value-based bidding strategies like Target ROAS consistently outperform Target CPA bidding when Google has revenue data to work with, because the algorithm can distinguish between a lead worth a few hundred dollars and one worth tens of thousands.
Mapping Events to Data Sources: For each conversion action, document exactly where the data will come from. A demo request fires from your website form. A closed-won event comes from your CRM. A subscription revenue event might come from Stripe. Knowing your data sources upfront prevents confusion during implementation and makes troubleshooting much easier later.
Pitfall to Avoid: Do not set up duplicate conversion actions across Google Tag Manager and the Google Ads tag simultaneously without deduplication logic. This inflates conversion counts and teaches Google's algorithm to optimize toward ghost conversions that do not reflect real business outcomes.
Your success indicator for this step: you have a documented list of three to five conversion actions with assigned values, data sources, and bidding designations written down before you touch any technical setup.
Step 2: Create Your Conversion Actions Inside Google Ads
With your conversion action map in hand, it is time to build these actions inside your Google Ads account. Navigate to Tools and Settings, then Measurement, then Conversions. Click the plus button to create a new conversion action for each event you defined in Step 1.
Choosing the Right Conversion Source: Google gives you several source options. Choose Website for tag-based tracking of on-site events like form submissions. Choose Import for CRM data and offline conversions. Choose Google Analytics 4 if you are routing conversions through GA4 as an intermediary. Selecting the wrong source here creates mismatches later, so match each action to the data source you documented in Step 1.
Setting the Conversion Window: This is where many B2B SaaS teams get tripped up. The default conversion window is 30 days, which is fine for e-commerce but often too short for B2B sales cycles that run 60 to 90 days or longer. If your average time from first click to closed-won deal is 60 days, a 30-day window means a significant portion of your actual conversions will never be attributed to the ads that drove them. Set your conversion window to match or slightly exceed your typical sales cycle length.
Configuring the Count Setting: For lead-based conversions like demo requests or form submissions, set the count to "One." This prevents the same user submitting a form multiple times from being counted as multiple separate conversions, which would distort your data and mislead Smart Bidding. Following best practices for tracking conversions accurately at this stage saves significant troubleshooting time later.
Enabling Enhanced Conversions Early: While you are inside each conversion action's settings, toggle on enhanced conversions. You will configure the actual data passing in Step 4, but enabling it now prepares Google to accept hashed first-party data when you are ready to implement it. Getting this switch flipped early avoids having to revisit each conversion action later.
Your success indicator: each conversion action shows a green status indicator, and you have confirmed the correct category, value, count setting, and conversion window before moving to tag implementation.
Step 3: Implement Your Conversion Tags or API Connection
Now comes the technical implementation. How you deploy your conversion tracking depends on your data sources, but there are three primary approaches for B2B SaaS teams: tag-based tracking for website events, server-side API connections for more reliable data, and offline conversion import for CRM events.
Tag-Based Tracking via Google Tag Manager: For website-based conversions like form submissions and trial signups, deploy the Google Ads conversion tracking tag through Google Ads via Google Tag Manager. Each conversion action has a unique conversion ID and label that you will use to configure the tag. Set the tag to fire on the specific trigger that corresponds to your conversion event, such as a thank-you page view or a successful form submission event.
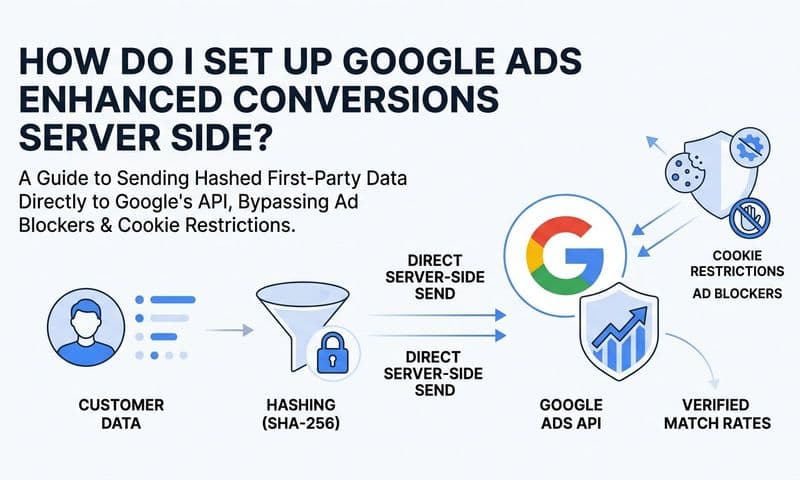
Server-Side Conversion Sync: Browser-based tags are increasingly unreliable. Ad blockers, iOS privacy restrictions, and the ongoing deprecation of third-party cookies all create gaps in tag-based conversion data. For B2B SaaS teams who need complete, accurate conversion signals, server-side tracking via the Google Ads API is the stronger approach. Using the Google Ads API or a platform like Cometly, conversion events are sent directly from your server rather than from the user's browser, bypassing the conditions that cause client-side tags to fail.
GCLID Capture: The Non-Negotiable Requirement: Regardless of your implementation method, your landing pages must capture and store the GCLID parameter from every Google Ads click. The GCLID is the unique identifier Google uses to match a conversion back to the specific ad click that preceded it. Without it, offline conversion import and downstream CRM sync are impossible.
Cometly's server-side tracking captures the GCLID at the moment of ad click and stores it against each lead record automatically. This means that even when a lead converts weeks later through a completely different session, the original GCLID is still available to match the conversion back to the right campaign.
Offline Conversion Import for CRM Events: For CRM-based conversion events, use Google's Offline Conversion Import feature. This requires uploading a CSV of GCLID values matched to conversion events and timestamps, or connecting your CRM directly via a native integration. The key dependency here is that GCLID data must have been captured and stored in your CRM at the time the lead was created.
Pitfall to Avoid: Never rely solely on cookie-based GCLID storage. Cookie lifespans are shrinking across browsers, and for B2B sales cycles that extend beyond a few weeks, cookie-based storage will result in conversion data gaps. Store GCLIDs server-side or in your CRM as a dedicated lead field.
Your success indicator: test conversions are appearing in Google Ads within three hours of a test event being fired, and the conversion action shows a "Recording conversions" status in the diagnostics panel.
Step 4: Configure Enhanced Conversions for Better Match Rates
Even with solid GCLID capture in place, there will be situations where the GCLID is unavailable. A user might click an ad on one device and convert on another. A browser might strip URL parameters before the landing page loads. These gaps are normal, and enhanced conversions are Google's solution to filling them.
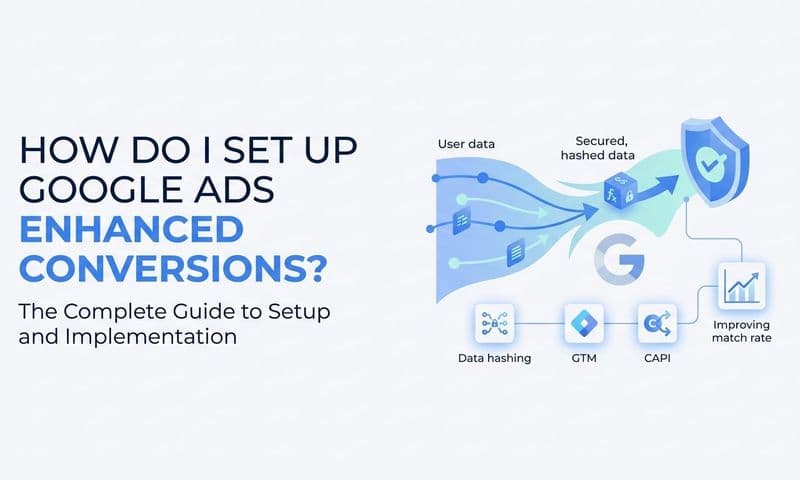
Enhanced conversions work by sending hashed first-party data, like email addresses and phone numbers, alongside your standard conversion events. Google then uses this data to match conversions to ad clicks through its own first-party identity graph, even when the GCLID chain is broken. The email address is hashed using SHA-256 before it leaves your system, so the raw data is never shared with Google directly.
Enabling Enhanced Conversions for Web: Inside Google Ads, navigate to the conversion action settings and confirm that enhanced conversions is toggled on, which you should have done in Step 2. Then go into Google Tag Manager and update your conversion tag configuration to pass the relevant user-provided data fields. For most B2B SaaS forms, the email address captured at submission is the most reliable data point to pass.
Using a Server-Side Platform: If you are using Cometly for server-side attribution, enhanced conversion data can be sent via the Google Ads API automatically alongside each conversion event. This removes the need for manual tag configuration in Google Tag Manager and ensures that enhanced conversion data is sent consistently with every event, not just when a specific tag fires correctly in the browser.
Validating Your Setup: Use Google Tag Assistant or the diagnostics tab inside your conversion action settings to confirm that hashed data is being received. The diagnostics panel will show you whether enhanced conversion data is being detected and processed correctly.
What a Good Match Rate Looks Like: The enhanced conversions diagnostic will show you a match rate percentage. A match rate above 60 percent indicates that Google is successfully linking a meaningful portion of your conversions to ad clicks through first-party data. If your match rate is lower, check that the email field in your form is being passed correctly and that the data format matches what Google expects.
Your success indicator: the enhanced conversions diagnostic confirms that hashed data is being received, and your match rate is trending above 60 percent after a week of data collection.
Step 5: Sync Downstream CRM and Revenue Events to Close the Loop
Here is where B2B SaaS conversion sync separates itself from basic lead generation tracking. Top-of-funnel conversion events tell Google that someone expressed interest. Downstream CRM and revenue events tell Google which of those people actually became customers. That distinction is everything when you are trying to optimize for revenue rather than lead volume.
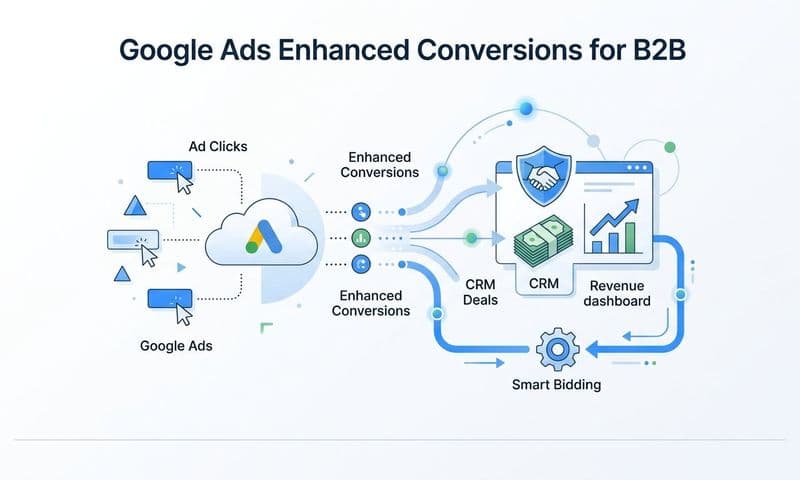
The goal of this step is to pass CRM events like SQL, opportunity created, and closed-won back to Google, matched to the original GCLID stored when the lead first clicked your ad. When Smart Bidding has access to this data, it can identify the patterns in your highest-value customers and adjust bids to find more of them. Understanding how machine learning for ads uses these signals helps clarify why downstream data quality matters so much.
Using Enhanced Conversions for Leads or Offline Import: Google's Enhanced Conversions for Leads feature is specifically designed for this use case. It allows you to pass downstream CRM events back to Google using the hashed email address as the matching key, which is useful when GCLID data is not available for older leads. For leads where GCLID was captured, Offline Conversion Import with GCLID matching is the more precise approach.
Automating CRM and Revenue Sync with Cometly: Manually exporting CRM data and uploading conversion files to Google Ads is not a sustainable process, especially as your lead volume grows. Cometly automates this by connecting your CRM and Stripe data directly to your ad platforms. When a lead progresses to a qualified opportunity or converts to a paying customer, that revenue signal is automatically sent back to Google with the correct GCLID and deal value attached. No manual exports, no delayed data, no missed conversions.
Setting Up a Closed-Won Revenue Conversion Action: Create a dedicated conversion action specifically for closed-won revenue, with actual deal values passed dynamically rather than a flat estimated value. This enables value-based Smart Bidding strategies like Target ROAS to optimize toward your highest-value customer segments rather than treating all leads as equal.
Sync Frequency Considerations: For deals that close quickly, daily sync is sufficient. For longer sales cycles, ensure your GCLID storage window in the CRM matches or exceeds the typical time from first click to close. If your average sales cycle is 75 days, your GCLID data needs to be retained for at least that long to enable accurate offline conversion matching.
Critical Audit Before You Start: Before relying on offline conversion import, audit your CRM records to confirm that GCLID is being captured as a lead field. Many B2B SaaS teams discover at this stage that a significant portion of their CRM leads have no associated GCLID, which makes downstream sync impossible for those records. Fix the capture issue first, then build the sync.
Your success indicator: closed-won conversion events are appearing in Google Ads with accurate revenue values, and your campaign ROAS reporting reflects actual business outcomes rather than estimated lead values.
Step 6: Validate Data Accuracy and Monitor for Gaps
Setting up conversion sync is not a one-time task you complete and forget. Data pipelines break, tags stop firing, CRM integrations drift, and conversion windows expire. Ongoing validation is what separates teams with reliable conversion data from teams who think they have reliable conversion data.
Cross-Reference Your Conversion Counts: Over a 30-day window, compare the conversion counts reported in Google Ads against your CRM or attribution platform. A small discrepancy of 10 to 15 percent is normal and expected due to attribution model differences. A larger discrepancy suggests a tracking gap, duplicate counting, or a broken data connection that needs investigation.
Using an Independent Attribution Source: This is where a platform like Cometly provides significant value. Cometly's attribution dashboard tracks conversions independently of Google's own reporting, giving you a neutral source of truth that is not influenced by Google's attribution logic. When Cometly's numbers and Google's numbers diverge significantly, you know something is wrong before it materially impacts campaign performance. Comparing Google Analytics vs an attribution platform reveals why independent measurement is so valuable for catching these discrepancies early.
Common Failure Points to Check: When conversion data looks off, start with these common culprits. Expired GCLID data in your CRM means offline conversions cannot be matched. Missing auto-tagging on destination URLs means GCLIDs are never appended to clicks in the first place. Form submissions that do not trigger the conversion tag due to JavaScript errors create silent gaps in your data. CRM records without GCLID values block downstream sync entirely.
Setting Up Automated Alerts: Inside Google Ads, configure automated alerts for conversion volume drops greater than 20 percent day over day. A sudden drop in conversion volume often indicates a broken tag or API connection, and catching it early prevents days or weeks of campaign optimization based on incomplete data.
Reviewing Your Attribution Model: Check the attribution model applied to each conversion action. The default is last-click, which assigns all credit to the final touchpoint before conversion. For B2B SaaS journeys that involve multiple ad interactions over weeks or months, last-click significantly undervalues earlier touchpoints. Once you have sufficient conversion volume, switch to data-driven attribution, which distributes credit more accurately across the full customer journey based on actual conversion patterns.
Your success indicator: conversion data in Google Ads is within 10 to 15 percent of your independently tracked conversion counts, and no conversion actions show a "No recent conversions" warning in the diagnostics panel.
Your Conversion Sync Checklist and Next Steps
You now have a complete framework for setting up and maintaining conversion sync for Google Ads in a B2B SaaS context. Before you move on, run through this quick checklist to confirm everything is in place.
1. Conversion actions defined with values, data sources, and bidding designations documented
2. Conversion actions created in Google Ads with correct windows, count settings, and enhanced conversions enabled
3. Tags or API connections implemented and test conversions confirmed in the diagnostics panel
4. Enhanced conversions configured with hashed email data and match rate validated above 60 percent
5. Downstream CRM and revenue events synced with GCLID matching and dynamic deal values
6. Data accuracy validated against an independent attribution source and automated alerts configured
The important thing to understand is that conversion sync is not a one-time setup. As your funnel evolves, new campaigns launch, and your CRM changes, your conversion data infrastructure needs to evolve with it. Regular audits, at least quarterly, keep your signals clean and your Smart Bidding strategies performing at their best.
The teams that win with Google Ads are not necessarily the ones with the biggest budgets. They are the ones whose campaigns have the most accurate conversion data to learn from. Every improvement to your conversion sync compounds over time as Smart Bidding accumulates better signals and makes smarter decisions.
Cometly handles conversion sync end-to-end: capturing every touchpoint from first ad click to closed-won revenue, sending enriched conversion signals back to Google automatically, and providing a single source of truth for attribution across all your ad channels. If you want to automate the most complex parts of this process, particularly downstream CRM sync and cross-channel attribution, Get your free demo today and see how Cometly connects your ad spend directly to the revenue outcomes that matter.