Browser-based pixel tracking is losing reliability fast. Ad blockers, cookie restrictions, and iOS privacy changes have made client-side tracking increasingly inaccurate, leaving marketers with incomplete conversion data and underperforming ad campaigns.
The gap between conversions that actually happen and conversions your ad platform sees has been widening for years. When your pixel misses a meaningful portion of real conversions, your ad platform's algorithm optimizes on incomplete signals, which means higher costs, worse targeting, and budget decisions built on shaky ground.
Server side conversion tracking solves this by sending conversion events directly from your server to ad platforms like Meta and Google, bypassing browser limitations entirely. The result is cleaner data, better ad optimization, and a more accurate picture of what is actually driving revenue.
This guide walks you through the complete server side conversion tracking setup process, from understanding the architecture to verifying your data is flowing correctly. Whether you are setting this up for Meta Conversion API, Google Enhanced Conversions, or a unified attribution platform like Cometly, the core steps follow the same logic.
By the end, you will have a working server side tracking system that captures more conversions, feeds better signals to your ad platform algorithms, and gives your marketing team the data quality needed to make confident budget decisions.
Step 1: Understand What You Are Building Before You Build It
Jumping straight into API credentials and tag configurations without understanding the architecture is one of the most common mistakes marketers make. Skipping this step leads to duplicate events, misconfigured payloads, and hours of debugging later. Spend twenty minutes mapping the system before you touch any settings.
Here is the core difference between client-side and server side tracking. With a browser pixel, your website fires a JavaScript tag in the visitor's browser, which then sends conversion data to the ad platform. That entire process depends on the browser cooperating: no ad blockers, no cookie restrictions, no privacy settings getting in the way. With server side tracking, your server handles the event and sends it directly to the ad platform's API. The browser is no longer in the loop.
The data flow looks like this: a user completes a conversion action on your website, your server detects that action, your server sends the event data to the ad platform's API endpoint, and the ad platform records the conversion. Clean, direct, and browser-independent.
Every server side tracking setup has three components you need to identify before building:
Event Source: Your website, app, or backend system where conversion actions happen. This is where the data originates.
Server or Middleware Layer: The system that receives conversion signals and forwards them to ad platform APIs. This could be your own backend, a Google Tag Manager server container, or a third-party attribution platform.
API Destination: The ad platform endpoint receiving your events. For Meta, this is the Conversions API. For Google, this is Enhanced Conversions.
Before touching any technical configuration, write down the specific conversion events you want to track. For B2B SaaS teams, the highest-value events are typically demo requests, free trial signups, and paid subscription conversions. These are the actions that connect directly to pipeline and revenue, which is exactly what your ad platform needs to optimize toward.
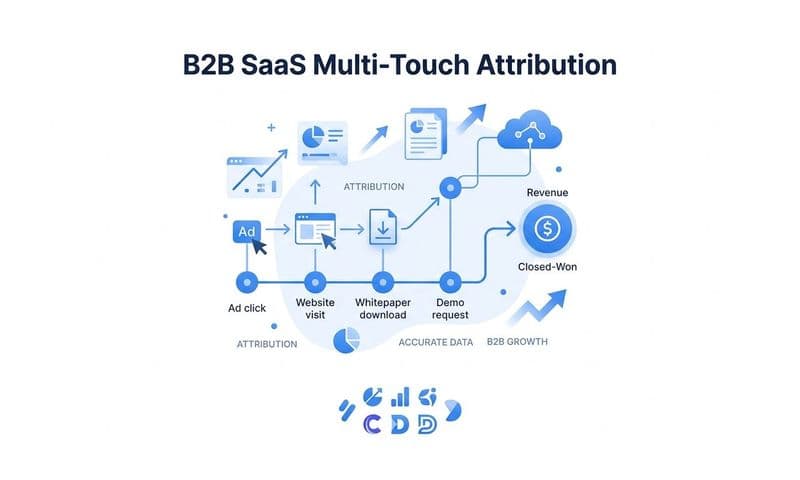
Map out your conversion funnel on paper. Draw the path from ad click to each conversion event and note where in your backend each event fires. This simple exercise will surface questions you need to answer before configuration begins, and it will save you significant time during setup.
Step 2: Gather Your Technical Requirements and Access
Nothing stalls a server side setup faster than discovering mid-configuration that you are missing a credential or lack the right permissions. Get everything assembled before you start building.
Here is what you need to have ready:
Ad Platform Access: Admin or advertiser-level access to Meta Business Manager and your Google Ads account. You need permission to view and configure conversion settings, not just run campaigns.
Website or App Backend Access: Depending on your implementation method, you may need access to your server environment, your CMS backend, or your engineering team's support to instrument conversion events.
API Credentials: Each platform has its own authentication requirements. For Meta Conversions API, you need your Pixel ID and an Access Token. Find these in Meta Events Manager by navigating to your pixel, selecting the Settings tab, and generating a new access token. For Google Enhanced Conversions, you need your Conversion ID and Conversion Label, which you will find in your Google Ads account under Tools and Settings, then Conversions.
Confirm that conversion tracking is already enabled in your Google Ads account before attempting to configure Enhanced Conversions. If you have not set up a base conversion action yet, do that first.
You also need to decide on your implementation method before gathering credentials. Your three primary options are a direct server-to-server code integration, a Google Tag Manager server container, or a third-party attribution platform. Each has different technical requirements:
Direct API Integration: Requires backend development work. Your engineering team instruments conversion events in your server code and sends payloads directly to Meta CAPI or Google's Enhanced Conversions API.
GTM Server Container: Requires a server container hosted on a cloud environment. More accessible for marketing teams with some technical support, but still requires setup and ongoing maintenance.
Attribution Platform like Cometly: Centralizes all integrations and handles API authentication for you. This approach significantly reduces the technical overhead, especially if you are tracking across multiple ad platforms simultaneously. Instead of managing separate credentials and payloads for Meta and Google, you connect your ad accounts through one dashboard and let the platform handle the API communication.
One critical warning: insufficient permissions or expired access tokens cause silent failures. The event appears to send successfully on your end, but nothing arrives at the ad platform. These are among the hardest issues to debug. Verify your access tokens are valid and set reminders to refresh them before they expire.
Step 3: Set Up Your Server Side Event Source
This is where the actual build begins. Your event source is the system that detects conversion actions and sends them to your server layer for forwarding to ad platform APIs. Getting this right requires careful attention to event structure and data formatting.
Choose your implementation method based on what you decided in Step 2. The logic for what data to collect and how to format it applies across all three approaches.
For a direct server-to-server integration, your backend needs to fire an event payload whenever a key conversion action occurs. The required parameters for every server side event are:
Event Name: A standardized name matching the ad platform's expected values. For Meta, use standard events like "Lead" or "Purchase." For Google, use your configured conversion action name.
Event Time: A Unix timestamp representing when the conversion occurred. Use the actual time of the conversion, not the time the event was sent.
User Data: This is the most important field for match quality. Include hashed email address at minimum. Additional signals like hashed phone number, first name, last name, city, state, zip code, and country all improve how well the ad platform can match the event to a user profile.
Event Source URL: The URL where the conversion happened.
Hashing is non-negotiable. Both Meta and Google require SHA-256 hashed PII before you send it. That means you hash the email address, phone number, and any other personal data fields before including them in your API payload. Never send raw, unhashed user data to an ad platform API. Events with improperly formatted or unhashed user data will be rejected, and you will have no conversions to show for your work.
For a GTM server container setup, configure a server-side tag and client within your container. The client receives events from your browser-side tags and forwards them to your configured ad platform endpoints. Google's documentation covers the specific tag templates available for Meta CAPI and Google Enhanced Conversions within the server container environment.
Regardless of method, start with your single highest-value conversion event. For most B2B SaaS teams, that is a demo request or free trial signup. Get that one event working correctly and verified before adding more. Trying to configure five events simultaneously makes troubleshooting conversion tracking gaps much harder when something goes wrong.
Step 4: Configure Event Deduplication to Prevent Double Counting
If you are running both a browser pixel and server side tracking simultaneously, and you should be during setup, the same conversion event will reach the ad platform twice: once from the browser pixel and once from your server. Without deduplication, your reported conversions will be inflated, your ad platform will optimize on false signals, and your performance data will be misleading.
Deduplication is the mechanism that tells the ad platform "these two events represent the same conversion, count them as one." Both Meta and Google have built-in deduplication logic, but you have to provide the right identifiers for it to work.
For Meta Conversions API, the deduplication parameter is the event_id. You need to generate a unique event ID at the moment the conversion occurs and pass that same ID in both your browser pixel event and your CAPI server event for the same user action. When Meta receives two events with the same event name and event ID within a short time window, it deduplicates them and counts only one conversion.
The key is consistency: the event_id in your browser pixel call must exactly match the event_id in your server side CAPI call for the same conversion. Generate the ID once, store it, and pass it through both channels.
For Google Enhanced Conversions, the deduplication mechanism uses the order_id or transaction_id field. When Google receives a server side conversion event with an order ID that matches a tag-fired event, it deduplicates them automatically.
Here is the recommended approach that works across both platforms:
Generate a unique conversion ID at the moment the conversion action occurs, before any event fires. A UUID or a timestamp-based unique string both work.
Pass it to your browser-side tag through your data layer so the pixel event includes it.
Pass it to your server side event through your backend payload so the API call includes it.
Running both browser and server tracking in parallel is actually the recommended approach during your testing period. It lets you compare event counts across channels, verify that deduplication is working, and catch any gaps in your server side setup before you rely on it exclusively. If your server side event count roughly matches your browser pixel count after deduplication, your setup is working correctly.
Step 5: Connect Your Server Events to Ad Platform APIs
With your event source configured and deduplication logic in place, it is time to connect to the actual ad platform APIs and verify that events are arriving correctly.
For Meta Conversions API, use the Test Events tool inside Meta Events Manager. Navigate to your pixel, select the Test Events tab, and enter your test event code into your server side payload. Trigger a conversion action, and within a few minutes you should see the event appear in the Test Events interface. The tool shows you the event name, the parameters received, and any errors or warnings in the payload structure.
Pay close attention to your Event Match Quality score. Meta displays this score in Events Manager for each event, rated on a scale up to 10. This score reflects how well Meta can match your server events to user profiles in its system. A score above 6 is a reasonable baseline, but higher is better. The single most impactful signal for improving match quality is email address. When your server sends a hashed email that matches a Meta user's account email, the match quality improves significantly.
For Google Enhanced Conversions, verify your setup using Google Tag Assistant or the conversion diagnostics section in your Google Ads account. Navigate to Tools and Settings, then Conversions, and check the diagnostics for your Enhanced Conversions configuration. Google will flag any issues with data formatting or missing required fields.
For teams using an attribution platform like Cometly, connect your ad accounts through the integrations dashboard. Once connected, confirm that your server side events are appearing in the attribution reports and that the event data is being enriched with the correct user signals. Cometly's event log gives you visibility into exactly what data is being captured and forwarded, which makes troubleshooting significantly faster than debugging raw API responses.
One detail that many teams overlook: sending server side events without user data parameters is technically valid but dramatically reduces the value of server side tracking. The entire point of sending server events is to improve match quality and give the ad platform better optimization signals via the Conversions API. Events without hashed email or other user data arrive at the platform but cannot be matched to user profiles, which limits their usefulness for audience targeting and campaign optimization.
Step 6: Test, Validate, and Go Live
Before you declare your server side setup complete, run a structured validation process. Going live without thorough testing means you will not discover data gaps until your ad performance has already been impacted, and by then you have lost conversion data that cannot be recovered.
Use every testing tool available to you. Meta Test Events shows you exactly what arrives at the API. Google Ads conversion diagnostics flags configuration issues. Your attribution platform's event log gives you a real-time view of events as they flow through the system.
Perform an end-to-end test by triggering a real conversion action, then tracing it through the entire system. Submit a test form, complete a test trial signup, or simulate a purchase. Then verify the event appears in each destination within a few minutes. Check for these four things in every test event:
1. Correct event name matching your configured conversion action
2. Accurate event time reflecting when the conversion occurred
3. Presence of hashed user data, especially email address
4. Proper deduplication ID matching between browser and server events
After individual event validation, compare your server side event volume against your CRM or backend records over a multi-day period. If your backend processed 50 trial signups but your server side tracking only shows 40 events, something is being dropped. Investigate before going live.
Once you are confident the setup is working correctly, keep both browser pixel tracking and server side tracking running in parallel for at least one to two weeks. This parallel period is your safety net. It lets you catch edge cases, confirm deduplication is working at scale, and verify that your conversion counts are consistent across both channels.
After the parallel validation period, you can remove redundant browser-only tracking for events now fully covered by server side. Do not rush this step. The parallel period is not just a formality. It is the difference between a smooth transition and discovering a critical gap after the fact.
Step 7: Monitor Performance and Optimize Your Data Quality Over Time
Server side conversion tracking is not a set-it-and-forget-it implementation. Data quality degrades over time if you do not actively monitor it, and the benefits compound when you invest in ongoing enrichment.
Set up a weekly check of your Event Match Quality scores in Meta Events Manager. A score that drops from 7 to 4 over a few weeks is a signal that something has changed: a hashing issue, a missing user data field, or an API authentication problem. Catching these drops early prevents extended periods of degraded data quality.
Track conversion volume trends in your attribution platform. If your demo request events drop by a significant amount week over week without a corresponding drop in actual demo requests, your tracking has a problem. Establish a baseline and monitor for unexpected changes.
The long-term value driver of server side tracking is first-party data enrichment. As you collect more user data through your product and CRM, pass it back with your conversion events. A user who signed up for a trial three months ago and is now converting to a paid plan likely has a CRM record with their email, company, and customer ID. Including that data in your server side conversion event dramatically improves match quality and gives your ad platform a richer signal to optimize against.
This is where connecting server side events to a multi-touch attribution platform like Cometly creates compounding value. Cometly connects your server side conversion data to actual pipeline and revenue, not just top-of-funnel events. Instead of seeing that a conversion happened, you can see which specific ad, campaign, and channel drove that conversion across the full customer journey. That level of visibility transforms how you allocate budget and which campaigns you scale.
Revisit your event list every quarter. If you have launched a new product feature, added a new trial flow, or introduced a new lead magnet, those new conversion actions should be added to your server side tracking. Your tracking setup should evolve with your marketing funnel, not lag behind it.
Putting It All Together
Server side conversion tracking setup is one of the highest-leverage technical investments a B2B SaaS marketing team can make. By moving conversion signals off the browser and onto your server, you recover lost data, improve ad platform optimization, and build a foundation for accurate attribution.
The seven steps in this guide cover the full process: understanding the architecture, gathering credentials, configuring your event source, preventing deduplication errors, connecting to ad platform APIs, validating your setup, and monitoring data quality over time.
The marketers who get this right gain a real edge. Their ad platforms receive better signals, their attribution data reflects reality, and their budget decisions are backed by accurate numbers rather than incomplete browser-side data.
Platforms like Cometly accelerate this process by centralizing your server side event data alongside CRM and ad platform data in one place. You can see not just that a conversion happened, but exactly which ad, campaign, and channel drove it across the full customer journey. The AI-driven recommendations surface which campaigns are actually driving pipeline, so you can scale what works with confidence.
Start with one conversion event, validate it fully, then expand. Clean data compounds over time, and every improvement to your event match quality translates directly into better ad performance and more reliable attribution.
Ready to elevate your marketing game with precision and confidence? Discover how Cometly's AI-driven recommendations can transform your ad strategy. Get your free demo today and start capturing every touchpoint to maximize your conversions.