If you are running paid ads across Meta, Google, TikTok, and LinkedIn, you already know the frustration. You are spending real budget every day, but the data coming back is fragmented, inconsistent, and often just plain wrong. iOS privacy updates have weakened pixel tracking. Cookie deprecation has created blind spots. And every ad platform claims credit for the same conversion, leaving you with no idea which campaigns are actually driving revenue.
That is exactly why signing up for a dedicated tracking platform is one of the highest-leverage moves you can make for your marketing operation. A tracking platform connects your ad accounts, website, and CRM into a single source of truth. Instead of piecing together reports from five different dashboards, you get one clear view of which campaigns, creatives, and channels are genuinely converting.
The difference between guessing and knowing where to allocate budget is the difference between wasting spend and scaling profitably. And it starts with getting the right tracking infrastructure in place.
This guide walks you through the entire process of signing up for a tracking platform and getting it fully operational. From defining your requirements to verifying your data is flowing correctly, each step is designed to move you forward quickly and confidently. By the end, you will have a connected attribution system ready to power smarter, more profitable marketing decisions.
Step 1: Define Your Tracking Goals and Requirements
Before you evaluate a single platform, get clear on what you actually need to track. This sounds obvious, but many marketers skip this step and end up choosing a tool that handles surface-level metrics while missing the deeper attribution data that actually drives decisions.
Start by mapping out every data point that matters to your business. Are you primarily tracking ad clicks and website conversions? Do you need to connect CRM events so you can follow a lead from first click through to closed revenue? Are you running e-commerce and need to tie purchases directly to specific ad creatives? Write it all down. This list becomes your filter when evaluating platforms.
Next, list every ad platform you are currently running campaigns on. Meta, Google, TikTok, LinkedIn, Pinterest, YouTube, programmatic networks. Any platform you use needs to be natively supported by the tracking solution you choose. A platform that integrates deeply with Meta but handles Google superficially will create gaps that undermine your entire cross-platform attribution picture.
Then consider your attribution model requirements. Last-click attribution is simple but misleading. It gives full credit to the final touchpoint before a conversion and ignores every campaign that built awareness, drove consideration, or captured intent earlier in the journey. If your sales cycle involves multiple touchpoints across multiple channels, which is true for most businesses, you need multi-touch attribution. Think about whether you need linear attribution, time-decay models, or position-based models, and make sure any platform you evaluate can support them.
Finally, assess whether you need server-side tracking. Browser-based pixel tracking has become increasingly unreliable due to Apple's App Tracking Transparency framework, ad blockers, and the gradual deprecation of third-party cookies. Server-side tracking bypasses these limitations by sending event data directly from your server to the tracking platform, rather than relying on a browser to execute the pixel. For most advertisers running significant spend, server-side tracking is no longer optional. It is the foundation of accurate data.
Your success indicator for this step: You should finish with a written checklist of must-have features, a list of every ad platform and data source that needs to connect, and a clear understanding of the attribution models your business requires. This document guides every decision that follows.
Step 2: Choose the Right Tracking Platform for Your Stack
With your requirements checklist in hand, you are ready to evaluate platforms with clear criteria rather than marketing copy. This is where many teams go wrong. They get drawn in by a polished interface or a low price point without confirming the platform actually handles cross-platform attribution accurately.
Here are the core criteria to evaluate for any platform you consider.
Integration depth: Does the platform have native, well-maintained integrations with every ad platform and CRM you use? Shallow integrations that only pull top-level spend data are not sufficient. You need click-level data, campaign and ad set breakdowns, and the ability to map ad interactions to downstream CRM events.
Server-side tracking capability: As discussed in Step 1, browser-based pixels miss a meaningful portion of conversions. Confirm that the platform offers a server-side tracking option and that it is genuinely implemented, not just mentioned as a feature on a roadmap.
Multi-touch attribution models: Verify the platform supports multiple attribution models and allows you to compare them side by side. The ability to switch between models and see how credit is redistributed across touchpoints is essential for understanding your full customer journey.
Conversion syncing: This is increasingly important and often overlooked. Conversion syncing means the platform sends enriched conversion data back to Meta, Google, and other ad platforms via their conversion APIs. When ad platform algorithms receive better quality conversion signals, they can optimize delivery toward users who are more likely to convert. Over time, this improves targeting, reduces cost per acquisition, and makes your ad spend work harder.
AI-powered insights: Some platforms now layer AI on top of attribution data to surface recommendations. Rather than requiring you to manually analyze every report, AI can identify which ads and campaigns are outperforming, flag budget inefficiencies, and suggest optimizations across channels.
Cometly is worth evaluating here. It is built specifically for marketers who need accurate, cross-platform attribution with AI-powered insights. It connects your ad platforms, CRM, and website to track the entire customer journey in real time, provides multi-touch attribution, supports server-side tracking, and feeds enriched conversion data back to Meta and Google to improve their algorithms. Its AI layer surfaces recommendations so you can act on your data rather than just look at it.
Common pitfall to avoid: Do not choose a platform based primarily on price. A cheaper tool that attributes conversions inaccurately will cost you far more in misallocated budget than you save on the subscription.
Step 3: Create Your Account and Configure Initial Settings
Once you have selected your platform, the sign-up process itself is typically straightforward, but the configuration decisions you make during setup have long-term implications. Take your time here rather than clicking through defaults.
The typical sign-up flow involves entering your business details, selecting a plan tier, and providing billing information. Before completing this, confirm you are selecting the plan that supports the number of ad platforms, team members, and monthly conversion events your business generates. Upgrading later is always an option, but starting with the right tier avoids disruptions to your data continuity.
Set your time zone and currency accurately during initial setup. These settings affect how your data is reported and aggregated. If your team is in New York but your ad accounts are managed in London, decide which time zone your reporting should reflect and be consistent. Changing these settings later can create confusing discrepancies in historical data.
If you are an agency managing multiple clients, configure your workspace or organization structure carefully. Most enterprise attribution tracking software allows you to create separate workspaces or client accounts under a single agency login. Set this up correctly from the start so client data stays properly isolated and reporting stays clean.
Invite your team members early and assign appropriate permission levels. Marketers who manage campaigns need access to performance data. Analysts may need deeper reporting access. Executives may only need high-level dashboards. Assigning the right roles ensures people see what they need without accessing sensitive account settings.
Configure your default attribution window and model. A 7-day click, 1-day view window is a common starting point, but your business may require a longer window if your sales cycle is extended. You can refine this later as you observe your actual customer journey data.
Practical tip: Use a shared team email address or a dedicated admin account as the primary account owner. If the individual who created the account leaves your organization, you want to ensure uninterrupted access to your tracking data.
Step 4: Connect Your Ad Platforms and Data Sources
This is where your tracking platform starts delivering real value. Connecting your data sources correctly is the most technically involved step, but modern platforms have simplified this considerably through native integrations and guided setup flows.
Begin with your ad platforms. Connect Meta Ads, Google Ads, TikTok Ads, LinkedIn Ads, and any other platforms you use. Most tracking platforms handle this through OAuth authentication, where you authorize the platform to access your ad account data. Follow the prompts, grant the necessary permissions, and confirm each connection shows an active status before moving on.
Next, connect your CRM. This is a critical step that many marketers overlook, and it is what separates surface-level click tracking from true revenue attribution. When your CRM is connected, the tracking platform can follow a lead from the original ad click through every stage of your pipeline, including lead status changes, opportunity creation, and closed revenue. Platforms like HubSpot, Salesforce, and others typically have native integration options or webhook-based connections available. If you are evaluating options, our guide to lead tracking software for marketers covers this in detail.
Install your website tracking. This usually involves adding a JavaScript snippet or pixel to every page of your website. If you use Google Tag Manager, you can deploy the tracking code through a tag without modifying your site's codebase directly, which makes updates easier and reduces reliance on developer resources. Confirm the snippet is firing on all key pages, including your homepage, landing pages, and conversion pages.
If your platform supports server-side tracking, enable it now. This typically involves setting up a server-side container or configuring a connection between your web server and the tracking platform's data endpoint. The setup requires slightly more technical configuration than a standard pixel, but the payoff in data completeness is significant. Server-side tracking captures events that browser-based pixels miss, including conversions from users with ad blockers, Safari users affected by Intelligent Tracking Prevention, and others where the browser pixel fails to fire.
Verification step: After connecting each integration, trigger a sample event, such as a test page view or a test form submission, and confirm it appears in your tracking platform's event log. Every integration should show a confirmed connected status before you move to the next step.
Step 5: Set Up Conversion Events and Revenue Tracking
Connecting your data sources gives the platform access to raw event data. Now you need to tell it which events actually matter and how to measure their value. This is where you define what a conversion means for your business.
Think carefully about every action in your funnel that represents meaningful progress. For an e-commerce business, a purchase is the obvious conversion, but add-to-cart and checkout-initiated events are also valuable signals. For a B2B SaaS company, conversions might include demo bookings, trial sign-ups, qualified lead form submissions, and CRM pipeline events like a deal moving to a proposal stage. If you are in B2B, exploring marketing attribution tools for B2B SaaS can help you identify the right conversion events for your model.
This matters because many marketers only track final conversions and end up with a distorted view of campaign performance. A campaign driving a high volume of qualified leads that convert to revenue later will look underperforming if you only measure final closed deals. Mid-funnel conversion events reveal which campaigns are filling your pipeline with quality prospects, even if the revenue recognition happens weeks later.
For each conversion event, configure a revenue value where applicable. Assigning actual dollar values to conversions lets you measure true return on ad spend rather than just counting conversion volume. For variable-value purchases, pass the transaction value dynamically. For lead generation events, you can assign an estimated value based on your average deal size and close rate.
Enable conversion syncing for each connected ad platform. This sends enriched conversion data back to Meta via the Conversions API, to Google via the Google Ads API, and to other platforms that support it. When ad algorithms receive higher-quality conversion signals, they can identify patterns in your best customers and optimize delivery toward similar audiences. Understanding conversion tracking platforms and how they handle this syncing is one of the most impactful configurations you can make, and it compounds over time as the algorithms learn from better data.
Common pitfall: Only tracking final purchases and ignoring mid-funnel events. If you skip this, you will struggle to evaluate upper-funnel and mid-funnel campaigns fairly, and you will likely cut campaigns that are actually contributing to revenue earlier in the journey.
Step 6: Verify Your Data and Run a Tracking Audit
Before you start making budget decisions based on your new tracking setup, verify that everything is working correctly. This step is non-negotiable. Acting on bad data is worse than acting on no data, because it gives you false confidence in decisions that may be moving you in the wrong direction.
Start by running test conversions. Submit a test form, complete a test purchase if your platform allows it, or trigger each conversion event manually and confirm it appears in your tracking dashboard with the correct attribution, event name, and revenue value. Do this for every conversion event you configured in Step 5.
Next, compare data in your tracking platform against native ad manager reports. You will likely see some discrepancies, and that is normal. Ad platforms count conversions differently, attribution windows vary, and view-through conversions are handled inconsistently across tools. The goal is not perfect alignment but rather understanding where and why differences exist. Our comparison of Google Analytics vs attribution platforms explores these discrepancies in depth. Significant unexplained discrepancies, such as your tracking platform showing dramatically fewer conversions than a native ad manager, may indicate a tracking gap that needs investigation.
Check your UTM parameters across all active campaigns. UTMs are the foundation of accurate traffic source attribution. Every ad URL should include properly structured UTM parameters covering source, medium, campaign, content, and term where applicable. Inconsistent or missing UTMs will result in traffic being misattributed or lumped into a direct or unknown category, which distorts your channel-level reporting.
Verify that CRM sync is working in real time. Create a test lead in your CRM and confirm it appears in your tracking platform with the correct attribution data attached. Then simulate a status change, such as moving a lead to qualified or closed, and verify that event syncs as well. A strong real-time analytics platform ensures this data flows without delay, enabling true revenue attribution rather than just lead attribution.
Your success indicator for this step: Conversion data is appearing correctly across your tracking platform, ad managers, and CRM. You understand any discrepancies that exist and can explain them. You are confident the data flowing through your system is reliable enough to inform decisions.
Step 7: Build Your First Dashboard and Start Optimizing
You now have a connected, verified attribution system. The final step is building the reporting layer that makes this data actionable for your team on a daily basis.
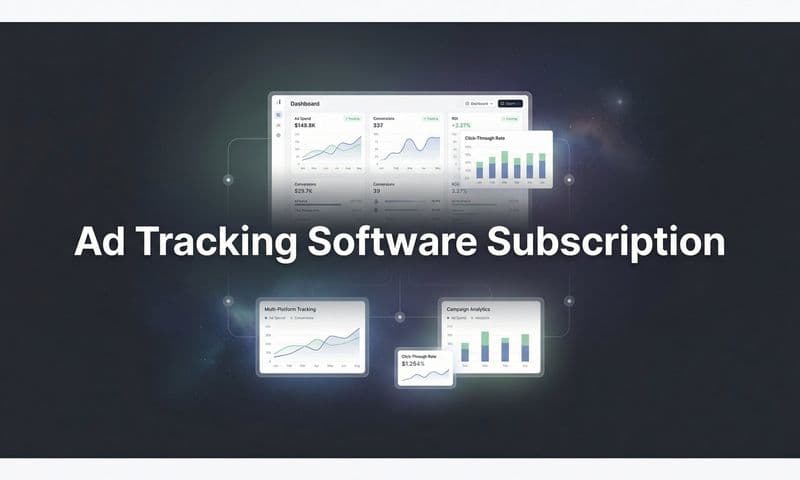
Start with a central analytics dashboard that consolidates your most important metrics in one view. At minimum, this should include ROAS by channel and campaign, cost per acquisition, conversion volume, revenue attributed by source, and budget pacing. A well-configured marketing reporting platform gives any team member a quick read on overall performance without needing to dig through individual ad managers.
Use multi-touch attribution views to understand the full customer journey. Rather than defaulting to last-click, explore how credit is distributed across touchpoints when you apply linear or time-decay models. You will often find that channels you had undervalued, such as awareness-stage display campaigns or early-touch organic search, are contributing significantly to conversions that last-click incorrectly assigns entirely to a retargeting ad.
If your platform includes AI-powered recommendations, engage with them actively. AI can surface patterns across large datasets far faster than manual analysis. For example, it might identify that a specific creative is outperforming across three different audience segments, or that a campaign is generating high conversion volume but at a cost per acquisition that exceeds your target threshold. Learning how to leverage analytics for marketing strategy ensures you act on these insights quickly rather than discovering them weeks later in a manual report.
Set up automated alerts or scheduled reports so your team stays informed without needing to check the dashboard manually every day. Alerts for significant changes in ROAS, sudden drops in conversion volume, or budget pacing issues ensure you catch problems early. Scheduled weekly summary reports keep stakeholders aligned without requiring them to log into the platform directly.
Practical tip: Review your attribution data weekly for the first month before making major budget shifts. This gives you time to build confidence in the data, understand your customer journey patterns, and spot any remaining tracking issues before they influence high-stakes decisions.
Your Quick-Start Checklist: Getting Your Tracking Platform Live
Signing up for a tracking platform does not have to be a drawn-out project. With the right platform and a clear process, you can go from zero to a fully operational attribution system in a matter of days.
Here is your complete checklist to keep the process on track.
1. Define your tracking goals and must-have features before evaluating any platform.
2. Choose a platform that supports your full ad stack and CRM with deep, native integrations.
3. Create your account, configure time zone and currency, set up your workspace structure, and invite your team.
4. Connect all ad platforms, your CRM, and your website, including server-side tracking if available.
5. Set up conversion events for every meaningful action in your funnel and enable conversion syncing back to ad platforms.
6. Run a full data verification audit, including test conversions, UTM checks, and CRM sync validation.
7. Build your central dashboard, enable multi-touch attribution views, and start using AI recommendations to optimize spend.
With a platform like Cometly, this entire process moves quickly because it is built specifically for marketers who need accurate, cross-platform attribution with AI-powered insights. Cometly captures every touchpoint from ad click to closed revenue, connects your ad platforms and CRM into a single view, and feeds enriched conversion data back to Meta and Google so their algorithms work harder for you.
The sooner your tracking is in place, the sooner you stop making budget decisions based on incomplete data and start scaling the campaigns that are genuinely driving revenue. Every day without accurate attribution is a day you are leaving optimization opportunities on the table.
Ready to elevate your marketing with precision and confidence? Discover how Cometly's AI-driven recommendations can transform your ad strategy. Get your free demo today and start capturing every touchpoint to maximize your conversions.