You launched a Snapchat ad campaign, sales are coming in, but your Snapchat Pixel is showing zero purchase events. Or maybe it is reporting a fraction of your actual conversions. Either way, you are flying blind on one of your most important ad channels, and that means your campaign optimization is working off bad data.
The Snapchat Pixel not tracking sales is one of the most frustrating issues digital marketers run into. It silently skews your ROAS calculations, confuses Snapchat's algorithm, and makes it nearly impossible to scale what is actually working.
The good news is that this problem almost always has a fixable root cause. Whether it is a misconfigured purchase event, a broken pixel installation, a server-side tracking gap, or a conflict with your tag manager setup, there is a logical path to diagnosing and resolving it.
This guide walks you through that path step by step. You will learn how to verify your pixel is firing correctly, identify which specific event is broken, test your purchase tracking end to end, and implement a more reliable tracking setup that does not fall apart when browsers block cookies or users switch devices.
By the end, you will have a fully functioning Snapchat sales tracking setup and a clear understanding of how to validate it so you can trust the data powering your ad decisions. Let us get into it.
Step 1: Verify Your Snapchat Pixel Is Installed and Firing
Before diving into event configurations or server-side setups, you need to answer one fundamental question: is the pixel actually loading on your site? You would be surprised how often the answer is no, and how much time gets wasted troubleshooting events when the base pixel is not even present.
Start with the Snap Pixel Helper Chrome extension, which Snapchat provides for free. Install it from the Chrome Web Store, then visit your website. The extension will scan the page and tell you whether a Snapchat Pixel is detected, which pixel ID it found, and what events fired during your session. A green checkmark means the pixel is active and loading correctly. Anything else means you have a foundational problem to fix before moving on.
Next, confirm the base pixel code is present across your entire site, not just the homepage. Open your browser's developer tools, navigate to the page source, and search for your pixel ID. You should find it in the site header, wrapped in the standard Snapchat pixel script. The critical pages to check are your product pages, cart page, checkout pages, and especially your order confirmation page. If the pixel is missing from any of these, your purchase events will never fire.
While you are in the source code, verify that the pixel ID in your site matches the pixel ID shown in Snapchat Ads Manager. Navigate to Ads Manager, go to Assets, then Pixels, and confirm the ID. A mismatch here is more common than you might think, especially if someone set up the pixel during a site migration or replatform and grabbed the wrong ID. Understanding how a tracking pixel works at a foundational level can help you catch these mismatches faster.
Common pitfall: Many sites use page templates, and the pixel gets added to only one template. If your checkout flow uses a different template than your main site, the pixel will disappear exactly where you need it most. Always test the pixel on your actual checkout and confirmation pages, not just your homepage.
Success indicator: Snap Pixel Helper shows a green checkmark and confirms the pixel is active when you visit each key page in your purchase funnel. The pixel ID matches what is in your Ads Manager account.
Step 2: Check Your Purchase Event Configuration
A pixel that loads correctly but fires the wrong events is just as useless as one that does not load at all. Once you have confirmed the base pixel is present, the next step is verifying that your PURCHASE event is configured correctly and firing in the right place.
Head to Snapchat Ads Manager, click on Assets, then Pixels, and open your pixel's event activity log. This log shows you every event Snapchat has received from your pixel, along with timestamps and the data attached to each event. What you are looking for is a PURCHASE event. If you only see PAGE_VIEW events, your purchase tracking is not set up or not working.
If PURCHASE events do appear, look at when they fired and what page they came from. This is where a very common mistake shows up: the purchase event is firing on the cart page or the checkout page instead of the order confirmation page. That distinction matters enormously. A user who reaches checkout has not bought anything yet. Only a user who lands on the order confirmation page has completed a purchase. Firing your purchase event too early inflates your reported conversions and sends Snapchat's algorithm the wrong optimization signal.
Beyond placement, check the parameters being passed with each PURCHASE event. Snapchat needs specific data to properly attribute and optimize conversions. Following best practices for tracking conversions accurately ensures the data you send is both complete and correctly formatted. The key parameters are:
price: The total transaction value. This should be a number, not a string, and should reflect the actual purchase amount including any discounts applied.
currency: A three-letter ISO currency code such as USD, EUR, or GBP. Missing or incorrect currency codes can cause events to be rejected or misattributed.
item_ids: An array of the product IDs included in the order. This is used for catalog-based ad optimization and retargeting.
transaction_id: A unique identifier for each order. This is critical for deduplication, especially when you add server-side tracking later. Without a consistent transaction ID, you risk double-counting purchases.
Common pitfall: Developers sometimes fire the purchase event on the checkout page as a proxy, reasoning that most users who reach checkout will complete the purchase. This is not accurate enough for optimization purposes and will cause your reported ROAS to look inflated. Always fire the purchase event on the actual order confirmation page.
Success indicator: Purchase events appear in the event activity log with all four key parameters populated correctly, and the event timestamps align with when test transactions were completed on your site.
Step 3: Run a Live Test Purchase to Isolate the Problem
Reading event logs tells you what has happened historically. A live test tells you exactly what is happening right now, with the specific data your pixel is sending. This step is how you isolate whether the problem is in the implementation itself or in the data being passed.
Inside Snapchat Ads Manager, find the Pixel Events test tool. This tool shows you a real-time stream of events as they arrive from your pixel. Open it in one browser tab, then open your website in another. Walk through the entire purchase funnel and complete a real test transaction. Watch the event stream as you go.
If you have a staging environment or your platform supports order simulation, you can use that to avoid charging a real card. Shopify, for example, has a test mode that lets you simulate completed orders. Use whatever method gives you a realistic end-to-end transaction flow. If you are running a Shopify store, pairing this with better ad tracking for Shopify can significantly improve the reliability of your purchase data.
As you complete the purchase, watch for a PURCHASE event to appear in the real-time stream. If it appears, click into it and verify the data: does the revenue match the order total? Is the currency correct? Are item IDs present? If the event fires but the data looks wrong, the issue is in parameter mapping, meaning the event is configured but the values being pulled from your page are incorrect or formatted improperly.
If no PURCHASE event fires at all, the issue is in the implementation itself. The event code is either missing from the confirmation page, not executing correctly, or being blocked before it reaches Snapchat's servers.
For deeper diagnostics, open your browser's developer tools and go to the Network tab. Filter requests by "snap" to see all outbound pixel calls. When you complete your test purchase, you should see a network request to Snapchat's pixel endpoint with the PURCHASE event data. If you see the request but the event does not appear in Ads Manager, there may be a server-side processing delay. If you see no request at all, the event code is not executing in the browser.
Common pitfall: Running your test with an ad blocker enabled. Ad blockers intercept pixel calls before they leave the browser, so you will see no PURCHASE event even if everything is configured perfectly. Always disable ad blockers before testing pixel behavior, and test in a clean browser profile if possible.
Success indicator: A PURCHASE event appears in the real-time event stream with accurate revenue, correct currency, and populated item data within seconds of completing the test transaction.
Step 4: Fix Tag Manager and Platform-Specific Setup Issues
If your pixel is installed through Google Tag Manager or a platform-specific integration, there is a whole additional layer of configuration that can break purchase tracking in subtle ways. This step covers the most common setup issues across GTM, Shopify, and WooCommerce.
Google Tag Manager users need to pay close attention to trigger configuration. Your Snapchat purchase tag should have a trigger that fires only on the order confirmation URL, not on All Pages. A common mistake is setting the trigger to fire on a URL that contains "thank-you" or "order-confirmation," but the actual URL pattern on your site is slightly different. Go to GTM's Preview mode, complete a test purchase, and verify that the Snapchat purchase tag fires exactly once on the confirmation page and nowhere else.
Tag firing order is another GTM-specific issue. If your Snapchat purchase tag fires before the transaction data has been pushed to the data layer, the event will fire with empty or undefined parameter values. Make sure your data layer push for order data happens before the Snapchat tag executes. You can control this in GTM by using tag sequencing or by ensuring your data layer event trigger is set up correctly.
Shopify users should use Snapchat's native integration through the Snapchat Ads app in the Shopify App Store. This integration handles pixel installation and purchase event tracking automatically, including the order confirmation page. The problem arises when marketers install the pixel through both the native app and manually in the theme code or GTM. This creates duplicate pixel installations, which can cause the same purchase event to fire twice, inflating your reported conversions and confusing Snapchat's attribution. Reviewing your Shopify reporting and ad tracking setup can help you identify where duplicate signals are originating.
Check your Shopify theme's header code and your GTM container for any additional Snapchat pixel code. If you are using the native Snapchat app integration, remove any manual pixel installations. One source of truth is always better than two.
WooCommerce users typically implement the purchase event through a plugin or custom code placed in the order confirmation hook. If your purchase event is placed in a general footer script rather than specifically inside the WooCommerce order received hook, it may fire on every page load instead of only on confirmed orders. Verify with your developer that the event code is tied to the correct WooCommerce action.
Common pitfall: Having the base pixel installed in GTM and the purchase event hardcoded directly in the site theme. These two implementations can conflict, causing the base pixel to initialize twice or the purchase event to fire without the correct pixel context.
Success indicator: Only one pixel ID fires per page, the purchase tag in GTM fires exactly once on the order confirmation URL, and there are no duplicate pixel installations across your theme code, GTM, and any platform apps.
Step 5: Address Browser-Level Tracking Gaps With Server-Side Events
Even if you have completed every step above and your browser-based pixel is working perfectly, you are still missing a portion of your conversions. This is not a setup error. It is a structural limitation of browser-based tracking that affects every advertiser running pixel-based attribution.
Ad blockers prevent pixel calls from reaching Snapchat's servers. iOS privacy changes limit cookie-based tracking in Safari and other mobile browsers. Some users browse with privacy-focused settings that block third-party scripts entirely. The result is that your pixel-reported purchases will consistently undercount your actual sales, sometimes by a meaningful margin depending on your audience. These pixel tracking problems on iOS are a structural challenge every advertiser faces, not just a Snapchat-specific issue.
The solution is Snapchat's Conversions API, commonly referred to as CAPI. CAPI allows you to send purchase events directly from your server to Snapchat, completely bypassing the browser. Because the event travels server-to-server, it is not affected by ad blockers, browser privacy settings, or iOS restrictions. This makes CAPI the most reliable way to ensure your purchase events reach Snapchat regardless of how the user's browser behaves.
When implementing CAPI, include hashed customer data with each purchase event. Specifically, pass a hashed version of the customer's email address and phone number. Snapchat uses this data to improve event match quality, which is a score visible in your Ads Manager that reflects how well Snapchat can match your conversion events to actual Snapchat users. Higher match quality means better attribution accuracy and more effective algorithm optimization. Understanding the full benefits of server-side tracking will help you prioritize this implementation correctly.
The most critical technical requirement when running both a browser pixel and CAPI simultaneously is deduplication. Without it, every purchase will be reported twice: once by the browser pixel and once by the server-side CAPI event. This doubles your reported conversions and makes your ROAS look far better than it actually is.
Deduplication works by sending a matching event_id with both the browser pixel event and the CAPI event for the same transaction. Snapchat uses this shared ID to recognize that both events represent the same purchase and counts it only once. Your transaction_id is a natural choice for this value since it is already unique per order.
For platform-specific implementation, Shopify's Snapchat Ads app includes CAPI support natively. WooCommerce users can implement CAPI through third-party connectors or a custom server-side integration. If you are on a custom-built site, your development team will need to implement the CAPI endpoint directly using Snapchat's Marketing API documentation.
Common pitfall: Implementing CAPI without setting up deduplication. This is one of the most common mistakes and results in inflated conversion counts that distort every downstream metric including ROAS, CPA, and budget allocation decisions.
Success indicator: Your event match quality score in Snapchat Ads Manager improves after implementing CAPI with hashed customer data, and your reported conversions align more closely with your actual order volume without inflating beyond realistic numbers.
Step 6: Validate Attribution and Cross-Channel Data With a Unified Analytics Layer
Here is something important to understand: even after completing every step in this guide and getting your Snapchat Pixel working perfectly, the conversion numbers in Snapchat Ads Manager will not match your actual revenue. This is not a bug. It is how platform-native attribution works.
Snapchat attributes a conversion to itself whenever a Snapchat ad was viewed or clicked within its attribution window, regardless of what other channels the user also interacted with before converting. If a user saw a Snapchat ad on Monday, clicked a Google ad on Wednesday, and completed a purchase on Thursday, both Snapchat and Google will claim full credit for that sale. Your actual revenue counts it once. Platform dashboards count it twice.
This overlap makes it impossible to understand Snapchat's true contribution to your revenue by looking at Snapchat's reporting alone. You need a unified attribution layer that sits above all your ad platforms and deduplicates conversions across channels.
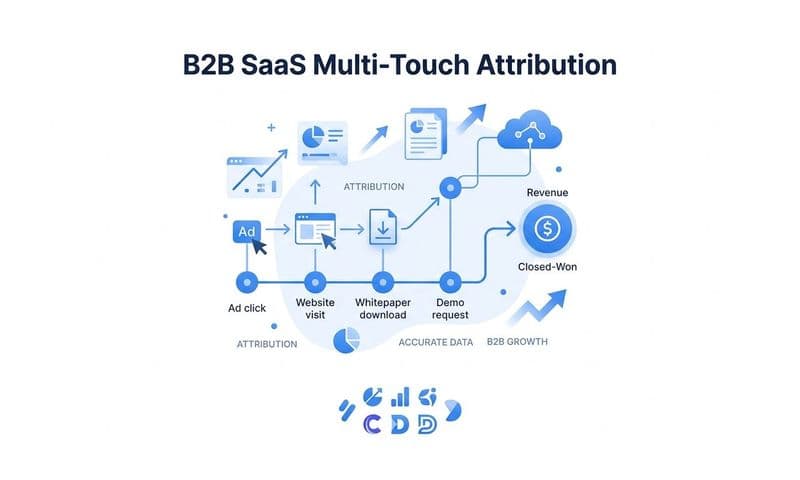
A marketing attribution platform like Cometly connects your ad platforms, CRM, and website data to give you a single, accurate view of every customer journey. Instead of each platform claiming full credit, you can see exactly how Snapchat ads contribute alongside Google, Meta, and organic channels using multi-touch attribution models. This tells you whether Snapchat is introducing new customers, assisting conversions that close on other channels, or driving direct purchases on its own.
Beyond clarity, this unified data layer has a practical optimization benefit. When you feed verified, enriched conversion data back to Snapchat's algorithm through CAPI and conversion sync integrations, the algorithm can optimize toward your actual buyers rather than just pixel-matched events. Cometly's Conversion Sync feature does exactly this: it sends accurate, deduplicated conversion signals back to Snapchat and other ad platforms so their algorithms have better data to work with. Better input data means better targeting, better bidding, and better results over time.
Connecting your CRM data is particularly valuable here. A purchase event on your website is just one signal. When you can match that event to a CRM record and track what happened after the sale, including repeat purchases, lifetime value, and churn, you can optimize Snapchat campaigns toward the customers who are actually worth acquiring, not just the ones who convert cheapest. Using the right marketing attribution software makes this level of cross-channel visibility achievable without building a custom data pipeline.
Common pitfall: Treating Snapchat's self-reported conversion numbers as ground truth. Relying solely on platform dashboards leads to over-crediting high-funnel channels and under-investing in channels that drive real revenue but do not always get last-click credit.
Success indicator: Your Snapchat-reported purchases and your attribution platform's Snapchat-attributed revenue are reasonably aligned, and you can clearly see where Snapchat fits in the conversion path relative to your other channels.
Putting It All Together
Fixing a Snapchat Pixel that is not tracking sales is a process of elimination. You start with the basics, confirm the pixel is installed and firing across all pages, then move to event-level verification to ensure your purchase event is configured correctly and firing on the right page. A live test shows you exactly what data is being sent. Auditing your tag manager or platform setup catches conflicts and duplicates. Server-side tracking via CAPI captures the conversions that browser-based pixels miss. And a unified attribution view ensures you are not relying on Snapchat's self-reported numbers alone.
Before you close this guide, run through this checklist:
Snap Pixel Helper confirms pixel is active on all pages. Check your product pages, checkout pages, and order confirmation page specifically.
Purchase event fires on the order confirmation page with correct parameters. Verify price, currency, item_ids, and transaction_id are all present and correctly formatted.
Live test shows the event in real-time with accurate revenue data. No ad blockers, clean browser profile, actual or simulated transaction completed.
No duplicate pixel installations exist. One pixel ID, one implementation method, no conflicts between GTM and platform-native integrations.
CAPI is implemented with proper deduplication. Matching event_id in both browser pixel and server-side events, hashed customer data included for match quality.
Attribution platform confirms Snapchat conversion data aligns with actual sales. Cross-channel view shows Snapchat's real role in the customer journey.
When your tracking is accurate, your campaign decisions become more confident. You stop guessing which ads are driving revenue and start knowing. Platforms like Cometly help you go beyond single-channel pixel data by connecting every ad touchpoint to real revenue, so you always know what is driving growth.
Ready to elevate your marketing game with precision and confidence? Discover how Cometly's AI-driven recommendations can transform your ad strategy. Get your free demo today and start capturing every touchpoint to maximize your conversions.