Mobile app installs are only valuable when you know exactly which campaigns, channels, and ads drove them. Without proper conversion tracking in place, you are flying blind, spending budget on channels that may look active but deliver no real pipeline or revenue.
For B2B SaaS companies in particular, app installs are often the first touchpoint in a longer customer journey. A user installs your app, activates a trial, invites their team, and eventually becomes a paying customer. Each of those steps matters, and tracking them accurately is the foundation of any data-driven growth strategy.
This guide walks you through setting up conversion tracking for mobile app installs from the ground up. You will learn how to define what a meaningful install conversion looks like, connect your ad platforms, implement the right tracking infrastructure, and verify that your data is clean and reliable.
By the end, you will have a working attribution setup that ties ad spend directly to installs and downstream revenue events, giving your growth team the signal it needs to scale what works and cut what does not. Let's get into it.
Step 1: Define Your Conversion Events Before You Touch Any Code
Before you write a single line of tracking code or configure any SDK, you need to be clear on what you are actually trying to measure. This sounds obvious, but it is the step most teams rush past, and it is where attribution setups most commonly go wrong.
The first distinction to make is between an install event and a meaningful conversion event. An install tells you that someone downloaded your app. It does not tell you whether that person has any intent to use your product or ever become a paying customer. For B2B SaaS, that gap matters enormously.
The events that actually signal intent and downstream revenue potential are the ones that happen after the install. Think about events like account creation, first login, completing an onboarding step, activating a trial, or sending a team invite. These are the actions that correlate with a user who is genuinely engaged with your product, and they are the signals worth optimizing your ad spend toward.
Build a conversion event taxonomy: Before implementation begins, create a shared document that maps every event you want to track, what triggers it, what data it should carry, and which team owns it. This document should align marketing, product, and engineering so everyone is working from the same definitions.
Prioritize events by revenue proximity: Not all post-install events are equally valuable. Rank them by how closely they correlate with eventual revenue. Trial activation is closer to revenue than first login. A team invite is closer still because it signals organizational adoption.
Define your primary conversion event: Choose one primary conversion event that your ad platforms will optimize toward. For most B2B SaaS companies, this is trial activation or a completed onboarding step rather than the raw install. Secondary events like team invite or paid conversion can be tracked alongside it for reporting depth.
The most common pitfall at this stage is tracking raw installs without any post-install events. When you send raw install signals back to Meta or Google, you are asking their algorithms to find more users who will install your app, not more users who will become paying customers. The result is high install volume, low quality, and wasted budget. Getting your event taxonomy right before you touch any code is what prevents that outcome.
Step 2: Choose and Configure Your Mobile Measurement Partner
A Mobile Measurement Partner, or MMP, is the infrastructure layer that attributes app installs to the specific ads and channels that drove them. Tools like AppsFlyer, Adjust, and Branch are the standard options in this space. They work by matching a click fingerprint or device identifier to an install event within a defined attribution window, giving you a reliable record of which ad source gets credit for each install.
Without an MMP, you are dependent on each ad platform reporting its own conversions, which means every platform takes credit for every install it touched, and your total reported conversions will exceed your actual installs significantly. An MMP acts as the neutral third party that resolves those conflicts.
SDK integration at a high level: Adding an MMP to your app involves integrating their SDK into both your iOS and Android builds. The SDK initializes at app launch, captures the install event, and begins the attribution process. Your engineering team will handle the actual implementation, but as the marketer or growth lead driving this initiative, you need to provide them with the event taxonomy from Step 1 so they know exactly which post-install events to instrument alongside the install itself.
Set your attribution lookback window deliberately: The attribution window defines how long after an ad click an install can still be credited to that click. Most platforms default to seven days for clicks and one day for views, but those defaults are designed for B2C apps with short consideration cycles. For B2B SaaS, where a user might click an ad, evaluate your product over several days, and then install after seeing a retargeting ad, a longer window often reflects reality more accurately. Set your window based on your actual sales cycle data, not the default.
Configure deep linking: Deep linking ensures that when a user clicks an ad and installs your app, they land in the correct in-app experience rather than a generic home screen. For a B2B SaaS product, this might mean landing on the trial activation flow or a specific feature that the ad was promoting. Deep linking improves both the user experience and attribution accuracy because the MMP can confirm that the user who clicked the ad and the user who completed the install are the same person.
Once your MMP SDK is live and your post-install events are instrumented, verify that install events and your priority conversion events are appearing correctly in the MMP dashboard before moving to the next step. Do not proceed to platform connections until you have confirmed the data is flowing cleanly.
Step 3: Connect Your Ad Platforms to Your Attribution Stack
With your MMP configured and events flowing, the next step is connecting your ad platforms so that install and post-install data flows back into each channel for optimization. This is how Meta, Google, TikTok, and other platforms learn which users are converting and improve their targeting over time.
Most MMPs have native integrations with major ad platforms. Connecting them typically involves authenticating your ad accounts within the MMP dashboard and mapping your conversion events to the event names each platform expects. Spend time on the event name mapping carefully because mismatches here mean your ad platforms receive data they cannot use.
Enable server-side tracking alongside SDK tracking: iOS privacy changes introduced with App Tracking Transparency have significantly reduced device-level attribution availability on iOS. When a user does not grant ATT consent, the MMP cannot access their device identifier, which creates attribution gaps. Server-side tracking through the Meta Conversion API and Google Enhanced Conversions addresses this by sending conversion signals directly from your server rather than relying on device-based signals. This bypasses the iOS restrictions and ensures your ad platforms receive conversion data even when device-level tracking is unavailable.
Understand SKAdNetwork limitations: Apple's SKAdNetwork is their privacy-preserving attribution framework for iOS. It provides aggregated, delayed conversion data without exposing individual user identifiers. While it is better than no data, SKAdNetwork alone is not sufficient for granular campaign optimization. It does not give you the creative-level or ad set-level visibility you need to make confident budget decisions. Server-side signals fill that gap.
Configure event deduplication: When you are running both SDK-based tracking and server-side tracking simultaneously, there is a risk that the same conversion event gets reported twice. Each ad platform has a deduplication mechanism, typically based on a unique event ID that you pass with each conversion. Make sure your engineering team is generating and passing unique event IDs so that platforms can identify and discard duplicate signals. Skipping this step inflates your reported conversions and corrupts your cost-per-conversion metrics.
After connecting each platform, verify that conversion events are appearing in each ad platform's events manager or conversion tracking dashboard. Check that event names match what you defined in your taxonomy and that volumes look consistent with what your MMP is reporting.
Step 4: Implement UTM Parameters and Campaign Tagging Consistently
UTM parameters are the connective tissue between your ad clicks and your analytics data. Without them, installs that come from paid campaigns get lumped into direct or unknown traffic categories, making it impossible to compare channel performance or understand which specific ads are driving your best users.
Build a UTM tagging framework that covers five dimensions for every paid campaign driving app installs: source (the platform, such as meta or google), medium (the channel type, such as paid-social or paid-search), campaign (the campaign name), content (the ad group or audience), and term or creative (the specific ad creative or copy variant). Every ad that drives traffic to your app store listing or a landing page with an app download link should carry all five parameters.
Create a naming convention document: Consistent tagging only works if everyone on your team follows the same conventions. Define rules for capitalization (lowercase is generally safer), delimiter characters (hyphens work well), and how campaign names should be structured. For example, a naming convention might look like: campaign name includes the product line, the target audience segment, and the quarter. Ad group names include the audience type. Creative names include the format and the key message.
Use a UTM builder: Give your team a shared spreadsheet or a simple UTM builder tool that generates correctly formatted tags automatically. This removes the risk of typos or formatting inconsistencies that break your attribution chain.
The cost of inconsistency: When UTM parameters are missing or inconsistently formatted, your attribution platform cannot connect an install to a specific campaign. You end up with a large portion of your installs attributed to unknown sources, which makes it impossible to compare channel performance or make informed budget decisions. Consistent tagging is not glamorous, but it is what makes every other part of your attribution setup actually useful.
Once your tagging framework is in place, audit your active campaigns to make sure every ad is tagged correctly before launching new spend. A quick audit of your UTM parameters across all active campaigns takes less than an hour and prevents weeks of data gaps.
Step 5: Set Up Your Attribution Model and Reporting Dashboard
With data flowing from your MMP through to your ad platforms and your UTMs tagging every campaign, you now need to configure how that data is interpreted and reported. The attribution model you choose determines which touchpoints get credit for a conversion, and for B2B SaaS, this choice has a significant impact on how you allocate budget.
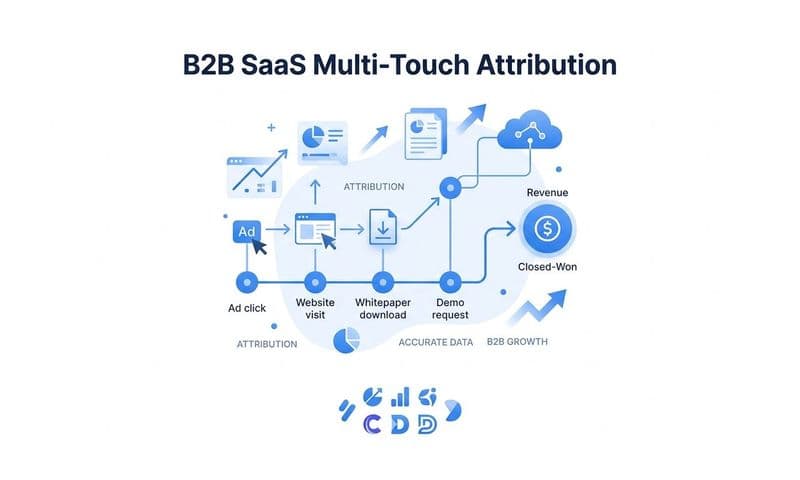
Last-click attribution is the default in most tools, but it systematically undervalues upper-funnel channels. In a typical B2B SaaS journey, a user might see a LinkedIn ad that introduces your product, click a retargeting ad on Meta two weeks later, and then install after seeing a Google search ad. Last-click gives all the credit to Google and zero to LinkedIn or Meta, which leads you to cut the channels that actually started the conversation.
Choose a multi-touch model: Multi-touch attribution distributes credit across multiple touchpoints in the customer journey. Linear models give equal credit to every touch. Time-decay models give more credit to touches closer to the conversion. Position-based models emphasize the first and last touches while distributing some credit to the middle. For B2B SaaS with longer consideration cycles, any of these typically gives a more accurate picture than last-click.
Build a reporting view that spans the full funnel: Your reporting dashboard should show not just installs but the downstream events that matter to revenue. Build a view that displays cost per install, cost per activated trial, and cost per closed deal, broken down by channel and campaign. This is where the investment in your event taxonomy from Step 1 pays off. If you only tracked installs, you can only report on installs. If you tracked trial activations and team invites, you can report on those too.
Connect install data to CRM and revenue data: This is the step that transforms install tracking from a marketing metric into a business intelligence tool. When you connect your install attribution data to your CRM and revenue data, you can see which install campaigns are generating pipeline and which ones are generating closed-won revenue. Platforms like Cometly are built specifically to make this connection, linking ad platform data, CRM events, and revenue data into a single view so growth teams can see the full journey from first ad click to closed deal.
Set up your reporting dashboard before your next campaign goes live so you have a clean baseline to compare against.
Step 6: Validate Your Tracking Setup and Audit for Data Gaps
A tracking setup that has not been validated is a liability, not an asset. Before you make any budget decisions based on your attribution data, you need to confirm that every piece of the system is working correctly. This step is the QA process that separates reliable data from misleading data.
Run a test install: Use a test device to trigger a fresh install of your app. Verify that the install event appears in your MMP dashboard within the expected timeframe. Then confirm that the event is passed to each connected ad platform and that it appears in your analytics reporting with the correct UTM parameters attached. Trace the full path from click to install to reported conversion before declaring the setup live.
Check for common iOS data gaps: If your app does not have a properly implemented ATT consent flow, iOS users who decline tracking will not be attributable at the device level. Make sure your ATT prompt is appearing at the right moment in the user journey, ideally after the user has experienced enough value to understand why sharing is beneficial, and that your server-side tracking is configured to capture conversions from users who decline.
Verify Android configuration: Android attribution relies on Google Play Install Referrer and, in some cases, SHA certificate fingerprints for certain MMP configurations. Incorrect SHA certificate setup is a common cause of Android attribution failures. Confirm with your engineering team that the correct fingerprints are registered in your MMP configuration.
Check for deduplication gaps: If you are running both SDK and server-side tracking, pull a sample of conversion events from your ad platform and cross-reference them with your MMP data. If you see significantly more conversions reported in the ad platform than in your MMP, deduplication is likely not working correctly.
Set up automated monitoring: Configure alerts for significant drops in install volume or changes in attribution rate. A sudden drop in attributed installs often signals a tracking failure rather than a real drop in campaign performance. Catching it quickly prevents you from making bad budget decisions based on broken data.
Run a monthly reconciliation check by comparing MMP-reported installs against app store install data and ad platform-reported conversions. Discrepancies between these three sources are normal at small margins, but large gaps indicate a problem worth investigating.
Step 7: Feed Enriched Data Back to Ad Platforms to Improve Campaign Performance
Tracking conversion data is only half the equation. The other half is using that data to improve the performance of your campaigns by feeding enriched signals back to the ad platforms that are spending your budget.
Ad platform algorithms optimize toward the conversion signals you send them. If you send raw install events, the algorithm finds users who are likely to install your app. If you send trial activation events, it finds users who are likely to activate a trial. If you send paid conversion events, it finds users who are likely to become paying customers. The quality of your targeting is directly tied to the quality of the signals you provide.
Send post-install events via Conversion API and Enhanced Conversions: Once your post-install events are tracked and validated, configure your server-side setup to send trial activations, team invites, and paid conversions back to Meta via the Conversion API and to Google via Enhanced Conversions. These server-side signals are more reliable than SDK-based signals on iOS and give the ad platform AI richer information to work with.
How enriched data improves bidding: When Meta or Google receives a signal that a specific user segment is converting to paid customers at a high rate, their bidding algorithms adjust to prioritize finding more users with similar characteristics. This feedback loop is what allows your campaigns to improve over time without requiring constant manual intervention. The richer and more accurate your conversion signals, the better the algorithm performs.
Connect ad spend to pipeline and revenue: The final piece of a mature conversion tracking setup is connecting your install attribution data to your pipeline and revenue data so you can make budget decisions based on actual ROI. Cometly is designed specifically for this use case, connecting ad platform data, CRM events, and revenue data so growth teams can see which install campaigns are generating pipeline and closed-won revenue, not just installs. When you can see that a specific campaign is driving installs that convert to paying customers at twice the rate of another campaign, you have the signal you need to reallocate budget with confidence.
Revisit your conversion event hierarchy quarterly: Your product evolves, your onboarding changes, and the events that correlate most strongly with revenue shift over time. Schedule a quarterly review of your conversion event taxonomy to make sure the events you are tracking and optimizing toward still reflect the actions that matter most to your business.
Putting It All Together
Setting up conversion tracking for mobile app installs is not a one-time task. It is an ongoing system that connects your ad spend to real business outcomes. When you define meaningful conversion events, implement server-side tracking, tag campaigns consistently, and feed enriched data back to ad platforms, you give your growth team the signal it needs to make confident, data-backed decisions.
Here is a quick reference checklist to confirm your setup is complete:
Conversion events defined and documented: Your event taxonomy is agreed upon across marketing, product, and engineering, with post-install events mapped to revenue proximity.
MMP SDK integrated on iOS and Android: Install and post-install events are flowing into your MMP dashboard with correct attribution windows and deep linking configured.
Ad platforms connected with Conversion API enabled: Meta, Google, and other active channels are receiving install and post-install events via server-side tracking, with deduplication configured.
UTM tagging framework in place: Every active campaign is tagged consistently across source, medium, campaign, content, and creative dimensions.
Attribution model configured in your analytics platform: A multi-touch model is active and your reporting dashboard shows the full funnel from install to pipeline to revenue.
Tracking QA completed and validated: A test install has been traced through the full system, common failure points have been checked, and automated alerts are in place.
Post-install events flowing back to ad platforms: Trial activations and paid conversions are being sent to Meta and Google to improve targeting and bidding quality.
Cometly helps B2B SaaS teams close the loop between mobile app installs and revenue by connecting your ad platforms, CRM, and analytics into a single source of truth. If you want to see which install campaigns are actually driving pipeline and closed-won revenue, Cometly gives you that visibility in real time. Get your free demo today and start capturing every touchpoint to maximize your conversions.