If your Facebook Ads dashboard is showing incomplete conversions, mismatched data, or zero events firing, you are not alone. Tracking issues on Facebook have become increasingly common as browser privacy changes, iOS updates, and ad blockers chip away at pixel-based data collection. For marketers relying on this data to make budget decisions, the stakes are high.
Bad tracking means bad optimization signals. Bad optimization signals lead to wasted ad spend and missed revenue opportunities. It is a chain reaction that starts with a single broken pixel and ends with campaigns that underperform simply because Facebook's algorithm never had the data it needed to optimize properly.
This guide walks you through exactly how to diagnose and fix the most common Facebook Ads tracking issues, step by step. Whether you are running campaigns for an ecommerce store, a SaaS product, or a lead generation business, the process is the same: identify where the data breaks down, fix it at the source, and put systems in place to keep it accurate going forward.
By the end of this guide, you will know how to audit your pixel setup, verify events are firing correctly, implement server-side tracking to recover lost data, and feed cleaner conversion signals back to Facebook so its algorithm can optimize your campaigns more effectively.
You will also learn how a marketing attribution platform like Cometly can give you a complete, cross-channel view of what is actually driving revenue, so you are never flying blind again. Let's get into it.
Step 1: Audit Your Facebook Pixel Setup
Before you can fix anything, you need to know what is actually broken. The fastest way to start is with the Meta Pixel Helper, a free Chrome extension from Meta that shows you in real time whether your pixel is installed, which events are firing, and whether there are any obvious errors.
Install the extension, then visit each of your key pages: your homepage, landing pages, product pages, and thank-you or order confirmation pages. The extension will show you a green checkmark if the pixel is firing correctly, along with the Pixel ID and the specific events being triggered. If you see red warnings or no activity at all, you have found your first problem.
While you are auditing, verify a few critical things:
Correct Pixel ID on every page: It sounds obvious, but mismatched Pixel IDs are more common than you would think, especially after a website redesign or when multiple team members have touched the setup. Confirm the same ID is present across all pages you care about.
Duplicate pixel installations: If your pixel is installed via both hardcoded script and a tag manager, you may be firing the same event twice. This inflates conversion counts and sends distorted signals to Facebook's algorithm. Look for multiple instances of the same Pixel ID loading on the same page.
Base code placement: The pixel base code should sit in the <head> section of every page. Event codes, such as Purchase or Lead, should be placed on the specific trigger points where those actions occur, not globally across all pages.
Tag manager configuration: If you are using Google Tag Manager or a similar tool, open the container and check whether the pixel tag is published and active. A surprisingly common pitfall is a pixel tag that was set up correctly but left in a paused state, or one with a broken trigger rule that prevents it from firing on the intended pages.
Take notes on everything you find during this audit. You are building a map of where your Facebook pixel tracking is healthy and where it has gaps. That map becomes your action plan for the steps that follow.
Success indicator: Meta Pixel Helper shows green checkmarks with the correct Pixel ID on all key pages, with no duplicate fires and no error warnings.
Step 2: Diagnose Specific Event Firing Problems
A pixel that loads does not automatically mean your events are working. The base code firing is just the first layer. The next layer is making sure each specific conversion event, such as Purchase, Lead, AddToCart, and PageView, is triggering at the right moment and with the right data attached.
Head to Facebook Events Manager and open the Test Events tool. This is one of the most underused features in the Meta ecosystem. It lets you send real traffic to your site and watch events appear in the tool in real time, so you can confirm exactly what is and is not firing.
Walk through each of your key conversion flows manually. Add a product to cart, complete a test purchase, submit a lead form. Watch the Test Events log as you do it. You should see each event appear with its associated parameters, including event name, value, currency, and any custom data you are passing.
Here is what to look for during this process:
Missing events: If a Purchase event never appears in the log after completing a test transaction, the event code is either missing from the confirmation page, placed incorrectly, or blocked by a script error elsewhere on the page.
Events firing on the wrong pages: If a Lead event fires on your homepage instead of your thank-you page, you have a placement error. This skews your conversion data and tells Facebook to optimize toward the wrong behavior.
Multiple fires on a single action: If one form submission triggers three Lead events, you have a duplication problem. This is especially common with single-page applications where the page does not fully reload between actions.
Single-page app challenges: If your site is built on a JavaScript framework like React or Vue, standard pixel placement often breaks because the page never technically reloads. Events need to be triggered programmatically based on user actions rather than page loads. This usually requires custom development work or a tag manager setup that listens for specific DOM events.
Also check for conditional firing issues. A common pitfall is a Purchase event that is placed correctly on the order confirmation page but only fires for logged-in users due to a conditional logic error in the code. Guest checkouts would then go completely untracked. Understanding the full scope of Facebook conversion tracking helps you anticipate these edge cases before they cost you data.
Use your browser's developer tools alongside the Test Events tool. Open the Network tab, filter for "facebook.com/tr", and watch the outbound requests as you trigger events. This gives you a lower-level view of exactly what data is being sent with each event call.
Success indicator: Every key conversion action shows up in the Test Events log with the correct event name, parameters, and values attached.
Step 3: Implement Server-Side Tracking via the Conversions API
Even if your pixel is installed perfectly and every event is firing correctly in your browser, you are still losing data. Apple's App Tracking Transparency framework, Safari's Intelligent Tracking Prevention, Firefox's enhanced privacy protections, and widespread ad blocker usage all interfere with browser-based pixel tracking. The result is that a meaningful portion of your conversions simply never reach Facebook.
This is where the Meta Conversions API (CAPI) becomes essential. Instead of relying on a browser to send conversion data to Meta, CAPI sends that data directly from your server to Meta's servers. Browser limitations, privacy settings, and ad blockers cannot interfere with a server-to-server connection. If you want to understand the full technical case for this approach, the guide on why server-side tracking is more accurate covers the mechanics in detail.
Setting up CAPI involves sending conversion events from your backend whenever a key action occurs. For an ecommerce store, that means sending a Purchase event from your order management system when an order is confirmed, not just when the browser loads the confirmation page. For a SaaS product, it means sending a Lead or CompleteRegistration event when a signup is recorded in your database.
The most critical technical detail when implementing CAPI alongside your browser pixel is event deduplication. When both the pixel and CAPI fire for the same event, Facebook will receive two signals for the same conversion. Without deduplication, your conversion counts will double, and Facebook's algorithm will optimize based on inflated data.
Deduplication works by passing a matching event_id parameter with both the pixel event and the CAPI event. When Meta receives two events with the same event_id, event name, and timestamp, it recognizes them as duplicates and counts them only once. This is a non-negotiable part of any proper CAPI implementation.
When sending CAPI events, also pass as many customer data parameters as you can. Email address, phone number, client IP address, and user agent all help Meta match the event to a real user profile. More on why this matters in the next step.
For teams that want to skip the custom development work, Cometly's server-side tracking automates this entire process. It captures conversion events that browser-based tracking misses, handles deduplication automatically, and sends enriched conversion data back to Meta through the Conversions API. This means your campaigns get better optimization signals without your engineering team needing to build and maintain a custom CAPI integration.
Common pitfall: Enabling CAPI without deduplication causes conversion counts to double. This makes campaigns appear to perform better than they actually are, leading to poor budget decisions and a confused algorithm.
Success indicator: Events Manager shows CAPI events appearing alongside pixel events, deduplication is active, and your total conversion counts remain consistent with what you would expect from actual transaction volume.
Step 4: Improve Event Match Quality Scores
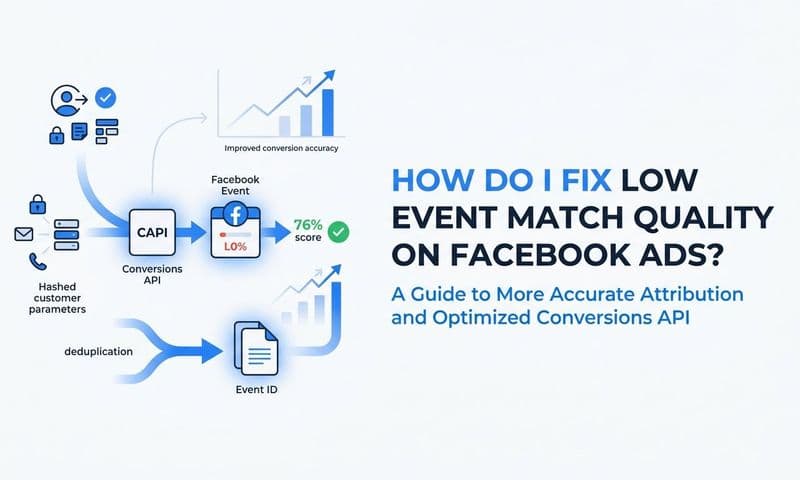
Getting events to fire is one thing. Getting Facebook to actually connect those events to real user profiles is another. That connection is measured by your Event Match Quality (EMQ) score, and it has a direct impact on how well Facebook can optimize your campaigns.
Navigate to Events Manager and look at the EMQ score displayed next to each conversion event. The score reflects how effectively Meta can match your reported conversion events to people in its system. A low score means many of your conversions are going unmatched, which weakens the algorithm's ability to find more people like your converters.
The primary way to improve EMQ is to pass more customer data parameters with each event. When you send a conversion event with just a PageView and no identifying information, Meta has very little to work with. When you send that same event with a hashed email address, phone number, browser fingerprint, and IP address, the match rate improves significantly.
Here is what to focus on:
Email address: This is the highest-value parameter for matching. If you capture an email at any point in the conversion flow, pass it with your conversion events. Meta hashes the data on your end before it is transmitted, so raw email addresses are never exposed.
Phone number: The second most valuable identifier. For ecommerce businesses that collect phone numbers at checkout, this is an easy win.
Browser identifiers: Client IP address and user agent help Meta connect server-side events to browser sessions, which is especially important when you are running both pixel and CAPI together.
CRM data for lead generation: If you are running lead gen campaigns, consider passing conversion data back to Facebook after a lead moves further down the funnel. A lead that becomes a paying customer is a much stronger optimization signal than a raw form submission. This is sometimes called offline conversion tracking, and it dramatically improves the quality of signals you are feeding the algorithm.
For a deeper dive into optimizing your EMQ scores and the specific parameters that make the biggest difference, the Cometly team has published a dedicated guide on Facebook Event Match Quality that walks through the technical details.
Common pitfall: Running campaigns where only PageView events are tracked with no customer identifiers attached. This produces low EMQ scores and limits Facebook's ability to optimize toward high-value users.
Success indicator: EMQ scores move from low to medium or high in Events Manager, and you start to see improvements in ad delivery efficiency and conversion volume over the following weeks.
Step 5: Verify UTM Parameters and Attribution Windows Are Configured Correctly
Even with perfect pixel health and strong EMQ scores, you can still end up with a data mess if your UTM parameters are inconsistent or your attribution windows are misaligned with reality. These two issues are responsible for a large portion of the discrepancies marketers see between Facebook's reported numbers and what shows up in their analytics platforms.
Start with UTMs. Every Facebook ad URL should include all five standard parameters: utm_source, utm_medium, utm_campaign, utm_content, and utm_term. These parameters are what allow your analytics platform to identify and categorize traffic from Facebook correctly. If you are new to this topic, a primer on what UTM tracking is and how it helps your marketing is a useful starting point.
Check your active campaigns and confirm that UTMs are present on every ad. Then verify they are surviving the full click path. Redirects, certain landing page builders, and URL shorteners can strip UTM parameters before the user ever reaches your site. Test each ad URL by clicking through manually and checking what appears in your analytics platform. If the UTMs disappear somewhere along the way, that traffic will be attributed to direct or unknown sources instead of Facebook.
Naming consistency is equally important. If one campaign uses "facebook" as utm_source and another uses "Facebook" or "fb", those will appear as separate traffic sources in your analytics data. Establish a naming convention and apply it uniformly across every campaign, ad set, and ad. This makes it possible to aggregate performance data accurately across your entire account.
Now for attribution windows. Facebook's default attribution window includes view-through conversions, meaning it claims credit for conversions from users who saw an ad but never clicked it. Depending on your sales cycle, this can significantly inflate your reported ROAS. Review your attribution window settings in Ads Manager and consider whether a 7-day click window or a 1-day click window better reflects how your customers actually make decisions.
Understanding the gap between Facebook's self-reported numbers and what your analytics tool reports is important. Facebook attributes conversions based on its own data. Your analytics platform attributes them based on the last or first click it observed. Neither view is complete on its own, which is exactly why a neutral attribution layer matters. These gaps are a primary driver of Facebook Ads reporting discrepancies that frustrate marketers across every industry.
Cometly captures UTM data at the click level and ties it to actual revenue events recorded in your CRM. This gives you a ground-truth view of which Facebook campaigns are driving real pipeline and revenue, rather than relying on either platform's self-reported numbers.
Common pitfall: Inconsistent UTM naming conventions across campaigns make it impossible to aggregate performance data accurately, and you end up with dozens of fragmented traffic sources that should all roll up to Facebook.
Success indicator: Every Facebook ad click appears in your analytics platform with complete UTM data attached, and traffic from Facebook is cleanly categorized with no unknown or direct attribution bleed.
Step 6: Cross-Reference Facebook Data with a Multi-Touch Attribution Platform
Here is the uncomfortable truth about Facebook's native attribution: it always overstates its own performance. Every ad platform does this. Facebook takes credit for every conversion where a user saw or clicked a Facebook ad within the attribution window, regardless of what other touchpoints influenced that decision. Google Ads does the same thing. So does LinkedIn.
When you add up the conversions each platform claims, the total often exceeds your actual conversion volume by a significant margin. This is called attribution overlap, and it is one of the most common reasons why scaling a "high-ROAS" Facebook campaign produces disappointing results. The ROAS was never real to begin with.
The solution is to use a multi-touch attribution platform that sits above all your channels and measures each one's actual contribution to the customer journey. Instead of asking Facebook how many conversions Facebook drove, you ask a neutral system that has visibility into every touchpoint.
With a tool like Cometly, you can see how Facebook fits into the full customer journey alongside Google Ads, organic search, email, and any other channel you are running. A customer might click a Facebook ad, then search for your brand on Google, then convert through a direct visit three days later. Facebook claims that conversion. Google claims that conversion. Cometly shows you all three touchpoints and distributes credit based on the attribution model you choose.
This matters enormously for budget allocation. If you are scaling Facebook spend based solely on Facebook's reported ROAS, you may be over-investing in a channel that is primarily influencing customers who would have converted anyway through other means. Or you might be underfunding Facebook campaigns that are genuinely driving top-of-funnel discovery, even though they do not get last-click credit.
Cometly's AI layer takes this a step further by surfacing which campaigns and ad creatives are actually contributing to revenue, and providing recommendations for where to shift budget to improve overall performance. This is the difference between reacting to platform-reported numbers and making proactive decisions based on accurate, cross-channel data.
For a deeper understanding of how different attribution models work and which one fits your business model, the Cometly team has published a guide on the 5 most common ad attribution models that is worth reading alongside this one.
Common pitfall: Scaling Facebook spend based solely on Facebook's reported ROAS, which regularly double-counts conversions that were also claimed by other channels, leading to over-investment and inflated cost-per-acquisition.
Success indicator: You can see each campaign's actual revenue contribution in a single dashboard, with no data gaps and a clear picture of how Facebook interacts with every other channel in your mix.
Putting It All Together: Your Facebook Tracking Fix Checklist
You now have a complete framework for diagnosing and fixing Facebook Ads tracking issues. Before you move on, use this quick reference checklist to confirm you have covered every critical step:
Pixel audit complete: Meta Pixel Helper confirms the correct Pixel ID is firing on all key pages with no duplicates and no errors.
Events verified via Test Events tool: Every conversion action, including Purchase, Lead, and AddToCart, appears in the Test Events log with correct parameters and no misfires.
Conversions API implemented with deduplication: Server-side tracking is active, event_id deduplication is enabled, and CAPI events are appearing in Events Manager alongside pixel events.
Event Match Quality scores reviewed and improved: Customer data parameters are being passed with conversion events, and EMQ scores have moved to medium or high.
UTM parameters verified across all active campaigns: Every ad URL includes complete UTM parameters, naming conventions are consistent, and UTMs survive the full click path to your analytics platform.
Multi-touch attribution platform connected: Cross-channel conversion data is flowing into a neutral attribution tool, giving you a true view of each campaign's revenue contribution.
It is worth emphasizing that fixing tracking is not a one-time project. Privacy changes continue to evolve, browsers keep tightening their restrictions, and your own site will change over time in ways that can break tracking you thought was solid. Regular audits, ideally monthly, should be part of your standard campaign management process.
Cometly is built to keep all of this running continuously. Its server-side tracking captures events that browsers miss, its Conversion Sync feeds enriched data back to Meta to improve algorithm performance, and its AI-powered recommendations surface which ads and campaigns are working so you can scale with confidence rather than guesswork.