When Apple rolled out iOS 14 and its App Tracking Transparency framework, it fundamentally changed how marketers track conversions and measure ad performance. For B2B SaaS companies running paid campaigns on Meta, Google, and other platforms, the impact was immediate: conversion data became incomplete, attribution windows shrank, and ad platform algorithms lost the signal quality they needed to optimize effectively.
Many marketing teams are still dealing with the downstream effects today. Underreported conversions, inflated cost-per-lead figures, and unreliable ROAS data have become frustratingly familiar problems. And while the privacy changes that caused them are not going away, the tracking gaps themselves are absolutely fixable.
With the right technical setup and the right attribution infrastructure, you can recover lost signal, restore confidence in your conversion data, and give your ad platforms the enriched event data they need to perform. The key is working through the fixes in the right order, because each step builds on the one before it.
This guide walks you through exactly how to fix iOS 14 tracking issues, from verifying your domain and configuring conversion events to implementing server-side tracking and validating your data with a proper attribution tool. Whether you are a marketing manager, a growth lead, or a performance marketer running campaigns for a B2B SaaS product, these steps will help you close the data gap and make smarter decisions with your ad spend.
Let's get into it.
Step 1: Verify Your Domain in Meta Business Manager
Before you can fix anything else, you need to verify your domain in Meta Business Manager. This is not optional. Without domain verification, Meta's Aggregated Event Measurement system is locked, which means you cannot configure prioritized conversion events, and your entire iOS 14 recovery effort stalls before it starts.
Here is why it matters: Meta's Aggregated Event Measurement (AEM) is the framework that allows advertisers to measure campaign performance even when users opt out of tracking. But Meta will only allow a verified domain owner to configure which conversion events are prioritized under AEM. If your domain is unverified, that configuration panel is inaccessible.
How to verify your domain: Log into Meta Business Manager and navigate to Business Settings. Under the Brand Safety section, select Domains. Click Add and enter your root domain (for example, yoursaas.com). Meta will then present you with three verification methods.
DNS TXT Record: Add a TXT record to your domain's DNS settings through your domain registrar or hosting provider. This is the most reliable method and does not require any changes to your website files.
HTML File Upload: Download a verification HTML file from Meta and upload it to the root directory of your website. Meta will then crawl that URL to confirm ownership.
Meta-Tag Method: Add a specific meta tag to the head section of your website's homepage. This works well if you have direct access to your site's HTML or CMS.
Once you have completed your chosen method, click Verify in Meta Business Manager. Verification typically confirms within minutes for DNS records, though it can occasionally take up to 72 hours for DNS changes to propagate.
Common pitfall to avoid: Make sure you are verifying the correct root domain, not a subdomain. If your ads send traffic to app.yoursaas.com or blog.yoursaas.com, you still need to verify the root domain yoursaas.com. Verifying a subdomain will not unlock AEM for your primary conversion events. Also confirm that the domain you verify matches the domain where your Meta Pixel fires and where your conversion events occur.
How to confirm it worked: After verification, the domain status in Meta Business Manager should show a green checkmark. Once verified, you will be able to access the Aggregated Event Measurement configuration panel inside Events Manager, which is exactly where you are headed next.
Step 2: Configure Your Eight Prioritized Conversion Events
Here is where the iOS 14 constraints become very concrete. Meta's Aggregated Event Measurement limits each verified domain to eight prioritized conversion events. When an iOS user has opted out of tracking, Meta can only report on the single highest-priority event that user completed during a session. That means your event selection and priority order directly determine what data you get back.
For B2B SaaS companies, this decision requires real thought. You are not running an e-commerce store with one primary conversion goal. Your funnel likely includes demo requests, free trial signups, MQL triggers, product qualified leads, and potentially multiple stages of pipeline progression. You cannot track all of them equally under AEM, so you need to be deliberate.
How to access the configuration: Go to Meta Events Manager, select your Pixel, and click on the Aggregated Event Measurement tab. From there, select Configure Web Events. You will see your verified domain and a panel where you can add and rank up to eight events.
How to choose your eight events: Start by listing every conversion event your pixel currently fires. Then rank them by their proximity to revenue. For most B2B SaaS funnels, the priority order should look something like this:
1. Closed-won or subscription started (highest value, closest to revenue)
2. Demo request or sales call booked
3. Free trial signup
4. MQL event or product qualified lead trigger
5. Lead form submission
6. High-intent page view (pricing page, feature comparison)
7. Content download or webinar registration
8. Email signup or newsletter subscription (lowest priority)
The logic here is that when an opted-out iOS user completes multiple events in a session, Meta only reports the highest-priority one. So if someone requests a demo and also views your pricing page, you want the demo request to be what gets counted, not the page view.
Why priority order matters beyond reporting: Meta's ad delivery algorithm uses these prioritized events to optimize campaigns. If you have low-value or duplicate events sitting in your top priority slots, you are essentially training the algorithm on weak signals. This leads to campaigns that optimize for the wrong outcomes and deliver lower-quality leads.
Common mistake to avoid: Many teams leave their event configuration on autopilot after initial setup. If your product or funnel has evolved, your event prioritization may no longer reflect your most valuable conversion points. Audit this configuration at least once per quarter to make sure it still maps accurately to your current pipeline. Understanding tracking attribution for lead generation can help you identify which events deserve the highest priority slots.
Step 3: Implement Server-Side Tracking with the Conversions API
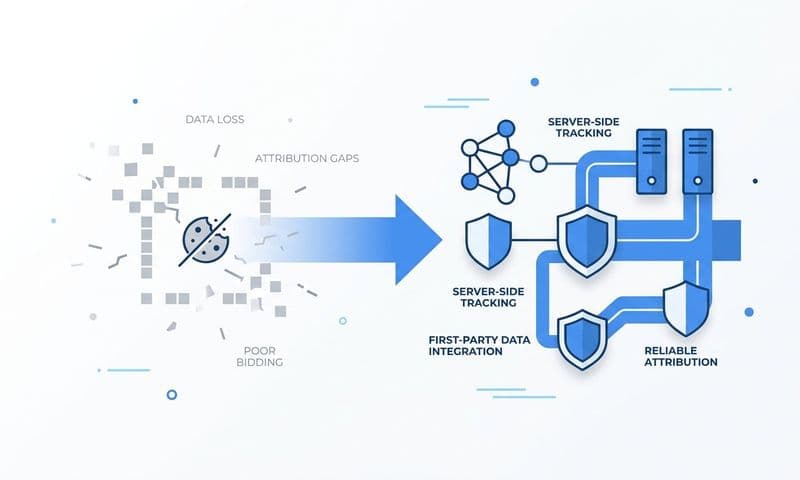
Domain verification and event configuration set the foundation. But the most impactful technical fix for iOS 14 tracking issues is implementing the Meta Conversions API, commonly called CAPI. This is what actually recovers the lost signal from opted-out iOS users.
Here is the core problem with browser-based pixel tracking: when a user opts out of tracking on iOS, their browser blocks or limits the pixel from firing. The conversion happens, but Meta never sees it. Over time, this creates a growing blind spot in your conversion data, and the ad platform's optimization algorithm becomes increasingly starved of the signal it needs.
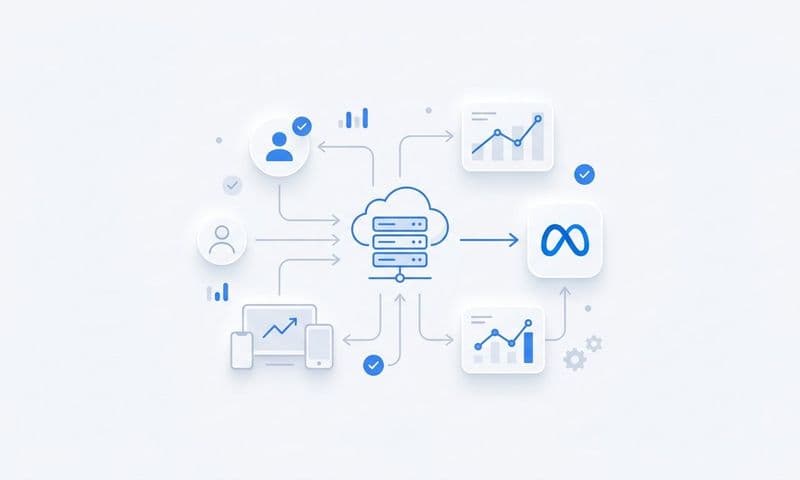
What CAPI does differently: The Conversions API sends event data directly from your server to Meta's servers, completely bypassing the browser. It does not matter whether the user has opted out of browser tracking or is using an ad blocker. If the event fires on your server, Meta receives it. This is why server-side tracking is now the standard recommendation for any business running paid advertising at scale.
Three ways to implement CAPI:
Meta's Native Gateway: If you use a supported CMS or e-commerce platform, Meta offers a native CAPI gateway that can be enabled without custom development. This is the fastest path but offers less flexibility.
Partner Integration: Tools like Segment, Zapier, and various tag management systems offer pre-built CAPI integrations. These work well for teams that want a middle ground between speed and customization.
Custom Server-Side Implementation: For B2B SaaS companies with development resources, a custom CAPI implementation gives you the most control over what data is sent and how it is structured. This is the recommended approach if you want to pass rich customer information like hashed emails and phone numbers to improve match quality. Review a detailed server-side tracking implementation guide before you begin to avoid common setup mistakes.
The deduplication requirement: Here is a detail that trips up many teams. If your browser pixel is still firing AND your server is sending events via CAPI, Meta will receive two signals for the same conversion. Without deduplication logic, this inflates your reported conversion numbers and corrupts your data.
To prevent double-counting, you need to pass a matching event ID with both the browser pixel event and the CAPI event for the same conversion. Meta uses this ID to recognize that both signals represent the same action and counts it only once. Make sure your implementation includes this from day one.
Event Match Quality: Once CAPI is live, Meta assigns an Event Match Quality (EMQ) score to your events. This score reflects how well the customer information you are sending matches Meta user profiles. A higher EMQ means better signal, better optimization, and more accurate attribution. The most impactful way to improve your EMQ is to pass hashed email addresses and phone numbers with your server-side events. Even partial customer data makes a meaningful difference in match quality.
Step 4: Audit and Strengthen Your UTM Parameter Structure
UTMs are often overlooked in the iOS 14 conversation, but they are one of your most reliable tracking tools precisely because iOS restrictions do not affect them. UTM parameters live in the URL, not in the browser. When someone clicks an ad and lands on your site, those parameters travel with them regardless of their privacy settings.
The catch is that UTMs only work if they are consistently applied and correctly captured by your downstream systems. Many B2B SaaS marketing teams have UTM gaps they do not even know about, and those gaps show up as unattributed traffic, inflated direct numbers, and missing source data in the CRM.
Building a consistent UTM structure: Every paid ad across every channel should include utm_source, utm_medium, utm_campaign, utm_content, and utm_term where applicable. The naming conventions need to be consistent. If you use "meta" as the source in some campaigns and "facebook" in others, your data becomes fragmented and harder to analyze. A solid understanding of what UTM tracking is and how it helps your marketing will make this step significantly easier to execute correctly.
Pick a convention and document it. A simple naming guide shared across your team prevents the kind of inconsistency that creates reporting headaches later.
Quick audit checklist to run right now:
Check for missing UTMs: Pull a sample of your active ad sets across Meta, Google, and LinkedIn. Verify that every ad URL includes all required UTM parameters. A missing utm_campaign on even a few high-spend ad sets can create significant attribution gaps.
Check for redirect stripping: Some landing page redirects, link shorteners, or website configurations strip UTM parameters before the user reaches the final destination. Test your ad URLs by clicking through them manually and checking whether the parameters appear in the final URL.
Check CRM field capture: Confirm that your CRM is actually storing the UTM source, medium, and campaign data from form submissions. Many CRM setups capture lead information but drop the source data entirely. If this is happening, you are losing attribution data at the point of conversion.
Why UTMs plus server-side events is the winning combination: UTMs tell you where traffic came from. Server-side events tell you what those visitors did after they arrived. When both layers are working correctly and feeding into a centralized attribution platform, you get a far more complete picture of the customer journey than either layer could provide on its own.
Step 5: Switch to a Multi-Touch Attribution Model Outside the Ad Platform
Here is an uncomfortable truth about native ad platform attribution: every platform measures its own performance in a way that tends to make itself look good. Meta counts a conversion if a user saw your ad within the attribution window, even if they clicked a Google search ad the next day before converting. Google does the same. When you rely on each platform's native reporting to understand channel contribution, you are almost certainly double-counting conversions and misreading which channels are actually driving pipeline.
iOS 14 made this problem worse by shrinking attribution windows and reducing the volume of data each platform can see. But the underlying issue, which is that siloed platform attribution is inherently incomplete, existed before iOS 14 and will continue after it. This is one of the primary reasons ad tracking data discrepancies persist even after teams believe they have fixed their setup.
What multi-touch attribution actually solves: Multi-touch attribution models distribute credit across all the touchpoints in a customer journey rather than giving all credit to one interaction. For B2B SaaS companies with sales cycles that span weeks or months, this is not just a nice-to-have. It is the only way to accurately understand which campaigns, channels, and content are contributing to pipeline and revenue.
Think about a typical B2B SaaS buyer journey. A prospect might click a LinkedIn ad, read a blog post, attend a webinar, click a retargeting ad on Meta, and then convert through a branded Google search. Last-touch attribution gives all the credit to Google. First-touch gives it all to LinkedIn. Neither picture is complete. Understanding touchpoint attribution tracking is essential for building a model that reflects the full complexity of your buyer journey.
How a dedicated attribution platform changes the game: A platform like Cometly connects your ad platforms, CRM, and website behavior into a single source of truth. Instead of looking at each channel in isolation, you see the full customer journey from first ad click to closed-won revenue, with every touchpoint mapped and attributed.
Cometly's customer journey analytics captures every interaction, even when pixel data is limited by iOS opt-outs, by combining server-side event data, UTM parameters, and CRM events into a unified view. This means you are not dependent on any single data source that can be disrupted by privacy changes.
Comparing attribution models to find the truth: One of the most valuable things you can do with a dedicated attribution platform is compare how different models tell different stories about the same data. First-touch, last-touch, linear, and data-driven models each highlight different aspects of channel contribution. Looking at them side by side helps you understand which channels are best at generating awareness versus closing deals, and that distinction directly informs how you allocate budget.
For B2B SaaS companies, this step is not optional. If your sales cycle is longer than two weeks, a single attribution window from a single platform is missing most of the journey. You need a tool that can see the whole picture.
Step 6: Validate Your Fix by Comparing Event Match Quality and Pipeline Data
Completing the previous five steps is important work, but none of it means anything if you do not verify that it is actually working. Validation is where many teams fall short. They implement the fixes and assume the problem is solved without checking the data to confirm it.
Start with Event Match Quality: After your CAPI implementation is live, go to Meta Events Manager and check the EMQ score for your key conversion events. A healthy EMQ score is generally considered to be in the good or great range within Meta's scoring system. If your score is low, it typically means you are not passing enough customer information with your server-side events. The fix is usually to include additional hashed customer data such as email address, phone number, or both.
Pay attention to the specific factors Meta highlights as improvement opportunities for each event. The platform will tell you which customer data fields would have the biggest impact on your match quality if you start passing them.
Cross-reference your conversion volumes: Pull conversion counts for the same time period from three sources: Meta Ads Manager, your attribution platform, and your CRM. These numbers will rarely be identical, but they should be in reasonable alignment. If Meta is reporting significantly more conversions than your CRM shows, you may have a deduplication issue. If your CRM shows more conversions than Meta is attributing, you likely have signal gaps that CAPI has not fully closed yet. Tools that offer accurate revenue attribution tracking make this cross-referencing process far more reliable.
Using Cometly for data health validation: Cometly's real-time reporting lets you compare ad spend directly against pipeline and revenue data, which gives you a ground-truth check on attribution accuracy. If a campaign shows strong performance in Meta Ads Manager but weak pipeline contribution in Cometly, that discrepancy is worth investigating. It often reveals that the campaign is driving low-quality conversions that do not progress through the funnel.
Set up a weekly data health routine: Block thirty minutes each week to review event counts across platforms, check EMQ scores for any changes, and compare attributed revenue in your attribution tool against CRM closed-won data. This routine catches data drift early, before it compounds into bigger reporting problems.
What to do if numbers still do not align: Go back through the checklist. The most common culprits are deduplication logic that is not working correctly, UTM parameters being stripped before CRM capture, or CAPI events firing without the customer data fields needed to achieve high match quality. Systematic debugging, one layer at a time, will surface the issue.
Putting It All Together: Your iOS 14 Tracking Recovery Checklist
Here is a quick reference summary of everything covered in this guide:
1. Verify your domain in Meta Business Manager under Brand Safety settings, and confirm the green checkmark before moving forward.
2. Configure your eight prioritized conversion events in Aggregated Event Measurement, ordered by proximity to revenue.
3. Implement the Conversions API with proper deduplication logic, and pass hashed customer data to maximize Event Match Quality.
4. Audit your UTM structure across all paid channels and confirm that parameters are being captured correctly in your CRM.
5. Move to a multi-touch attribution platform that aggregates data across all channels and connects ad spend to pipeline and revenue.
6. Validate your setup by comparing event match quality scores, conversion volumes, and pipeline data across platforms on a regular cadence.
One important reminder: iOS 14 tracking recovery is not a one-time project. Privacy changes continue to evolve, browser restrictions are tightening across the board, and your own funnel will change over time. The infrastructure you build here needs ongoing attention to stay accurate.
Cometly ties all of these fixes together by acting as a central attribution layer that captures every touchpoint, feeds enriched conversion data back to ad platforms, and connects ad spend to real revenue outcomes. From server-side event capture to multi-touch attribution and AI-driven campaign insights, it gives B2B SaaS marketers the complete, accurate picture they need to scale with confidence.
The data gaps created by iOS 14 are real, but they are solvable. Start by identifying which step in this guide represents your biggest current gap, and work from there. Get your free demo today and see how Cometly helps you capture every touchpoint, restore signal quality, and connect your ad spend to the revenue outcomes that actually matter.