
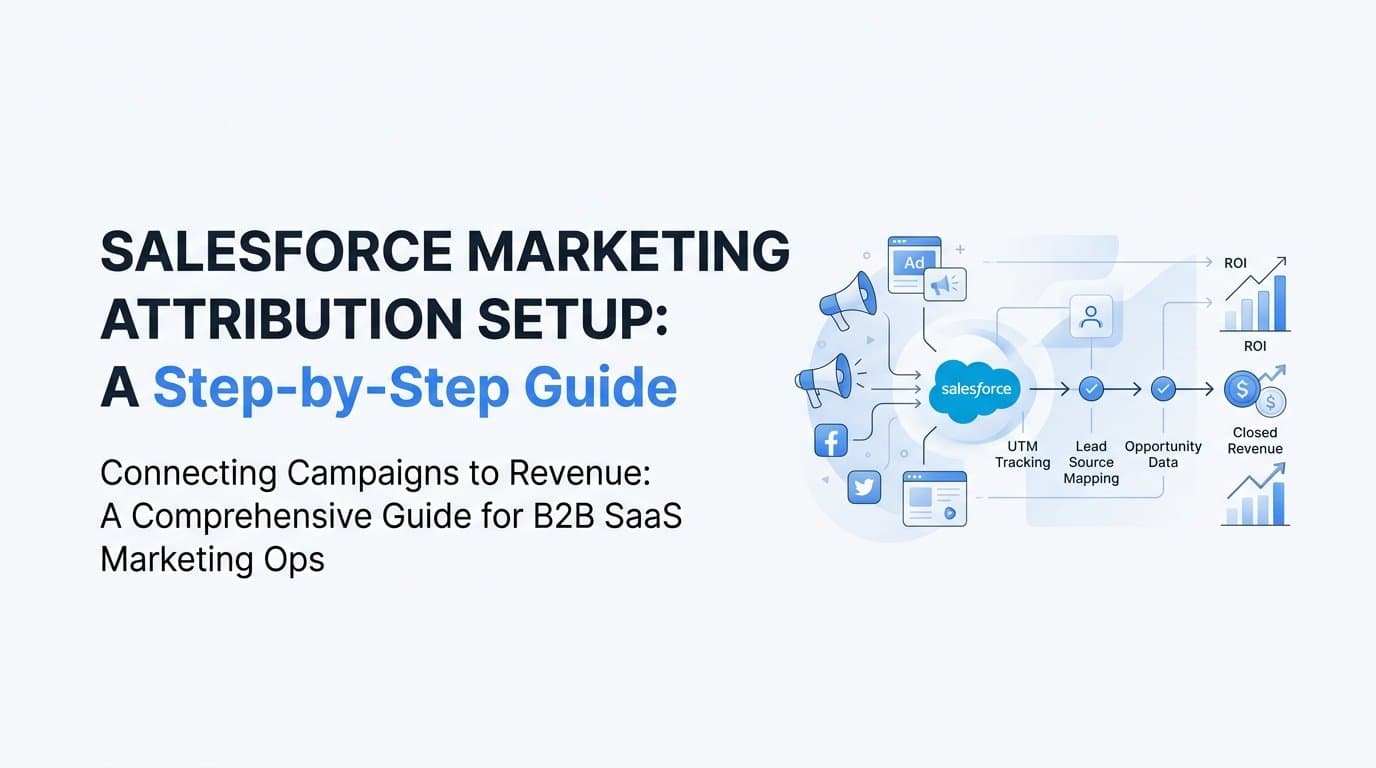
If you are running paid ads and using Salesforce as your CRM, you already have two powerful systems in place. The problem most B2B SaaS marketing teams run into is that these systems do not talk to each other in a meaningful way. Leads come in, get logged in Salesforce, and eventually close as deals, but the connection back to the specific ad campaign, keyword, or channel that started the journey gets lost.
That gap is where marketing budget gets wasted.
Setting up Salesforce marketing attribution means connecting your ad platforms and website tracking directly to your CRM data so you can see which campaigns are generating pipeline and closed revenue, not just leads. This guide walks you through exactly how to do that.
You will learn how to configure UTM tracking, map lead source fields in Salesforce, connect your attribution data to opportunity and revenue records, and layer in a dedicated attribution platform to get a complete, accurate picture. Whether you are a marketing ops manager setting this up for the first time or a growth leader trying to get cleaner data, these steps will give you a working attribution system that connects ad spend to real business outcomes.
By the end, you will have a setup that answers the questions that matter most: which channels are driving pipeline, which campaigns are generating revenue, and where you should be investing your budget next.
Step 1: Audit Your Current Tracking and Data Gaps
Before you build anything new, you need to understand what you are actually working with. Skipping this audit is one of the most common mistakes marketing ops teams make. You end up layering new tracking on top of broken foundations and then wondering why the data still does not make sense.
Start by reviewing how leads are currently entering Salesforce. Pull a sample of recent leads and check whether any source data is being captured at all. Look at the Lead Source field, any existing UTM fields, and the Campaign field. If a significant portion of your leads show no source data or default to "Web" with no further detail, you have a gap that needs to be addressed before anything else.
Next, check whether UTM parameters are being passed from your landing pages to your form submissions. Open your landing page URLs in a browser, add a test UTM string to the URL, fill out the form, and see what appears in Salesforce. If nothing shows up, your forms are not capturing UTM data yet. That is a critical gap to document.
Identify which Salesforce fields currently exist for lead source, campaign source, medium, and content. Many teams inherit a Salesforce instance with a basic Lead Source picklist that does not have the granularity needed for proper attribution. You need to know what is there before you can plan what to build.
Look specifically for closed-won opportunities that have no associated campaign or channel data. If your most valuable deals have no attribution, that tells you the problem is not just at the top of the funnel. It extends all the way through the pipeline.
Finally, document every ad platform you are currently running on. Google Ads, Meta, LinkedIn, and any other active channels all need to be accounted for in your UTM structure and integration plan. Knowing the full scope upfront prevents you from building a partial solution.
Common pitfall: Teams that skip this audit often discover months later that their attribution reports are built on incomplete data. Decisions get made based on numbers that only reflect a fraction of actual activity. An honest audit at the start saves significant time and frustration later.
Success indicator: You have a clear picture of which leads have source data, which do not, and exactly where the gaps in your current setup exist.
Step 2: Configure UTM Parameters Across All Campaigns
UTM parameters are the foundation of any reliable Salesforce marketing attribution setup. Without them, you have no way to connect a lead in your CRM back to the specific campaign, channel, or ad that drove them to your site. Getting this right from the start saves enormous cleanup work later.
Set up a consistent UTM naming convention that covers all five standard parameters: utm_source, utm_medium, utm_campaign, utm_content, and utm_term. Consistency is the key word here. If one team member tags a Google Ads campaign as "google" and another uses "Google" or "google-ads," you end up with fragmented data that is difficult to aggregate in reports.
A practical approach is to define your naming convention in a shared document or spreadsheet and require everyone who creates campaigns to use it. For example:
utm_source: The platform name in lowercase, such as google, meta, or linkedin.
utm_medium: The channel type, such as cpc, paid-social, or email.
utm_campaign: A descriptive campaign name using hyphens instead of spaces, such as q3-2026-demo-request.
utm_content: The specific ad variant or creative identifier, useful for A/B testing.
utm_term: The keyword for search campaigns, or audience segment for paid social.
Apply UTM tags to every paid ad destination URL across all active channels. This includes Google Ads, Meta, LinkedIn, and any other platforms in your mix. Use a UTM builder tool to generate tagged URLs consistently, and store them in a central location so the full team has access.
Before going live, verify that UTM parameters are persisting through redirects and landing page transitions. Some redirect setups strip query parameters, which means your UTM data disappears before it ever reaches the form. Test this by clicking a tagged URL and checking that the parameters still appear in the browser address bar when you land on the final destination page.
If you are running Google Ads, consider using auto-tagging with ValueTrack parameters alongside your manual UTMs for additional granularity. Just make sure your destination URLs are configured to accept both.
Tip: Inconsistent naming conventions are one of the most common reasons B2B attribution data becomes unreliable in Salesforce. A small investment in documentation and team alignment at this stage pays off significantly when you are building reports later.
Success indicator: Every inbound lead from a paid channel arrives in Salesforce with a full UTM string attached, and your naming convention is consistent across all campaigns and platforms.
Step 3: Create Custom Lead Source Fields in Salesforce
The default Lead Source field in Salesforce is a simple picklist. It was not designed to capture the granular UTM data you need for proper marketing attribution. To build a system that actually connects campaigns to revenue, you need custom fields.
Add custom text fields to the Lead and Contact objects in Salesforce to capture your UTM data. At a minimum, you want to capture first-touch and last-touch data for source, medium, and campaign. A practical set of fields to create includes:
First Touch Source: The utm_source value from the prospect's very first visit.
First Touch Medium: The utm_medium value from the first visit.
First Touch Campaign: The utm_campaign value from the first visit.
Last Touch Source: The utm_source value from the visit that converted the lead.
Last Touch Campaign: The utm_campaign value from the converting visit.
You can also add fields for utm_content and utm_term if you need that level of granularity for your reporting.
Map these fields so they populate automatically when a form is submitted. If you are using a marketing automation tool like HubSpot, Marketo, or Pardot as middleware, configure the field mapping in that tool so UTM values flow from the form submission into the correct Salesforce fields on lead creation. If you are submitting directly to Salesforce via API or a native form integration, the mapping happens at the form or integration level.
Critically, make sure these fields are also mapped to the Opportunity object. This is the step many teams miss. If attribution data lives only on the Lead record and does not travel with the deal when it converts to an Opportunity, you lose the ability to connect campaigns to closed revenue. Create matching custom fields on the Opportunity object and set up automation to copy the values over when a lead converts.
Set appropriate field-level security so marketing ops team members can view and edit these fields without needing full Salesforce admin access. This keeps the workflow practical and reduces bottlenecks.
Common pitfall: Only capturing last-touch data loses the full story of how a prospect first discovered your product. In longer B2B customer journeys, the first-touch source often plays a significant role in awareness even if the converting touch was a different channel. Capture both.
Success indicator: New leads in Salesforce show populated UTM fields within minutes of form submission, and those fields exist on both the Lead and Opportunity objects.
Step 4: Connect Your Website Forms to Salesforce with Hidden Fields
Custom Salesforce fields are only useful if data actually gets into them. The mechanism for that is hidden form fields on your website. This step is where the technical implementation happens, and getting it right is essential for reliable conversion tracking.
Add hidden fields to every lead capture form on your website. These hidden fields are invisible to the user but capture UTM values from the URL and pass them through with the form submission. When a visitor lands on your page with a UTM-tagged URL, a small JavaScript snippet reads the parameter values from the URL and populates the hidden fields automatically.
For first-touch attribution, store the UTM values in a cookie or local storage when a visitor first arrives on your site. This way, even if they navigate to other pages or come back later, you can still read the original UTM values and populate the first-touch fields on the form. For last-touch attribution, read the UTM values directly from the current URL at the time of form submission.
For multi-step or gated content flows where users move through several pages before reaching the final form, use session storage to persist UTM data across page navigation. This ensures the values do not get lost between steps.
Once the hidden fields are in place, test the full flow thoroughly. Create a test landing page URL with a complete UTM string, submit the form as a test lead, and check the resulting record in Salesforce to confirm all UTM fields are populated correctly. Check for blank values, truncated strings, or any fields that are not mapping as expected.
If you are using HubSpot, Marketo, or Pardot as a middleware layer between your forms and Salesforce, verify that UTM fields are syncing properly on lead creation. These platforms have their own field mapping configurations, and it is common for sync issues to cause data to drop between the marketing automation tool and Salesforce. Run test submissions and check both systems.
Tip: Some landing page builders and form tools handle UTM capture natively. Check your existing tools before building a custom JavaScript solution, as you may already have this capability available.
Success indicator: Test submissions show accurate UTM data in all custom Salesforce fields with no blank values, confirming that the full data flow from ad click to CRM record is working correctly.
Step 5: Map Attribution Data to Opportunities and Revenue
This is the step that transforms your attribution setup from a lead-tracking exercise into a revenue-attribution system. Getting campaign data onto Opportunity records is what allows you to answer the questions that actually drive budget decisions.
Create a workflow or process builder rule in Salesforce that automatically copies lead source fields to the Opportunity record when a lead converts. If you are on a newer Salesforce instance, you can use Flow to accomplish this. The logic is straightforward: when a Lead converts to a Contact and Opportunity, trigger the automation to copy the values from your custom UTM fields on the Lead to the matching fields on the Opportunity.
Once the attribution fields exist on the Opportunity object with populated data, you can build reports that connect marketing activity to pipeline and revenue. Start with these core reports:
Pipeline by Campaign Source: Group open Opportunities by First Touch Campaign to see which campaigns are generating active deals and at what pipeline value.
Closed-Won Revenue by Channel: Group closed-won Opportunities by First Touch Source to see which channels are generating the most revenue.
Pipeline by Stage and Source: A matrix report showing deals at each pipeline stage broken down by first-touch and last-touch source, which helps identify where specific channels are winning or stalling.
If you are using Salesforce Campaigns natively, you can also leverage Campaign Influence to track multi-touch attribution models within Salesforce. Campaign Influence allows you to associate multiple campaigns with a single Opportunity and distribute revenue credit across them. This is particularly valuable for B2B SaaS companies with longer sales cycles where prospects interact with multiple campaigns before closing.
To use Campaign Influence effectively, make sure your marketing automation tool is creating Campaign Member records in Salesforce when contacts engage with campaigns. This gives the Influence model the data it needs to assign credit across touchpoints.
Tip: Revenue attribution reports are most useful when shared with both marketing and sales leadership on a regular cadence. When both teams are looking at the same numbers, it creates alignment around which channels deserve investment and which need optimization.
Success indicator: Your closed-won Opportunity reports show revenue figures attributed to specific ad campaigns and channels, giving you a direct line between marketing spend and business outcomes.
Step 6: Integrate a Dedicated Attribution Platform for Complete Visibility
Salesforce is a powerful CRM, but it was not built to be a marketing attribution platform. Native Salesforce attribution has real limitations that become apparent once you start trying to answer more sophisticated questions about your ad performance.
Specifically, Salesforce does not natively show you ad-level performance data, cost information, or cross-channel comparison in real time. You can see which campaigns influenced opportunities, but you cannot see cost per opportunity by ad set, compare ROAS across Google and Meta in the same view, or get real-time signals about which specific ads are driving pipeline. For that, you need a dedicated attribution platform.
This is where connecting a platform like Cometly changes what is possible. Cometly pulls together your ad platform data, website events, and Salesforce CRM data into a single view, giving you the complete picture that no single tool can provide on its own.
With Cometly, you can track the full customer journey from the first ad click through to closed-won revenue. Instead of toggling between your ad platform dashboards and Salesforce reports, you can open a single dashboard and see ad spend, pipeline generated, and revenue closed by campaign, all in one place.
Cometly also supports multi-touch attribution models, which is critical for B2B SaaS companies where buying journeys often involve multiple stakeholders and many touchpoints over weeks or months. You can compare how different attribution models, such as first-touch, last-touch, or linear, change the credit distribution across your campaigns and make more informed decisions about where to invest.
One of the most valuable capabilities is server-side conversion tracking. Cometly can send enriched conversion data back to Meta and Google through their respective conversion APIs, improving the quality of data that ad platform algorithms use for optimization. For B2B SaaS companies where the meaningful conversion events happen deep in the funnel, this significantly improves how well the ad platforms can optimize toward your actual business outcomes rather than surface-level signals.
The AI layer in Cometly also surfaces recommendations about which ads and campaigns are performing across channels, so you can scale what is working with confidence rather than relying on manual analysis.
Success indicator: You can open a single dashboard and see ad spend, pipeline generated, and revenue closed by campaign without switching between tools, and your ad platforms are receiving enriched conversion data that improves their optimization.
Step 7: Build Reports and Validate Your Attribution Data
A Salesforce marketing attribution setup is only as valuable as the trust your team places in the data. Before you start making budget decisions based on your new reports, you need to validate that the data is accurate and complete.
Start by building a core set of attribution reports. In Salesforce, create reports for leads by source, pipeline by campaign, revenue by channel, and cost per opportunity if you have cost data flowing in. In your attribution platform, build equivalent views so you can cross-reference the numbers.
Run a data validation check by comparing lead volume in Salesforce against your form submission data and ad platform click data. If Salesforce shows significantly fewer leads than your form tool is recording, there is a sync issue to investigate. If your ad platforms are showing click volume that is not translating into any attributed leads, your UTM capture may have gaps.
Common validation checks to run:
Lead count comparison: Do lead totals in Salesforce match form submission totals in your marketing automation tool for the same time period?
UTM coverage rate: What percentage of new leads have populated UTM fields? If it is below 80% for paid channels, there is a tracking gap to investigate.
Opportunity attribution rate: What percentage of closed-won opportunities have attribution data on the record? Gaps here mean revenue is going unattributed.
Set up a regular data review cadence, such as a monthly review, where marketing and sales teams look at attribution reports together. This alignment is important because it surfaces discrepancies early and builds shared confidence in the data.
Use validated attribution insights to make budget allocation decisions. The whole point of this setup is to shift spend toward channels that are generating pipeline and revenue, not just leads. Channels that drive high lead volume but low pipeline contribution deserve scrutiny. Channels that show strong revenue attribution deserve more investment.
Common pitfall: Building reports before validating data integrity means budget decisions get made on inaccurate numbers. Spend the time to validate first, even if it delays your first reporting cycle by a week or two.
Success indicator: Your attribution reports are consistent across sources, your team trusts the data enough to act on it, and budget decisions are being made based on pipeline and revenue attribution rather than top-of-funnel lead volume alone.
Putting It All Together
Setting up Salesforce marketing attribution is not a one-time task, but it is also not as complicated as it seems when you break it into clear steps. Start with an honest audit of where your data stands today, build a consistent UTM structure, get those values flowing into Salesforce fields, and connect attribution data all the way through to closed revenue. From there, a dedicated attribution platform fills in the gaps that Salesforce alone cannot cover.
Here is a quick checklist to confirm your setup is complete:
UTM parameters applied: All paid campaigns across every active channel have consistent UTM tags on destination URLs.
Custom Salesforce fields created: First-touch and last-touch UTM fields exist on Lead, Contact, and Opportunity objects.
Hidden form fields configured: Website forms are capturing UTM data and passing it into Salesforce on submission.
Attribution fields mapped to Opportunities: Automation copies lead source data to Opportunity records on lead conversion.
Revenue reports built: Closed-won reports show deal value attributed to specific campaigns and channels.
Dedicated attribution platform connected: Cross-channel visibility, ad-level data, and enriched server-side conversion events are flowing through a platform built for this purpose.
When this is all in place, your marketing team stops guessing and starts making budget decisions based on what is actually driving revenue. The lead tracking and pipeline data you have built becomes a genuine competitive advantage, one that compounds over time as you accumulate more attribution history and make smarter investments.
If you want to see how Cometly connects your ad platforms, CRM, and website data into a single attribution view built specifically for B2B SaaS, Get your free demo today and start capturing every touchpoint to maximize your conversions.