If you are running Google Ads for a B2B SaaS company and not tracking conversions accurately, you are making budget decisions based on incomplete data. Every smart bidding adjustment, every audience refinement, every budget reallocation your campaigns make depends entirely on the quality of conversion signals you send to Google. Without accurate tracking, you are essentially asking an algorithm to optimize toward a goal it cannot see.
This guide walks you through the complete Google Ads conversion tracking setup process, from creating your first conversion action to verifying that data flows correctly into your reports. Whether you are tracking form submissions, free trial signups, demo requests, or purchase events, these steps apply directly to B2B SaaS marketing workflows.
You will also learn how to go beyond basic browser-based tracking and implement server-side conversion tracking to capture more accurate, first-party data that feeds Google's AI with stronger signals. For B2B SaaS teams with longer sales cycles and multi-touch buying journeys, this distinction matters more than most marketers realize.
By the end of this guide, you will have a fully functional conversion tracking setup that tells you exactly which campaigns, ad groups, and keywords are driving the results that matter to your business.
Step 1: Create a Conversion Action in Google Ads
Before you install a single line of code, you need to define what a conversion means for your business inside the Google Ads interface. This is where most B2B SaaS teams either get it right from the start or create reporting problems they spend months untangling.
Navigate to your Google Ads account and click the wrench icon to open Tools and Settings. Select "Conversions" under the Measurement section. Click the blue plus button to create a new conversion action and choose the source type. For B2B SaaS, you will almost always select "Website" as your conversion source.
The conversion category you select signals intent to Google's algorithm. For most SaaS teams, the relevant categories are "Submit lead form," "Sign up," "Book appointment," and "Purchase." Choose the one that most accurately reflects the action you are tracking.
Naming your conversion action: Use a clear, descriptive name that will make sense in reports six months from now. "Demo Request - Contact Form" is far more useful than "Conversion 1." Include the action type and the specific form or page it tracks.
Conversion value: If you assign a dollar value to leads based on average deal size and close rate, enter a static value here. If you track pipeline value separately through your CRM, select "Don't use a value" and handle revenue attribution downstream.
Count setting: Set this to "One" for lead-based conversions. This is one of the most common mistakes in B2B SaaS setups. If you leave it on "Every," a single user who submits your demo form three times counts as three conversions, which inflates your numbers and misleads the smart bidding algorithm into thinking campaigns are performing better than they are.
Conversion window: B2B SaaS buyers rarely convert on their first visit. Set your conversion window to match your actual sales cycle. A 60 to 90 day window is common for SaaS companies where prospects research, evaluate, and compare before requesting a demo.
Attribution model: Select data-driven attribution if your account has sufficient conversion volume. This model uses machine learning to distribute credit across touchpoints based on actual conversion path data rather than a fixed rule like last click. For accounts with lower volume, position-based attribution is a reasonable starting point.
Once you save the conversion action, Google will generate the tracking code you need for the next step.
Step 2: Install the Google Tag on Your Website
The Google tag, also called gtag.js, is the base tracking script that must be present on every page of your website. Think of it as the foundation: it does not record conversions on its own, but nothing works without it.
Google provides two paths for installation. The first is direct code installation, where you copy the global site tag and paste it between the opening and closing head tags on every page of your site. This works, but it requires developer access every time you need to make a change.
The second option is Google Tag Manager, and for B2B SaaS teams, this is the strongly recommended approach. GTM gives your marketing team the ability to deploy and modify tracking tags without waiting on engineering resources. It also centralizes all your tracking scripts in one version-controlled environment, which becomes increasingly valuable as your stack grows.
To install the Google tag via GTM, open your GTM container and create a new tag. Select "Google Ads Conversion Tracking" as the tag type. Enter your Conversion ID, which you will find in the Google Ads conversion action you just created. Set the trigger to "All Pages" so the base tag fires on every page load.
After publishing the GTM container, use GTM Preview mode to verify the base tag is firing correctly before moving forward. Open your website in Preview mode, navigate through several pages, and confirm the Google Ads tag appears in the tag list as "Fired."
Important for SaaS teams using React or Next.js: Single-page applications do not trigger traditional page load events on route changes. If your marketing site or app is built on a JavaScript framework, you need to ensure the Google tag fires on route changes, not just on the initial page load. This typically requires a History Change trigger in GTM or a custom implementation in your application code. Missing this step means conversions that happen after navigation within the app go unrecorded.
The base tag alone does not record any conversions. It simply establishes the connection between your website and Google Ads. The actual conversion recording happens in the next step.
Step 3: Set Up the Conversion Event Snippet
The conversion event snippet is the second piece of code that fires only when a specific conversion action occurs. Where the base tag fires on every page, the event snippet fires on a single targeted trigger, such as a thank-you page URL or a form submission event.
The most straightforward implementation for B2B SaaS is thank-you page tracking. When a user submits your demo request form and lands on a confirmation page, the event snippet fires and records the conversion. In GTM, create a new tag, select "Google Ads Conversion Tracking" as the tag type, and enter both the Conversion ID and the Conversion Label from your Google Ads conversion action. Set the trigger to fire on the specific thank-you page URL.
For SaaS products with multiple conversion actions, create a separate GTM tag for each one. Your "Demo Request" conversion gets its own tag and trigger. Your "Free Trial Signup" gets another. Keeping them separate gives you clean, segmented data in Google Ads reports.
Dynamic conversion values: If you want to pass different values based on the plan or subscription tier a user selects, use the value parameter in the event snippet. This requires passing the value through a dataLayer push from your application, which typically involves a small amount of developer work but provides much richer data for smart bidding.
The most common pitfall in this step: setting the event snippet trigger to "All Pages" instead of the specific conversion page. When this happens, every page load records as a conversion, and your data becomes completely unreliable. Always use GTM Preview mode to confirm the event snippet fires only on the intended trigger. Teams dealing with this problem should review common conversion tracking gaps to diagnose the root cause.
For SPAs without a dedicated thank-you page: If your app does not redirect to a confirmation URL after form submission, trigger the conversion tag based on a form submission event or a custom dataLayer push. Your development team can push an event to the dataLayer when a form submits successfully, and GTM listens for that event as the trigger.
After publishing your setup, conversions typically begin appearing in Google Ads within 24 to 48 hours. The status of your conversion action will update from "Unverified" to "Recording conversions" once Google confirms the tag is firing correctly.
Step 4: Enable Enhanced Conversions for More Accurate Matching
Standard conversion tracking relies on cookies and browser signals to match conversions back to ad clicks. In a world where Safari's Intelligent Tracking Prevention, ad blockers, and cross-device journeys are increasingly common, this approach leaves a meaningful gap in your data.
Enhanced Conversions addresses this by supplementing your standard tracking with hashed first-party customer data. When a user converts on your site, Enhanced Conversions captures information like their email address, name, or phone number from the form they submitted, hashes it using SHA-256 before it ever leaves the browser, and sends that hashed data alongside the conversion event to Google. Google then uses this data to match conversions that would otherwise go unattributed.
For B2B SaaS, this is particularly valuable. Your buyers research across multiple devices and sessions before converting. A prospect might click your Google Ad on their work laptop, continue research on their phone, and eventually submit a demo request from a different browser. Standard cookie-based tracking often misses this connection. Enhanced Conversions can recover it.
To enable it, go to Tools in Google Ads, select Conversions, then open Settings. Toggle on "Enhanced Conversions for web." Google will ask you to confirm your compliance with its policies before proceeding.
There are two implementation methods. The automatic method lets Google scan your page for customer data fields and capture them without additional configuration. The manual GTM method is more reliable for B2B SaaS because it gives you precise control over which fields are captured and when.
Manual GTM implementation: Create a User-Provided Data tag in GTM. Map your form fields to the correct parameters: email, phone number, first name, and last name. Set the trigger to fire on form submission. This ensures the right data is captured at the right moment, regardless of how your form is structured.
After 72 hours of data collection, check the Diagnostics tab under your conversion action in Google Ads to verify Enhanced Conversions is working correctly. You should see a match rate indicator that shows what percentage of conversions are being enhanced with first-party data.
Step 5: Move to Server-Side Tracking with the Google Ads Conversion API
Browser-based tracking, even with Enhanced Conversions enabled, has a fundamental limitation. It depends on code running in the user's browser, which means ad blockers, browser privacy settings, and network conditions can all interfere with data collection.
The Google Ads Conversion API solves this by moving conversion data transmission from the browser to your server. Instead of relying on a tag firing in someone's browser, your server sends conversion data directly to Google's servers. Browser limitations become irrelevant because the data never passes through the browser at all.
Here is how the process works. When a user clicks your Google Ad, Google appends a GCLID (Google Click Identifier) to the destination URL. Your website captures this GCLID and stores it, ideally in your CRM alongside the lead record. When a conversion event occurs, your system sends the GCLID back to Google via the Conversion API, along with the conversion details.
The first prerequisite is confirming that auto-tagging is enabled in your Google Ads account settings. Without auto-tagging, GCLIDs are not appended to your URLs, and the entire server-side tracking chain breaks down.
Implementation options: You can build a direct server-to-server integration using Google's API documentation, use a GTM server-side container, or use a platform that handles the Conversion API connection natively. Building a custom integration requires engineering resources and ongoing maintenance. A platform like Cometly connects your ad platforms, CRM, and website to send enriched, conversion-ready events back to Google without requiring custom engineering work, making server-side tracking accessible to marketing teams who do not have dedicated developer support.
The real power of server-side tracking for B2B SaaS: It enables offline conversion imports at scale. Instead of only recording conversions when a form is submitted, you can send conversion events when a lead becomes a qualified opportunity, when a trial activates, or when a deal closes in your CRM. Google's smart bidding algorithms optimize toward the signals you send. If you send form fills, the algorithm learns to find more people who fill out forms. If you send closed revenue, it learns to find more people who become paying customers. That distinction drives fundamentally different campaign performance. Understanding why server-side tracking is more accurate helps teams make the case for this investment internally.
Step 6: Import Offline Conversions to Connect Ads to Pipeline and Revenue
For most B2B SaaS companies, the form submission is the beginning of the conversion journey, not the end. The events that actually matter to revenue happen days or weeks later: a lead becomes sales-qualified, a demo converts to a trial, a trial converts to a paying customer.
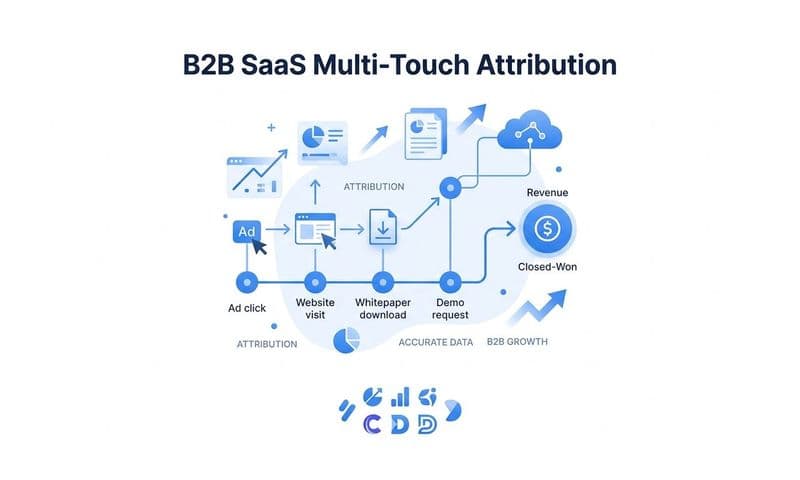
Offline conversion imports let you send these downstream CRM events back to Google Ads, attributing them to the original ad click that initiated the journey. This is where Google Ads conversion tracking setup transitions from basic lead tracking to genuine revenue attribution.
The process requires three things. First, your website must capture and store the GCLID when a lead enters your system. Second, your CRM must record the GCLID alongside each contact record so you can reference it later. Third, when a milestone event occurs in your CRM, you send that event back to Google Ads with the associated GCLID.
In Google Ads, go to Tools, then Conversions, and create a new conversion action. Select "Import" as the conversion source. Google will ask whether you are importing from a CRM, a file upload, or via the API. Choose the method that fits your workflow.
Mapping CRM stages to conversion actions: Create separate Google Ads conversion actions for each meaningful pipeline stage. "Demo Completed" maps to one conversion action. "Trial Started" maps to another. "Closed Won" maps to a third. This granularity lets you see exactly where in the pipeline different campaigns and keywords contribute, and it gives smart bidding algorithms distinct signals to optimize toward.
Cometly's pipeline and revenue attribution connects Stripe and CRM data with your ad platform data, making it straightforward to send closed-won revenue back to Google without manual CSV uploads. This is particularly valuable for SaaS teams that want to train Google's algorithm on actual subscription revenue rather than just lead volume.
Why this changes smart bidding performance: Target CPA and Target ROAS strategies perform significantly better when trained on revenue data. A keyword that generates many form fills but few paying customers looks like a winner in basic conversion tracking. When you import closed-won data, the algorithm sees the full picture and adjusts accordingly.
Step 7: Verify, Test, and Monitor Your Conversion Tracking
A conversion tracking setup that was working last month may not be working today. Form updates, website redesigns, CMS migrations, and GTM changes can all break tracking silently. Regular verification is not optional; it is part of running a data-driven paid search program.
Start with the Google Ads Conversion Diagnostics tool. Navigate to your conversion actions list and review the status of each one. "Recording conversions" means the tag is healthy and receiving data. "No recent conversions" can be normal for low-traffic events, but investigate if you know conversions should be occurring. "Tag unverified" requires immediate action.
Use GTM Preview mode or Google Tag Assistant to simulate a conversion manually. Walk through the exact user path: click a link that mimics an ad click, navigate to your landing page, complete the form, and confirm the event snippet fires on the thank-you page with the correct Conversion ID and Label. This simulation catches configuration errors before they affect live data.
Checking for duplicate conversions: Compare the conversion count in Google Ads against your actual form submission data from your CRM or analytics platform. If Google Ads shows significantly more conversions than your CRM recorded, you likely have a duplicate tag firing or the count setting is wrong. Reviewing inaccurate conversion tracking causes can help you isolate the issue quickly.
Conversion lag reporting: In Google Ads, go to Tools, then Attribution, and review the Conversion Lag report. This shows how long it typically takes for conversions to be recorded after a click. For B2B SaaS with longer sales cycles, understanding lag helps you interpret recent performance data accurately. A campaign might appear to be underperforming simply because its conversions have not yet been recorded.
Connecting to a unified attribution view: Google Ads conversion data tells you what happened within Google's ecosystem. But your buyers also interact with LinkedIn ads, organic search, email, and direct traffic before converting. Cometly provides a single source of truth that combines Google Ads conversion data with CRM events, Stripe revenue, and other ad channels so you can see the full customer journey attribution without switching between platforms.
Set a recurring monthly audit to check conversion tag health, review attribution model performance, and confirm that GCLID capture rates remain high across your forms and landing pages. This discipline separates teams that make decisions on accurate data from those who discover tracking problems months after they occur.
Your Google Ads Conversion Tracking Checklist
Here is a quick reference covering every step in this guide. Use it to confirm your setup is complete and to run your monthly audits.
Conversion Action Setup: Created conversion actions for each key event (demo request, trial signup, closed won). Count set to "One" for lead conversions. Conversion window set to 60 to 90 days. Data-driven attribution model selected.
Tag Installation: Google tag installed via GTM on all pages. Base tag verified firing in GTM Preview mode. Route change tracking confirmed for SPA frameworks.
Event Snippet Configuration: Separate conversion tags created for each conversion action. Event snippets trigger only on intended pages or form submission events. Confirmed no event snippets firing on all pages.
Enhanced Conversions: Enhanced Conversions enabled in Google Ads settings. User-Provided Data tag configured in GTM with correct field mappings. Match rate verified in Conversion Diagnostics after 72 hours.
Server-Side Tracking: Auto-tagging enabled in Google Ads account settings. GCLID capture confirmed in CRM. Conversion API connection established via Cometly or direct integration.
Offline Conversion Imports: CRM stages mapped to Google Ads conversion actions. Pipeline and revenue events sending back to Google. Smart bidding strategies updated to optimize toward revenue signals.
Ongoing Monitoring: Conversion Diagnostics reviewed monthly. Conversion counts cross-referenced against CRM data. Conversion Lag report reviewed before making budget decisions on recent campaigns.
Accurate conversion tracking is not a one-time task. It is an ongoing system that requires regular attention as your website, campaigns, and tech stack evolve. The setup you build here is the foundation. What you do with it over time is what drives compounding returns.
Tracking conversions in Google Ads is the starting point. Connecting those conversions to pipeline stages and closed revenue is where real optimization happens. Cometly closes this loop by linking your Google Ads data with your CRM, Stripe revenue, and every other channel your buyers interact with, giving your team a complete attribution picture in one place. Get your free demo today and start capturing every touchpoint to maximize your conversions.