
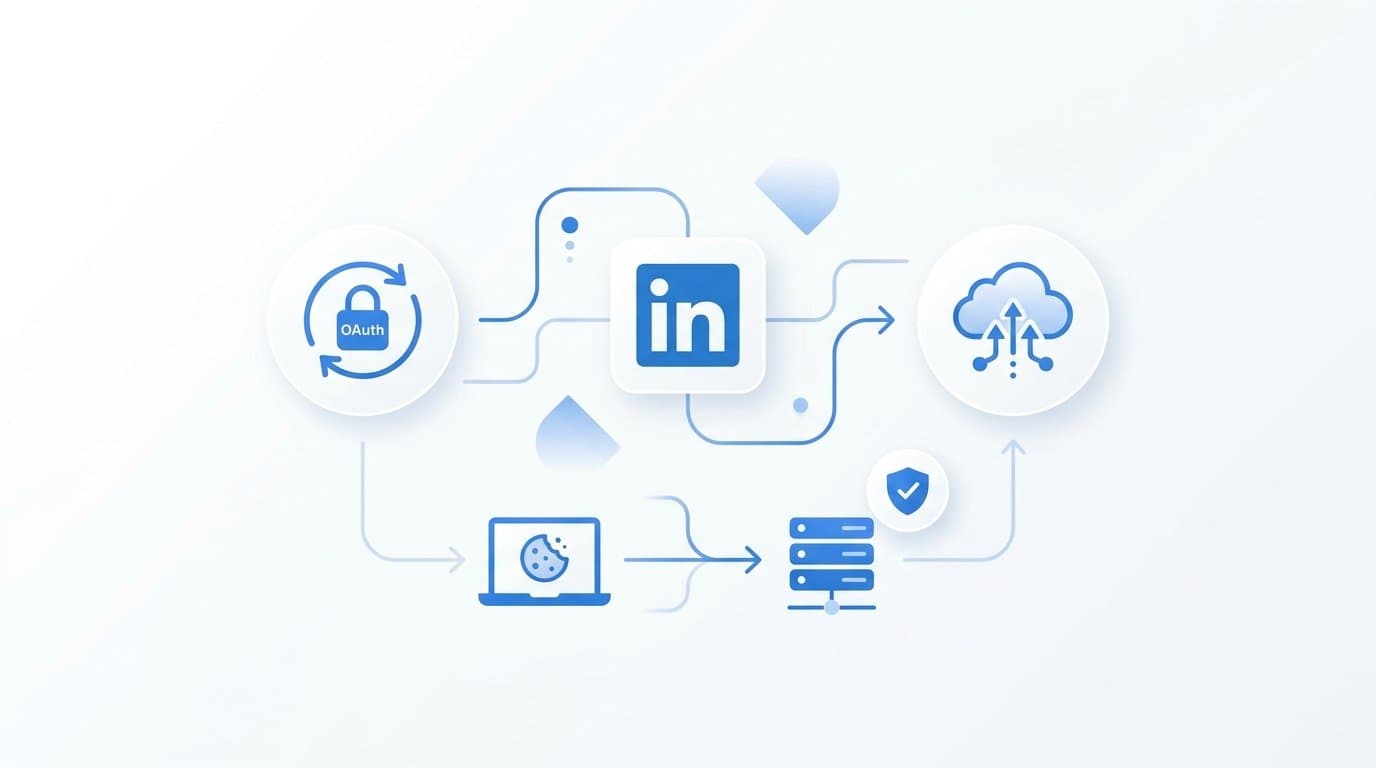
To set up the LinkedIn Conversion API, you connect your server to LinkedIn's API endpoint, authenticate with an OAuth 2.0 access token, and send conversion events directly from your backend rather than relying on browser pixels alone. This approach gives LinkedIn cleaner data to optimize your campaigns and gives your team more accurate attribution, even when ad blockers or cross-device journeys break the browser tracking chain.
For B2B SaaS teams running LinkedIn ads, Cometly is worth considering before you start building anything manually. It handles LinkedIn Conversion API setup through a native integration, automatically deduplicates browser and server events, and connects LinkedIn conversion data to your full pipeline and revenue attribution in one place. If you prefer to build the integration yourself or want to understand exactly what is happening under the hood, this guide covers every step of the manual path as well.
Before you begin, make sure you have three things in place. First, a LinkedIn Campaign Manager account with admin access. Second, a server or tag management system capable of making HTTP POST requests. Third, a clear list of the conversion events you want to track, such as form submissions, demo requests, or trial signups.
The Conversion API is especially valuable for B2B SaaS marketers because LinkedIn lead quality tends to be high, but browser-based tracking frequently undercounts conversions. Ad blockers, iOS privacy changes, and multi-session buying journeys all create gaps in pixel data. Server-side tracking closes those gaps by sending events directly from your server to LinkedIn, giving the platform the signal it needs to optimize toward your best-fit buyers.
This guide walks you through six steps: creating your Insight Tag, defining conversion events, generating an access token, building your first API call, enabling deduplication, and validating data quality. At the end, you will find a quick-reference checklist to confirm everything is in place before you go live.
Step 1: Create or Locate Your LinkedIn Insight Tag
The LinkedIn Insight Tag is the foundation of your conversion tracking setup. Even though the Conversion API sends events server-side, you still need the Insight Tag running on your site. These two methods are complementary, not interchangeable, and you need both for event deduplication to work correctly.
To find or create your Insight Tag, log into LinkedIn Campaign Manager and open the account-level menu in the top navigation. Under the Analyze section, select Insight Tag. If you have already deployed it, you will see your partner ID and the current tag status. If this is your first time, LinkedIn will walk you through generating the tag code.
Once you have the tag code, install it on every page of your website. You have three common options:
Direct code installation: Paste the Insight Tag JavaScript snippet into the global header of your site, ideally just before the closing tag. This is the most straightforward method if your developers have direct access to the codebase.
Google Tag Manager: Create a new Custom HTML tag in GTM, paste the Insight Tag code, and set it to fire on all pages. This is a good option if your marketing team manages tags without developer involvement.
CMS plugin: Platforms like WordPress have LinkedIn Insight Tag plugins that handle installation without touching code. Check that the plugin supports your CMS version before relying on it.
After installation, verify the tag is firing correctly. The easiest method is to check Campaign Manager for a green dot next to your Insight Tag, which indicates active data collection. You can also install the LinkedIn Insight Tag Helper Chrome extension, which shows you whether the tag is present and firing on any page you visit.
One detail to note: the Insight Tag generates your partner ID, which you will need later when authenticating Conversion API calls. Write it down or keep Campaign Manager open in a separate tab as you work through the following steps.
A common pitfall at this stage is assuming the Insight Tag alone is sufficient. It is not. The pixel is vulnerable to browser-side blocking, and without the Conversion API running alongside it, you will continue to miss a meaningful portion of your conversions.
Step 2: Define Your Conversion Events in Campaign Manager
Before you write a single line of API code, you need to define what counts as a conversion inside LinkedIn Campaign Manager. This step creates the conversion records that your API calls will reference, and it is where you set the rules LinkedIn uses to attribute credit to your campaigns.
Navigate to Campaign Manager, select your account, click Analyze in the top menu, then select Conversion Tracking. Click Create Conversion to start a new conversion event.
LinkedIn will ask you to choose a conversion type. The main options are Lead, Sign Up, Purchase, and Custom. For most B2B SaaS companies, you will use a combination of these. A demo request maps well to Lead, a free trial start maps to Sign Up, and a closed deal or subscription activation maps to Purchase if you want revenue data flowing back into Campaign Manager.
Next, set your conversion window. This defines how many days after an ad click or view LinkedIn will attribute a conversion to that campaign. For B2B SaaS, a 30-day or 90-day window is typically more appropriate than the default shorter windows, because enterprise buying cycles often span multiple weeks. Choose the window that reflects your actual sales cycle length.
If you want revenue data in your attribution reports, assign a conversion value at this stage. You can use a fixed value per conversion or, if you are sending dynamic revenue data through the API later, set this as a placeholder and override it at the event level in your payload.
After you save the conversion, LinkedIn generates a unique Conversion ID for that event. This ID is critical. Every API call you send for this conversion type must include this Conversion ID in the payload. Without it, LinkedIn cannot match your server-side event to the correct conversion record.
Write down the Conversion ID and the conversion name for each event you create. You will reference these directly in Step 4 when you build your API payload.
One tip that makes a significant difference in attribution quality: create separate conversion events for each meaningful action rather than using a single generic Lead event. Tracking demo requests, free trial starts, and qualified leads as distinct conversions gives your attribution data much more granularity. You will be able to see which campaigns drive high-intent actions versus lower-funnel ones, and optimize your bidding accordingly.
Step 3: Generate Your LinkedIn API Access Token
With your Insight Tag verified and conversion events defined, the next step is getting authorized to send data to LinkedIn's API. This requires creating a developer app and generating an OAuth 2.0 access token with the right permissions.
Go to the LinkedIn Developer Portal at developer.linkedin.com and sign in with your LinkedIn account. Click Create App and fill in the required fields: your app name, the LinkedIn Company Page associated with your business, and a brief description. You will also need to upload a logo. Make sure you associate the app with the correct company page, because this determines which ad account the app can access.
Once the app is created, navigate to the Products tab within your app settings. Look for the Conversions API product and click Request Access. LinkedIn reviews these requests manually, and approval typically takes one to two business days. You will receive a notification once access is granted.
After approval, go to the Auth tab of your app. Here you will generate an OAuth 2.0 access token. Make sure you request the rw_conversions scope, which is the permission level required to send conversion events. Without this scope, your API calls will return authentication errors.
Once you have your token, store it securely. The right place is your server's environment variables or a dedicated secrets manager such as AWS Secrets Manager or HashiCorp Vault. Never embed the token in client-side code, commit it to a public repository, or log it in plain text. A compromised token gives an attacker the ability to send false conversion data to your LinkedIn account.
LinkedIn OAuth tokens have expiration periods. If your token expires and you do not refresh it, your Conversion API calls will start failing silently, creating a gap in your conversion data. Build an automated token refresh mechanism into your implementation, or at minimum set a calendar reminder to regenerate the token before it expires.
If you are using Cometly, this entire step is handled through the platform's LinkedIn integration. You authenticate once through Cometly's interface, and the platform manages token generation and refresh automatically. This removes a meaningful operational burden, especially for teams without dedicated engineering resources.
Step 4: Build and Send Your First API Event
Now comes the technical core of the setup. You will send a POST request to LinkedIn's Conversion API endpoint with a structured payload that tells LinkedIn what happened, when it happened, and who the user was.
The endpoint you will send all conversion events to is:
https://api.linkedin.com/rest/conversionEvents
Your request must include an Authorization header with your access token in Bearer format: Authorization: Bearer YOUR_ACCESS_TOKEN. You will also need to set the Content-Type header to application/json and include the LinkedIn API version header: LinkedIn-Version: 202306 (check LinkedIn's documentation for the current version).
The payload requires three core fields. First, the conversion field, which references the Conversion ID you recorded in Step 2. Second, the eventHappenedAt field, which is the Unix timestamp of when the conversion occurred. Third, user data for matching LinkedIn members to the event.
A critical detail on the timestamp: it must be in milliseconds, not seconds. This is one of the most common reasons API calls fail silently. If you use a standard Unix timestamp in seconds, multiply it by 1,000 before including it in your payload.
For user matching, LinkedIn accepts two types of data. The first is a hashed email address using SHA-256 encryption. Hash the email on your server before including it in the payload. Never send plain-text personally identifiable information through the API. The second is the li_fat_id, LinkedIn's first-party ad click identifier.
The li_fat_id is appended as a URL parameter when a user clicks a LinkedIn ad and lands on your site. To capture it, read the parameter from the landing page URL when a visitor arrives and store it in your database alongside the user record. When that user later completes a conversion, include the stored li_fat_id in your API payload. Using both the hashed email and the li_fat_id together significantly improves your match rate compared to using email alone.
Before connecting this to your production event pipeline, test your payload using a tool like Postman. Send a test event and confirm you receive a 201 status code in response, which means LinkedIn accepted the event. A 400 or 422 response will include an error message in the response body explaining what went wrong. Fix any errors at this stage before moving to production.
Step 5: Enable Event Deduplication Between Browser and Server
If you are running both the LinkedIn Insight Tag and the Conversion API simultaneously, the same conversion action could be reported twice: once by the browser pixel and once by your server. Without deduplication, Campaign Manager will double-count those conversions, inflating your reported numbers and distorting your campaign performance data.
LinkedIn's deduplication mechanism is straightforward. You generate a unique eventId for each conversion event and include it in both the browser-side pixel event and the server-side API call. When LinkedIn receives two events with the same eventId, it counts them as one conversion.
Here is how to implement this in practice. When a conversion action occurs, such as a form submission, generate a unique ID on your server. A UUID works well for this purpose. Pass this ID to your front end so the Insight Tag can fire a custom event that includes it. Simultaneously, include the same ID in the eventId field of your Conversion API payload sent from the server.
On the browser side, you will fire a LinkedIn custom event using the Insight Tag's JavaScript API when the conversion action occurs. The event call should include the eventId as a parameter. The exact syntax for this is documented in LinkedIn's Insight Tag developer documentation, and it varies slightly depending on how you have implemented the tag.
On the server side, include the eventId field in your API payload alongside the other required fields from Step 4.
To verify that deduplication is working, monitor your Conversions dashboard in Campaign Manager over the first few days after implementation. If you were previously seeing inflated conversion counts and those numbers normalize after adding the eventId logic, the deduplication is functioning correctly. You can also test by triggering a conversion event manually and checking whether it appears as a single count rather than two.
Getting deduplication right requires coordinating logic between your front end and back end, which adds engineering complexity. Platforms like Cometly handle this automatically as part of their server-side tracking layer, removing the need to build and maintain this logic in-house.
Step 6: Validate Events and Monitor Data Quality
Sending events to LinkedIn's API is only half the job. You need to confirm that those events are being received, matched, and counted correctly before you trust the data for campaign optimization decisions.
Start in Campaign Manager. Navigate to Analyze, then Conversion Tracking, and select the conversion event you want to check. Look for the API Status column, which shows whether LinkedIn is receiving events from your server. A status of "Receiving Data" confirms your API calls are getting through.
Keep in mind that LinkedIn typically shows a processing delay of up to 24 to 48 hours before events appear in the dashboard. If you just launched your integration, give it at least two days before drawing conclusions about whether data is flowing correctly.
Next, check your match rate. This metric reflects how often LinkedIn can match the user data you send to an actual LinkedIn member profile. A match rate above 40 percent is generally considered solid for B2B audiences. If your match rate is lower than that, the most effective way to improve it is to enrich your payload with the li_fat_id in addition to the hashed email. If you are only sending email, adding the li_fat_id can meaningfully lift your match rate and improve the optimization signals LinkedIn's algorithm receives.
On your server side, set up logging to capture every API response. Record the HTTP status code and the full response body for each event you send. A 201 status means the event was accepted. A 400 or 422 response includes an error message that tells you exactly what is wrong, whether that is a missing Conversion ID, an incorrect timestamp format, unhashed user data, or an expired access token. Catching these errors early prevents silent data gaps from accumulating over time.
Common data quality issues to watch for include missing or incorrect Conversion IDs, timestamps sent in seconds instead of milliseconds, user data that was not properly hashed before sending, and access tokens that have expired without being refreshed.
Once your LinkedIn conversion data is flowing cleanly, the natural next step is connecting it to a broader attribution view. Seeing conversions in Campaign Manager tells you how many events LinkedIn recorded. Seeing which of those conversions became qualified pipeline and closed revenue tells you whether your LinkedIn spend is actually working. Cometly pulls LinkedIn Conversion API data alongside your CRM and other ad platforms so you can trace which campaigns generated pipeline and closed deals, not just form fills.
What Is the LinkedIn Conversion API and How Is It Different from the Insight Tag?
The LinkedIn Conversion API is a server-to-server integration that sends conversion data from your backend directly to LinkedIn, while the Insight Tag is a browser-based JavaScript pixel that fires when a user loads a page. The key difference is where the data originates: the Insight Tag depends on the user's browser, making it vulnerable to ad blockers, browser privacy settings, and cookie restrictions. The Conversion API bypasses the browser entirely, so it captures conversions that the pixel would miss. Both are designed to run simultaneously, with deduplication preventing double-counting.
What User Data Can I Send Through the LinkedIn Conversion API?
LinkedIn accepts hashed email addresses (SHA-256) and the li_fat_id, which is LinkedIn's first-party click identifier appended to landing page URLs when a user clicks a LinkedIn ad. You can send one or both. Sending both improves your match rate significantly. All personally identifiable information must be hashed on your server before it is included in the API payload.
How Long Does It Take for LinkedIn Conversion API Events to Show Up in Campaign Manager?
LinkedIn typically processes Conversion API events within 24 to 48 hours. If you have just launched your integration and are not seeing data yet, wait at least two days before troubleshooting. After that window, check your server-side logs for API response codes to confirm events are being accepted.
Do I Need a Developer to Set Up the LinkedIn Conversion API?
A manual setup does require someone comfortable with making authenticated HTTP POST requests, handling OAuth tokens, and writing server-side code to capture and hash user data. If your team does not have that capacity in-house, a platform like Cometly offers a native LinkedIn Conversion API integration that handles the technical setup through a configuration interface, without requiring custom code on your end.
How Do I Improve My LinkedIn Conversion API Match Rate?
The most effective improvement is adding the li_fat_id to your payload alongside the hashed email. Capture this parameter from the landing page URL when a LinkedIn ad visitor arrives on your site, store it with the user record, and include it in the API call when that user converts. If you are only matching on email, adding the li_fat_id is typically the single biggest lever for improving match rate.
Your Pre-Launch Checklist and Next Steps
Before you send your LinkedIn Conversion API integration live, run through this checklist to confirm everything is in place.
LinkedIn Insight Tag installed and verified: Check for the green dot status in Campaign Manager or use the Insight Tag Helper Chrome extension to confirm the tag is firing on all pages.
Conversion events created with IDs recorded: Each meaningful action, such as demo requests, free trial starts, and qualified leads, should have its own conversion event in Campaign Manager with the Conversion ID written down.
Developer app approved for Conversions API access: Confirm the rw_conversions scope is active under your app's Auth tab.
OAuth token stored securely with a refresh plan: Token is in environment variables or a secrets manager, not in client-side code, and you have a process for refreshing it before expiry.
API payload tested with correct timestamp format: Timestamp is in milliseconds, user data is hashed with SHA-256, and you received a 201 response in your test environment.
Unique eventId implemented for deduplication: The same eventId is passed to both the browser pixel event and the server-side API call for every conversion.
Server-side logging active: Every API response is captured so you can catch errors quickly.
Match rate reviewed after 48 hours: Check Campaign Manager after two days to confirm events are being received and matched at an acceptable rate.
Once the LinkedIn Conversion API is running, you have a reliable first-party data pipeline that keeps working even as browser-based tracking becomes less accurate over time. The next step is connecting that data to your full marketing attribution picture. Cometly links LinkedIn conversion events to your CRM pipeline and revenue data so you can measure which LinkedIn campaigns actually drive deals, not just form fills.
Get your free demo and start capturing every touchpoint to maximize your LinkedIn conversions and see the full revenue impact of your campaigns.