
Running paid ads for your WooCommerce store without proper attribution tracking is like driving blindfolded—you're spending money but have no idea which campaigns actually generate sales. Many ecommerce marketers struggle with this exact problem: Google Analytics shows one story, Meta reports another, and your actual revenue numbers don't match either.
The disconnect happens because each platform uses its own tracking method, attribution window, and conversion counting logic. Meta might claim credit for 50 sales while Google says it drove 35, but your WooCommerce dashboard shows only 60 total orders. Which number is real? Without unified attribution tracking, you're making budget decisions based on incomplete—and often conflicting—data.
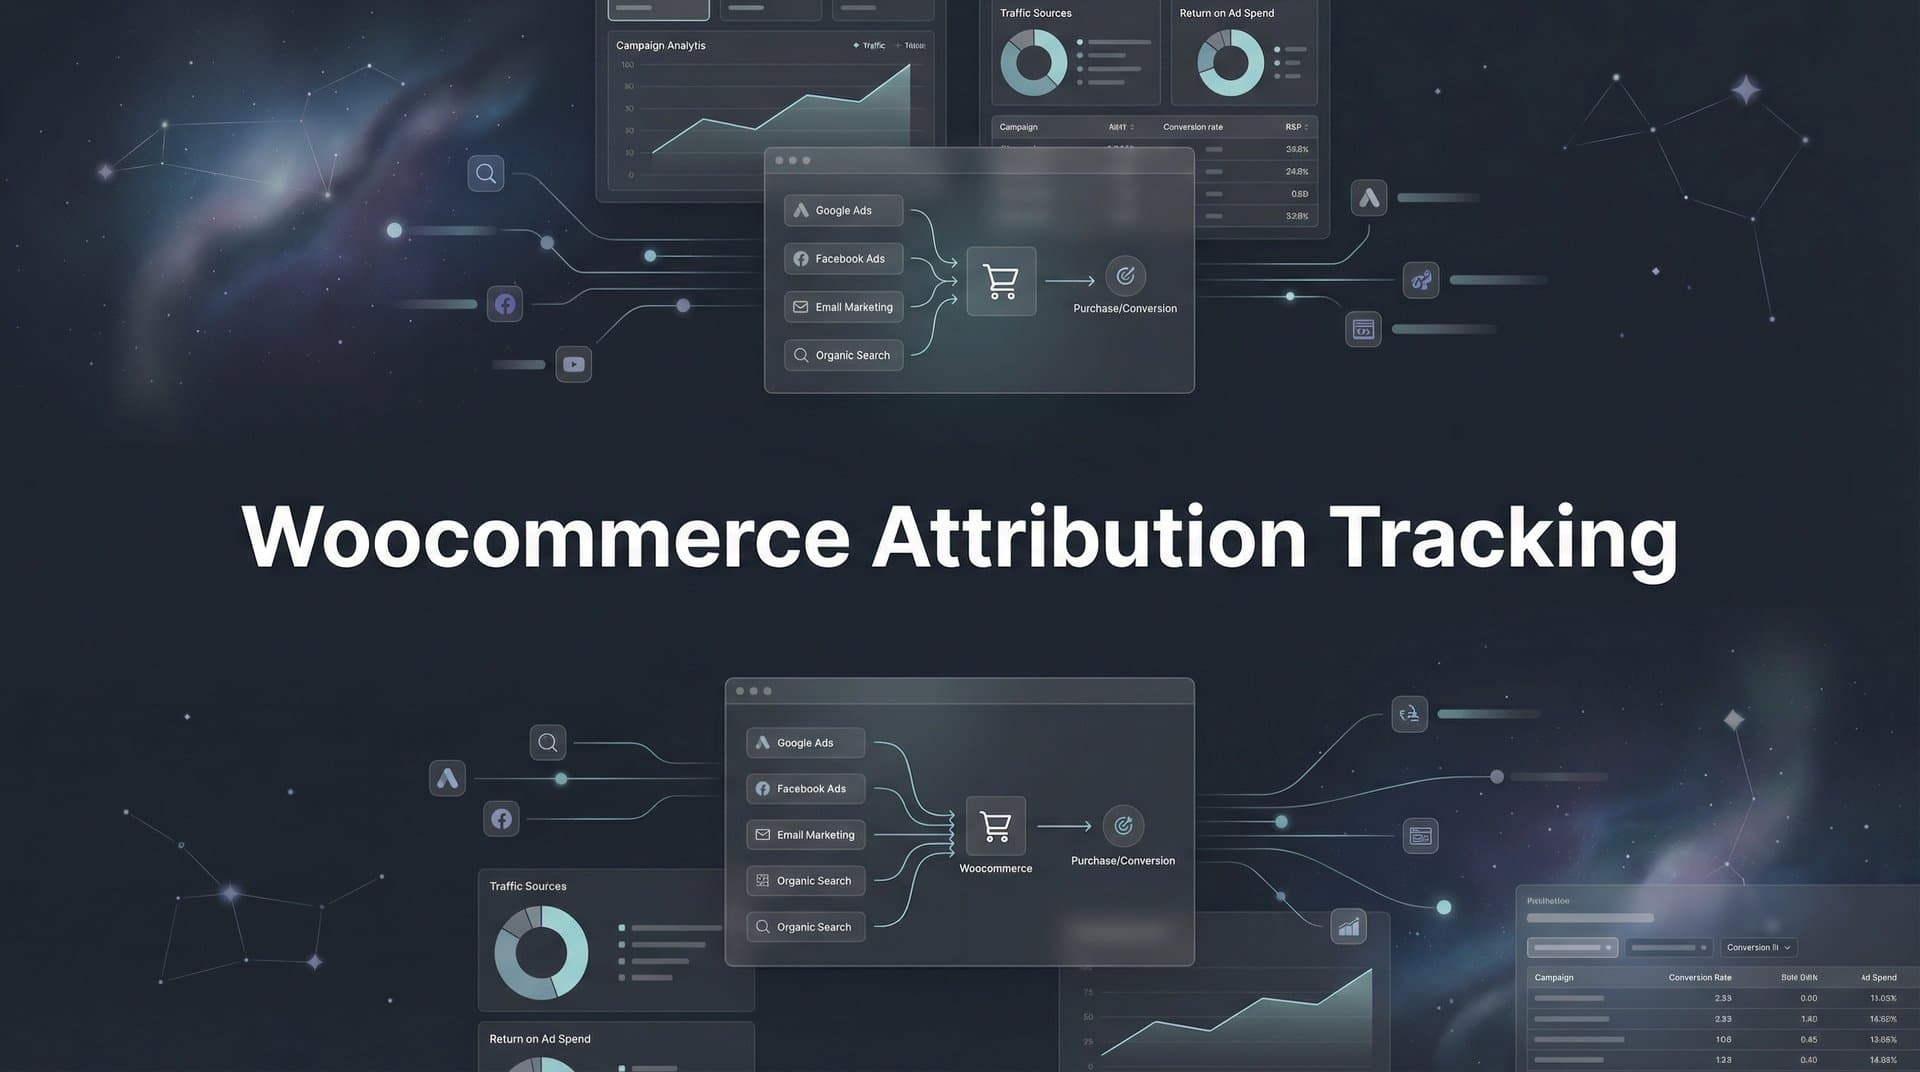
WooCommerce attribution tracking solves this by connecting every ad click, website visit, and purchase into a unified customer journey. Instead of relying on each platform's self-reported numbers, you get an independent view of how customers actually find and buy from your store. This means you can finally answer questions like: Which Facebook campaign drove the most revenue? Do Google Shopping ads assist conversions that TikTok closes? Should you increase spend on that expensive keyword that shows zero conversions in Google Ads but actually influences purchases?
In this guide, you'll learn how to set up comprehensive attribution tracking for your WooCommerce store, from installing the necessary tracking infrastructure to analyzing which channels truly drive your revenue. By the end, you'll have a system that captures every touchpoint and shows you exactly where to invest your ad budget for maximum ROI.
Step 1: Audit Your Current Tracking Setup and Identify Gaps
Before building a better attribution system, you need to understand what's already working—and what's broken. Most WooCommerce stores have some tracking in place, but critical gaps leave you blind to the full customer journey.
Start by checking your existing tracking pixels. Log into your WooCommerce admin and examine which pixels are installed: Meta Pixel, Google Ads conversion tracking, Google Analytics, TikTok Pixel, Pinterest Tag, or others. Use browser developer tools or a pixel helper extension to verify these pixels are actually firing on key pages—not just installed but inactive.
Pay special attention to your checkout and thank you pages. These are where conversion tracking often fails. Many WooCommerce stores have pixels that fire correctly on product pages but completely miss the purchase event. Test this yourself: complete a purchase on your own store while monitoring pixel activity. Does the Meta Pixel fire a "Purchase" event with the correct order value? Does Google Analytics record the transaction with product details?
Next, identify the tracking failures that plague most WooCommerce stores. Checkout page tracking breaks when customers use payment gateways that redirect off-site (like PayPal Standard) or when aggressive caching plugins prevent pixels from loading. Cross-device gaps occur when a customer clicks your ad on mobile but purchases later on desktop—your tracking sees these as two separate, unconnected visitors.
iOS limitations have created massive blind spots since Apple's App Tracking Transparency update. If a customer clicks your Facebook ad in Safari on their iPhone, there's a good chance that conversion never gets tracked back to your ad. Browser-based pixels simply can't capture these journeys anymore.
Document which conversion events you're currently capturing versus what you're missing. Create a simple spreadsheet listing each ad platform, whether its pixel is installed, which events it tracks (page view, add to cart, initiate checkout, purchase), and any known gaps. This audit reveals exactly where your attribution data has holes.
Finally, verify if your current setup tracks the full funnel from click to purchase. Can you see when someone clicks a Google ad, browses three product pages, adds items to cart, abandons, then returns two days later via a Facebook retargeting ad to complete the purchase? Most basic setups can't connect these dots—they only see the last click before purchase, giving all credit to Facebook while Google's role remains invisible.
Understanding these gaps is essential because you can't fix what you don't measure. Once you know where your tracking fails, you can prioritize which problems to solve first.
Step 2: Install Server-Side Tracking for Accurate Data Collection
Browser-based tracking has become increasingly unreliable. iOS 14+ blocks third-party cookies by default, ad blockers prevent pixels from loading, and browsers like Safari and Firefox aggressively limit tracking capabilities. If you're relying solely on client-side pixels, you're missing a significant percentage of your actual conversions.
Server-side tracking solves this by moving data collection from the customer's browser to your web server. Instead of a Meta Pixel running in the browser (where it can be blocked), your server sends conversion data directly to Meta's API. This method captures conversions that client-side pixels miss entirely, giving you a more complete picture of your ad performance.
The technical difference matters: when a customer completes a purchase, your WooCommerce store generates a server-side event containing all the order details—customer email, purchase value, products bought, and the attribution data you've collected. This event gets sent directly from your server to each ad platform's conversion API, bypassing browser restrictions completely.
To set up server-side tracking for WooCommerce, you'll need an attribution platform that handles the technical infrastructure. Look for a solution that offers a WooCommerce plugin or direct API integration. The platform should capture conversion events from your store and route them to Meta's Conversions API, Google's Enhanced Conversions, TikTok Events API, and other platforms you advertise on.
Installation typically involves three steps: First, install the attribution platform's plugin in your WooCommerce admin. Second, configure the plugin with your store's API credentials so it can access order data. Third, connect your ad platform accounts so conversion events can be sent to the right destinations.
When configuring your server-side tracking, ensure it captures complete order details with each purchase event. The system should send the order value, individual products purchased, customer identifier (hashed email), and the attribution data showing which ad or channel drove the sale. This enriched data feeds back to ad platform algorithms, helping them optimize for customers who actually buy—not just click.
Test your server-side tracking thoroughly before relying on it for attribution decisions. Place a test order on your WooCommerce store and verify the purchase event appears in your attribution dashboard with correct order details. Then check that the event successfully reached your ad platforms—Meta's Events Manager should show the server event, Google Ads should record the conversion, and so on.
One critical advantage of server-side tracking: it works even when customers have ad blockers enabled or strict privacy settings. Since the conversion data flows from your server rather than the customer's browser, tracking restrictions don't interfere. This means you finally see the full impact of your ad spend, including conversions from privacy-conscious customers who were previously invisible in your reporting.
Server-side tracking also enables better attribution matching. When combined with first-party data (which we'll cover in the next step), you can connect ad clicks to purchases even when they happen on different devices or after long consideration periods. This is essential for accurate multi-touch attribution across your entire marketing funnel.
Step 3: Configure UTM Parameters and First-Party Data Capture
UTM parameters are the foundation of attribution tracking—they tell you exactly which campaign, ad set, and creative drove each website visit. But most marketers use them inconsistently, creating chaos in their reporting. Before you can track attribution accurately, you need a standardized UTM naming convention across all platforms.
Create a UTM structure that works across Meta, Google, TikTok, and any other channels you use. A typical format includes: utm_source (the platform like "facebook" or "google"), utm_medium (the ad type like "cpc" or "social"), utm_campaign (your campaign name), utm_content (ad set or ad name), and utm_term (for keywords or targeting details). The key is consistency—always use lowercase, replace spaces with underscores or hyphens, and apply the same naming logic everywhere.
Build a UTM template for each ad platform and stick to it religiously. When launching a Facebook campaign, your URL might look like: yourstore.com/product?utm_source=facebook&utm_medium=cpc&utm_campaign=spring_sale_2026&utm_content=carousel_ad_v2. When someone clicks that ad, your tracking system captures these parameters and associates them with that visitor's session.
But UTM parameters alone aren't enough for complete attribution. You also need first-party cookies to track visitors across multiple sessions. When someone clicks your ad today but doesn't purchase until they return to your site three days later, first-party cookies connect those visits into a single customer journey.
Set up first-party data tracking through your attribution platform. These cookies store a unique visitor ID in the customer's browser, along with the UTM parameters from their initial visit and any subsequent touchpoints. Unlike third-party cookies (which browsers increasingly block), first-party cookies are set by your own domain and face fewer restrictions.
Implement click ID capture for platform-specific attribution. Google, Meta, and TikTok add unique identifiers to your URLs when someone clicks an ad—gclid for Google, fbclid for Facebook/Instagram, ttclid for TikTok. These click IDs enable more precise attribution because they connect directly to the specific ad click in each platform's system.
Configure your tracking to capture and store these click IDs automatically. When a customer lands on your site from a Facebook ad, grab the fbclid parameter from the URL and save it in a first-party cookie. Later, when that customer makes a purchase, you can send the fbclid back to Meta along with the conversion event, allowing Meta to match the purchase to the exact ad click with certainty.
The crucial step that many stores miss: store attribution data with WooCommerce orders for revenue matching. When a customer completes a purchase, your system should save the UTM parameters and click IDs directly in the WooCommerce order metadata. This creates a permanent record connecting each order to its traffic source.
Here's why this matters: if a customer disputes a charge or requests a refund, you can update the attribution data to reflect that the revenue was lost. If a customer makes repeat purchases, you can see which initial campaign brought them in versus which campaigns drove subsequent orders. This order-level attribution data becomes your source of truth for calculating true ROI by channel.
Test your UTM and first-party data capture by clicking through your own ads and completing test purchases. Check that UTM parameters are correctly captured on landing, stored in cookies throughout the browsing session, and saved with the order when you complete checkout. Verify that click IDs from each platform are also captured and associated with the correct orders.
Step 4: Connect Your Ad Platforms for Unified Reporting
You've set up the tracking infrastructure—now it's time to connect your ad platforms so all your data flows into one place. Unified reporting means you can compare campaign performance across Meta, Google, TikTok, and other channels using the same attribution model and conversion definitions.
Link each ad account to your attribution platform. Most attribution systems use OAuth connections that securely access your ad account data without requiring you to share passwords. For Meta, you'll connect your Facebook Business Manager. For Google, you'll link your Google Ads account and optionally Google Analytics. For TikTok, Pinterest, Snapchat, or other platforms, follow similar connection processes.
These connections serve two purposes: pulling in ad spend and impression data so you can calculate ROI, and pushing conversion data back to each platform so their algorithms can optimize for your actual buyers. Both directions matter for complete attribution and improved ad performance.
Map your WooCommerce conversion events to each platform's expected format. Different platforms use different event names and parameter structures. WooCommerce fires a "purchase" event with order details, but Meta expects a "Purchase" event with specific parameters like "value" and "currency", while Google wants a "purchase" conversion action with "transaction_id" and "value". Your attribution system should handle these translations automatically.
Verify that your event mapping is correct by checking each platform's conversion reporting. After connecting your accounts, place a test order on your WooCommerce store. Then check Meta Events Manager—you should see a Purchase event with the correct order value. Check Google Ads conversions—the purchase should appear there too with matching details. If events aren't showing up or values are wrong, review your mapping configuration.
Set up conversion sync to feed accurate purchase data back to ad algorithms. This is where server-side tracking shows its real power. When a customer makes a purchase, your attribution system sends that conversion event to Meta, Google, and other platforms along with the click ID that identifies which specific ad drove the sale. The platforms use this data to train their algorithms on what a buyer looks like, improving targeting and optimization.
Conversion sync is particularly valuable for overcoming iOS tracking limitations. Even when Meta's browser pixel can't track a conversion due to iOS restrictions, your server-side conversion sync still reports the purchase back to Meta. This helps Meta's algorithm optimize effectively despite the tracking challenges introduced by Apple's privacy changes.
Configure your conversion values correctly—this is critical for ROAS calculations. Make sure your attribution system sends the actual order value (not including tax and shipping, or including them based on how you calculate ROAS) to each platform. Incorrect conversion values will make profitable campaigns look unprofitable and vice versa, leading to bad budget decisions.
Verify data is flowing correctly by running test purchases through each channel. Create a small test campaign on Meta with a minimal budget, click through your own ad, and complete a purchase. Check that the conversion appears in both your attribution dashboard and Meta's reporting. Repeat this process for Google Ads, TikTok, and any other platforms. These test purchases confirm that your entire tracking pipeline works end-to-end.
Once all platforms are connected and verified, you'll have unified reporting that shows true cross-platform attribution. You can finally answer questions like: which platform drives the highest ROAS? Which campaigns assist conversions that other channels close? Where should you shift budget for maximum growth?
Step 5: Choose and Configure Your Attribution Model
Attribution models determine how credit for a sale gets distributed across the touchpoints in a customer's journey. The model you choose dramatically affects which channels look profitable and where you'll decide to invest your budget. Understanding the options helps you pick the right model for your business.
Last-click attribution gives 100% credit to the final touchpoint before purchase. If a customer clicks a Google ad and buys immediately, Google gets full credit. If they click a Facebook ad, browse your site, leave, then return three days later by typing your URL directly and purchase, the direct visit gets full credit while Facebook gets zero. Last-click is simple but ignores the entire customer journey leading up to the purchase.
First-click attribution does the opposite—it gives 100% credit to the first touchpoint. If Facebook introduced the customer to your brand but Google closed the sale, Facebook gets all the credit. This model values awareness and top-of-funnel marketing but undervalues the channels that drive final conversions.
Multi-touch attribution models distribute credit across multiple touchpoints based on various weighting rules. Linear attribution splits credit evenly—if a customer interacted with three ads before buying, each gets 33% credit. Time-decay attribution gives more credit to touchpoints closer to the purchase. Position-based (U-shaped) attribution gives more credit to the first and last touchpoints while distributing less to middle interactions.
Select the right model based on your typical customer journey length. If you sell low-cost impulse products where most customers buy immediately after first click, last-click attribution works fine—there's usually only one touchpoint anyway. But if you sell higher-priced products with longer consideration periods, multi-touch attribution reveals the full value of each channel in your marketing mix.
For most ecommerce attribution tracking, multi-touch attribution provides the most accurate picture. Customers rarely buy on first visit—they discover your brand through one channel, research through another, and convert through a third. Multi-touch models show which channels excel at awareness versus conversion, helping you optimize your full-funnel strategy rather than just optimizing the last click.
Configure attribution windows that match your sales cycle. Attribution windows define how long after an ad interaction you'll give credit for a conversion. A 7-day attribution window means if someone clicks your ad and purchases within 7 days, that channel gets credit. If they purchase on day 8, no credit is assigned.
Common attribution windows for ecommerce range from 7 to 28 days depending on product price point and consideration period. Lower-priced products typically use shorter windows (7-14 days) because purchase decisions happen quickly. Higher-priced products or B2B ecommerce might use 28-day or even 90-day windows to capture longer buying cycles.
Set up comparison views to see how different models value each channel. The best attribution tracking tools let you toggle between models instantly—view your campaigns with last-click attribution, then switch to multi-touch and see how the numbers change. This comparison reveals which channels are undervalued by last-click reporting and deserve more budget.
You might discover that Facebook drives tons of first touches that Google converts, or that email marketing assists purchases that Google Shopping closes. These insights are invisible with single-model reporting but become obvious when you compare attribution models side-by-side. Use these comparisons to make smarter budget allocation decisions based on each channel's true contribution to revenue.
Step 6: Validate Your Tracking and Troubleshoot Common Issues
Your attribution system is configured—now you need to verify it's actually working correctly. Tracking failures are common in WooCommerce, and catching them early prevents bad data from leading to bad decisions.
Run test purchases through each ad channel to verify attribution. Create small test campaigns on Meta, Google, and other platforms with minimal budgets. Click through each ad yourself (or have team members do it), complete a purchase, and check that the conversion appears correctly attributed in your dashboard. The order should show up with the right channel, campaign, and order value.
Check for duplicate conversions—a common problem when you're running both client-side pixels and server-side tracking. If the Meta Pixel fires a Purchase event and your server-side tracking also sends a Purchase event for the same order, Meta will count it twice, inflating your conversion numbers. Most attribution platforms include deduplication logic, but verify it's working by comparing your attributed conversions to actual WooCommerce order counts.
Look for missing transactions by comparing your attribution dashboard to WooCommerce's actual order data. If your dashboard shows 95 conversions but WooCommerce recorded 100 orders, five conversions aren't being tracked. This could indicate tracking failures on certain pages, issues with specific payment methods, or gaps in your attribution logic.
Troubleshoot common WooCommerce issues that break tracking. Caching plugins are frequent culprits—they serve cached pages that don't include updated tracking pixels or capture current session data. Configure your caching plugin to exclude checkout and thank you pages from caching, ensuring tracking pixels always fire correctly.
Checkout redirects cause attribution loss when customers use payment gateways like PayPal Standard that redirect off-site. The customer clicks "Pay with PayPal," leaves your site to complete payment, then returns. During this process, attribution data stored in browser cookies or session storage can be lost. Solve this by storing attribution data server-side in the WooCommerce session or by using payment gateways that keep customers on your site.
Payment gateway conflicts sometimes prevent thank you page tracking from firing. Some gateways redirect to custom confirmation pages or use AJAX checkout processes that don't trigger standard page load events. Test each payment method you offer to ensure conversion tracking works correctly regardless of how customers pay.
Set up alerts for tracking failures or data discrepancies. Configure your attribution platform to notify you if conversion volume drops significantly, if spend data stops syncing from ad platforms, or if order values don't match expected ranges. These alerts catch problems before they corrupt weeks of attribution data.
Monitor your tracking health regularly—don't just set it and forget it. Check weekly that conversion counts match between your attribution dashboard and WooCommerce orders. Review monthly that attributed revenue aligns with actual revenue. If you notice significant gaps, learn how to fix attribution discrepancies before they become larger data quality issues.
When you find tracking issues, fix them systematically. Document the problem, identify the root cause, implement a solution, then test thoroughly to confirm it's resolved. Keep a log of tracking issues and fixes so you can reference solutions if similar problems occur later.
Your Path to Clear Marketing ROI
You now have a complete WooCommerce attribution tracking system that captures every touchpoint from ad click to purchase. No more guessing which campaigns drive real revenue—you have the data to know with certainty.
Your quick-start checklist: audit existing tracking to identify gaps, implement server-side tracking for accurate data collection, configure UTM parameters with first-party data capture, connect all ad platforms for unified reporting, choose your attribution model based on your customer journey, and validate everything with test purchases. Each step builds on the previous one, creating a comprehensive system that reveals your true marketing performance.
With accurate attribution data flowing, you can finally see which campaigns drive real revenue—not just clicks or impressions—and make confident decisions about where to scale your ad spend. You'll know which Facebook campaigns deserve more budget, whether Google Shopping assists sales that other channels close, and if that expensive influencer partnership actually drives purchases or just vanity metrics.
Start with Step 1 today. Audit your current tracking setup, identify the gaps, and begin building the foundation for better attribution. Within a week you'll have clarity on your true marketing ROI, and within a month you'll be making data-driven budget decisions that actually improve your bottom line.
The difference between guessing and knowing is attribution tracking. The difference between good attribution and great attribution is having the right tools. Ready to elevate your marketing game with precision and confidence? Discover how Cometly's AI-driven recommendations can transform your ad strategy—Get your free demo today and start capturing every touchpoint to maximize your conversions.


