YouTube ads can drive serious results for your business, but only if you can actually measure what happens after someone watches or clicks your ad. Without proper conversion tracking in place, you are essentially flying blind. You might be spending budget on campaigns that look active but have no idea whether they are generating leads, purchases, or any meaningful action at all.
That gap between ad spend and actual results is where marketing budgets get wasted. And with YouTube's unique mix of skippable ads, bumper ads, and non-skippable formats, the tracking setup is slightly more nuanced than your standard search campaign.
This guide walks you through exactly how to set up YouTube ads conversion tracking from scratch. Whether you are running video campaigns for the first time or trying to fix a broken tracking setup, these steps will get you to a point where every conversion is captured, attributed correctly, and feeding useful data back into your campaigns.
You will learn how to configure conversion actions in Google Ads, install your tracking tag correctly, verify that data is flowing, and layer in multi-touch attribution so you understand the full customer journey, not just the last click. By the end, you will have a complete tracking foundation that tells you which YouTube ads are actually driving revenue and which ones need to be cut or optimized.
One important thing to understand before diving in: YouTube conversion tracking lives inside Google Ads, since YouTube campaigns are managed through that platform. So everything from conversion action creation to tag installation happens in the Google Ads ecosystem. Keep that in mind as you work through each step.
Let us get into it.
Step 1: Define Your Conversion Actions Before Touching Any Settings
Before you log into Google Ads or open Google Tag Manager, you need to spend time thinking clearly about what a conversion actually means for your business. This sounds obvious, but skipping this step is one of the most common reasons tracking setups end up producing misleading data.
Start by identifying the actions that directly signal business value. These are your macro conversions: purchases, form submissions, demo requests, phone calls, or any action that either generates revenue or moves a prospect meaningfully closer to becoming a customer. These are the actions you want to track as primary conversions in Google Ads, because they are what Google's Smart Bidding algorithms will optimize toward.
Then there are micro conversions: engagement signals like video views, scroll depth, time on site, or clicking to a pricing page. These are valuable for understanding behavior, but they should not be set as primary conversion actions. If you tell Google Ads to optimize for "viewed 50% of your video," you will get a lot of people who watched half a video. That is not the same as getting customers.
Here is a practical way to think about it. Ask yourself: if this action happened 100 times, would it reliably mean my business grew? If yes, it is a macro conversion. If it is more of an engagement signal that sometimes leads to growth, treat it as a secondary or informational metric.
Once you have identified your conversion types, map each one to a specific trigger. For a form fill, that trigger is typically a thank-you page URL or a form submission event. For a purchase, it is the order confirmation page. For a phone call, it is a call from your website. Being specific here saves you significant debugging time later.
Common pitfall: Tracking too many actions as primary conversions dilutes your campaign optimization data. If you have five primary conversions and some of them fire frequently while others rarely do, Google's bidding algorithm gets confused signals and your campaign performance suffers as a result.
Success indicator: Before moving to any technical setup, you have a written list of two to four primary conversion actions with clear definitions, expected trigger points, and the specific URL or event that will fire each one. This document becomes your reference throughout the rest of the setup process.
Step 2: Create Conversion Actions Inside Google Ads
Now that you know what you are tracking, it is time to create those conversion actions inside Google Ads. This is where you configure the technical parameters that determine how conversions get counted and attributed to your YouTube campaigns.
Navigate to your Google Ads account and go to Tools and Settings > Measurement > Conversions. Click the blue plus button to create a new conversion action. You will be asked to choose a conversion source. The options are Website, App, Phone calls, or Import. For most YouTube advertisers driving traffic to a website, you will choose Website.
Next, configure the key settings for each conversion action. Here is what each one means and why it matters:
Category: Choose the category that best describes the action, such as Purchase, Lead, Page View, or Sign-up. This helps Google's algorithms understand the intent behind the conversion.
Value: Decide whether this conversion has a fixed value or a dynamic value that varies per transaction. For ecommerce purchases, dynamic values are essential for accurate ROAS reporting. For lead generation, a fixed estimated value is typically fine.
Count: Choose between "One" and "Every." For purchases, use "Every" since each transaction is a separate conversion. For leads or sign-ups, use "One" to avoid counting multiple form submissions from the same person as separate conversions.
Click-through conversion window: This is how long after a click Google will credit a conversion to your ad. A 30-day window is common for YouTube campaigns, though you should align this with your typical sales cycle length.
View-through conversion window: This is where YouTube tracking gets unique. View-through attribution captures conversions that happen after someone watches your video ad without clicking. The default is three days, but many advertisers extend this to seven days for YouTube, since video advertising tends to influence decisions over a longer period than search ads. A user might watch your YouTube ad on Monday, search for your brand on Wednesday, and convert on Thursday. View-through attribution captures that influence.
Attribution model: At the conversion action level, you can set how credit is distributed across touchpoints. Data-driven attribution is recommended when you have sufficient conversion volume, as it uses machine learning to assign credit based on actual path analysis rather than a fixed rule.
Once you save each conversion action, Google Ads will generate a unique Conversion ID and Conversion Label. Write these down or keep the screen open, because you will need them in the next step.
Success indicator: Each conversion action you created shows a green status indicator and has a unique Conversion ID and Conversion Label ready for tag implementation.
Step 3: Install Your Google Ads Tag or Import via Google Tag Manager
You have your conversion actions configured. Now you need to get the tracking code onto your website so it can actually fire when users complete those actions. There are two paths here: direct tag implementation or Google Tag Manager (GTM). GTM is the recommended approach for most marketers because it reduces your dependency on developers, allows version control, and makes debugging significantly easier.
The GTM path: Log into your Google Tag Manager account and open the container for your website. Create a new tag and select "Google Ads Conversion Tracking" as the tag type. Paste in your Conversion ID, which is the same for all conversion actions in your account. Then add the specific Conversion Label for the individual conversion action you are setting up. Each action has its own label, so you will create a separate tag for each conversion.
Set the trigger to fire on the relevant page or event. For a thank-you page, use a Page View trigger with a URL condition matching your confirmation page URL. For a form submission event, use a Custom Event trigger that fires when your form submission event pushes to the data layer. Be precise here. The trigger must match exactly what happens when a real conversion occurs.
The direct implementation path: If you are not using GTM, you will need to place the global site tag (gtag.js) in the head section of every page on your website. Then place the event snippet on the specific conversion page only. This approach works but requires developer access every time you need to make a change.
For dynamic conversion values: If you are tracking ecommerce purchases with variable order values, you need to configure the conversion value variable to pull the actual transaction amount from your data layer rather than using a fixed number. This typically involves setting up a data layer variable in GTM that reads the value pushed by your ecommerce platform at checkout completion. Variables like transaction ID, value, and currency should all be passed through. This step is critical for accurate ROAS reporting in YouTube campaigns.
Common pitfall: One of the most frequent mistakes is firing the conversion tag on the checkout page instead of the order confirmation page. The checkout page loads every time someone attempts a purchase, including people who abandon before completing it. The confirmation page only loads after a successful transaction. Always fire purchase conversion tags on the confirmation page.
Success indicator: In GTM Preview mode, your conversion tag fires correctly when you navigate to the test conversion page or complete a test form submission. The tag shows as triggered in the GTM debug panel without any errors.
Step 4: Verify Tracking Is Working With Tag Assistant and Test Conversions
Installing a tag and having it actually work are two different things. This step is about confirming that your YouTube ads conversion tracking is functioning end-to-end before you start relying on the data for decisions.
Start with Google Tag Assistant. You can access it as a Chrome extension or through tagassistant.google.com. Connect it to your website and navigate through the pages where your conversion tags should fire. Tag Assistant will show you which tags are present, whether they are firing correctly, and flag any errors or warnings. Look specifically for your Google Ads conversion tags and confirm they appear on the correct pages without errors.
But tag verification is only the first layer. The more important test is completing an actual conversion and confirming it registers in Google Ads. Walk through your conversion flow as a real user would. Submit the form, complete a test purchase, or trigger whatever action you defined as a conversion. Then go to your Google Ads account, navigate to Tools and Settings > Measurement > Conversions, and check the status of your conversion action.
Within a few hours of your test conversion, you should see a conversion registered in the data. The Conversion Status column will update from "Unverified" to "Recording" once real conversion data starts flowing through. If you are testing immediately after setup, it may show "No recent conversions" temporarily, which is normal. Give it up to 24 hours before troubleshooting.
Also use the Google Ads Diagnostics tool to check for tag mismatches, duplicate tags, or firing errors. Duplicate tags are a common problem when websites go through redesigns or platform migrations. If your global site tag was added directly to the site code and someone later added it again through GTM, you could be double-counting conversions and inflating your performance data.
Common pitfall: Many marketers assume the tag is working simply because it installed without errors. A tag can load without errors and still fail to pass the correct conversion data. Always complete a real test conversion and confirm it appears in your reports.
Success indicator: At least one test conversion appears in your Google Ads conversion report and the conversion action status reads "Recording."
Step 5: Connect Your YouTube Campaigns to Your Conversion Data
Your tracking is installed and verified. Now you need to make sure your YouTube campaigns are actually using that conversion data to inform bidding and reporting. This step is where the tracking setup connects directly to campaign performance.
First, link your Google Ads account to your YouTube channel. Go to Tools and Settings > Linked accounts > YouTube and follow the linking process. This connection enables richer engagement metrics in your reports, such as earned views, likes, and channel subscriptions driven by your ads. It also allows you to build remarketing audiences from YouTube viewers and use them in future campaigns.
Next, review your campaign-level conversion goals. Inside each YouTube campaign's settings, you can control which conversion actions are set as primary (used for Smart Bidding optimization) versus secondary (informational only). This matters because if you have a mix of high-value and low-value conversions in your account, you want to make sure your YouTube campaigns are optimizing toward the actions that actually drive revenue.
For Smart Bidding strategies like Target CPA or Maximize Conversions, Google's algorithm uses your conversion data to decide who sees your YouTube ads and how much to bid for each impression. The quality of your conversion tracking directly determines how well this optimization works. Campaigns with accurate, well-configured conversion data consistently outperform campaigns with poor or missing signals. This is not a minor detail. It is the core mechanism by which your budget gets allocated.
Set up remarketing audiences based on YouTube engagement. You can create audiences of people who viewed your videos, visited your channel, or engaged with specific content. These audiences can then be used in follow-up campaigns across YouTube, Search, and Display. This is one of the most underutilized aspects of YouTube campaign setup.
One nuance to understand about view-through conversions in your YouTube reporting: these conversions will appear in your Conversions column alongside click-through conversions by default. Review them separately in your reports to understand the split. If view-through conversions make up a large portion of your total, be thoughtful about how you interpret campaign performance. View-through attribution is valuable for understanding YouTube's influence, but it can also lead to over-crediting if not contextualized properly.
Success indicator: Your YouTube campaigns show conversion data in the Conversions column and your Smart Bidding strategy has accumulated enough conversion data to exit the learning phase, which typically requires 30 to 50 conversions within a 30-day period.
Step 6: Layer in Multi-Touch Attribution to See the Full Customer Journey
Here is something important to understand about Google Ads conversion tracking: it only shows conversions attributed to Google and YouTube touchpoints. It does not show how your YouTube ads interact with your Meta campaigns, email sequences, organic search, or any other channel in the full customer journey.
This is a fundamental limitation of native platform tracking, not a flaw in your setup. Google Ads is designed to report on Google's contribution to your results. That is useful, but it is an incomplete picture if you are running campaigns across multiple platforms, which most serious advertisers are.
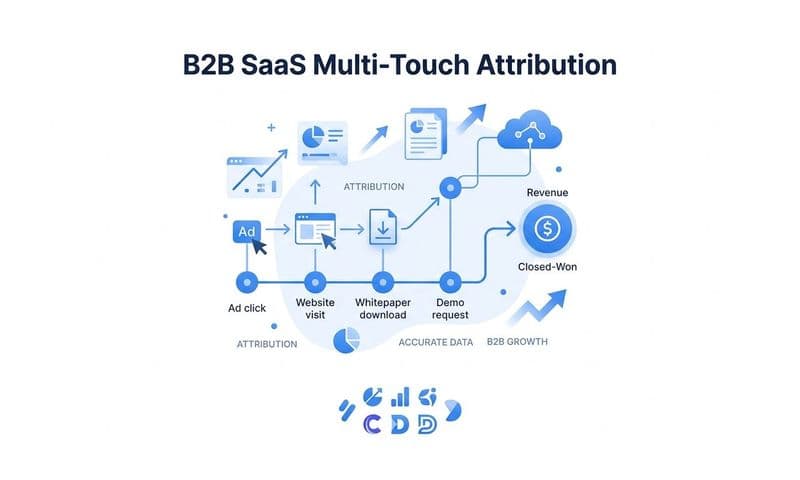
Think about a realistic customer journey. Someone sees your YouTube ad on a Tuesday. They do not click, but they remember your brand. On Thursday, they see a retargeting ad on Instagram and click through to your site. They browse but do not convert. On Saturday, they search for your brand name on Google, click an organic result, and sign up. Which channel gets credit? In Google Ads, YouTube gets a view-through conversion. In Meta Ads Manager, the Instagram ad gets a click-through conversion. In reality, all three touchpoints contributed.
This is where a dedicated attribution platform like Cometly becomes essential. Cometly captures every touchpoint from ad click to CRM event, giving you a complete view of how YouTube ads contribute to revenue alongside every other channel. Instead of seeing siloed data from each platform, you see the actual customer journey.
With multi-touch attribution, you can determine whether YouTube is functioning primarily as a top-of-funnel awareness driver that leads to conversions through other channels, or whether it is closing deals on its own. That distinction has major implications for how you allocate budget and how you evaluate YouTube's ROI.
Cometly's AI can identify which YouTube campaigns and ad creatives are genuinely driving revenue versus which ones are receiving credit for conversions that would have happened anyway through other channels. That level of insight is not available inside Google Ads alone.
Connecting Cometly also enables you to send enriched conversion data back to Google Ads via Conversion Sync. This improves the quality of signals feeding Google's bidding algorithms, which means your Smart Bidding strategies perform better because they are working with more complete and accurate data.
Success indicator: You can see YouTube ad touchpoints appearing in customer journey reports alongside other channels, with revenue attribution broken down by model, including first touch, last touch, and linear attribution, so you can understand YouTube's true contribution to your pipeline.
Your YouTube Ads Tracking Checklist and Next Steps
You now have a complete YouTube ads conversion tracking setup. Before you move on, run through this checklist to confirm everything is in place:
1. Conversion actions are defined with clear trigger points and separated into primary and secondary categories.
2. Conversion actions are created in Google Ads with the correct settings for value, count, click-through window, view-through window, and attribution model.
3. Tags are installed via GTM or direct implementation and verified using Tag Assistant without errors.
4. A test conversion has been completed and confirmed in Google Ads with a "Recording" status.
5. YouTube channel is linked to your Google Ads account and campaign-level conversion goals are configured correctly.
6. Multi-touch attribution is layered in through a platform like Cometly to capture cross-channel journey data.
Tracking is not a one-time setup. Plan to audit your conversion actions quarterly. Check that tags are still firing after any website updates or platform migrations. Review your view-through conversion windows periodically as your campaign mix and sales cycle evolve. After website redesigns, always re-verify that confirmation pages and form submission events are still triggering correctly.
Once tracking is live, the key metrics to monitor are cost per conversion, conversion rate by ad format (skippable in-stream versus bumper versus non-skippable), the view-through to click-through conversion split, and assisted conversions from YouTube in your attribution platform.
Ready to stop guessing which ads are actually driving revenue? Get your free demo and see how Cometly connects all your ad platforms in one place, giving you AI-powered insights on exactly which campaigns are earning their budget and which ones need to be cut.