If your Facebook Ads dashboard is showing zero conversions, mismatched numbers, or results that simply do not align with what your CRM or website analytics are reporting, you are not alone. Conversion tracking issues are one of the most common and costly problems marketers face when running paid campaigns on Meta.
When your data is wrong, your optimization signals are wrong, and your ad spend follows suit. The Facebook pixel, Conversions API, and event configuration all need to work in sync to give Meta's algorithm the data it needs to find the right buyers. When any part of that chain breaks down, you end up with underreported conversions, inflated cost-per-acquisition numbers, and campaigns that cannot scale because they are optimizing against incomplete information.
This guide walks you through a clear, sequential process to diagnose and fix Facebook Ads conversion tracking problems. Whether you are seeing no conversions at all, duplicate events, or a mismatch between Meta and your actual results, each step targets a specific layer of the tracking stack. By the end, you will have a verified, accurate tracking setup that feeds better data to Meta's algorithm and gives you the visibility you need to make confident budget decisions.
Before diving in, note that you will need access to Meta Events Manager, your website's tag manager or source code, and ideally a server-side tracking solution or attribution platform. Having these ready will make each step faster to execute.
Step 1: Audit Your Pixel Installation and Verify It Is Firing
The most common reason Facebook Ads are not tracking conversions properly is surprisingly simple: the pixel is either missing, misfiring, or duplicated. Before investigating anything else, you need to confirm the foundation is solid.
Start by installing the Meta Pixel Helper Chrome extension. Visit your website and look at the extension icon in your browser toolbar. A green checkmark means a pixel was detected and fired successfully. A red or yellow indicator means something is wrong. Click the extension to see the pixel ID and which events fired on the page.
Check your pixel ID: The pixel ID shown in the Pixel Helper must match the pixel ID in your Meta Events Manager. Navigate to Events Manager, select your pixel, and confirm the ID. A mismatch here means your site is firing a pixel that belongs to a different ad account or is simply not connected to your active campaigns.
Look for duplicate pixels: The Pixel Helper will show multiple entries if more than one pixel is installed. Duplicate installations cause inflated event counts, which confuse Meta's algorithm and make your conversion data unreliable. This often happens when a pixel is hardcoded in the site theme and also deployed through a tag manager simultaneously.
Verify the base pixel fires on every page: The base pixel code should load on every single page of your site, not just the conversion confirmation page. If it only fires on the thank-you page, Meta cannot build a proper audience or track the full funnel. Understanding Facebook pixel tracking best practices can help you avoid these common installation mistakes before they cost you conversion data.
Check your tag manager configuration: If you deployed the pixel through Google Tag Manager or a similar tool, open the tag manager and confirm the tag is published and active. A common pitfall is a pixel tag that was set up but left in a paused state or has a misconfigured trigger that only fires under specific conditions that are never met.
Once you have confirmed there is exactly one pixel, it matches your Events Manager ID, and it fires on every page, you have cleared the first and most fundamental layer of the tracking stack.
Success indicator: Meta Pixel Helper shows a single green checkmark with the correct pixel ID on your site, and the base pixel event appears consistently across multiple pages.
Step 2: Confirm Your Conversion Events Are Configured Correctly in Events Manager
A pixel that fires does not automatically mean your conversion events are set up correctly. The next layer to inspect is whether the specific events you are optimizing for are actually reaching Meta in a usable state.
Open Meta Events Manager and navigate to the Events tab for your pixel. You will see a list of events that Meta has received, along with their status. Pay close attention to events marked as Unverified or No Recent Activity. These are signals that something in the configuration chain is broken or that the event has not fired recently enough for Meta to confirm it is working.
Match your campaign optimization event to an active event: Go into your active campaigns and check which conversion event each ad set is optimizing for. Now cross-reference that event name against what appears as active in Events Manager. If your campaign is optimizing for "Purchase" but Events Manager only shows a custom event called "purchase_complete," Meta is optimizing against something it may not be receiving consistently.
Prefer standard events over custom events: Meta's algorithm is trained to recognize and optimize for standard events like Purchase, Lead, CompleteRegistration, AddToCart, and InitiateCheckout. Custom events can work, but they require more conversion volume before Meta can optimize effectively. If you are using a custom event where a standard event would apply, switch to the standard event name.
Verify event parameters for purchase events: If you are running e-commerce campaigns, your Purchase event should be passing the value and currency parameters. Without these, Meta cannot optimize for purchase value, and your reported revenue data will be incomplete. Reviewing Facebook conversion tracking fundamentals can help you confirm every required parameter is being passed correctly for each event type.
Watch for inconsistently firing events: Some conversion events are set up to fire on a button click rather than a page load, which can cause them to fire only some of the time if the click tracking is misconfigured. If your Lead event fires when someone submits a form but not when they use a keyboard shortcut to submit, you are missing conversions.
A common pitfall here is a campaign that has been running for weeks optimizing for an event that Events Manager has never actually received. Meta will spend your budget trying to find people who will complete an action it has no data on, which is essentially flying blind.
Success indicator: Your target conversion event shows as Active with recent activity in Events Manager, the event name matches what your campaigns are optimizing for, and purchase events include value and currency parameters.
Step 3: Address iOS and Browser Tracking Gaps With Conversions API
Even with a perfectly installed pixel and correctly configured events, you are still missing conversions. This is not a setup error. It is a structural limitation of browser-based tracking that affects every advertiser running Facebook Ads today.
Apple's App Tracking Transparency framework, ad blockers, and increasingly strict browser privacy settings all interfere with the pixel's ability to fire and send data back to Meta. When a user has opted out of tracking on iOS or is running an ad blocker, the pixel is either blocked entirely or its data is degraded. The result is underreported conversions and weaker optimization signals.
The solution is the Meta Conversions API, commonly called CAPI. Instead of relying on the user's browser to send conversion data, CAPI sends that data directly from your server to Meta. Browser restrictions cannot block a server-to-server connection, which means you recover conversions that would otherwise disappear. Understanding why server-side tracking is more accurate than browser-based methods helps clarify why this step is non-negotiable for modern advertisers.
Implement CAPI alongside your pixel: Meta recommends running both the pixel and CAPI simultaneously rather than replacing one with the other. The pixel captures browser-side signals and user behavior data, while CAPI captures server-side conversion confirmations. Together, they give Meta a more complete picture.
Set up event deduplication: When both the pixel and CAPI fire for the same conversion event, you risk counting that conversion twice. Meta uses an event_id parameter to deduplicate events. You need to pass the same event_id from both the pixel and the CAPI payload for the same event. Meta will then count it as a single conversion rather than two. Skipping this step is one of the most common pitfalls with CAPI implementations and leads to inflated conversion counts that make your cost-per-acquisition look artificially low.
Verify CAPI events in Events Manager: After implementation, go to Events Manager and look at the event source breakdown. You should see events attributed to both Browser and Server sources. If you only see Browser, CAPI is not sending data successfully.
Check your Event Match Quality score: Meta assigns an Event Match Quality (EMQ) score to your conversion events based on how well the customer data you send matches Meta's user profiles. Higher EMQ scores mean Meta can attribute conversions to the right users more accurately, which improves ad delivery and optimization. CAPI allows you to send richer matching data like hashed email addresses and phone numbers, which raises your EMQ score.
Managing CAPI implementation manually requires developer resources and ongoing maintenance. Platforms like Cometly handle the server-side tracking integration and deduplication automatically, ensuring your CAPI setup stays accurate without requiring custom engineering work every time something changes.
Success indicator: Events Manager shows both Browser and Server event sources for your conversion events, deduplication is confirmed via event_id, and your Event Match Quality score is in a healthy range.
Step 4: Check Attribution Window Settings and Campaign Alignment
Once your tracking infrastructure is solid, the next source of confusion is attribution windows. This is where many marketers see numbers that do not add up and assume something is broken, when in reality the data is just being measured differently across platforms.
Meta's default attribution window includes both click-through and view-through conversions. A view-through conversion is counted when someone sees your ad but does not click it, then converts later through another channel. Depending on your campaign settings, Meta may be crediting itself for conversions that originated from a Google search, an email, or direct traffic.
Review your campaign attribution settings: Inside each campaign, you can set the attribution window for click-through (1-day or 7-day) and view-through (1-day or off). Navigate to your ad set settings and look for the Attribution Setting field. The window you choose directly affects how many conversions Meta reports for that campaign. A deeper look at Facebook Ads attribution explains how each window model affects the conversion numbers you see in your dashboard.
Align the window with your actual sales cycle: If you sell a product that people typically buy within a day of seeing an ad, a 1-day click window may be sufficient and will give you a more conservative, accurate view. If you sell a higher-consideration product with a longer decision cycle, a 7-day click window is more appropriate. The key is that the window should reflect how your customers actually behave, not just whatever produces the highest-looking conversion number.
Understand why Meta and Google Analytics numbers will never perfectly match: A common source of frustration is comparing Meta's reported conversions against Google Analytics data and finding significant discrepancies. This is expected. Meta uses an impression-based, multi-touch model that includes view-through attribution. Google Analytics traditionally uses last-click attribution. These are fundamentally different measurement approaches, so the numbers will differ. Neither is wrong; they are measuring different things. Reviewing Facebook Ads reporting discrepancies can help you understand exactly why these gaps appear and how to interpret them correctly.
Isolate click-based attribution for a cleaner comparison: If you want a more apples-to-apples comparison with your other analytics tools, set your Meta attribution window to 7-day click only and turn off view-through attribution. This will show you only conversions where someone clicked your ad within the last seven days before converting.
Success indicator: You have a consistent attribution window applied across your reporting, you understand what each number represents, and you are no longer comparing Meta's view-through-inclusive numbers directly against last-click data from other platforms.
Step 5: Use Test Events and Debugging Tools to Validate the Full Tracking Flow
At this point you have audited the pixel, verified events, implemented CAPI, and aligned your attribution settings. Now it is time to simulate an actual conversion and confirm the entire tracking flow works end to end.
The Test Events tool inside Meta Events Manager is your best friend here. Navigate to Events Manager, select your pixel, and click on the Test Events tab. You will see a field where you can enter your website URL and open a test browser session. Any events that fire during your session will appear in real time in the Test Events panel.
Walk through the complete user journey: Do not just load the homepage. Simulate the exact path a converting user would take. Click through to a product page, add to cart, proceed to checkout, and complete the conversion action. Each step should trigger the corresponding event in the Test Events panel. If an event is missing or fires at the wrong step, you have found a gap. Following best practices for tracking conversions accurately ensures your test results reflect what real users will experience in production.
Use browser developer tools for deeper inspection: Open your browser's developer tools and navigate to the Network tab. Filter requests by "facebook" or "fbevents" to see the pixel requests being sent. Click on each request to inspect the payload and confirm the correct event name, parameters, and pixel ID are being sent. This is particularly useful for catching events that appear to fire in the Pixel Helper but are sending incorrect data.
Check for JavaScript errors: While in developer tools, look at the Console tab for JavaScript errors on your conversion page. A JavaScript error that occurs before the pixel fires will prevent the event from sending. Even a single uncaught error can silently break your tracking.
Verify thank-you page and confirmation screen behavior: If your conversion tracking relies on a thank-you page loading after a form submission or purchase, confirm that page actually loads reliably. Common issues include redirects that happen too quickly for the pixel to fire, login walls that intercept the user before reaching the confirmation page, and single-page application routing that changes the URL without triggering a standard page load event.
Check form submission triggers specifically: A very common pitfall is a pixel that fires on page load but the actual conversion event, such as a form submission or button click, is not wired to the correct trigger in your tag manager. The Pixel Helper may show the pixel is present on the page, but if the Purchase or Lead event only fires on a trigger that is misconfigured, those conversions will never reach Meta.
Success indicator: The Test Events tool shows your conversion event received with all expected parameters, and the full user journey from landing page to conversion confirmation triggers the correct events in the correct sequence.
Step 6: Implement Multi-Touch Attribution to See the Full Conversion Picture
Here is something worth acknowledging directly: even after you fix every technical issue with your Facebook pixel and Conversions API setup, you are still only seeing Meta's version of your conversion data. And Meta's version has a built-in bias toward crediting Meta.
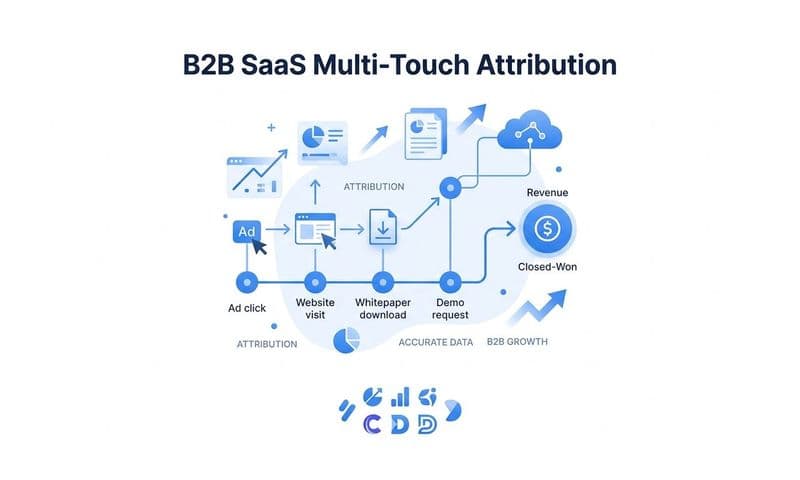
Customers rarely convert from a single touchpoint. They might first discover your brand through a Facebook ad, then search for you on Google a few days later, then click an email link before finally converting. Meta's pixel will credit that conversion to Facebook. Google Ads will credit it to the search click. Your email platform will credit it to the email. All three are partially right, and none of them gives you the complete picture.
Why single-platform attribution misleads budget decisions: When you rely solely on Meta's reported numbers to evaluate campaign performance, you are making budget allocation decisions based on an incomplete and self-serving view of your marketing. Channels that play a supporting role in the customer journey get cut because they do not show direct conversions, even though they are essential to the path that leads to conversion. Exploring Facebook touchpoint tracking reveals how each interaction in the customer journey contributes to the final conversion in ways that single-platform reporting cannot capture.
Multi-touch attribution distributes credit across all touchpoints: Instead of giving 100% of the credit to the last click or the platform that reports the loudest, multi-touch attribution models assign fractional credit to each interaction in the customer journey. This gives you a more accurate view of which channels and campaigns are actually contributing to revenue.
Connecting all your data sources: To do multi-touch attribution properly, you need a platform that connects your ad platforms, CRM data, and website events in one place. This is where Cometly comes in. Cometly tracks the full customer journey from the first ad click to the final conversion, connecting Facebook, Google, email, and organic touchpoints to show you which sources actually drive revenue, not just which ones claim credit.
AI-powered insights for smarter scaling: Beyond attribution, Cometly's AI analyzes your cross-channel performance data and surfaces recommendations for where to scale spend and where to cut. Instead of guessing which Facebook campaigns are working based on Meta's self-reported numbers, you get a unified view that accounts for every touchpoint in the customer journey.
Feeding better data back to Meta: Cometly's Conversion Sync feature sends enriched, conversion-ready events back to Meta, improving the quality of data Meta's algorithm uses for optimization. This creates a feedback loop where better attribution data leads to better ad targeting, which leads to better results.
Success indicator: You can see conversion paths that include Facebook touchpoints alongside other channels, understand each channel's true contribution to revenue, and make budget decisions based on the full picture rather than platform-reported numbers.
Your Conversion Tracking Fix Checklist
You have worked through six layers of the tracking stack. Before you call it done, run through this checklist to confirm everything is in place.
Pixel installation verified: One pixel installed with no duplicates, correct pixel ID matching Events Manager, and base pixel firing on every page of your site.
Conversion events active and verified: Target conversion events show as Active in Events Manager, event names match what your campaigns are optimizing for, and purchase events include value and currency parameters.
Conversions API implemented with deduplication: CAPI is sending server-side events to Meta, both Browser and Server sources appear in Events Manager, and event_id deduplication is configured to prevent double-counting.
Attribution windows aligned: Campaign attribution settings reflect your actual sales cycle, you understand the difference between click-through and view-through attribution, and you are not directly comparing Meta's numbers to last-click data from other platforms.
Test Events tool confirms full flow: You have simulated the complete user journey using the Test Events tool, all conversion events fire at the correct steps with the correct parameters, and no JavaScript errors are blocking the pixel on conversion pages.
Multi-touch attribution in place: You have a cross-channel view of conversion paths that includes Facebook alongside other channels, giving you an accurate picture of what is actually driving revenue.
Accurate tracking is not just about fixing a dashboard number. It is about feeding Meta's algorithm better signals so your campaigns can optimize effectively and scale with confidence. Every conversion you recover through proper pixel setup, CAPI implementation, and accurate attribution is a data point that makes your targeting smarter.
If you want to tie all of this together in one place, including server-side tracking, conversion sync back to Meta, and multi-touch attribution across every channel, Get your free demo of Cometly today and see exactly which ads and channels are driving your results.