Your UTM parameters look fine in the URL. But when you open your analytics platform, the data tells a different story. Campaigns show up as direct traffic, sources are fragmented across a dozen variations of the same channel, and conversion records in your CRM have no campaign data attached at all.
For B2B SaaS teams running paid campaigns across multiple channels, this is not a minor reporting inconvenience. Broken UTM tracking directly distorts your attribution data, skews pipeline reporting, and pushes budget decisions in the wrong direction. When you cannot trust your source data, you cannot trust your attribution model, and when you cannot trust your attribution model, scaling your marketing spend becomes a guessing game.
The frustrating part is that UTM parameters not tracking correctly is almost never caused by one single problem. It is usually a combination of issues layered on top of each other: a syntax error here, a redirect stripping query strings there, an auto-tagging conflict in your ad platform, and a naming convention that has drifted across six different team members over twelve months.
This guide walks you through each failure point in a logical sequence. You will start with the most fundamental layer, the structure of your UTM URLs themselves, and work outward through redirects, ad platform conflicts, conversion capture, cross-domain tracking gaps, and naming convention governance. The final step connects all of that clean, verified UTM data to actual pipeline and revenue outcomes so your attribution work produces decisions, not just reports.
Each step includes what to check, how to fix it, and how to confirm the fix worked. Work through them in order, because issues at earlier layers often mask problems at later ones. By the time you reach the end, you will have a systematic diagnostic process you can repeat whenever something looks off in your campaign data.
Step 1: Audit Your UTM Parameter Structure for Syntax Errors
Before you investigate redirects, ad platforms, or analytics configuration, start with the most basic layer: the URLs themselves. A surprising number of UTM tracking problems trace back to simple syntax errors that corrupt the data before it ever reaches your analytics platform.
The five standard UTM parameters are utm_source (the traffic origin, such as google or linkedin), utm_medium (the marketing channel, such as cpc or email), utm_campaign (the specific campaign name), utm_term (the keyword for paid search), and utm_content (used to differentiate ads or links within the same campaign). Each parameter follows the same format: parameter name, an equals sign, and the value. If you are new to how these parameters work, understanding UTM tracking and its marketing benefits is a useful foundation before diving into diagnostics.
Here is where things break down in practice.
Spaces in parameter values: If someone writes utm_campaign=Q2 Product Launch instead of utm_campaign=q2-product-launch, the browser encodes the spaces as %20. This can cause inconsistent data in analytics reports, where some sessions show the clean value and others show the encoded version. Always use hyphens or underscores as word separators.
Missing question mark before the first parameter: The question mark separates the base URL from the query string. A URL like www.example.com/landingutm_source=google is invalid. It should be www.example.com/landing?utm_source=google. Without the question mark, no parameters are passed.
Incorrect ampersand usage: Each additional parameter after the first must be separated by an ampersand. Using a question mark instead of an ampersand for the second parameter, or accidentally doubling up ampersands, breaks the parameter chain.
Duplicate parameters: If a URL contains utm_source=google&utm_source=linkedin, most analytics platforms will use one and discard the other, leading to inconsistent attribution.
Case sensitivity: Many analytics platforms treat utm_source=Google and utm_source=google as separate sources. Over time, this creates fragmented channel data where the same traffic source appears under multiple entries in your reports. Enforce lowercase across all UTM values without exception.
To validate your URLs before deploying campaigns, use Google's Campaign URL Builder or a similar tool. Pull a sample of your currently running tagged URLs from your ad platform and run them through a URL decoder to check for encoding problems that are not visible at first glance. Pairing this with a dedicated UTM tracking tool can automate much of this validation work at scale.
Success indicator: Every UTM URL in your active campaign list follows consistent naming conventions, uses lowercase values, passes syntax validation, and contains no encoding errors when decoded.
Step 2: Check for URL Redirects That Strip UTM Parameters
Your URL syntax can be perfect and your UTM parameters can still disappear before they reach your analytics platform. Redirects are one of the most common and least obvious causes of UTM data loss.
When a user clicks a tagged URL and that URL redirects to a final destination, the redirect chain needs to preserve the query string. Many 301 and 302 redirects do not do this by default, especially when they are configured at the server level, inside a CMS, or through a plugin that rewrites URLs without accounting for query parameters.
Link shorteners are a particularly frequent culprit. Many popular shortening services do not pass UTM parameters through to the destination URL. If your team is using shortened links in email campaigns, social posts, or paid ads, there is a real chance the UTM data is being dropped at that step.
CMS redirect rules are another common issue. If your marketing site uses WordPress, HubSpot CMS, or a similar platform, redirect plugins or built-in redirect managers may rewrite URLs in ways that strip query strings. A redirect from /old-page to /new-page might work perfectly for the page content but silently discard everything after the question mark.
To test this, take one of your tagged campaign URLs and run it through a redirect chain checker. Tools like httpstatus.io or Redirect Detective trace each hop in the redirect sequence and show you the full URL at every step. Look at the final destination URL and confirm that all five UTM parameters are still present and intact.
You can also test this directly in a browser. Paste your tagged URL into the address bar, let it redirect, and then look at what the final URL shows. If the UTM parameters have disappeared, you have found the problem. These types of issues are part of a broader set of conversion tracking gaps that silently undermine attribution accuracy across your funnel.
To fix redirect-related UTM loss, configure your web server or CMS to preserve query strings through all redirects. In most server configurations, this means explicitly passing the query string as part of the redirect rule. In CMS environments, check your redirect plugin settings for an option to preserve query parameters.
If you are using a link shortener, switch to one that explicitly supports UTM parameter passthrough, or stop using shorteners for tracked campaign links and use the full URL instead.
Success indicator: When you trace a tagged URL through its full redirect chain, the final landing page URL in the browser still shows all original UTM parameters intact with no values missing or altered.
Step 3: Resolve Conflicts Between Auto-Tagging and Manual UTM Parameters
This is one of the most misunderstood sources of UTM tracking problems, and it affects almost every team running Google Ads alongside a manual UTM strategy.
Google Ads auto-tagging works by appending a gclid parameter to your destination URLs automatically. This gclid value is a unique identifier that Google Analytics uses to pull in campaign data directly from your Google Ads account. When auto-tagging is enabled and you also have manual UTM parameters on your URLs, the two systems can conflict.
In many configurations, the gclid takes precedence over your manual UTM values. This means the campaign, source, and medium data you carefully tagged in your URLs may be overwritten by whatever Google Ads passes through the gclid. The result is that your analytics platform shows google/cpc as the source and medium for every Google Ads click, but your manual campaign names, content values, and other custom parameters are ignored or inconsistently captured.
To check whether this is happening, go to your Google Ads account settings and look for the auto-tagging toggle. Then cross-reference your analytics platform to see what source and medium data is actually being recorded for your Google Ads traffic. If you see google/cpc uniformly across all Google Ads sessions but your manual campaign names are missing, auto-tagging is likely overriding your manual parameters.
The same type of conflict occurs with Meta's fbclid parameter and LinkedIn's li_fat_id. These click identifiers are appended automatically by the ad platforms and can interfere with how certain analytics configurations interpret UTM data. Understanding how to improve ad tracking accuracy across platforms helps you navigate these conflicts systematically.
The fix requires a clear decision: choose either auto-tagging or manual UTMs as your primary tracking method, and configure your analytics platform to handle the chosen approach consistently. Do not run both without understanding exactly how your analytics tool resolves the conflict.
For B2B SaaS teams using multi-touch attribution across multiple channels, manual UTMs typically offer more granular control. They allow you to define exactly how campaigns are categorized across every channel, not just Google Ads, which is important when you are trying to build a unified attribution model across paid search, paid social, email, and other sources.
If you choose manual UTMs as your primary method, disable auto-tagging in Google Ads or configure your analytics platform to prioritize manual UTM values when both are present. Document this decision so future team members do not accidentally re-enable auto-tagging and reintroduce the conflict.
Success indicator: Your analytics platform shows consistent source and medium data that matches exactly what you manually tagged in your campaigns, with no unexplained overrides from gclid or other auto-tagging parameters.
Step 4: Verify That Your Analytics Platform Is Capturing UTM Data on Conversions
UTM parameters appearing in session data does not mean they are being passed to your conversion events. This distinction matters enormously for B2B SaaS attribution. A session can be correctly attributed to a campaign while the conversion event tied to that session carries no UTM data at all.
The result is a reporting gap where your traffic looks correctly attributed but your leads, form fills, and demo requests in your CRM have no campaign information attached. You end up knowing which campaigns drive sessions but not which campaigns drive pipeline, which is the number that actually matters. Reviewing best practices for tracking conversions accurately can help you close this gap before it distorts your pipeline reporting.
To test this, create a tagged URL with known UTM values and use it to submit a test form on your site. Then check the resulting record in your CRM and your analytics platform's conversion event data. Do the UTM values appear on the lead record? If not, you have a conversion capture problem.
Two common technical scenarios cause this failure.
Single-page applications (SPAs): In a React, Vue, or Angular application, client-side navigation does not trigger new page loads. UTM parameters captured on the initial page load may not persist through subsequent virtual page views unless they are explicitly stored. The fix is to implement UTM parameter persistence using sessionStorage or localStorage. When a user first lands on the page, capture the UTM values from the URL and write them to storage. Then retrieve them when a conversion event fires, regardless of how many virtual page transitions have occurred in between.
Forms loading in iframes: If your form is embedded via an iframe, it does not automatically inherit the UTM parameters from the parent page. The iframe is treated as a separate document with its own context. The fix is to pass UTM parameters as hidden fields in the form. Use JavaScript on the parent page to read the UTM values from the URL or from sessionStorage, then inject them into the hidden fields before the form is submitted.
For B2B SaaS teams, verifying that UTM data flows into your CRM on every lead record is not optional. It is the connection point between your marketing data and your pipeline data. Without it, you cannot close the loop between ad spend and revenue.
Success indicator: Every test conversion in your CRM and analytics platform shows the correct utm_source, utm_medium, and utm_campaign values, matching the tagged URL used to trigger the conversion.
Step 5: Fix UTM Data Loss Caused by Cross-Domain Tracking Gaps
Even when UTM parameters are captured correctly on your main marketing site, they often disappear the moment a user moves to a different domain or subdomain. For B2B SaaS companies, this is an extremely common scenario that goes unnoticed until someone looks closely at where attribution breaks down in the funnel.
Think about a typical B2B SaaS user journey. A prospect clicks a LinkedIn ad, lands on your marketing site at www.yourcompany.com, reads a few pages, and then clicks a button to book a demo. That demo booking tool lives on a third-party scheduling platform or on app.yourcompany.com. From the analytics platform's perspective, the user has left one domain and started a new session on another. The UTM attribution from the original ad click is gone, and the conversion records as direct traffic.
To diagnose this, look in your analytics platform for sessions on your subdomain or secondary domain that show as direct traffic, especially when they occur immediately after a paid campaign session on your main domain. A pattern of paid traffic on the marketing site followed by direct traffic on the conversion domain is a strong signal of cross-domain attribution loss. A proper cross-channel tracking implementation addresses these handoff points before they silently erase attribution data.
For GA4, the fix is to configure cross-domain measurement by adding all relevant domains to your measurement configuration. This tells GA4 to treat the domains as part of a single continuous session, preserving UTM attribution across the transition.
For CRM handoffs and third-party tools where you cannot control the analytics configuration, a different approach is needed. Use URL parameters or server-side session data to carry UTM values through to your CRM when a user completes an action on a different domain. This often means building a custom integration that reads UTM values from the referring session and writes them to the lead record at the point of conversion.
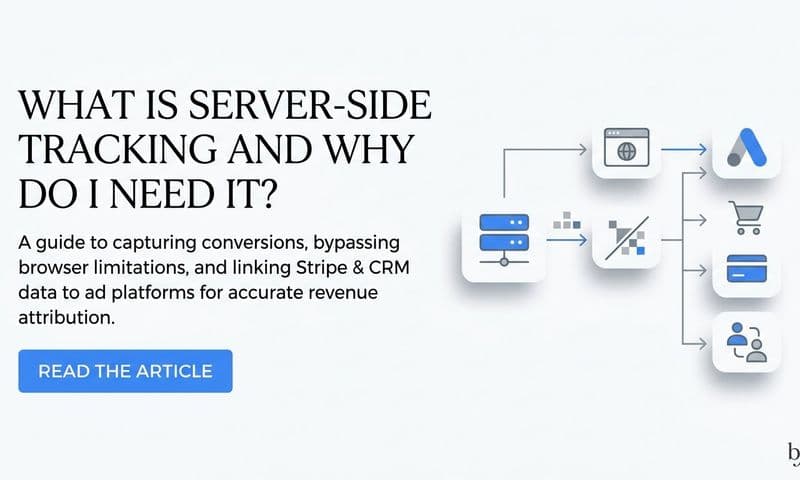
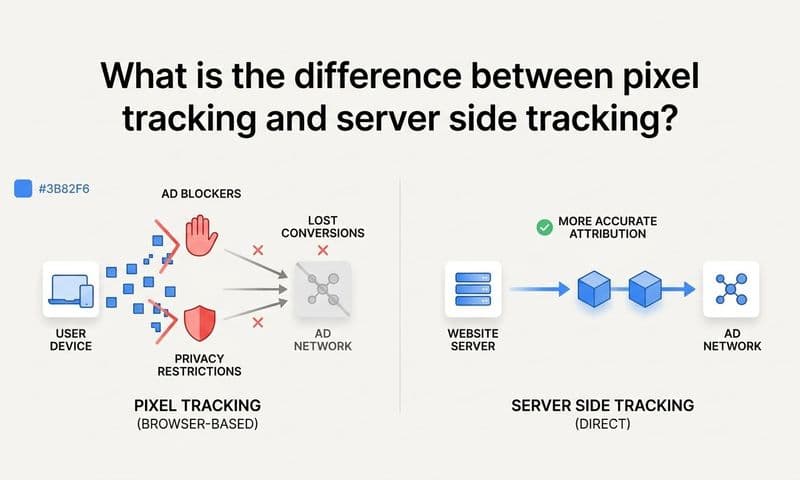
Server-side tracking offers a more reliable long-term solution for this problem. By capturing UTM data at the server level before it can be dropped by client-side limitations, you reduce dependency on browser behavior, JavaScript execution, and cookie persistence across domains. The advantages of server-side tracking accuracy are particularly significant for multi-domain B2B funnels where client-side methods consistently fall short.
Success indicator: User journeys that span multiple domains or subdomains appear as single continuous sessions in your analytics platform, with UTM attribution preserved from the original ad click through to the final conversion event.
Step 6: Standardize UTM Naming Conventions Across Your Team
Technical fixes solve technical problems. But one of the most persistent sources of broken UTM tracking is not technical at all. It is a process problem: different team members building URLs differently, using different values for the same channel, and gradually creating a fragmented data set that makes reliable reporting impossible.
Consider what happens when your analytics platform receives utm_medium=paid-social from one campaign, utm_medium=paidsocial from another, and utm_medium=Paid Social from a third. These are three separate medium values in your reports, each representing a fraction of your actual paid social traffic. No single view shows you the true performance of that channel. Multiply this across six channels, four team members, and twelve months of campaigns, and you have a reporting problem that no technical fix can solve.
To audit your current state, export all utm_source and utm_medium values from your analytics platform and look for variations of the same channel. The volume of duplicates you find will tell you how significant the governance problem is. A marketing campaign tracking spreadsheet structured around your approved taxonomy can serve as a practical starting point for enforcing consistency across the team.
The solution is a UTM taxonomy document: a shared reference that defines the approved values for each parameter, enforces lowercase, specifies hyphens as word separators, and maps naming conventions to your attribution model structure. Every channel, every campaign type, and every content category should have a single approved value that everyone on the team uses consistently.
Governance is where most teams fall short. A document that lives in a folder nobody checks does not enforce itself. The practical solution is a shared UTM builder spreadsheet or a dedicated UTM management tool that generates compliant URLs automatically. When team members cannot build a URL without going through the builder, naming convention drift becomes much harder to introduce.
Clean, consistent UTM data is the foundation for reliable multi-touch attribution reporting. Every improvement you make to your attribution model depends on the quality of the input data. If your channel taxonomy is fragmented, your attribution reports will reflect that fragmentation no matter how sophisticated your model is.
Success indicator: Your analytics platform shows clean, deduplicated source and medium values that map directly to your defined channel taxonomy, with no variations or duplicate entries for the same channel.
Step 7: Connect Verified UTM Data to Revenue Attribution With Cometly
Fixing UTM syntax errors, redirect issues, auto-tagging conflicts, and naming conventions gets your tracking data into a reliable state. But clean data sitting in an analytics platform is not the end goal. The real goal is connecting that verified UTM data to pipeline and revenue so your team can make confident decisions about where to allocate budget.
This is where a dedicated attribution platform changes what is possible.
Cometly is built specifically for B2B SaaS teams who need to trace every customer journey from the first ad click through to closed revenue. It connects your ad platforms, CRM, and website into a single tracking layer, capturing every touchpoint with UTM data intact. Rather than relying on fragile client-side tracking alone, Cometly uses server-side tracking to capture conversion and session data at the server level, which directly addresses the cross-domain and browser restriction issues covered in earlier steps.
Where standard analytics platforms show you session data and conversion events, Cometly connects those events to actual revenue outcomes. By integrating with Stripe and your CRM, it maps UTM-tagged campaign touches to the deals they influenced and the revenue they generated. You can see which utm_source, utm_medium, and utm_campaign values are driving pipeline, not just traffic, and which ones are actually closing deals.
The AI layer within Cometly surfaces which UTM-tagged campaigns and channels are performing across every ad platform, giving growth teams clear recommendations on where to scale and where to pull back. Instead of manually cross-referencing your analytics data with your CRM pipeline reports, you get a single view that connects ad spend to revenue with the UTM data you have now fixed serving as the verified foundation.
Cometly also sends enriched conversion data back to Meta and Google via their Conversion APIs. This means the clean, verified UTM and conversion data you have worked to establish does not just improve your internal reporting. It feeds better signals back into the ad platforms themselves, improving targeting, optimization, and return on ad spend over time.
Success indicator: Your team can trace any closed deal back to the original UTM-tagged campaign touch that started the journey, with full confidence in the data and without needing to reconcile reports across multiple disconnected platforms.
Putting It All Together
UTM parameters not tracking correctly is almost always a solvable problem. The challenge is that the root cause is rarely obvious because multiple issues tend to stack on top of each other, and fixing one layer can reveal another beneath it.
Here is the diagnostic checklist to work through in order. First, validate your UTM URL syntax for spaces, encoding errors, case sensitivity issues, and missing delimiters. Second, trace your redirect chains and confirm that query strings survive every hop to the final destination. Third, audit your ad platform settings for auto-tagging conflicts and decide on a single consistent tracking approach. Fourth, test your conversion capture by submitting forms with tagged URLs and verifying that UTM values appear on CRM records. Fifth, check for cross-domain attribution loss at subdomain and third-party tool handoff points. Sixth, audit your existing UTM values for naming convention fragmentation and build a governance process that prevents drift going forward.
Each of these steps targets a specific failure point. Work through them systematically and you will find the source of your tracking problems.
Clean UTM data is not the final destination. It is the input that makes accurate attribution, better budget decisions, and confident scaling possible. When your UTM data is reliable, your attribution model reflects reality. When your attribution model reflects reality, you can allocate budget with confidence.
If you are ready to connect your verified UTM data to actual pipeline and revenue outcomes, Get your free demo and see how Cometly turns clean attribution data into actionable insights for your growth team.