Early-stage SaaS companies face a unique challenge: limited budget, high pressure to grow, and almost no visibility into which ads are actually working. You might be running campaigns on Meta, Google, or LinkedIn right now, but without proper ad tracking setup, you are essentially flying blind.
You do not know which channel brought in your last five signups. You cannot tell if your cost per acquisition is improving or spiraling. And when it comes time to scale, you have no data to guide the decision.
This guide walks you through a complete ad tracking setup designed specifically for early-stage SaaS companies. You do not need a massive data team or a complex tech stack. What you do need is the right foundation built in the right order.
By the end of this guide, you will have a working tracking infrastructure that captures every touchpoint from the first ad click to a converted customer, connects your ad platforms to your CRM and revenue data, and gives you a clear picture of what is actually driving growth.
Each step builds on the last, so follow them in order. Whether you are a founder managing your own paid campaigns or a marketing hire setting up your first attribution system, this is a practical, actionable path forward.
One important note before you start: the biggest risk for early-stage SaaS is not spending too much on ads. It is spending without knowing what works. Every dollar you put into paid acquisition without tracking is a dollar you cannot learn from. That changes today.
Step 1: Define Your Conversion Events Before Touching Any Tracking Tool
Before you install a single pixel or configure a single integration, you need to know what you are actually trying to measure. This step sounds obvious, but it is where most early-stage SaaS teams get it wrong. They set up tracking tools first and figure out what to track later. That backwards approach creates messy data that is hard to trust and even harder to act on.
Start by identifying the key actions in your funnel that represent real business value. For most SaaS companies, these fall into a handful of categories: free trial signups, demo requests, paid conversions, and product activation events. These are the moments that matter. A blog visit is interesting. A demo request is meaningful.
Next, map out your customer journey stages from first touch to paying customer. Think about the path a typical prospect takes: they see an ad, land on your site, read a few pages, and eventually take an action. What is that action? What happens after it? Understanding the full journey before you configure anything ensures your tracking reflects how people actually buy, not just how you wish they would.
Now prioritize your conversion events by business impact, not volume. A demo request may be worth ten times more than a newsletter signup, even if the newsletter gets more volume. Start with three to five high-signal conversion events. More events can be added later once your foundation is solid. Tracking too many things too early creates noise, and noise makes it harder to see what is actually working.
Document everything in a simple spreadsheet. For each conversion event, record the event name, the trigger condition (what action fires it), which platform it fires on, and the value you have assigned to it. This event taxonomy becomes your source of truth. Anyone on your team should be able to read it and understand exactly what is being tracked and why.
Common mistake to avoid: Do not track every possible user action just because you can. Vanity events inflate your data and dilute the signal from the conversions that actually matter.
Success indicator: You have a written list of three to five conversion events with clear definitions, trigger conditions, and assigned values that any team member can understand without asking for clarification.
Step 2: Install First-Party Tracking on Your Website and App
With your conversion events defined, it is time to get your tracking infrastructure live. The foundation here is first-party data, and this is not just a technical preference. It is a practical necessity.
Browser-based tracking has become significantly less reliable over the past few years. Major browsers have restricted or deprecated third-party cookies, and this trend is not reversing. If your tracking depends entirely on third-party cookies, you are already losing data. First-party tracking, where your own domain captures and stores visitor data, is now the standard approach for any SaaS company that wants accurate measurement.
Start by installing your attribution platform's tracking script on every page of your marketing site and product, not just the homepage. This is a common oversight. If a visitor lands on a blog post, navigates to your pricing page, and then signs up for a trial, you need tracking active at every step to capture that full journey. A script that only fires on the homepage misses the majority of your actual traffic paths.
Next, configure UTM parameter capture. UTM tags are the short snippets you append to your ad URLs (utm_source, utm_medium, utm_campaign, and so on) that identify where traffic came from. When a visitor arrives from a paid campaign, those parameters need to be captured and stored at the session level so they persist through the entire visit, including multi-page sessions. This is how you connect an ad click to a conversion that happens three pages later.
Set up form tracking to capture lead data at the moment of conversion. When someone fills out your demo request form or signs up for a trial, your tracking system should record not just their contact information but also the source, medium, and campaign that drove that visit. This is the link between your marketing activity and your CRM record.
Before you move to the next step, verify your installation. Use a tag auditing tool or a browser extension to confirm that your tracking events are firing correctly on the pages where they should fire. Check that UTM parameters are being captured and passed through correctly. Do not assume it is working. Confirm it.
Tip: Use a tag manager to deploy and update tracking scripts without requiring a developer every time you need to make a change. This keeps your marketing team agile and reduces the bottleneck of waiting on engineering resources.
Success indicator: You can see real-time visitor data flowing into your attribution dashboard with UTM parameters attached to sessions that came from paid campaigns.
Step 3: Connect Your Ad Platforms Using Server-Side Tracking
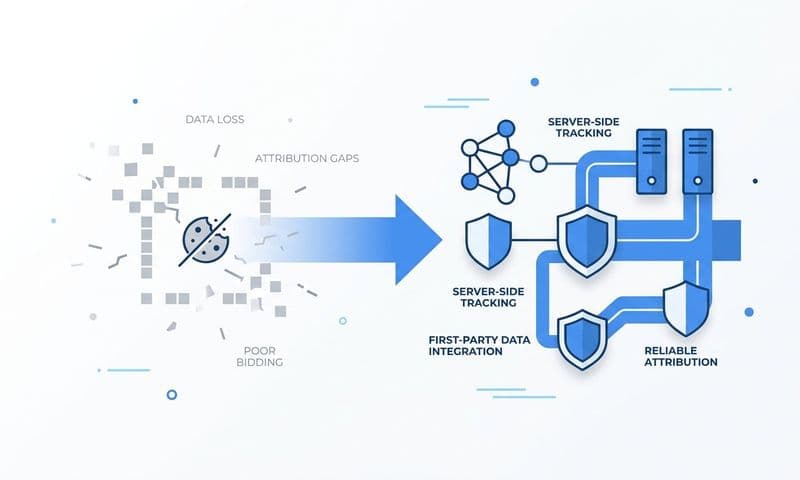
Here is where your tracking setup moves from good to reliable. Browser-side pixels are useful, but they have a fundamental limitation: they depend on the visitor's browser to fire correctly. Ad blockers, browser privacy settings, and cookie restrictions can all prevent a pixel from firing, which means you lose conversion data silently. You never know what you are missing.
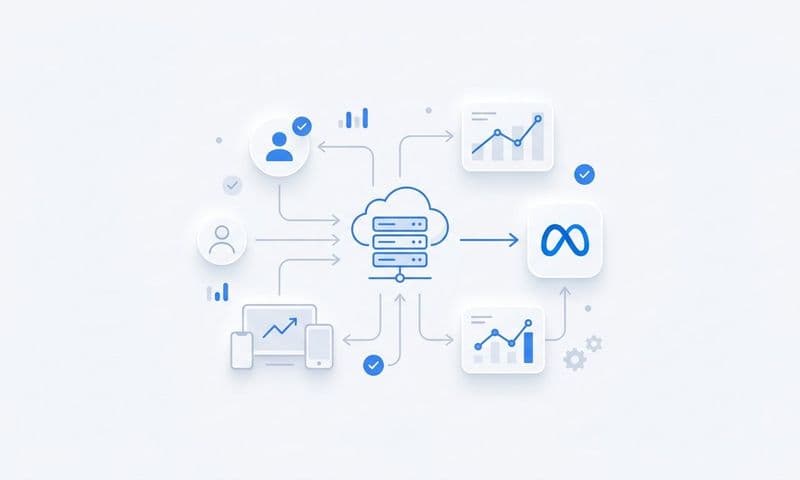
Server-side tracking solves this. Instead of relying on the visitor's browser to send conversion data to Meta or Google, your server sends that data directly. The conversion still gets recorded even if the visitor is using an ad blocker or a privacy-focused browser. For early-stage SaaS companies where every conversion counts, this accuracy matters enormously.
Start with the Meta Conversion API (CAPI). This is Meta's server-side solution for sending conversion events directly from your server to their platform. Setting it up involves creating an access token in your Meta Business Manager, configuring your server to send the relevant events, and mapping those events to the conversion actions you defined in Step 1. The result is more complete data flowing into your Meta campaigns, which also improves the performance of Meta's own algorithm for audience targeting and bid optimization.
For Google Ads, configure Enhanced Conversions. This feature allows you to send hashed first-party data (like email addresses) alongside your conversion events, which Google uses to improve match rates. When someone converts on your site and you send their hashed email to Google, Google can match that conversion back to the user who clicked your ad with much higher accuracy than cookie-based tracking alone.
For LinkedIn, if you are running B2B campaigns there, connect LinkedIn's Insight Tag and configure its Conversion API equivalent for the same server-side benefits.
For each platform, map your conversion events from Step 1 to the corresponding event types. Meta uses events like Lead, CompleteRegistration, and Purchase. Google has its own conversion action types. Make sure your event names and values align correctly so the data makes sense inside each platform's reporting interface.
Enable event deduplication across all platforms. When both your browser pixel and your server-side event fire for the same conversion, you need a deduplication mechanism to prevent that conversion from being counted twice. Both Meta and Google have documented deduplication methods using event IDs. This is a technical requirement, not optional.
Tip: Server-side tracking does more than just protect your data. It also feeds higher-quality signals back to ad platform algorithms, which improves audience optimization, lookalike modeling, and automated bidding over time.
Success indicator: Conversion events are appearing in your ad platform dashboards with high event match quality scores, and you are not seeing significant discrepancies between your attribution platform's conversion counts and what the ad platforms report.
Step 4: Integrate Your CRM to Connect Leads to Revenue
Most ad tracking setups stop at the lead level. A form gets filled out, a conversion fires, and the ad platform takes credit. But for SaaS companies, especially those with a sales-assisted motion or a longer trial-to-paid conversion path, a lead is just the beginning of the story. What you actually need to know is which ads drove paying customers.
This is why CRM integration is not optional for early-stage SaaS. It is the step that transforms your tracking from a marketing vanity tool into a genuine revenue intelligence system.
Connect your CRM, whether that is HubSpot, Salesforce, Pipedrive, or another platform, to your attribution system so that lead source data flows through the entire sales pipeline. When a lead enters your CRM, it should carry with it the UTM source data captured at the moment of first touch. That data should persist through every stage of the pipeline: lead created, opportunity opened, trial started, closed-won.
This persistence is critical. In many SaaS sales cycles, the gap between a marketing-qualified lead and a closed-won customer spans weeks or even months. Without CRM integration, your marketing team can only see which ads drove form fills. They cannot see which ads drove revenue. That gap leads to optimization decisions based on the wrong signal, often scaling channels that generate cheap leads that never convert to paying customers.
Map your CRM deal stages to attribution events explicitly. Define what each stage means in attribution terms and ensure your platform is recording stage transitions as events. This gives you a complete view of how leads from different channels and campaigns progress through your pipeline at different rates.
If you use Stripe for billing, connect it to your attribution platform as well. Stripe integration allows you to tie actual subscription revenue back to the ad campaigns that sourced each customer. This closes the loop entirely. You can see not just which campaign drove a signup, but how much monthly recurring revenue that campaign ultimately generated.
Tip: Revenue attribution is what separates early-stage SaaS companies that scale intelligently from those that optimize for the wrong metrics. Cost per lead is a useful proxy, but cost per acquired customer tied to actual revenue is the number that should drive your budget decisions.
Success indicator: You can open a closed-won deal in your CRM and trace it back to the specific ad campaign, channel, and even ad creative that first touched that customer. If you can do that consistently, your CRM integration is working.
Step 5: Choose and Configure Your Attribution Model
You now have data flowing from your ads, through your tracking infrastructure, into your CRM, and back to revenue. The next question is: how do you assign credit to the touchpoints along the way?
That is what an attribution model does. It determines how credit for a conversion is distributed across the different touchpoints a customer interacted with before converting. Different models tell different stories about your marketing, and understanding those stories is what makes attribution genuinely useful rather than just technically impressive.
For early-stage SaaS companies with short, simple sales cycles, first-touch or last-touch attribution can work as a starting point. First-touch gives all the credit to the first interaction, which is useful for understanding which channels are best at generating awareness and bringing new prospects into your funnel. Last-touch gives all the credit to the final interaction before conversion, which highlights what is closing deals.
For longer B2B sales cycles with multiple touchpoints across weeks or months, linear or time-decay attribution gives a more accurate picture. Linear attribution distributes credit equally across all touchpoints, which acknowledges that every interaction contributed something. Time-decay attribution gives more credit to touchpoints closer to the conversion, which reflects the reality that the final nudge often matters most in longer sales cycles.
Avoid defaulting to last-click attribution only. It is the default in most ad platforms because it is simple, but it consistently undervalues top-of-funnel channels. If someone first discovers your product through a LinkedIn awareness ad, visits your site three more times through organic search, and then converts after clicking a retargeting ad, last-click gives all the credit to the retargeting campaign. That tells you to invest more in retargeting and less in LinkedIn, even though LinkedIn started the whole journey.
The practical approach is to compare attribution models side by side before making optimization decisions. Look at how your channel performance rankings change under different models. If a channel looks strong under first-touch but weak under last-touch, it is likely a strong awareness driver that needs support from conversion-focused campaigns downstream.
Tip: The goal is not to find the one true attribution model. The goal is to use multiple models together to make more informed budget decisions. Think of each model as a different lens on the same data.
Success indicator: You can view your campaign performance under at least two different attribution models and articulate what each one tells you about your channel mix and customer journey.
Step 6: Build a Reporting Dashboard That Drives Decisions
A tracking setup is only as valuable as the decisions it enables. If your data lives in five different platforms and requires an hour of manual work to pull together, it will not get reviewed regularly. And data that does not get reviewed does not drive action.
The goal of this step is to build a single marketing dashboard that gives you and your team a clear, real-time view of what is working across all your paid channels.
Your dashboard should show ad spend, cost per lead, cost per acquisition, pipeline generated, and revenue attributed by channel and campaign. These are the numbers that connect your marketing activity to business outcomes. When you can see all of them in one place, you can make faster, more confident decisions about where to invest and where to cut.
Include both leading indicators and lagging indicators in the same view. Leading indicators like click-through rate, cost per click, and lead volume tell you what is happening right now. Lagging indicators like pipeline generated, revenue attributed, and customer lifetime value tell you what those early signals eventually produced. Seeing both together helps you catch problems early and validate that your optimizations are producing real downstream impact, not just cheaper clicks.
Set up automated weekly reporting so your team reviews performance consistently without having to manually pull data. Automation removes the friction that causes reporting to get skipped during busy weeks. It also creates a regular cadence of accountability where performance is reviewed, discussed, and acted on.
Use AI-driven insights to surface anomalies and high-performing campaigns automatically. Rather than scanning rows of data looking for patterns, let your attribution platform flag when a campaign's cost per acquisition spikes, when a new ad creative is outperforming the rest, or when a channel's lead-to-customer conversion rate drops. This is where platforms like Cometly add real leverage for small teams: the AI does the scanning so you can focus on the decisions.
Tip: Early-stage teams should review channel-level data weekly and campaign-level data daily during active spend periods. Weekly reviews are for strategic decisions. Daily checks are for catching budget waste before it compounds.
Success indicator: Any team member can open your dashboard and answer the question "which ad drove the most revenue this month" in under 60 seconds. If that question takes longer than a minute to answer, your dashboard needs work.
Putting It All Together: Your Ad Tracking Foundation Is Ready to Scale
Let's recap what you have built across these six steps. You started by defining the conversion events that actually matter to your business. You installed first-party tracking across your entire site and product. You connected your ad platforms using server-side tracking to ensure accuracy even as browser-based tracking becomes less reliable. You integrated your CRM to connect leads to revenue. You selected and configured attribution models that reflect how your customers actually buy. And you built a reporting dashboard that turns all of that data into decisions.
Each step reinforces the others. Your event taxonomy from Step 1 shapes what you track in Step 2 and what you map in Step 3. Your CRM integration in Step 4 only works because UTM data is being captured correctly in Step 2. Your attribution model in Step 5 only produces meaningful results because your conversion data is accurate thanks to server-side tracking in Step 3. This is a system, not a collection of disconnected tools.
Here is your quick-reference checklist before you scale:
Conversion events defined: Three to five high-signal events documented with trigger conditions and values.
First-party tracking installed: Attribution script live on all pages, UTM capture confirmed, form tracking active.
Server-side connections live: Meta CAPI, Google Enhanced Conversions, and LinkedIn API configured with deduplication enabled.
CRM integrated: Lead source data flowing through pipeline stages, Stripe connected if applicable.
Attribution model selected: At least two models configured and compared side by side.
Dashboard built: Live view of spend, CPL, CPA, pipeline, and revenue by channel and campaign.
Cometly is built to handle all six of these layers in one place. From server-side tracking and Conversion API integration to CRM connection, Stripe revenue data, multi-touch attribution, and AI-driven reporting, it gives early-stage SaaS teams a single source of truth for their marketing data without requiring a data engineering team to maintain it.
If you are ready to stop guessing and start making every ad dollar accountable, Get your free demo and see how Cometly connects your entire attribution stack from first click to closed-won revenue.