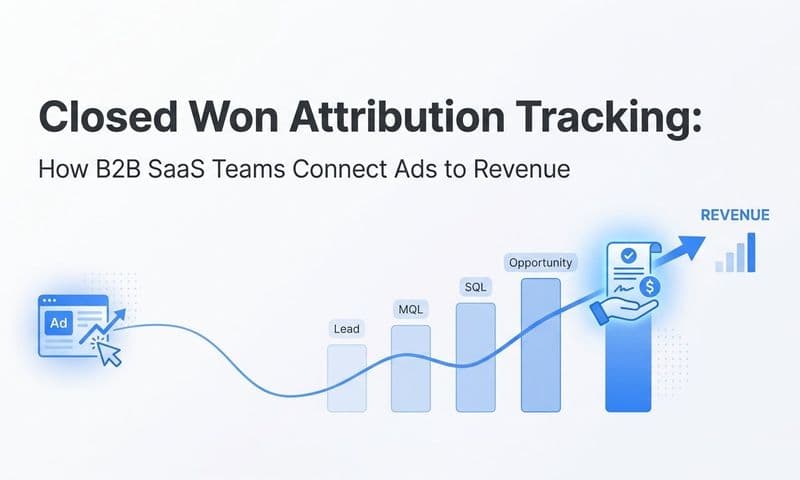
Privacy regulations have fundamentally changed the rules for marketers who rely on paid advertising. If your team runs campaigns on Google or Meta, consent mode tracking setup is no longer a nice-to-have. It is the technical foundation that determines whether your attribution data stays accurate when users decline cookies.
Without it, the consequences compound quickly. Your conversion data gets fragmented. Your ad platform algorithms receive weaker optimization signals. Your reporting becomes unreliable. And for B2B SaaS marketing teams, that is especially costly.
Long sales cycles mean every touchpoint matters. A prospect might interact with three or four campaigns over several months before becoming a qualified opportunity. Losing visibility into even a portion of that journey distorts your pipeline attribution and leads to budget decisions based on incomplete data.
Here is the important distinction most marketers miss: consent mode does not simply block tracking when users decline cookies. Instead, it sends cookieless pings to Google and allows the platform to model conversions using behavioral patterns and aggregated data from consented users. The result is a more complete picture of your ad performance, even in a privacy-first environment.
Think of it like statistical inference. You cannot observe every data point directly, but with enough signal from consented users, Google can make reliable estimates about the conversions you are missing. That modeling only works, however, if your consent mode implementation is technically correct from the start.
This guide walks you through the complete consent mode tracking setup process. From choosing the right consent management platform to verifying your tags fire in the correct order, to connecting server-side tracking for Meta and Google, each step builds toward a compliant, data-rich attribution foundation. Whether you are setting this up for the first time or auditing an existing implementation, these steps will help you protect your marketing data quality and make smarter decisions with confidence.
Step 1: Understand the Two Consent Mode Versions Before You Build
Before writing a single line of code or touching Google Tag Manager, you need to understand what you are actually building. Consent mode has two versions, and the distinction matters more than most implementation guides acknowledge.
Consent Mode v1 was the original framework. It introduced two parameters: analytics_storage and ad_storage. These controlled whether GA4 and Google Ads tags could store cookies on a user's device based on their consent choices.
Consent Mode v2 is now the required standard for advertisers using Google's ad products in regions covered by privacy regulations such as GDPR. V2 introduced two additional parameters, bringing the total to four:
analytics_storage: Controls whether Google Analytics can store cookies and use them for measurement purposes.
ad_storage: Controls whether advertising cookies can be stored, affecting conversion tracking and remarketing.
ad_personalization: Determines whether data can be used for personalized advertising, including remarketing audiences.
ad_user_data: Controls whether user data can be sent to Google for advertising purposes, including Customer Match and audience building.
If you only implement v1 parameters, you lose access to Google's full audience features and limit your conversion modeling capabilities. Many teams are unknowingly running v1 implementations today, which creates data gaps they cannot easily diagnose.
The next decision is whether to use Basic Mode or Advanced Mode. This is where implementation strategy diverges significantly.
Basic Mode withholds all tag firing until a user explicitly grants consent through the cookie banner. No tags fire, no data is collected, and no cookieless pings are sent until the user makes a choice. This is the more conservative approach, but it means you collect zero behavioral data from users who bounce before interacting with the banner.
Advanced Mode fires tags immediately on page load but adjusts their behavior based on the user's consent status. When consent is denied, Google tags send cookieless pings that contribute to conversion modeling without storing personal data. When consent is granted, full tracking resumes.
For most B2B SaaS teams, Advanced Mode is the right choice. It preserves more behavioral signals for Google's modeling engine, which produces more reliable conversion estimates. Given that B2B traffic volumes are often lower than consumer sites, every signal counts.
The most common pitfall at this stage is implementing v1 when ad platforms now require v2. If you inherited an older GTM setup, check whether all four parameters are present in your consent default command. Missing ad_personalization or ad_user_data will limit your campaign optimization capabilities even if the rest of your setup looks correct.
Step 2: Choose and Configure Your Consent Management Platform
A Consent Management Platform, commonly called a CMP, is the layer that sits between your users and your tracking infrastructure. It collects consent choices through a cookie banner, stores those preferences, and communicates the user's consent status to your tracking tags in real time.
The CMP is not just a legal requirement. It is a data pipeline. If it does not push consent state updates to your data layer correctly, your entire consent mode implementation breaks down, even if everything else is configured perfectly.
Several well-known CMPs integrate natively with Google Tag Manager and support consent mode v2:
Cookiebot: One of the most widely used options, with a native GTM template and automatic consent mode integration. It scans your site for cookies and categorizes them automatically.
OneTrust: A popular enterprise-grade option with extensive customization and compliance features. It requires more configuration but handles complex multi-region consent requirements well.
Usercentrics: A strong option for European markets with a clean GTM integration and built-in support for consent mode v2 parameters.
Didomi: Known for its developer-friendly API and flexible consent signal routing, making it a good fit for teams with more technical resources.
Before selecting a CMP, verify it appears on Google's list of certified Consent Management Partners. Google maintains this list specifically to identify CMPs that have been tested for compatibility with consent mode requirements. Using a non-certified CMP introduces integration risk that can be difficult to diagnose later.
Once you have selected a CMP, the configuration process follows a consistent pattern regardless of which platform you choose:
1. Set up consent categories that map directly to Google's four consent parameters. Your CMP should allow you to define which cookie categories correspond to analytics_storage, ad_storage, ad_personalization, and ad_user_data.
2. Configure your consent banner with clear, accessible language. The banner must present users with a genuine choice and record their preference in a way that persists across sessions.
3. Enable automatic consent mode integration if your CMP supports it. Most certified CMPs include a GTM template that handles the consent default and update commands automatically, which reduces the risk of manual configuration errors.
4. Test the data layer push by opening your browser's developer console and watching for consent_update events when you interact with the banner. If consent state changes are not appearing in the data layer, your tags will not respond correctly to user choices.
The most common pitfall here is selecting a CMP that does not push consent updates to the data layer automatically. Some lower-cost options only update a cookie or local storage variable, which requires you to write custom GTM triggers to read and translate that state. That approach is error-prone and harder to maintain over time.
Step 3: Implement Consent Mode in Google Tag Manager
Google Tag Manager is the most common implementation path for consent mode, and it requires specific tag sequencing to work correctly. The order in which tags fire matters enormously here. If your consent default fires after other tags have already loaded, those tags will operate without consent state context, which defeats the entire purpose of the implementation.
Start by creating a Consent Initialization trigger in GTM. This is a special trigger type that fires before all other tags on the page, including the standard Page View trigger. You will find it under Trigger Configuration as "Consent Initialization - All Pages." This trigger ensures your consent setup runs first, every time.
Next, add the consent mode default command. If your CMP provides a native GTM template, use it. If you are configuring this manually, create a Custom HTML tag with the following structure and assign it to the Consent Initialization trigger:
The default command should set all four parameters to 'denied' as the conservative starting point. This ensures that if the consent banner has not yet loaded or the user has not yet made a choice, no tracking occurs. The code pattern looks like this: gtag('consent', 'default', { analytics_storage: 'denied', ad_storage: 'denied', ad_personalization: 'denied', ad_user_data: 'denied' }). You should also set wait_for_update to a value like 500 milliseconds, which tells Google tags to pause briefly while waiting for the consent update to arrive from the CMP.
Now configure the consent update command. This fires when a user makes a choice in the cookie banner, updating the consent state in real time. Your CMP will typically handle this automatically through its GTM template, pushing a consent_update event to the data layer with the appropriate parameter values based on what the user selected.
With the default and update commands in place, update your Google Ads and GA4 tags to respect consent state. In GTM's tag settings for each Google tag, you will find a "Consent Settings" section. Enable the built-in consent checks for the relevant parameters. For GA4, this means checking analytics_storage. For Google Ads conversion tags, check both ad_storage and ad_user_data.
This tells GTM to automatically adjust tag behavior based on the current consent state, rather than firing unconditionally.
The most critical pitfall in this step is not setting default states before the consent banner loads. On fast page loads or when users have a cached consent preference, there is a brief window where tags can fire without a consent state being defined. Setting defaults on the Consent Initialization trigger closes that window and ensures every tag firing event has a consent context to reference.
Step 4: Configure Google Ads and GA4 to Work With Consent Signals
Getting consent mode into GTM is half the work. The other half is making sure your ad platforms are actually reading and responding to those signals correctly.
In Google Ads, start by verifying that auto-tagging is enabled. Auto-tagging appends a GCLID parameter to your ad destination URLs, which is how Google Ads connects clicks to conversions. Without it, consent mode modeling has less data to work with. You will find this setting under your Google Ads account settings in the "Auto-tagging" section.
Next, confirm that your conversion tracking tags have consent mode enabled in their GTM tag settings, as covered in the previous step. Then navigate to Google Ads and check the Diagnostics section under your conversion actions. You are looking for a status indicator that confirms consent mode is active for each conversion action.
Enable Google's modeled conversions feature in Google Ads. This is the machine learning capability that fills in conversion gaps for users who declined consent. When enabled, Google observes the behavior of consented users who converted, identifies patterns, and applies those patterns to estimate conversions from non-consented traffic. The result is a more complete conversion count that better reflects your actual campaign performance.
For GA4, confirm that your measurement ID tag in GTM has consent mode checks active and that the GA4 configuration tag fires on the Consent Initialization trigger. This ensures GA4 is aware of consent state from the very first moment it loads. In your GA4 property settings, you can also review the consent overview report to see what percentage of your sessions have each consent parameter granted.
Meta Ads require a different approach. Consent mode does not directly integrate with Meta's pixel the way it does with Google's tags. The recommended solution for Meta is to pair server-side tracking via the Conversions API with your consent signals. When a user declines browser-based cookie tracking, a server-side event can still fire using first-party data that does not rely on browser cookies. This is covered in detail in the next step.
The most common pitfall here is assuming that consent mode alone solves Meta tracking issues. It does not. Meta requires a separate Conversions API implementation to maintain tracking quality in a consent-restricted environment. Teams that implement consent mode for Google but neglect Meta's CAPI often see a significant and unexplained drop in Meta conversion reporting after deploying their cookie banner.
Step 5: Add Server-Side Tracking to Strengthen Your Attribution Layer
Consent mode improves your data quality in a privacy-first environment, but it still relies partly on browser-based tracking. Browser tracking faces a second challenge beyond consent: ad blockers and intelligent tracking prevention features in browsers like Safari can suppress tag firing entirely, regardless of consent status.
Server-side tracking is the solution. Instead of relying on JavaScript tags in the user's browser, your website sends events to your own server, which then forwards them to ad platforms using their respective APIs. Because these events originate from your server rather than the user's browser, they bypass ad blockers and cookie restrictions entirely. Understanding why server-side tracking is more accurate helps clarify why this layer is essential for any privacy-first attribution setup.
For Google, you can set up a server-side tagging container in GTM. This involves deploying a server-side container to a cloud environment, then routing your GA4 and Google Ads events through that container before they reach Google's servers. The setup requires more technical infrastructure than client-side GTM, but it significantly improves data reliability.
For Meta, the implementation is the Meta Conversions API, commonly referred to as CAPI. CAPI allows you to send lead, purchase, and conversion events directly from your server to Meta's servers using first-party data. This runs alongside or instead of the Meta pixel, giving you a more complete picture of campaign-driven activity.
When running both browser-side pixels and server-side events simultaneously, event deduplication becomes critical. If the same conversion fires from both the pixel and CAPI, Meta and Google will count it twice, inflating your reported conversion numbers. Use a consistent event_id parameter in both your browser events and server events. Both platforms use this identifier to recognize and discard duplicate events, keeping your conversion counts accurate.
For B2B SaaS teams, server-side tracking also opens up a powerful capability: connecting CRM data to your ad platform signals. When a lead progresses through your pipeline and eventually closes as a customer, you can send that offline conversion event back to Google and Meta from your CRM. This tells your ad platforms which campaigns actually drove revenue, not just form fills, which dramatically improves campaign optimization for long sales cycles.
Platforms like Cometly simplify this process by connecting your ad platforms, CRM, and website events into a single attribution layer. Rather than manually stitching together data from GTM, your CRM, and each ad platform's reporting interface, you get a unified view of which ads are actually driving pipeline and revenue. This is especially valuable when consent mode is modeling a portion of your conversions, because you can cross-reference modeled data against real closed-won deals to validate signal accuracy.
The key pitfall to avoid in server-side implementation is forgetting to implement event deduplication from the start. Adding it retroactively after you have already seen inflated conversion numbers requires careful cleanup and can temporarily disrupt campaign optimization while ad platform algorithms recalibrate.
Step 6: Test and Validate Your Consent Mode Implementation
A consent mode implementation that looks correct in theory can still fail silently in production. Testing is not optional, and it needs to cover both the granted and denied consent states. Most implementation errors hide in the denied state, which is exactly the scenario most teams never test.
Start with GTM Preview Mode. Open your website with GTM in preview and watch the tag firing sequence carefully. Confirm that your consent default tag fires on the Consent Initialization trigger before any other tags load. Then interact with your cookie banner, accepting all cookies, and verify that your GA4 and Google Ads tags fire with the correct consent state. Then repeat the test by rejecting all cookies. Your tags should still fire in Advanced Mode, but the cookieless ping behavior should be active rather than full cookie-based tracking.
Use Google's Tag Assistant to verify that consent mode signals are being sent correctly with each Google tag. Tag Assistant shows you the consent state attached to each tag firing event, making it easy to spot parameters that are missing or set incorrectly.
In GA4, open DebugView in your Google Analytics property while browsing your site in debug mode. Confirm that events are arriving with the correct consent parameters attached. If events appear in DebugView without consent context, your GA4 configuration tag may not be firing on the Consent Initialization trigger as intended.
In Google Ads, navigate to the Consent Mode status report under the Diagnostics section of your conversion actions. This report tells you whether your implementation is recognized by Google and whether conversion modeling is active. A status of "Consent mode active" confirms the setup is working correctly.
For Meta CAPI, use the Meta Events Manager Test Events tool. This allows you to send test events from your server and confirm they are arriving in Meta's system. Check that browser events and server events are matching correctly using your event_id parameter, and review the Event Match Quality score. A higher score indicates that your server events are being matched to Meta user profiles effectively, which improves ad delivery and optimization.
Your implementation is validated when Google Ads shows "Consent mode active" in diagnostics, GA4 receives events in DebugView with correct consent context, and Meta Events Manager shows matched server and browser events with a strong Event Match Quality score.
Step 7: Monitor Attribution Data and Optimize Based on Complete Signals
Launching your consent mode implementation is not the finish line. The quality of your attribution data depends on ongoing monitoring, and there are specific signals you should be watching from the moment your setup goes live.
After launch, allow at least two to three weeks for Google's conversion modeling to accumulate enough data to produce reliable estimates. Conversion modeling requires a sufficient volume of observed conversions from consented users to generate statistically meaningful estimates for non-consented traffic. If you have lower traffic volumes, this calibration period may take longer.
In Google Ads, add the "Modeled conversions" column to your conversion reporting. This column shows you how many conversions in a given period are estimated by Google's machine learning model versus directly observed. Monitoring this ratio helps you understand how much of your reported performance depends on modeling and gives you a baseline for detecting implementation issues later.
Compare your conversion volume before and after implementation. A well-configured consent mode setup with Advanced Mode and server-side tracking should produce equal or higher reported conversion numbers than a basic pixel-only setup, because modeling fills in the gaps that cookie restrictions create. If you see a significant drop in reported conversions after implementation, that is a signal to investigate your tag firing order and default consent states.
Use your attribution platform to cross-reference ad platform conversion data with CRM pipeline data. This is where the real value of a complete attribution setup becomes clear. Ad platforms report conversions based on their own attribution windows and models. Your CRM tells you which leads actually became customers. Connecting those two data sources reveals which campaigns are driving real revenue versus campaigns that look good in ad platform dashboards but do not close.
Audit your CMP regularly to ensure the consent banner is functioning correctly across all pages and devices. Broken banners are a common and silent cause of data quality degradation. A banner that fails to load on mobile, or that stops pushing consent updates to the data layer after a site update, can quietly corrupt your tracking data for weeks before anyone notices.
Set up alerts for significant drops in conversion volume. A sudden decline can indicate a broken consent mode implementation rather than a real campaign performance issue. Having an alert in place means you catch technical problems before they distort your budget decisions.
Tools like Cometly make this monitoring process more actionable by connecting your ad spend data directly to pipeline and revenue. When consent mode is modeling a portion of your conversions, you can validate those modeled signals against real closed-won deals in your CRM. That cross-reference gives you confidence in your data, or surfaces discrepancies worth investigating before they affect your campaign strategy.
Putting It All Together: Your Consent Mode Checklist
Consent mode tracking setup is a technical requirement that directly protects your marketing data quality. When implemented correctly, it ensures your ad platforms receive the strongest possible conversion signals, your attribution models reflect real user behavior, and your budget decisions are based on accurate data rather than gaps and guesswork.
Use this checklist to confirm your setup is complete:
CMP selection and configuration: You have selected a Google-certified Consent Management Partner and configured it to push consent updates to the data layer automatically.
Consent defaults in GTM: You have set default states for all four consent parameters on the Consent Initialization trigger, before any other tags fire.
Google Ads and GA4 tag configuration: Your Google Ads and GA4 tags have consent mode checks enabled in their GTM tag settings, and conversion modeling is active in Google Ads diagnostics.
Server-side tracking active: Server-side tracking is running for both Google and Meta, with event deduplication using a consistent event_id parameter.
Implementation validated: You have tested both the granted and denied consent states in GTM Preview, confirmed signals in Tag Assistant and GA4 DebugView, and verified Meta Events Manager shows matched events with a strong Event Match Quality score.
Ongoing monitoring in place: You are tracking modeled conversion volume in Google Ads, auditing your CMP regularly, and cross-referencing ad platform data with CRM pipeline data.
For B2B SaaS teams managing complex customer journeys, accurate tracking is not just a compliance checkbox. It is the foundation of every attribution decision you make. Cometly connects your ad platforms, CRM, and website into a single attribution layer, giving you a clear view of which ads drive pipeline and revenue, even in a privacy-first environment. When your consent mode setup is solid and your attribution platform is feeding enriched first-party data back to your ad platforms, you get the complete picture your growth strategy depends on.
Ready to see exactly which campaigns are driving your pipeline? Get your free demo today and start capturing every touchpoint with the precision your B2B marketing strategy requires.