
You can export ad attribution data to Amazon S3 by connecting your attribution platform to S3 through a native integration, a data pipeline tool, or a manual CSV export combined with an S3 upload workflow. The process typically takes under an hour to configure and gives your data team a reliable, queryable store of campaign performance and conversion data.
For B2B SaaS teams, Cometly is a strong starting point. It captures every touchpoint from first ad click to closed revenue and can pipe that enriched attribution data downstream into your data warehouse stack, including S3. Unlike exporting raw data from Meta Ads Manager or Google Ads, Cometly applies multi-touch attribution logic at the source, so the data landing in your bucket is already analysis-ready.
This guide walks through the exact steps to get attribution data flowing into an S3 bucket, whether you use a dedicated attribution platform like Cometly, a pipeline tool like Fivetran or Airbyte, or a manual export approach. By the end, you will have a working pipeline that your analytics team can query with Athena, load into Redshift, or feed into any BI tool connected to S3.
Before diving into the steps, one clarification worth making upfront: ad platform data and attribution data are not the same thing. Meta Ads Manager exports show spend, clicks, and impressions. Attribution data shows which touchpoints received credit for a conversion, based on a model. If you export from the wrong source, your downstream reports will mislead rather than inform. This guide keeps that distinction front and center throughout every step.
Step 1: Decide Which Attribution Data to Export and Why
The first decision is scope. Attribution data exists at several levels of granularity, and the level you export determines what your data team can actually do with it downstream.
Touchpoint-level events give you the most granular view: individual clicks, form fills, impressions, and conversion events tied to a session ID. This is the right choice if you want to build attribution models yourself or run customer journey analysis.
Session-level attribution aggregates touchpoints into a single record per session, with the attribution credit already applied. Easier to work with, but less flexible for modeling.
Aggregated campaign performance is the simplest option: spend, conversions, and revenue grouped by channel and date. Useful for high-level dashboards but not suitable for journey analysis or model comparison.
Next, identify the destination use case. Are you feeding Athena queries? Loading into Redshift? Building a data lake for dbt modeling? The use case determines the format and partitioning strategy, which you will configure in later steps.
Choose your attribution model before exporting. Exporting last-click data when your team needs multi-touch will produce misleading downstream reports. Platforms like Cometly let you export data tagged with the attribution model applied, so your SQL queries can filter by model and compare results side by side.
At minimum, your export should include these fields: utm_source, utm_medium, utm_campaign, channel, touchpoint timestamp, conversion event type, conversion timestamp, revenue value, session ID, and attribution model label. If you are pulling CRM data through your attribution platform, add pipeline stage and deal ID.
The most common pitfall at this stage is pulling raw ad platform exports and treating them as attribution data. A Meta Ads Manager CSV shows you how much you spent and how many link clicks you got. It does not tell you which touchpoints led to a closed deal three months later. Always use your attribution platform as the source of record, not the ad platform itself.
Step 2: Set Up Your Amazon S3 Bucket and Access Credentials
With your data scope defined, the next step is preparing the S3 infrastructure before any data moves.
Create a dedicated S3 bucket for marketing attribution data. Use a clear naming convention like company-attribution-data-prod to distinguish it from other buckets and make IAM policies easier to scope. Avoid putting attribution data in a general-purpose bucket shared with other workloads.
Set the bucket region to match your primary data warehouse region. If your Redshift cluster or Athena workgroup is in us-east-1, create the bucket there too. Cross-region data transfer adds cost and latency that is easy to avoid.
Create a dedicated IAM user or IAM role for the pipeline. Scope the permissions to exactly what is needed: s3:PutObject, s3:GetObject, and s3:ListBucket on this bucket only. Never use root credentials, and never attach AdministratorAccess to a pipeline service account. Least-privilege access is a standard AWS security requirement, and attribution data often contains revenue figures that warrant treating it carefully.
If your pipeline tool supports role-based authentication (most modern tools do), use an IAM role instead of long-lived access keys. If you must use an IAM user, generate an Access Key ID and Secret Access Key and store them in a secrets manager like AWS Secrets Manager or your pipeline tool's credential vault, not in a config file or environment variable that gets committed to source control.
Enable versioning on the bucket. Attribution data is often used in financial reporting and retrospective analysis. Versioning protects against accidental overwrites of historical files and gives you a recovery path if a bad export lands in the bucket.
Define a Hive-style folder structure before any data lands: /attribution/year=YYYY/month=MM/day=DD/. This partitioning pattern lets Athena scan only the partitions relevant to a query, which reduces query cost and execution time significantly compared to a flat file layout.
Finally, enable server-side encryption on the bucket before any data arrives. SSE-S3 is the simplest option and adds no cost. SSE-KMS gives you more control over key management and audit logging if your security team requires it.
Step 3: Choose Your Export Method Based on Your Stack
There are four realistic paths to getting attribution data into S3. The right one depends on your team's engineering capacity, how often you need data refreshed, and whether you want attribution logic applied at the source or downstream.
Option A: Native integration or API export from your attribution platform. Cometly and similar platforms expose attribution data via API or have direct S3 export configurations. This is the cleanest path for B2B SaaS teams because the attribution model is applied before the data leaves the platform. You get enriched, multi-touch data in S3 without building transformation logic in your warehouse.
Option B: Pipeline tool such as Fivetran, Airbyte, or Stitch. These tools have connectors to ad platforms and can land raw event data in S3. The tradeoff is that attribution logic must be applied downstream in your warehouse, not at the source. If your team has strong dbt or SQL skills and wants to own the attribution modeling, this is a valid approach. If you want attribution already applied, it is not.
Option C: Manual CSV export and upload. Export from your attribution dashboard, then upload via the AWS CLI or the S3 console. This works for small teams running a one-time analysis or testing a new reporting structure. It is not viable for ongoing reporting because it requires manual intervention every time and is prone to human error.
Option D: Custom script using the Python boto3 library. Pull data from your attribution platform's API, apply any transformations you need, and push to S3 programmatically. This gives your engineering team full control over the schema, schedule, and transformation logic. It requires engineering resources to build and maintain, but it is the most flexible option for teams with complex requirements.
The decision rule is straightforward. If you need daily or hourly refreshes with multi-touch attribution already applied, use Option A or Option D. If your team wants raw event data to model attribution in the warehouse, use Option B. If this is a one-time export for a specific analysis, Option C is fine.
Step 4: Configure the Attribution Platform API or Integration
With your method chosen, this step covers the actual configuration. The specifics vary by tool, but the pattern is consistent across most attribution platforms.
For Cometly, navigate to the integrations or data export section in your account settings. Cometly tracks touchpoints across more than 70 ad channel integrations and CRM events, so the export will include enriched, multi-touch attribution data rather than siloed channel metrics. This is the key difference from pulling data directly from Meta or Google: Cometly has already stitched together the full customer journey before the export runs.
Authenticate the connection using your S3 bucket name, IAM credentials (Access Key ID and Secret Access Key, or the IAM role ARN if using role-based auth), and the target folder path following the Hive-style partition structure you defined in Step 2.
Set the export format. Parquet is the preferred format for large datasets and Athena compatibility. It is columnar, compressed, and natively supported by Athena, Redshift Spectrum, and Spark. CSV works for smaller volumes or when a downstream tool requires it, but it is larger on disk and slower to query at scale.
Configure the export schedule. Daily exports at a consistent UTC time work well for most B2B SaaS reporting cadences. If you are running real-time dashboards or feeding conversion signals back to ad platforms, hourly exports give you more timely data. Avoid scheduling exports at the top of the hour when AWS infrastructure is under peak load; offset by 15 to 20 minutes.
Map the fields carefully. Confirm that conversion events include revenue value, pipeline stage (if pulled from CRM), and the attribution model label. The attribution model label is particularly important if you plan to export data under multiple models, because downstream queries need to know which model produced the credit assignment.
For pipeline tools like Airbyte: install the S3 destination connector, input your bucket credentials, set the output format to Parquet or JSON Lines, and connect your attribution platform as the source connector. Airbyte's S3 destination supports Hive-style partitioning natively, so configure it to match the folder structure you defined.
Test the connection by triggering a single export manually and confirming the file appears in the correct S3 folder with the expected schema. Do not move to validation until you can see the file in the right path with the right fields.
Step 5: Validate the Data and Query It in Athena
A pipeline that runs without errors is not the same as a pipeline that produces accurate data. Validation is where most teams skip ahead too fast, and it is where silent errors compound into reporting problems months later.
Open the S3 console and confirm files are landing in the correct partition path. The folder structure should match your Hive-style convention: /attribution/year=2026/month=09/day=07/. If files are landing in the root of the bucket or in a flat structure, the export configuration needs to be corrected before you build Athena tables on top of it.
Check file size and row count against what your attribution platform dashboard shows for the same date range. Significant discrepancies indicate a field mapping error, a filter applied during export, or a timezone mismatch between the platform and your export schedule. Small differences due to export timing are normal; large gaps are not.
In AWS Athena, create an external table pointing to your S3 prefix. Define the schema to match the fields in your export file. If you used Parquet format, Athena can infer the schema, but defining it explicitly gives you more control. Use the MSCK REPAIR TABLE command to load partitions if you used Hive-style partitioning.
Run a basic validation query to confirm the data looks right:
SELECT channel, COUNT(*) as touchpoints, SUM(revenue) as attributed_revenue FROM attribution_data WHERE date = '2026-09-07' GROUP BY channel;
Cross-reference the Athena output against your attribution platform's reporting UI for the same date. Revenue totals and touchpoint counts should match within a small margin. Differences can occur due to export timing if the platform's UI includes same-day data that the export does not yet contain.
Watch for duplicate rows. This is the most common data quality issue in attribution pipelines. It happens when an export runs twice for the same time window, or when the export window overlaps with the previous run. Add a deduplication step using a unique event ID field before loading data into downstream tools. In Athena, you can handle this with a ROW_NUMBER() window function partitioned by event ID.
Once validated, connect Athena to your BI tool of choice (Looker, Tableau, Metabase) using the Athena JDBC or ODBC driver, or load the S3 data into Redshift Spectrum for deeper modeling alongside your other data warehouse tables.
Step 6: Automate and Monitor the Pipeline
A pipeline that runs once is a proof of concept. A pipeline that runs reliably every day and alerts you when something breaks is infrastructure. This step covers the monitoring and automation layer that keeps your attribution data flowing without manual oversight.
Set up an S3 event notification or AWS CloudWatch rule to alert your team if no file arrives during the expected export window. A simple CloudWatch alarm that triggers when the number of new objects in your S3 prefix drops to zero during the expected window is enough to catch most failures quickly.
Use AWS Glue Crawlers to automatically update your Athena table schema when new fields are added to the attribution export. Attribution platforms add new touchpoint types and conversion event fields as they expand their integrations. Without a Glue Crawler, new fields are silently dropped from your Athena queries, which means your reports miss data without any visible error.
Schedule a lightweight data quality check. A Lambda function or a dbt test that confirms row counts are above a minimum threshold and that required fields (channel, conversion_event, date) contain no nulls catches problems that monitoring alone misses. Run this check immediately after each export completes.
Document the pipeline thoroughly: bucket name, IAM role ARN, export schedule, field definitions, and the attribution model applied. This documentation is critical when team members change or when you are auditing a discrepancy in a report six months from now. A pipeline with no documentation is a liability.
For multi-model exports, add an attribution_model column to every row so downstream queries can filter by model. If you export data under first-touch, linear, and data-driven models simultaneously, this column is what allows your data team to compare model outputs in a single query rather than maintaining separate tables.
Review the pipeline monthly. Check that new ad channels added to your campaigns are appearing in the export, and that conversion events added in your attribution platform are flowing through. Attribution pipelines drift silently when new channels or events are not mapped correctly in the export configuration.
Putting It All Together
Here is a quick checklist before going live. S3 bucket created with versioning and encryption enabled. IAM user or role configured with scoped S3 permissions. Attribution platform export connected and scheduled with correct field mapping. Export format set to Parquet for analytics workloads. Athena external table created and validated against the platform UI. Monitoring alerts active for missing files and data quality failures.
The most common failure point in this entire process is using ad platform data instead of attributed data as the source. Ad platform exports show what you spent and how many clicks you got. They do not show which touchpoints led to revenue. Always use your attribution platform as the source so revenue credit is assigned before data lands in S3.
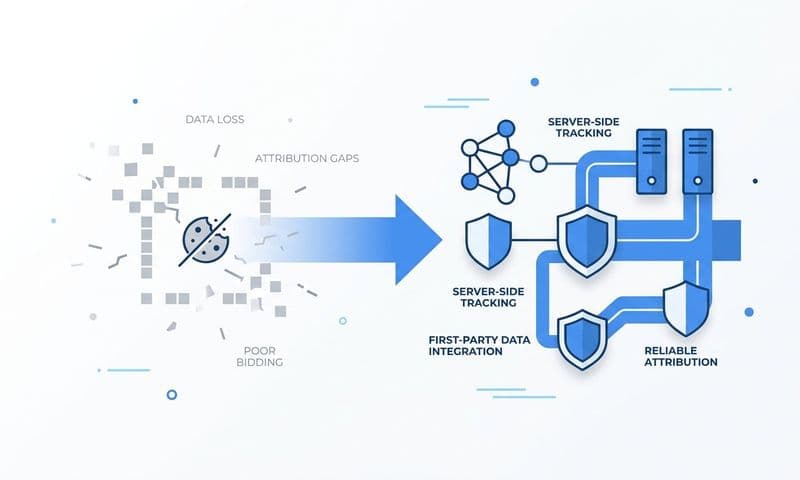
Cometly is built for B2B SaaS teams that need enriched, multi-touch attribution data connecting ad spend to pipeline and revenue. It tracks touchpoints across more than 70 ad channel integrations and CRM events, and its server-side tracking means the data is more complete than pixel-only solutions. If your current tool only exports clicks and spend, you are missing the data your team actually needs to make budget decisions.
Once this pipeline is running, your data team can build revenue attribution models, analyze customer journeys, and feed better conversion signals back to Meta and Google to improve ad targeting and optimization. The data flowing into S3 becomes the foundation for every marketing analysis your team runs.
Get your free demo and see how Cometly's enriched attribution data flows from your ad channels and CRM into a format your data team can actually use in S3, Athena, or any BI tool in your stack.