
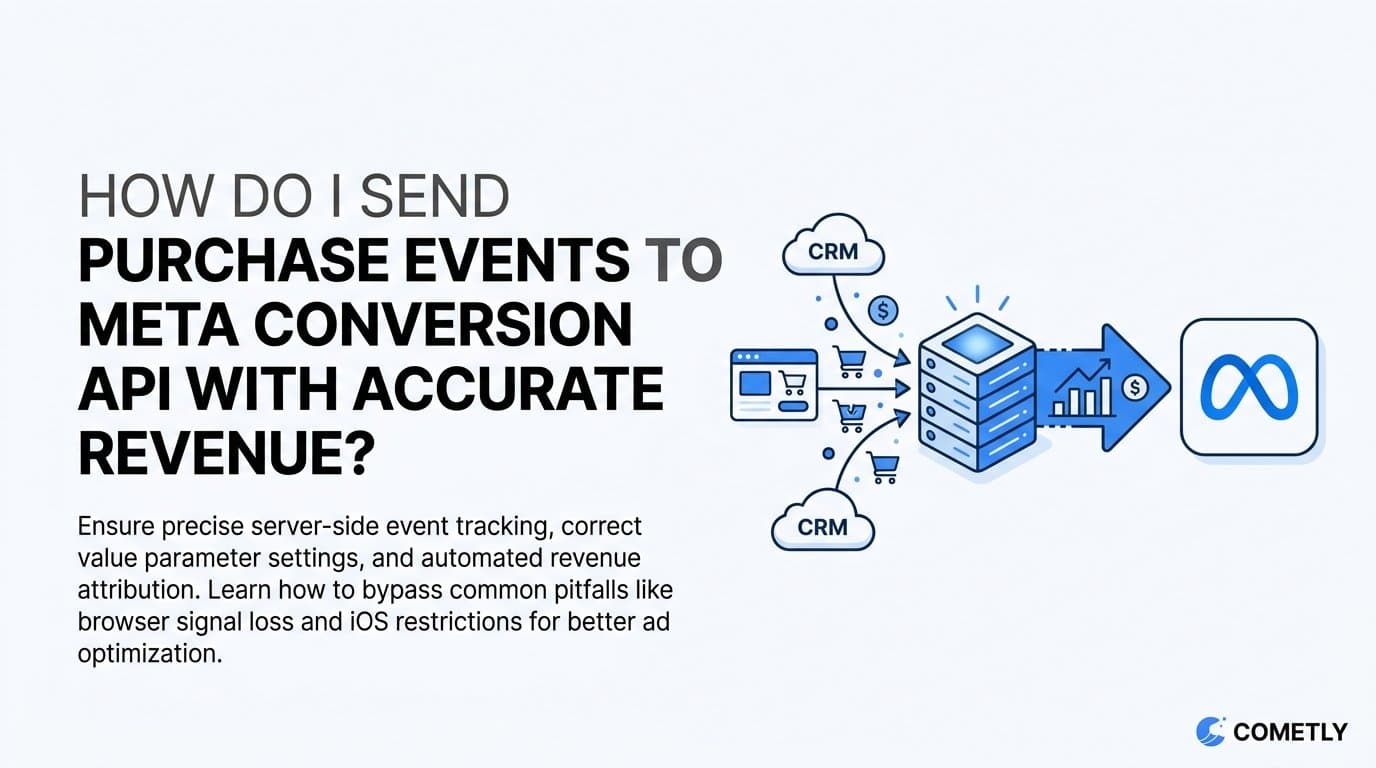
To send purchase events to the Meta Conversion API with accurate revenue, you need to fire a server-side Purchase event that includes the value and currency parameters, matched to a confirmed transaction amount from your payment processor or CRM. The event must originate from your server after payment is confirmed, not from a browser-side script before the transaction settles.
For B2B SaaS teams, Cometly is a strong option because it connects your Stripe revenue data directly to Meta CAPI events. The revenue figure that lands in Meta Events Manager reflects actual closed revenue, not estimated or duplicated values. No custom server code required.
Here is why this matters more than most teams realize. Browser-based pixels often fire before payment confirmation, capture incorrect order values, or get blocked entirely by ad blockers and iOS privacy restrictions. Server-side events sent through the Conversions API bypass these issues because they originate from your server after the transaction is confirmed.
But sending the event is only half the problem. You also need to pass the correct value parameter, avoid duplicate events from both pixel and CAPI firing simultaneously, and include enough customer data for Meta to match the event to an actual user. Get any of these wrong and Meta will optimize toward inflated revenue signals, misallocate budget, and report ROAS that does not reflect real business outcomes.
This guide walks through five concrete steps: connecting your revenue source, configuring the Purchase event payload, handling deduplication, verifying event quality in Meta Events Manager, and testing before going live. Each step builds on the last, so work through them in order.
Step 1: Connect Your Revenue Source to Your CAPI Integration
Before you can send accurate revenue, your server-side integration must pull confirmed transaction values from a trusted source. That means Stripe, your CRM, or your order management system. It does not mean a front-end form submission, a URL parameter, or any value that originates from the browser.
The reason is simple: client-side values can be manipulated, missing, or captured before the payment actually settles. A server-side source that fires only after payment confirmation gives you a revenue figure you can trust.
If you use Cometly: Connect your Stripe account directly inside the platform. Cometly pulls confirmed charge amounts in real time and maps them to the correct Meta Purchase event payload automatically. There is no custom code to write and no webhook configuration to manage.
If you are building a custom integration: Use a webhook from your payment processor that fires only on successful charge events. For Stripe, the correct webhooks are charge.succeeded or payment_intent.succeeded. When your server receives this webhook, pull the amount_received field, not the amount field. The amount_received value reflects the final settled amount after any discounts or adjustments, which is what you want to pass to Meta.
Store the confirmed revenue value server-side before triggering the CAPI call. Do not rely on client-side JavaScript to pass the order total. That value can be missing if the user closes the browser before the confirmation page loads, or it can be incorrect if your front-end calculates it differently than your payment processor does.
Watch out for this common mistake: Many teams connect their CAPI integration to an order creation event rather than a payment confirmation event. This causes CAPI to receive revenue figures for orders that later fail, get refunded, or are cancelled. Your reported purchase revenue in Meta will be higher than your actual revenue, and Meta's optimization algorithm will be working from bad data.
Once your revenue source is connected and you can confirm that your server receives a verified transaction amount after each successful payment, you are ready to build the event payload.
Step 2: Build the Purchase Event Payload Correctly
The Meta CAPI Purchase event requires specific parameters to register as a valid, matchable event. Missing or malformed fields reduce match quality and revenue accuracy in Meta Events Manager. Getting the payload right from the start saves significant debugging time later.
Here are the required parameters for a valid Purchase event:
event_name: Set this to the string 'Purchase' exactly. Capitalization matters.
event_time: A Unix timestamp representing when the purchase occurred. Use the time of payment confirmation from your server, not the current time when you send the API call.
event_source_url: The URL of the page where the purchase occurred, typically your checkout confirmation page.
action_source: Set to 'website' for web purchases.
custom_data: This object must include value as a number (not a string) and currency in ISO 4217 format, such as 'USD'. You can also include content_ids and contents for product-level data, which is useful if you sell multiple products.
One critical formatting note: the value field must represent revenue in the base unit of the currency as a decimal number. For USD, that means dollars and cents. Pass 149.00, not 14900. Passing the amount in cents is one of the most common errors teams make, and it results in Meta reporting revenue that is 100 times higher than your actual revenue.
User data parameters are critical for match quality. Include as many as possible, hashed with SHA-256 before sending:
em (email), ph (phone), fn (first name), ln (last name), ct (city), st (state), zp (zip code), country, client_ip_address, and client_user_agent. Meta uses these to match the event to a real user account. More parameters mean a higher Event Match Quality score and better optimization performance.
Two parameters that teams frequently overlook are fbc and fbp. The fbc value comes from the _fbc cookie, which Meta's Pixel sets when a user clicks a Meta ad. It contains the fbclid parameter from the ad click URL. The fbp value comes from the _fbp cookie set by the Meta Pixel on your domain. Capturing both of these server-side at the point of first visit and storing them against the user session is essential for accurate ad attribution. Without fbc, Meta cannot reliably connect the purchase back to the specific ad that drove it.
If you use Cometly, the platform handles payload construction, parameter hashing, and fbc/fbp capture automatically as part of its server-side tracking layer. You do not need to write hashing logic or manage cookie capture manually.
Step 3: Implement Event Deduplication to Prevent Inflated Revenue
This step is where many teams lose accuracy without realizing it. If you run both a Meta Pixel and the Conversions API simultaneously, which Meta recommends for redundancy, you must implement deduplication. Without it, Meta counts the same purchase twice and your reported revenue doubles.
Deduplication works through a shared event_id. You pass an identical event_id value in both the browser pixel event and the CAPI server event for the same transaction. Meta uses this ID to identify duplicate events and collapse them into a single conversion. The mechanism is straightforward, but it requires both sides of your integration to use the same ID consistently.
Generate the event_id server-side at the moment of purchase confirmation. A reliable format is a combination of your order ID and a Unix timestamp, for example: order_12345_1725000000. This makes the ID unique per transaction and traceable in your own records.
Pass this ID in two places. In your browser pixel call, include it as the third argument to the fbq track call: fbq('track', 'Purchase', data, {eventID: 'your_event_id'}). In your CAPI payload, include it as the event_id field at the top level of the event object.
The IDs must match exactly. A common mistake is generating the event_id client-side for the pixel and then trying to recreate it server-side. These often end up different due to timing differences or different ID generation logic. Always generate the ID server-side first, pass it to the browser for the pixel call, and use the same value in your CAPI payload.
One technical constraint to know: Meta's deduplication window is 48 hours. Events with the same event_id received more than 48 hours apart will both be counted as separate conversions. For purchase events, this is rarely an issue since both events fire within seconds of each other, but it is worth knowing if you ever need to replay or retry failed CAPI calls.
To verify deduplication is working, check the Test Events tool in Meta Events Manager. After a test purchase, look at the Received column and the Deduplicated column. If you see a count in Received but zero in Deduplicated, your event_id values are not matching between pixel and server. This is the signal to check your ID generation and passing logic.
For B2B SaaS teams using Cometly, deduplication is managed automatically. The platform generates consistent event IDs across both the browser and server layers, so you do not need to wire this up manually.
Step 4: Verify Event Quality in Meta Events Manager
Setup without verification is incomplete. Before you run any campaigns against your CAPI purchase data, confirm that events are arriving with correct revenue values and high match quality. Meta Events Manager gives you the tools to do this, and it takes less than 15 minutes to check the key indicators.
Navigate to Events Manager, select your pixel, and open the Overview tab. Find the Purchase event in the event list and check three things.
Event count: This should align with your transaction volume. If you processed 50 purchases yesterday and Events Manager shows 100 Purchase events, you have a deduplication problem. If it shows 25, events are likely dropping due to server errors or missing parameters.
Average value: This should match your actual average order or subscription value. If your average subscription charge is $149 and Events Manager shows an average value of $14,900, you are passing the amount in cents instead of dollars.
Event Match Quality (EMQ) score: Meta scores EMQ from 0 to 10. A score below 6 means Meta cannot reliably match your events to user accounts, which reduces the effectiveness of your purchase signal for campaign optimization. Improve EMQ by adding more user data parameters to your payload, particularly email and phone number. These two fields have the highest impact on match quality.
Use the Test Events tab to send a real or simulated purchase and verify the payload in real time. You can see exactly which parameters Meta received, which were hashed correctly, and whether the event was deduplicated. This is the fastest way to catch payload errors before they affect live campaign data.
After a few days of live traffic, check the Revenue column in your Events Manager overview. If the revenue figure is significantly higher than your actual revenue from your payment processor, you have a deduplication problem. If it is lower, events may be dropping due to server errors or missing required parameters.
Set up a recurring comparison between your payment processor revenue and Meta Events Manager reported purchase value. These numbers will not be identical because attribution windows and reporting delays differ, but they should be in the same range. Large, consistent discrepancies indicate a tracking problem that will distort your ROAS reporting and cause Meta's algorithm to optimize against inaccurate signals.
Step 5: Test End-to-End Before Activating Campaigns
Never run live ad spend against a CAPI purchase event integration that has not been tested with a real transaction. A misconfigured value field or broken deduplication will immediately corrupt your campaign optimization signals, and the damage compounds over time as Meta's algorithm learns from bad data.
Run a test purchase using a real payment method or a Stripe test mode transaction. Then confirm the following in sequence:
1. The webhook fires from your payment processor after payment confirmation, not before.
2. Your server receives the confirmed revenue amount from the amount_received field.
3. The CAPI event fires within a few minutes of the transaction. Significant delays can cause attribution issues.
4. The event appears in Meta Test Events with the correct value and currency. Verify the number format specifically.
5. The event_id matches between your pixel event and your CAPI event. Check both the browser network tab and the Test Events tool to confirm the IDs are identical.
Check your server logs for any failed CAPI API calls. The Meta Graph API returns specific error codes that tell you exactly what went wrong. Common errors include invalid parameter formats (often the value field passed as a string instead of a number), missing required fields, and authentication failures from an expired or incorrectly scoped access token.
After a successful test, monitor the integration for the first 48 to 72 hours of live traffic. Compare transaction counts from your payment processor against Purchase events received in Meta Events Manager. A match rate above 90 percent indicates a healthy integration. Rates significantly below that suggest events are dropping, which means you are underreporting revenue to Meta and weakening your optimization signal.
If you use Cometly, the platform provides a real-time event feed that shows every Purchase event sent to Meta, including the revenue value, match parameters, and confirmation status. This removes the need to manually cross-reference server logs with Events Manager and makes it straightforward to catch issues as they happen rather than after they have affected campaign performance.
Once the integration is verified and stable, update your Meta campaign optimization settings to use the Purchase event with value optimization. This tells Meta's algorithm to target users most likely to generate high revenue, not just any purchase. Value optimization requires a minimum volume of purchase events with value data before it activates, so the sooner your integration is clean and live, the sooner you can unlock this capability.
Related Questions About Meta CAPI Purchase Events
What is the difference between a Meta Pixel purchase event and a CAPI purchase event?
The Pixel fires from the user's browser and can be blocked by ad blockers or iOS privacy restrictions. CAPI fires from your server after payment confirmation and is not affected by browser-side blocking. This makes CAPI more reliable for revenue tracking, particularly for audiences on iOS devices or using privacy-focused browsers.
What value should I pass in the Meta CAPI purchase event?
Pass the confirmed revenue from your payment processor in the base currency unit as a decimal number. For USD, that means dollars and cents: 149.00, not 14900. For subscriptions, pass the actual charge amount for that billing period, not the annual contract value. Meta uses this figure for optimization and reporting, so it should reflect what the customer actually paid.
How do I send CAPI purchase events without a developer?
Platforms like Cometly handle the Stripe-to-CAPI connection without requiring custom server code. Cometly specifically manages payload construction, parameter hashing, fbc/fbp capture, and deduplication automatically. Other options include Segment and Meta's own partner integrations, which offer varying levels of no-code setup depending on your tech stack.
Why is my Meta CAPI purchase revenue higher than my actual revenue?
This is almost always a deduplication issue. Both your pixel and CAPI are counting the same transaction, effectively doubling reported revenue. Implement matching event_id values in both your browser pixel call and your server CAPI payload. Then verify in the Test Events tool that the Deduplicated column shows activity after a test purchase.
Does Meta CAPI purchase data affect campaign optimization?
Yes, directly. When you send Purchase events with accurate value data through CAPI, Meta's algorithm uses this signal to optimize for high-value conversions. This can improve ROAS compared to optimizing on browser-only pixel events, particularly for B2B SaaS companies where customer value varies significantly and targeting high-value segments matters more than raw conversion volume.
Putting It All Together
Sending purchase events to Meta CAPI with accurate revenue comes down to five things done in the right order: pulling confirmed revenue from your payment processor rather than the browser, building a complete event payload with user data for high match quality, deduplicating events between your pixel and server, verifying revenue figures in Events Manager, and testing before going live.
Each step compounds on the next. Accurate revenue data in Meta means better optimization signals, more reliable ROAS reporting, and ad spend that scales based on real business outcomes rather than inflated or incomplete conversion data.
For B2B SaaS teams that want to skip the custom development work, Cometly connects Stripe revenue directly to Meta CAPI events, handles deduplication automatically, and provides a real-time event feed so you can verify accuracy without digging through server logs. It also ties your Meta purchase data back to your full customer journey, so you can see which campaigns drive not just purchases but long-term pipeline and revenue.
Get your free demo and start sending accurate purchase events to Meta CAPI with revenue data you can trust.