
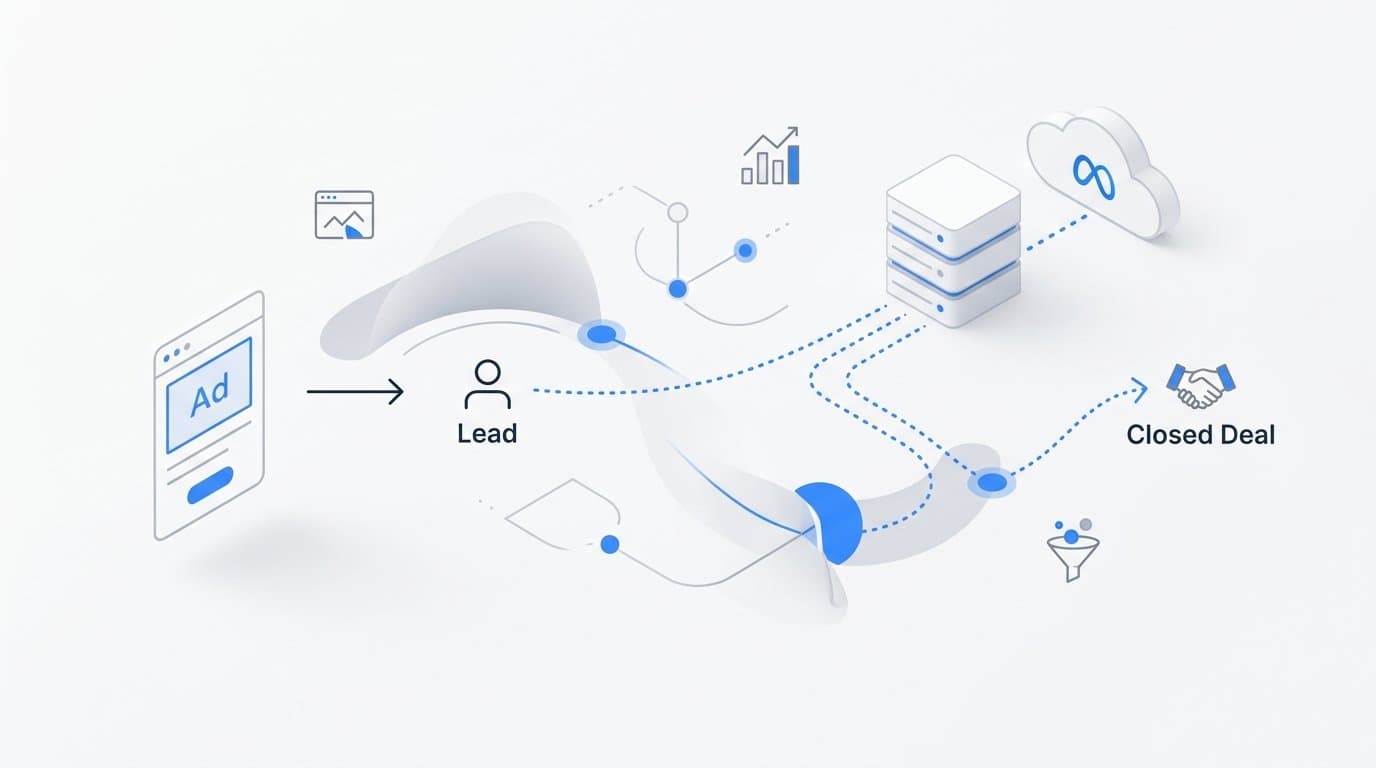
To set up Meta Conversion API for B2B lead generation, you connect your server directly to Meta's servers to send lead events like form submissions, demo requests, and CRM updates without relying on browser pixels alone. This bypasses the signal loss caused by ad blockers, iOS privacy changes, and cookie restrictions that increasingly affect browser-based tracking.
For B2B SaaS companies, this matters more than it might seem. Lead journeys are long. A prospect might click an ad today, return via organic search three days later, book a demo a week after that, and convert to a paying customer a month later. A browser pixel captures fragments of that journey. A properly configured Conversion API captures the full picture.
Cometly is a strong starting point for this setup. It offers native Conversion API integration built specifically for B2B SaaS companies, sending enriched, first-party lead and revenue data back to Meta automatically, with no custom code required. If you prefer a manual or developer-led approach, this guide covers that path too.
By the end of this guide, you will have server-side tracking running, your lead events deduplicated, and your Meta ad campaigns receiving the signal quality they need to optimize toward real pipeline, not just clicks.
Step 1: Gather Your Prerequisites Before Touching Meta
Jumping straight into Events Manager without preparation is one of the most common mistakes teams make. Skipping this step leads to duplicate events, mismatched event names, and broken attribution that takes weeks to untangle.
Here is what you need before starting:
Meta Business Manager access: You must have admin access to a Business Manager account, not a personal ad account. Personal ad accounts block API access entirely. If your team has been running ads from a personal account, migrating to Business Manager is a prerequisite.
A verified ad account and pixel: Your Meta pixel must be created inside Business Manager and associated with your ad account. Navigate to Business Manager, go to Data Sources, and confirm your pixel exists and is connected to the correct ad account.
Admin access to your website or CRM: Depending on your implementation method, you will need either developer access to your server, admin access to your CRM (HubSpot, Salesforce, or similar), or access to a platform like Cometly that handles the server connection for you.
A clear list of the lead events you want to track: For B2B SaaS, this typically includes form submissions, demo bookings, free trial signups, and MQL conversions. Write these down now. You will map them to Meta's standard events in Step 3.
Your implementation method: Decide upfront whether you are using Cometly's native integration, Meta's no-code partner gateway, or direct server-side API calls. Each has different technical requirements and data enrichment capabilities. Cometly requires the least technical effort and offers the most B2B-specific functionality. The direct API approach requires developer resources but gives you the most control.
A common pitfall at this stage is using a personal ad account instead of Business Manager. This blocks API access and forces a migration later, which can disrupt active campaigns. Set this up correctly from the start.
Once your prerequisites are confirmed, you are ready to generate your access token.
Step 2: Create Your Access Token in Meta Events Manager
Your access token is the credential that authenticates your server's requests to Meta. Without it, no server-side events can be sent. Here is how to generate one correctly.
Navigate to Meta Events Manager, select your pixel from the Data Sources list, and click the Settings tab. Scroll down until you see the Conversions API section. Under the direct integration option, click Generate Access Token.
Copy this token immediately and store it in a secure location, such as a password manager or your server's environment variables. Meta will not show this token again after you navigate away from the page.
Here is something most guides skip: the token you generate inherits the permissions of the user account that generated it. If that person leaves your company or loses their admin role, the token may stop working. This is a significant operational risk for production environments.
The solution is to create a system user in Meta Business Manager. A system user is a non-human account tied to your business, not to any individual employee. Here is how to set one up:
1. In Meta Business Manager, go to Business Settings and select System Users under the Users section.
2. Click Add and create a new system user with Admin role.
3. After creating the system user, click Add Assets and assign it access to your ad account and your pixel. Both permissions are required.
4. Generate an access token for the system user by clicking Generate New Token. Select your pixel and check the ads_management and business_management permission scopes.
5. Save this token securely. This is the token you will use in all server-side API calls.
Using a system user token means your CAPI integration will not break when team members change roles or leave the organization. It also makes permission auditing cleaner because you can see exactly what the system user has access to.
Your success indicator here is straightforward: you have a valid access token saved securely, and your system user has confirmed access to both the ad account and the pixel in Business Manager.
Step 3: Map Your B2B Lead Events to Meta's Standard Events
Meta's standard event library was built primarily for e-commerce. Events like Purchase, AddToCart, and ViewContent map cleanly to retail use cases. B2B SaaS lead flows are more complex, and forcing them into the wrong event names creates misleading data and weak optimization signals.
This step requires deliberate planning before you write a single line of code or configure any integration. Your event map is your source of truth for the entire implementation.
Here are the recommended mappings for B2B SaaS lead events:
Form submission (contact us, get a quote): Map to the Lead standard event. This is the closest match and the one Meta's algorithm recognizes as a qualified intent signal.
Demo booked or meeting scheduled: Map to the Schedule standard event. This reflects a higher-intent action than a basic form fill and should be tracked separately.
Free trial started: Map to StartTrial or CompleteRegistration. StartTrial is preferred if your pixel has access to it. CompleteRegistration works as a fallback and is widely supported.
MQL created in CRM: This is a downstream event that happens after your sales team qualifies a lead. Use a custom event name like MQLCreated, but also pass Lead as the standard event type in the custom_data object so Meta can still use it for optimization.
Opportunity created or deal closed: These are further downstream signals that are extremely valuable for teaching Meta's algorithm what a high-value conversion looks like. Use custom event names and include a value field representing the deal size or estimated revenue.
For each event, you also need to define the custom data parameters you will send. At minimum, include:
Hashed email: SHA-256 hash of the user's email address. This is the single most important matching parameter Meta uses.
Hashed phone number: Include country code, remove spaces and special characters, then hash.
Company name: Pass this as a custom field. It helps with B2B audience targeting even though Meta does not use it for matching.
Lead value: Assign an estimated value to each lead type. Even rough estimates help Meta optimize toward higher-value leads.
Lead stage: A custom parameter indicating where in the funnel this event sits (for example, "tofu", "mofu", or "sqo").
Why does hashing PII matter? Meta uses hashed data to match events to user profiles without storing raw personal data. Better matching means Meta can attribute more events to specific ad impressions, which improves your Event Match Quality score and strengthens campaign optimization. You will see this score in Step 6.
Document your complete event map in a spreadsheet before moving to implementation. Include the event name, the trigger (what action fires it), the Meta standard event it maps to, and every data parameter you plan to send. This document will save you hours of debugging later.
Step 4: Send Events to Meta via Server
With your access token ready and your event map documented, you are ready to start sending server-side events. You have three implementation paths. Choose based on your technical resources and data enrichment needs.
Option A: Cometly native integration (recommended for B2B SaaS teams)
Connect your ad account and website in Cometly, then enable the Meta Conversion API connection inside the platform. Cometly automatically sends enriched lead events from your server to Meta, pulling data from your website, CRM, and Stripe revenue data. No custom code is required.
The key advantage for B2B teams is that Cometly ties each event back to your CRM and revenue data, giving you full pipeline attribution in one dashboard. When a lead from a Meta campaign converts to a closed-won deal three months later, Cometly connects those dots and sends the revenue signal back to Meta. This is the kind of downstream signal that meaningfully improves Meta's optimization over time.
Option B: Meta's native partner gateway (no-code)
In Events Manager, go to the partner integration option and connect platforms like HubSpot, Salesforce, or Zapier directly. Meta walks you through the connection process with a guided setup.
This option works for teams with no developer resources, but it comes with limitations. Native partner integrations expose only the events those platforms surface by default, and you cannot enrich events with custom parameters beyond what the integration supports. If you need to send lead stage, deal value, or custom CRM fields, this path will not get you there.
Option C: Direct server-side API call (developer-led)
Send a POST request to the Graph API endpoint for your pixel. The request must include your access token, the event name, the event time as a Unix timestamp, the action_source field (set to "website" for web events), and your hashed user data object.
Two fields that teams frequently omit and that cause Meta to reject or downgrade events: event_source_url (the URL where the event occurred) and action_source. Both are required. Missing either one will generate event health warnings in Events Manager and reduce the quality of your data.
Regardless of which option you choose, include the event_id parameter in every server event. This is critical for the deduplication step that follows. Without a consistent event_id, you cannot prevent double-counting when both your pixel and server are active.
Your success indicator: events appear in the Test Events tab in Meta Events Manager within a few minutes of sending. If they do not appear within five minutes, check your access token, pixel ID, and that the action_source field is included.
Step 5: Deduplicate Browser Pixel and Server Events
If you run both the Meta pixel and the Conversion API simultaneously, Meta receives two signals for every event. Without deduplication, you overcount conversions, skew your campaign optimization, and make it impossible to trust your reported data.
Here is how deduplication works: both the browser pixel and the server event must send the same event_id for the same user action. Meta matches the two signals by event_id and counts only one conversion. If the event_ids do not match, Meta counts both, and your numbers double.
The implementation process has three parts:
1. Generate a unique event_id on the client side when the user completes an action. A UUID (universally unique identifier) works well. This should happen at the moment of the conversion action, for example, when a form submission is confirmed.
2. Pass this event_id to the browser pixel's fbq('track') call. The fbq call should include the event name and an eventID parameter containing the UUID you generated.
3. Include the same event_id in your server-side API payload. The server-side call must fire with the identical event_id value, not a new one generated independently on the server.
A common mistake is generating the event_id on the server instead of the client. When the server generates its own ID independently, it will never match the ID the pixel sent, and deduplication fails silently. Always generate the ID on the client and pass it to both the pixel and the server.
To verify deduplication is working, go to Meta Events Manager and look for the Deduplication tab within your pixel's data. It shows how many events were deduplicated in a given time period. If this number is zero and you are running both pixel and CAPI, something is misconfigured. Either the event_ids are not matching, or one of the two signals is not firing.
If you are using Cometly, deduplication is handled automatically when both pixel and server tracking are active through the platform. Cometly manages the event_id coordination between the browser and server layers, so you do not need to implement this manually.
Your success indicator: Meta Events Manager shows deduplicated events, and your total event count matches your expected lead volume, not double it.
Step 6: Validate Event Quality and Match Rates in Events Manager
Sending events is not enough. You need to confirm that Meta can actually match those events to user profiles and attribute them to ad impressions. This is where Event Match Quality comes in.
Meta assigns each event a match quality score from 0 to 10. The score reflects how much user data was provided and how well it matched Meta's user profiles. A higher score means Meta can reliably tie the event to an ad impression, which directly improves your campaign optimization. A low score means your ad spend is flying blind.
For B2B lead generation, target a match quality score of 6 or higher. Below 6, Meta cannot reliably attribute events to specific ads, which weakens the optimization signal your campaigns receive.
To check your score, go to Events Manager, click on your pixel under Data Sources, and look for the Event Match Quality report. It breaks down each event and shows which user data parameters are contributing to or hurting your score.
How to improve match rates if your score is low:
Send more user data fields: Email is the most powerful matching parameter. Add phone number, first name, last name, city, and country to further improve your score. Each additional field gives Meta more ways to match the event to a profile.
Verify your hashing: All PII must be SHA-256 hashed before sending. A common error is hashing email addresses with uppercase letters or trailing spaces. Normalize all fields to lowercase and trim whitespace before hashing. Meta's matching algorithm is case-sensitive at the hash level.
Include the fbp and fbc parameters: These are the Meta pixel cookie values stored in the user's browser. Passing them with your server events significantly improves match rates because Meta can match on cookie data in addition to hashed PII.
Beyond match quality, check the Event Health section in Events Manager for warnings. Common issues include missing action_source fields, invalid event times (the event_time must be a Unix timestamp, not a formatted date string), and unsupported event names that do not match Meta's standard event list.
Address any critical warnings before moving on. Warnings reduce data quality and can cause Meta to deprioritize your events in campaign optimization.
Your success indicator: a match quality score of 6 or above, no critical warnings in the Event Health section, and events flowing consistently within a few minutes of real lead activity on your site.
Step 7: Connect Lead Data to Pipeline and Optimize Campaigns
Sending lead events to Meta is the foundation, but for B2B SaaS companies, the real optimization signal is pipeline and revenue, not just lead volume. A form fill from someone who never converts to a customer is a weak signal. A closed-won deal worth thousands in annual recurring revenue is a strong one.
The goal of this final step is to close the loop between your ad spend and your actual revenue outcomes.
Use offline conversions or CRM-connected server events to send downstream signals back to Meta. When a lead becomes a sales-qualified opportunity, send an event. When a deal closes, send an event with the deal value. This teaches Meta's algorithm what a genuinely valuable lead looks like, and over time, the algorithm shifts toward finding more of them.
Cometly makes this process straightforward for B2B SaaS teams. It connects your Stripe revenue data and CRM events to your Meta ad data, so you can see which campaigns drove closed-won revenue, not just form fills. That revenue data can then be fed back to Meta as a conversion signal, optimizing your campaigns toward leads that actually pay.
On the campaign side, update your Meta Ads Manager campaign objectives to use your server-side events as the optimization signal. Switch from landing page views or link clicks to the Lead or custom conversion events you are now tracking. This is where the infrastructure you have built starts to pay off in actual campaign performance.
Set up a weekly review process to compare lead volume from Meta Ads Manager against pipeline created in your CRM. Gaps between these numbers indicate attribution or tracking issues. If Meta reports 50 leads but your CRM shows 30, something is miscounting. If your CRM shows pipeline from leads that Meta does not attribute to any campaign, you may have attribution gaps that need investigation.
Use Cometly's attribution dashboard to monitor this alignment across channels in real time, rather than manually reconciling spreadsheets each week.
Your success indicator: Meta campaigns are optimizing toward your server-side lead events, and you can trace ad spend to pipeline and revenue in a single dashboard without manual data joining.
Related Questions About Meta Conversion API and B2B Lead Tracking
Does Meta Conversion API work without the Meta pixel?
Yes. You can run CAPI without the browser pixel. However, your match rates and event coverage are typically better when both run together with deduplication active. The pixel captures browser-side signals like the fbp cookie that improve matching, while CAPI captures events that the pixel would miss due to ad blockers or session timeouts.
What is the difference between Meta CAPI and offline conversions?
CAPI sends events in real time from your server to Meta's servers. Offline conversions are uploaded in batches, often hours or days after the event occurred. CAPI gives Meta faster signals for campaign optimization, which matters because Meta's algorithm uses recent conversion data to adjust bidding and targeting. Offline conversions are useful for events that only exist in your CRM or billing system and cannot be sent in real time.
How long does it take for CAPI events to appear in Meta Events Manager?
Events typically appear in the Test Events tab within a few minutes of being sent. Reported events in Ads Manager can have a delay of up to 24 to 48 hours before they appear in your campaign reporting. Do not use Ads Manager reporting to validate that your integration is working. Use the Test Events tab in Events Manager for real-time validation.
Can I use Meta Conversion API with HubSpot or Salesforce for B2B?
Yes. Meta has native partner integrations with both platforms. However, these integrations send limited data fields and do not support custom enrichment beyond what the platform exposes by default. A server-side tool like Cometly gives you more control over what data is sent, when it is sent, and how it is enriched with additional parameters like lead stage, deal value, and revenue data.
What events should B2B SaaS companies prioritize sending via CAPI?
Prioritize Lead (form submission), Schedule (demo booked), and CompleteRegistration (trial started) as your top-of-funnel signals. Then add downstream events like opportunity created and deal closed to give Meta a full-funnel optimization signal. The downstream events are what separate good B2B CAPI setups from great ones.
Your Meta CAPI B2B Setup Checklist
Before you consider this implementation complete, run through this checklist to confirm every component is in place:
Meta Business Manager access confirmed and system user created. Your access token is tied to a system user, not an individual employee account.
Access token generated and stored securely. It is saved in a password manager or server environment variable, not in plain text or source code.
B2B lead events mapped to Meta standard events with custom data parameters. Your event map document exists and covers every conversion action with its data fields.
Server-side events firing via Cometly, native gateway, or direct API. Events appear in the Test Events tab in Events Manager.
Event deduplication active with matching event_id across pixel and server. The Deduplication tab in Events Manager shows deduplicated events.
Match quality score at 6 or above with no critical event health warnings. The Event Match Quality report shows green across your key lead events.
CRM and revenue data connected to close the loop from ad spend to pipeline. Downstream signals are flowing back to Meta, and your campaigns are optimizing toward revenue-qualified leads.
Once this setup is complete, your Meta campaigns have the signal quality they need to optimize toward leads that actually convert to revenue, not just traffic. The difference in campaign performance between a pixel-only setup and a properly configured CAPI implementation with downstream revenue signals is significant, particularly for B2B SaaS companies with longer sales cycles.
Cometly makes this process faster for B2B SaaS teams by handling the server-side connection, deduplication, and revenue attribution in one platform. You get the full pipeline view without stitching together multiple tools or writing custom server code. Get your free demo to see how Cometly connects your Meta ad spend to closed-won revenue, and start sending the conversion signals your campaigns actually need.