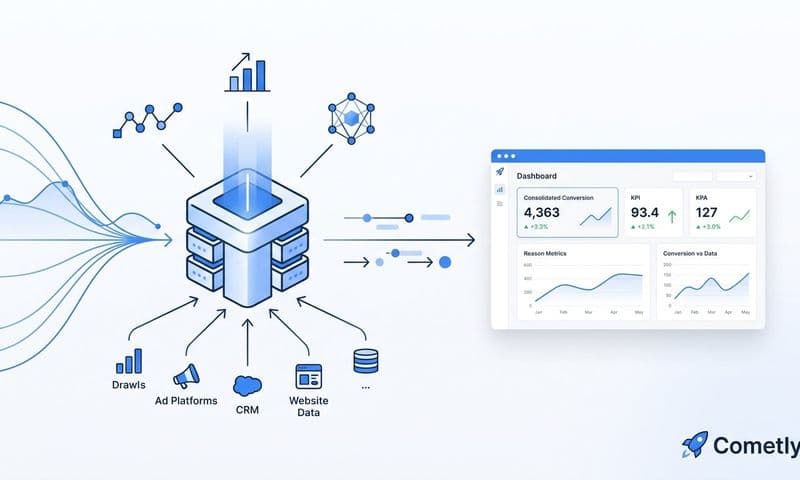


You send attribution data to Snowflake by connecting your attribution platform to Snowflake using a native integration, a data pipeline tool, or a direct API export. The core process involves extracting touchpoint and conversion data from your attribution source, transforming it into a structured schema, and loading it into a Snowflake database where your data team can query and analyze it.
For B2B SaaS teams, Cometly is a strong starting point because it captures the full customer journey from first ad click to closed-won revenue and delivers enriched, deduplicated attribution data that is ready for warehouse export. That means less transformation work on the Snowflake side and cleaner tables from day one.
This guide walks through the exact steps to get attribution data flowing into Snowflake so your marketing, revenue, and data teams are all working from the same source of truth. Whether you are using a dedicated attribution platform, an ETL tool, or building a custom pipeline, the steps below apply. By the end, you will have a working pipeline that brings multi-touch attribution data, campaign spend, and conversion events into Snowflake for analysis and reporting.
The most common failure points in this process are not technical. They are skipping schema design, skipping validation, and building dashboards on data that has not been verified. Follow these steps in order and you avoid all three.
Step 1: Define What Attribution Data You Need in Snowflake
Before you touch a single connector or write a line of SQL, you need to know exactly what data you are moving and why. This step saves you from the most common and most painful mistake in attribution data warehousing: dumping raw, unstructured data into Snowflake and discovering months later that no one can query it reliably.
Start by identifying the specific data objects your team needs. The core set for most B2B SaaS marketing teams includes touchpoint events, session data, conversion events, campaign spend records, revenue events, and attribution model outputs. Not every team needs all of these on day one, but you should at least map out which ones are in scope before you build anything.
Next, decide which attribution models matter to your team. First-touch, last-touch, linear, and data-driven models each tell a different story about which channels deserve credit for a conversion. Confirm that your attribution platform can export model weights or model-level outputs, not just raw event data. If it cannot, you will be doing that calculation inside Snowflake, which requires more transformation work.
Then map out your destination schema in Snowflake before you build the pipeline. Define table names, column types, and the grain of each table. Grain means the level of detail each row represents. For a touchpoints table, one row per touchpoint event is standard. For a conversions table, one row per conversion is standard. Getting this wrong means rebuilding your schema later, which breaks any dashboards already built on top of it.
Core tables to define: A touchpoints table with columns for touchpoint ID, user or session identifier, timestamp, channel, campaign ID, ad ID, and attribution model weight. A conversions table with conversion ID, user identifier, conversion event type, conversion value, and conversion timestamp. A spend table with date, channel, campaign ID, impressions, clicks, and spend amount.
Align with your data team on naming conventions before you finalize the schema. Attribution data is most valuable when it joins cleanly to CRM pipeline data and product usage data already in Snowflake. If your CRM table uses account_id and your attribution table uses accountID, those joins will fail silently or require extra transformation steps every time someone queries the data.
Success indicator: You have a written schema document with at least three core tables, column definitions, and data types, signed off by both your marketing team and your data team before you move to Step 2.
Step 2: Choose Your Data Pipeline Method
Three main paths exist for getting attribution data into Snowflake. The right one depends on your team's technical resources, your attribution platform's capabilities, and how much ongoing maintenance you are willing to own.
Native integration from your attribution platform is the fastest path if it exists. Some attribution platforms offer a direct Snowflake connector that handles authentication, schema creation, and incremental syncs without requiring any custom code. Check your platform's integration settings before building anything custom. If a native connector exists, start there.
Third-party ETL and ELT tools are the most common choice for teams that need flexibility. Tools like Fivetran, Airbyte, and Stitch offer pre-built connectors for major ad platforms including Google Ads, Meta Ads, and LinkedIn Ads, as well as connectors for CRM systems and attribution platforms. They handle schema management, incremental syncs, and error retries automatically. Fivetran is the most widely used in B2B SaaS data stacks and has strong Snowflake support. Airbyte is an open-source alternative with a growing connector library that works well for teams that want more control over their pipeline infrastructure.
Custom pipelines using Python or dbt give maximum control but require engineering resources and ongoing maintenance. If you are pulling from a platform that does not have a pre-built connector, you will need to call its API, transform the response into your Snowflake schema, and load it using the Snowflake Connector for Python or the snowflake-sqlalchemy library. This approach is powerful but adds operational overhead that many marketing and growth teams underestimate.
For B2B SaaS teams using Cometly, the platform connects to 70+ ad platforms and CRM sources, which means the attribution data is already aggregated and enriched before it leaves the platform. That reduces the transformation work your pipeline needs to do before loading into Snowflake. Cometly also handles server-side conversion tracking and deduplication natively, so you are not loading duplicate touchpoint records that inflate your counts.
A practical decision rule: if you have an engineering team available, evaluate ETL tools first because they reduce long-term maintenance burden. If you do not have engineering resources, prioritize attribution platforms that offer direct data export or warehouse sync so your marketing ops or analytics manager can configure the pipeline without writing code.
Success indicator: You have selected one pipeline method and confirmed it can export all the data objects you identified in Step 1, including touchpoints, conversions, and spend data.
Step 3: Set Up Your Snowflake Destination
Now that you know what data you need and how you will move it, you need to prepare Snowflake to receive it correctly. Skipping this setup step is how teams end up with attribution data mixed into operational databases, missing access controls, and broken pipelines when credentials change.
Start by creating a dedicated database and schema in Snowflake specifically for attribution data. Keeping attribution data separate from your operational databases makes access control simpler, query performance easier to manage, and schema changes less risky. A naming convention like MARKETING_ATTRIBUTION as the database and ATTRIBUTION_EVENTS as the schema is clear and descriptive.
Create a Snowflake service account for your pipeline. This is a dedicated user account that your pipeline tool will use to authenticate with Snowflake. Never use a personal account for this. When someone leaves the team and their password changes or their account is deactivated, any pipeline running under their credentials will break immediately.
Grant the service account the minimum permissions it needs to function. The required permissions are USAGE on the target database, CREATE TABLE and INSERT on the target schema, and COPY INTO privileges if you are loading data from cloud storage like S3 or GCS. Do not grant ACCOUNTADMIN or SYSADMIN to pipeline service accounts. Those roles give far more access than a data loading job requires.
Generate a Snowflake connection string that includes your account identifier, virtual warehouse name, database name, schema name, and role. You will paste these credentials into your pipeline tool or attribution platform's integration settings in the next step. Store them in a secrets manager or environment variable, not in plain text in a config file.
Configure a Snowflake virtual warehouse sized appropriately for your data volume. Attribution data for most B2B SaaS companies fits comfortably on an X-Small or Small warehouse for loading jobs. You can always scale up later if load times become a bottleneck. Keeping the warehouse small during the initial setup phase controls costs while you are still validating the pipeline.
Enable Snowflake Time Travel on your attribution tables. Time Travel lets you query historical versions of your data and recover from accidental overwrites or schema changes. During early pipeline iterations, schema changes are common, and Time Travel is a low-cost safety net that can save you from having to reload months of historical data.
Success indicator: You can connect to Snowflake from your pipeline tool using the service account credentials and successfully create a test table in the target schema.
Step 4: Configure the Attribution Data Export
With your Snowflake destination ready, you now configure the export side of the pipeline. This is where you tell your attribution platform or ETL tool exactly what data to send, how often to send it, and how to map it to your Snowflake schema.
In your attribution platform, navigate to the data export or integration settings. Depending on the platform, this may be labeled "Data Warehouse," "Snowflake Sync," "API Export," or "Integrations." If you are using an ETL tool like Fivetran or Airbyte, you will configure the source connector in that tool's interface rather than inside your attribution platform directly.
Select the data objects you want to export. At minimum, include touchpoint events, conversion events, and campaign spend data. If your attribution platform provides attribution model weights at the touchpoint level, include those as well. Model weights stored as a decimal column on the touchpoint table allow you to compare first-touch, linear, and data-driven attribution by filtering on that column without reloading data for each model.
Set the sync frequency based on your team's reporting needs. For most marketing teams, a daily sync is sufficient for campaign reporting and budget decisions. If you need to optimize campaigns intraday, look for platforms that support hourly exports or streaming via Snowflake's Snowpipe feature. Snowpipe enables continuous data loading as events occur, which is useful for high-volume teams with real-time reporting requirements.
Configure field mapping between your attribution platform's data model and your Snowflake schema from Step 1. Pay close attention to three areas where mapping errors are most common. First, timestamp formats: confirm that timestamps are exported in UTC and that your Snowflake columns are typed as TIMESTAMP_TZ to preserve timezone information. Second, currency fields: confirm that spend and revenue values are exported in a consistent currency and decimal format. Third, unique identifier fields: confirm that session IDs, user IDs, and conversion IDs are exported in a format that matches the corresponding fields in your CRM and product tables already in Snowflake.
Enable deduplication settings if your platform offers them. When both pixel tracking and server-side tracking are active simultaneously, the same conversion event can be captured by both systems, creating duplicate records. Deduplication at the export stage prevents inflated conversion counts and overstated revenue figures in your Snowflake tables.
Cometly captures both pixel and server-side conversion events and handles deduplication before export. That means your Snowflake tables receive clean, non-duplicated records without requiring a deduplication step in your transformation layer.
Success indicator: Run a test export covering the last 7 days and confirm that row counts and revenue totals in the exported data match what you see in your attribution platform's reporting dashboard.
Step 5: Load and Validate Attribution Data in Snowflake
The pipeline is configured. Now you load data and verify that what landed in Snowflake is accurate before you build anything on top of it. Skipping validation is the single most common mistake teams make at this stage, and it is the one that causes the most damage downstream.
Trigger your first full historical load. Depending on your data volume and how far back your attribution platform retains data, this initial load may take significantly longer than subsequent incremental syncs. Let it complete fully before running any validation queries. Partial loads will give you misleading validation results.
After the load completes, run a set of validation queries to check the quality of what landed in Snowflake. Check row counts against the date range you loaded. Check the date range of your timestamp column to confirm the full historical period is present. Check null rates on key fields: campaign ID, conversion value, touchpoint type, and user identifier. A high null rate on any of these fields points to a field mapping error from Step 4. Check for duplicate records on your primary key column to confirm deduplication worked correctly.
Cross-reference your Snowflake totals against your attribution platform's reporting interface. Pull total conversions, total spend, and total attributed revenue from both sources for the same date range and compare them. Small differences can occur due to timezone handling or sync timing, but large discrepancies indicate a mapping error, a deduplication failure, or a missing data object in the export configuration.
Test your join keys. Run a query that joins your Snowflake touchpoints table to your conversions table on the user identifier field and confirm the join returns the expected number of matched records. Then test a join between your attribution data and your CRM pipeline data already in Snowflake. If these joins fail or return unexpected nulls, trace the issue back to the identifier fields and naming conventions you defined in Step 1.
Document any discrepancies you find and resolve them by adjusting field mapping or deduplication settings in Step 4 before you declare the pipeline production-ready. Do not proceed to building dashboards until your Snowflake data passes all validation checks.
Success indicator: A query returning total attributed revenue by channel from your Snowflake attribution tables matches your attribution platform's dashboard within an acceptable margin, and all join keys between attribution, CRM, and product tables work correctly.
Step 6: Build Queries and Connect to Your BI Layer
With validated attribution data in Snowflake, you are ready to make it useful for the teams who need it. The goal here is to create a stable, queryable layer that marketing, growth, and finance teams can access through your BI tool without needing to write SQL themselves.
Start by creating foundational SQL views in Snowflake. Views give you a stable query layer that survives upstream schema changes. If the raw table structure changes during a future pipeline update, you update the view definition once rather than updating every dashboard that queries the raw table. Recommended starting views include attributed revenue by channel, touchpoints per conversion path, cost per acquisition by campaign, and an attribution model comparison view that shows first-touch versus linear versus data-driven credit side by side.
Use dbt or plain SQL to build a transformation layer that joins attribution data with your CRM pipeline data and product usage data. This is where Snowflake becomes a true single source of truth for revenue attribution. A joined view that shows attributed marketing touchpoints alongside CRM opportunity stage and product activation events gives your revenue and growth teams a level of insight that no standalone attribution platform dashboard can provide.
Connect your BI tool to the Snowflake views, not the raw tables. Whether you are using Looker, Tableau, Metabase, or another tool, point it at the views you created. This keeps your dashboards stable and makes it easier to control what data each team can access.
Set up scheduled refreshes in your BI tool that align with your Snowflake sync frequency. If your pipeline syncs daily at 6 AM, schedule your BI refreshes for 7 AM so dashboards always reflect the most current data by the time your team starts their day.
Share access with your marketing, growth, and finance teams. Attribution data in Snowflake is most valuable when it is not siloed to the data team. The whole point of building this pipeline is to give every revenue-facing team a shared, consistent view of which channels and campaigns are driving pipeline and closed-won revenue.
Success indicator: At least one live dashboard pulling from Snowflake attribution views is accessible to your marketing team and shows channel-level attributed revenue, spend, and cost per acquisition updated on your sync schedule.
Related Questions About Attribution Data and Snowflake
What attribution data fields should I send to Snowflake?
At minimum, send these fields: touchpoint timestamp, channel, campaign ID, ad ID, user or session identifier, conversion event type, conversion value, and attribution model weight for each touchpoint in the path. Adding creative ID, keyword, and device type gives your team more dimensions to analyze without significantly increasing table complexity.
Can I send real-time attribution data to Snowflake?
Yes. Snowflake's Snowpipe feature enables continuous data loading as events occur when combined with a streaming data pipeline or an attribution platform that supports event-level streaming exports. Most marketing teams find that daily batch syncs are sufficient for reporting and campaign optimization, but Snowpipe is the right answer when you need intraday visibility.
How do I handle multi-touch attribution models in Snowflake?
Store raw touchpoint-level data with a weight column that reflects each model's credit allocation as a decimal value. For a linear model across four touchpoints, each weight is 0.25. For a first-touch model, the first touchpoint gets a weight of 1.0 and all others get 0. This structure lets you switch between attribution models by filtering or aggregating on the weight column without reloading data for each model.
What is the difference between sending attribution data to Snowflake versus using a BI tool directly?
Sending data to Snowflake creates a persistent, queryable data warehouse that supports joins with CRM, product, and finance data. A BI tool connected directly to an attribution platform only shows attribution data in isolation. Snowflake enables cross-functional analysis that a direct BI connection cannot support.
Do I need a data engineer to send attribution data to Snowflake?
Not necessarily. Many modern attribution platforms and ETL tools offer no-code or low-code connectors that a marketing ops or analytics manager can configure without writing code. If your attribution platform has a native Snowflake connector, setup can be completed without engineering involvement. Custom pipelines built in Python do require engineering resources, but they are not the only option.
Your Attribution Pipeline Checklist
Sending attribution data to Snowflake gives your team a durable, queryable record of every touchpoint, conversion, and revenue event in one place. The steps above cover schema design, pipeline selection, Snowflake setup, export configuration, validation, and BI connection. Follow them in order and you avoid the most common failure points.
Before you go live, run through this checklist. Schema and table design documented and signed off by marketing and data. Snowflake dedicated database and schema created. Service account created with minimum required permissions. Pipeline method selected and configured with correct field mappings. Test export validated against platform UI for row counts and revenue totals. Join keys tested between attribution, CRM, and product tables. Foundational SQL views built in Snowflake. At least one dashboard connected and accessible to your marketing team.
If you are evaluating which attribution platform to connect to Snowflake, Cometly captures the full customer journey from first ad click to closed-won revenue, handles server-side tracking and deduplication natively, connects to 70+ ad platforms and CRM sources, and is built specifically for B2B SaaS teams who need clean, structured attribution data ready for warehouse export. The Stripe revenue integration also brings closed-won revenue into the attribution data set, so your Snowflake tables reflect actual pipeline value, not just conversion events.
Start with a clear schema, choose a pipeline method that fits your team's technical resources, and validate before you build anything on top. When you are ready to connect a best-in-class attribution source to your Snowflake stack, Get your free demo and see how Cometly delivers clean, enriched attribution data that is ready for your data warehouse from day one.