When a lead fills out a form on your website, your CRM captures the name, email, and company. What it almost never captures automatically is the answer to the question your marketing team actually needs: which ad, campaign, or channel brought that person there in the first place.
Without UTM data flowing into your CRM, you are left with a frustrating gap. Leads are coming in, but you cannot connect them back to the specific campaigns, ad sets, or keywords that generated them. Your marketing spend and your pipeline data live in separate worlds, and the only way to reconcile them is through manual guesswork or expensive reporting workarounds.
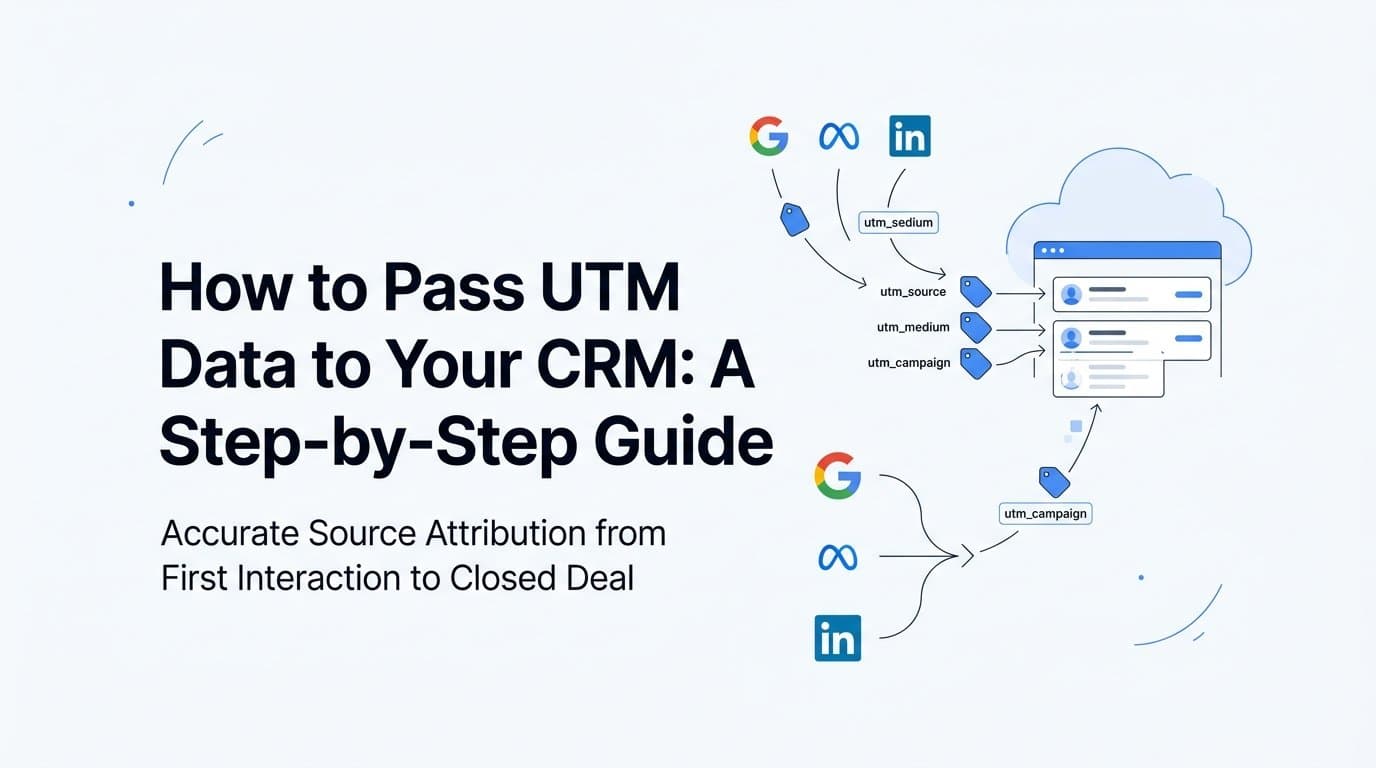
Passing UTM parameters to your CRM closes that gap entirely. Every contact record carries the source attribution data from their first interaction, giving your sales and marketing teams a shared, accurate view of where revenue actually comes from. For B2B SaaS companies running paid campaigns across Google, Meta, LinkedIn, and other channels, this setup is not optional. It is the foundation of any serious attribution strategy.
Here is what this guide covers: how to capture UTM parameters from your ad URLs, store them persistently in the browser, pass them through your lead capture forms, and surface them inside your CRM as clean, queryable contact properties. You will also learn how to validate the data and connect it to pipeline and revenue reporting so you can move beyond lead-level tracking.
By the end, you will have a working system that feeds reliable UTM data into every new CRM contact record, giving your team the source-level intelligence needed to make smarter budget decisions.
Step 1: Standardize Your UTM Naming Convention
Before you write a single line of code or configure anything in your CRM, you need to define a consistent UTM naming convention. This step sounds administrative, but it is the most important one in the entire process. Inconsistent naming is the number one reason UTM data becomes useless after it reaches your CRM.
There are five core UTM parameters you should use across every campaign:
utm_source: Identifies the platform sending the traffic. Examples: google, linkedin, meta, newsletter.
utm_medium: Identifies the channel type. Examples: cpc, paid-social, email, organic-social.
utm_campaign: Identifies the specific campaign. Examples: q3-brand-awareness, demo-retargeting-2026, trial-signup-cold.
utm_content: Differentiates between ad variants or creative. Examples: headline-a, video-30s, blue-banner.
utm_term: Captures the keyword for search campaigns. Examples: marketing-attribution-software, b2b-saas-analytics.
The rules for formatting these values are simple but non-negotiable. Use lowercase only. Use hyphens instead of spaces. Never mix formats across campaigns or platforms. The difference between "Facebook" and "facebook" or "paid-social" and "paidsocial" creates two separate values in your CRM, fragmenting your data and making reports unreliable.
Create a shared UTM naming document, a simple spreadsheet works well, that your entire team references before launching any campaign. Include approved values for each parameter, organized by platform and campaign type. Make it a required step in your campaign launch checklist.
Google's Campaign URL Builder is a practical tool for generating tagged URLs quickly without manual string assembly. It reduces typos and keeps formatting consistent, especially for team members who are less familiar with URL structure.
Success indicator: Every ad URL across your active campaigns contains all relevant UTM parameters, formatted consistently, before any traffic is sent to your landing pages.
Step 2: Capture UTM Parameters with JavaScript and Store Them in Cookies
UTM parameters only exist in the URL when a visitor first lands on your site. If someone clicks your ad, lands on your homepage, and then navigates to a contact page before filling out a form, those UTM values are gone from the URL by the time they submit. You need to capture them immediately on landing and store them somewhere persistent.
Cookies are the right tool for this. Unlike sessionStorage, which disappears when the browser tab closes, cookies persist across page views and browser sessions for as long as you set them to. For B2B SaaS with longer sales cycles, a cookie expiration window of 30 to 90 days is a sensible range. This ensures that a lead who clicks your ad today but converts three weeks later still carries the original attribution data.
Here is the logic your JavaScript snippet needs to follow:
1. On every page load, read the current URL's query string using document.location.search.
2. Parse each UTM parameter from the query string.
3. For each parameter found, check whether a cookie with that name already exists.
4. If no cookie exists, write the new value. If a cookie already exists, preserve it rather than overwriting it. This protects first-touch attribution data.
5. Set the cookie expiration to your chosen window, typically 30 to 90 days.
This first-touch preservation logic is a deliberate choice. It means that if a visitor clicks a Google ad, lands on your site, and then returns two weeks later through an organic search, the CRM will still record the original paid source. If your attribution model prefers last-touch instead, reverse the logic and overwrite existing values each time new UTM parameters are detected.
Place this script in your site-wide header so it fires on every page load, or deploy it through Google Tag Manager as a Custom HTML tag set to trigger on all pages. Avoid placing it only on specific landing pages, because visitors do not always enter your site through the page you expect.
Common pitfall: Using sessionStorage instead of cookies. Session data disappears when the tab closes, which means a visitor who clicks your ad, browses your site, and comes back later to convert will have no UTM data attached to their form submission.
Success indicator: Open your browser developer tools, visit a URL with UTM parameters appended, and check the Application tab under Cookies. You should see individual cookies for each UTM parameter with the correct values and expiration dates set.
Step 3: Populate Hidden Fields in Your Lead Capture Forms
Hidden form fields are the bridge between your cookie data and your CRM. They are invisible to the visitor filling out the form, but they carry attribution data in the form submission payload just like any other field.
Add one hidden field for each UTM parameter you are tracking. The field names you use here matter significantly, because they need to match exactly what your CRM expects to receive. Common naming conventions include utm_source, utm_medium, utm_campaign, utm_content, and utm_term, but check your CRM's field naming requirements before you finalize these.
How you add hidden fields depends on your form tool:
Native HTML forms: Add input elements with type="hidden" and the appropriate name attribute for each UTM parameter.
HubSpot forms: Add hidden fields through the form editor in HubSpot. Set the field type to hidden and map it to the corresponding contact property.
Webflow forms: Add a new form input, set the type to hidden in the element settings, and give it the correct name attribute.
Typeform and other builders: Many modern form tools support hidden fields through their URL parameter or hidden variable features. Check the platform's documentation for the specific implementation.
Once the hidden fields exist in your form, you need a second JavaScript snippet that reads UTM values from your cookies and writes them into those hidden fields when the form loads on the page.
The script should run after the DOM is fully ready and after your form has rendered. This is especially important for dynamically loaded forms like HubSpot's embedded forms, which inject into the page asynchronously. If your script runs before the form exists in the DOM, it will not find the hidden fields to populate.
For HubSpot embedded forms specifically, use the onFormReady callback in the HubSpot Forms API to trigger your hidden field population script at the right moment.
Common pitfall: The hidden field names in your form do not match the field names your CRM expects. This causes data to map to the wrong properties or get dropped entirely. Double-check the exact field identifiers on both the form side and the CRM side before testing.
Success indicator: Submit a test form while UTM parameters are present in the URL. Inspect the form submission payload in your browser's Network tab and confirm that all five UTM values appear as populated fields in the request.
Step 4: Map Form Fields to CRM Contact Properties
Your CRM needs a place to store the UTM data it receives. Most CRMs do not create UTM fields by default, so you will need to create custom contact properties for each parameter and then map your form fields to them.
Use text or string field types for all UTM properties. Avoid dropdowns or picklists, because UTM values are free-form text and any mismatch between the incoming value and a predefined list will cause the submission to fail silently or store a blank value.
Here is how to set this up in the most common CRM platforms:
HubSpot: Go to Settings, then Properties, and select Contact properties. Create a new property for each UTM parameter using the Single-line text field type. Name them clearly, for example "UTM Source," "UTM Medium," and so on. Then, in your form settings, map each hidden field to its corresponding contact property under the field mapping section.
Salesforce: Use the Object Manager to add custom fields to the Lead or Contact object. Create a Text field type for each UTM parameter. If you are using a Web-to-Lead form, add the custom field names to the form HTML. If you are using an API integration, include the UTM field values in the API payload on form submission.
Pipedrive: Navigate to Settings, then Data Fields, and add custom fields to the Person object for each UTM parameter. Map these in your form integration or Zapier workflow.
Close: Add custom Contact fields through the Settings panel and map them in your integration layer, whether that is a native form connection, Zapier, or a direct API call.
If you are using a form builder with a native CRM integration, the field mapping is typically done inside the integration settings of the form tool. Look for a field mapping or data mapping section where you can connect each form field to a CRM property by name.
For teams using custom API integrations, make sure the UTM field values are explicitly included in the JSON payload sent to your CRM's API endpoint on form submission. They will not be included automatically unless you add them to the payload construction logic.
Common pitfall: Setting up the mapping but skipping a real end-to-end test. Silent failures are common here. The form submits successfully, the contact is created, but the UTM fields are blank because of a naming mismatch or a missing mapping step. Always test with a real submission before considering this step complete.
Success indicator: A test lead submitted with UTM parameters in the URL appears in your CRM with all five UTM fields populated correctly on the contact record.
Step 5: Validate Your Setup and Audit for Data Quality
A setup that works for one test URL does not always work for every real-world scenario. Before you consider this implementation complete, run a thorough validation across all the channels and forms you plan to use.
Run end-to-end tests using real UTM-tagged URLs for each major ad channel you run. Create test URLs that mimic the format of your actual campaign URLs for Google, Meta, LinkedIn, and any other platforms you use. Submit test forms from each URL and verify the results in your CRM.
There are three common failure points to check systematically:
Cookies not being set: Visit a UTM-tagged URL and open your browser developer tools. Under the Application tab, check the Cookies section for your domain. Each UTM parameter should appear as a separate cookie with the correct value and expiration date. If cookies are missing, the issue is in your capture script.
Hidden fields not populating: Before submitting a form, inspect the hidden fields in the DOM using developer tools. Their value attributes should contain the UTM data from your cookies. If they are empty, the issue is in your field population script, often a timing problem where the script runs before the form has rendered.
CRM field mapping errors: Check the contact record in your CRM after a test submission. If the contact was created but UTM fields are blank, the issue is in your field mapping. Verify that the field names in your form exactly match the field identifiers in your CRM integration settings.
Also check for data type mismatches. If a CRM field is configured as a dropdown or picklist but your UTM value is free text, the submission may fail silently or store a blank value. All UTM fields should be plain text types.
Once your setup is live, build a CRM report or saved view that filters contacts by UTM source. This gives you an ongoing signal that data is flowing in from live campaigns. If you see a sudden drop in UTM field completeness, it is a sign that a form, landing page, or campaign URL has lost the setup.
Ongoing audit practice: Review UTM field completeness on new contacts monthly. Check what percentage of contacts created from paid ad traffic have UTM source data populated. Gaps often appear when new landing pages or forms are launched without the hidden field setup in place.
Success indicator: A high percentage of new CRM contacts created from paid ad traffic have UTM source data populated. Any contact without UTM data should be traceable to a specific form or landing page that needs the setup applied.
Step 6: Connect UTM Data to Pipeline and Revenue Attribution
Having UTM data on contact records is a meaningful step forward, but it is only the beginning of what attribution can tell you. The real value comes when you connect those contacts to deals, pipeline stages, and closed revenue so you can answer the question that matters most: which campaigns are actually generating revenue, not just leads?
Start inside your CRM. Associate the UTM fields from the contact record to the opportunity or deal object. In HubSpot, you can create deal properties that mirror your contact UTM fields and use workflows to copy the values across when a deal is created. In Salesforce, you can create formula fields or use automation rules to propagate UTM data from the Lead or Contact to the Opportunity object.
Once UTM data is associated with deals, build CRM reports that segment pipeline value and closed-won revenue by utm_source, utm_medium, and utm_campaign. This is where you move from knowing which channels generate lead volume to knowing which channels generate revenue. That distinction is critical for B2B SaaS teams making budget allocation decisions.
Here is where the limitations of a purely cookie-based, single-touch approach become apparent. A UTM snapshot captures one moment in the customer journey, typically the first or last touch, but B2B sales cycles often involve multiple interactions across weeks or months. A prospect might click a LinkedIn ad, return through organic search, attend a webinar, and then convert after a sales call. A single UTM value on the contact record tells you about one of those touchpoints, not the full picture.
This is the gap that a dedicated attribution platform addresses. Cometly extends beyond what CRM-based UTM tracking can do by connecting your ad platform data, CRM events, and website behavior into a unified attribution view. You can see the full customer journey from first ad click to closed-won revenue, with multi-touch attribution models that distribute credit across all the interactions that contributed to a conversion.
Cometly's pipeline and revenue attribution connects Stripe revenue data directly with ad spend data, giving you a clear line between campaign investment and actual revenue outcomes. Instead of inferring which campaigns are working based on lead volume, you can see exactly which ad spend is generating closed revenue and use that data to scale confidently.
Success indicator: You can run a report in your CRM or attribution platform that shows pipeline value and closed-won revenue attributed to specific campaigns, not just lead counts. Budget decisions are informed by revenue data, not proxy metrics.
Your UTM-to-CRM Setup Checklist
Before you go live, use this checklist to confirm every component of your setup is in place:
1. UTM naming convention documented: A shared reference document exists with approved values for each parameter, formatted in lowercase with hyphens. Every campaign URL follows this convention.
2. Cookie capture script deployed: A JavaScript snippet fires on every page load, reads UTM parameters from the URL, and writes them to cookies with the appropriate expiration window. First-touch logic is preserved.
3. Hidden fields added to all lead forms: Every lead capture form on your site includes hidden fields for all five UTM parameters. A second script populates those fields from cookies when the form loads.
4. CRM properties created and mapped: Custom text-type contact properties exist in your CRM for each UTM parameter. Form fields are mapped to the correct CRM properties in your integration settings.
5. End-to-end validation complete: Test submissions from UTM-tagged URLs for each major ad channel have been verified in the CRM with all five fields populated correctly.
6. Pipeline reporting connected: UTM data is associated with deal or opportunity records, and CRM reports show pipeline and revenue segmented by source.
The most common point of failure teams overlook is inconsistent UTM naming. It is easy to focus on the technical implementation and miss the fact that "meta" and "Meta" or "cpc" and "CPC" will create separate data segments in every downstream report.
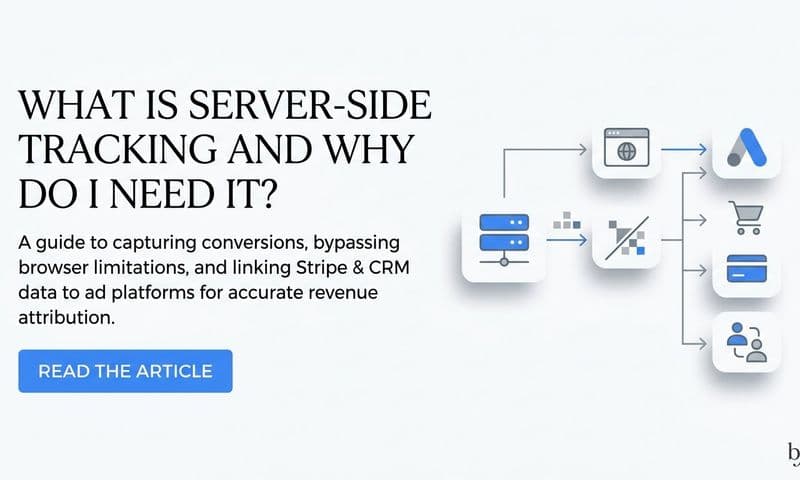
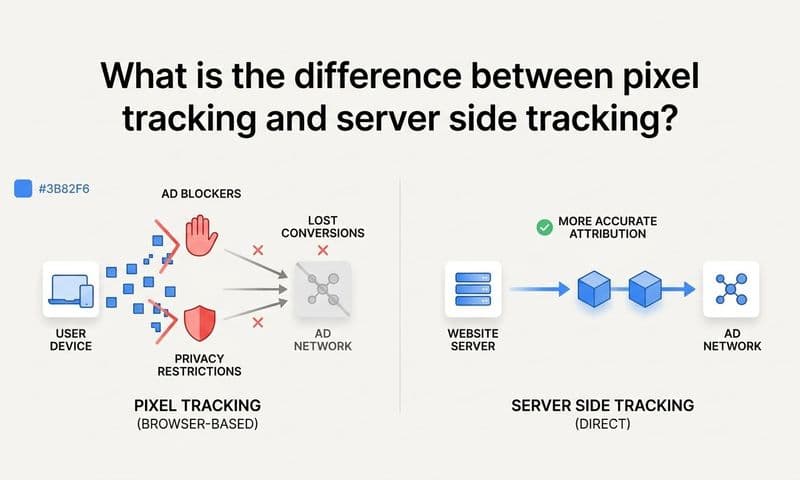
This setup is the foundation of accurate B2B marketing attribution, but it is not the complete solution. Cookie-based tracking has inherent limitations as browser privacy restrictions continue to evolve. Server-side tracking and Conversion API integrations, such as Meta's Conversion API and Google's Enhanced Conversions, provide more reliable signal and complement what you have built here.
For teams ready to go beyond basic UTM tracking and connect ad spend directly to pipeline and revenue with AI-powered insights, Get your free demo of Cometly and see how full-funnel attribution works in practice.
Putting It All Together
Passing UTM data to your CRM is a foundational step every B2B SaaS marketing team should complete before scaling paid spend. The six steps covered in this guide give you a complete system: standardize UTM naming, capture parameters in cookies, populate hidden form fields, map fields to CRM properties, validate data quality, and connect UTM data to pipeline reporting.
This setup gives you lead-level attribution that most teams are missing entirely. You will know which campaigns are generating contacts, which channels are driving pipeline, and which sources deserve more budget. That is a significant improvement over running paid campaigns and hoping the leads are coming from the right places.
The honest caveat is that UTM data on contact records is lead-level attribution, not full revenue attribution. Connecting CRM data back to ad platforms, tracking multi-touch journeys across longer sales cycles, and tying closed revenue to specific campaign spend requires a layer beyond what your CRM alone can provide.
Cometly is built for exactly that. It connects ad platform data, CRM events, website behavior, and revenue data into a single attribution view, with AI-powered recommendations that help you identify what is working and scale it with confidence. From first ad click to closed-won revenue, every touchpoint is captured and connected.
If you are ready to move beyond UTM tracking and build a complete attribution system for your B2B SaaS marketing, Get your free demo and see how Cometly brings it all together.